Thursday, August 10, 2023

Speed Painting Challenge: 36 models in 36 days - COMPLETE

 In an effort to work through some of the "pile of shame" and have more fun painting by getting results quicker, I have been experimenting again with Contrast and finally getting better results (see the recent White Scars Scouts, for example).

So, I have set myself the goal of painting this entire 36-man platoon of grenadiers at an average pace of one model per day, an ambitious target for me since it can usually take me at least two or three weeks to finish a ten-man squad.

Here is the test speed-painted model on the left compared to some of the models I painted in my classic-style recipe of base-shade-highlight-highlight for each color.


Sunday, August 6, 2023

Xhorik 87th Drop Troops - Reinforced 3rd Company Strike Force

 After making orbital drops to secure key objectives, the Xhorik 87th Drop Troops move to quickly deploy artillery to support their light infantry against the enemy's counterstrike. In the fierce fighting for the planetary shield generators, the 3rd Company was bolstered with significant artillery elements and multiple units of the elite 501st Company of Storm Troopers fighting in the role of heavily armed grenadiers.  It was also common to have air support from naval fighters and ground attack craft such as this Thunderbolt. Recon squads, sentinels and mechanized cavalry provided mobility and adaptability. This force configuration trades their usual high mobility for heavy firepower needed to destroy heavily armored foes and additional tactical flexibility.


This image shows a typical strike force of the reinforced 3rd Company during Operation Downfall on Xhorik Prime. This force was engaged in heavy fighting for one of the planetary shield generators, crucial to enabling the deployment of heavier units from orbit to the surface. 


Thursday, August 3, 2023

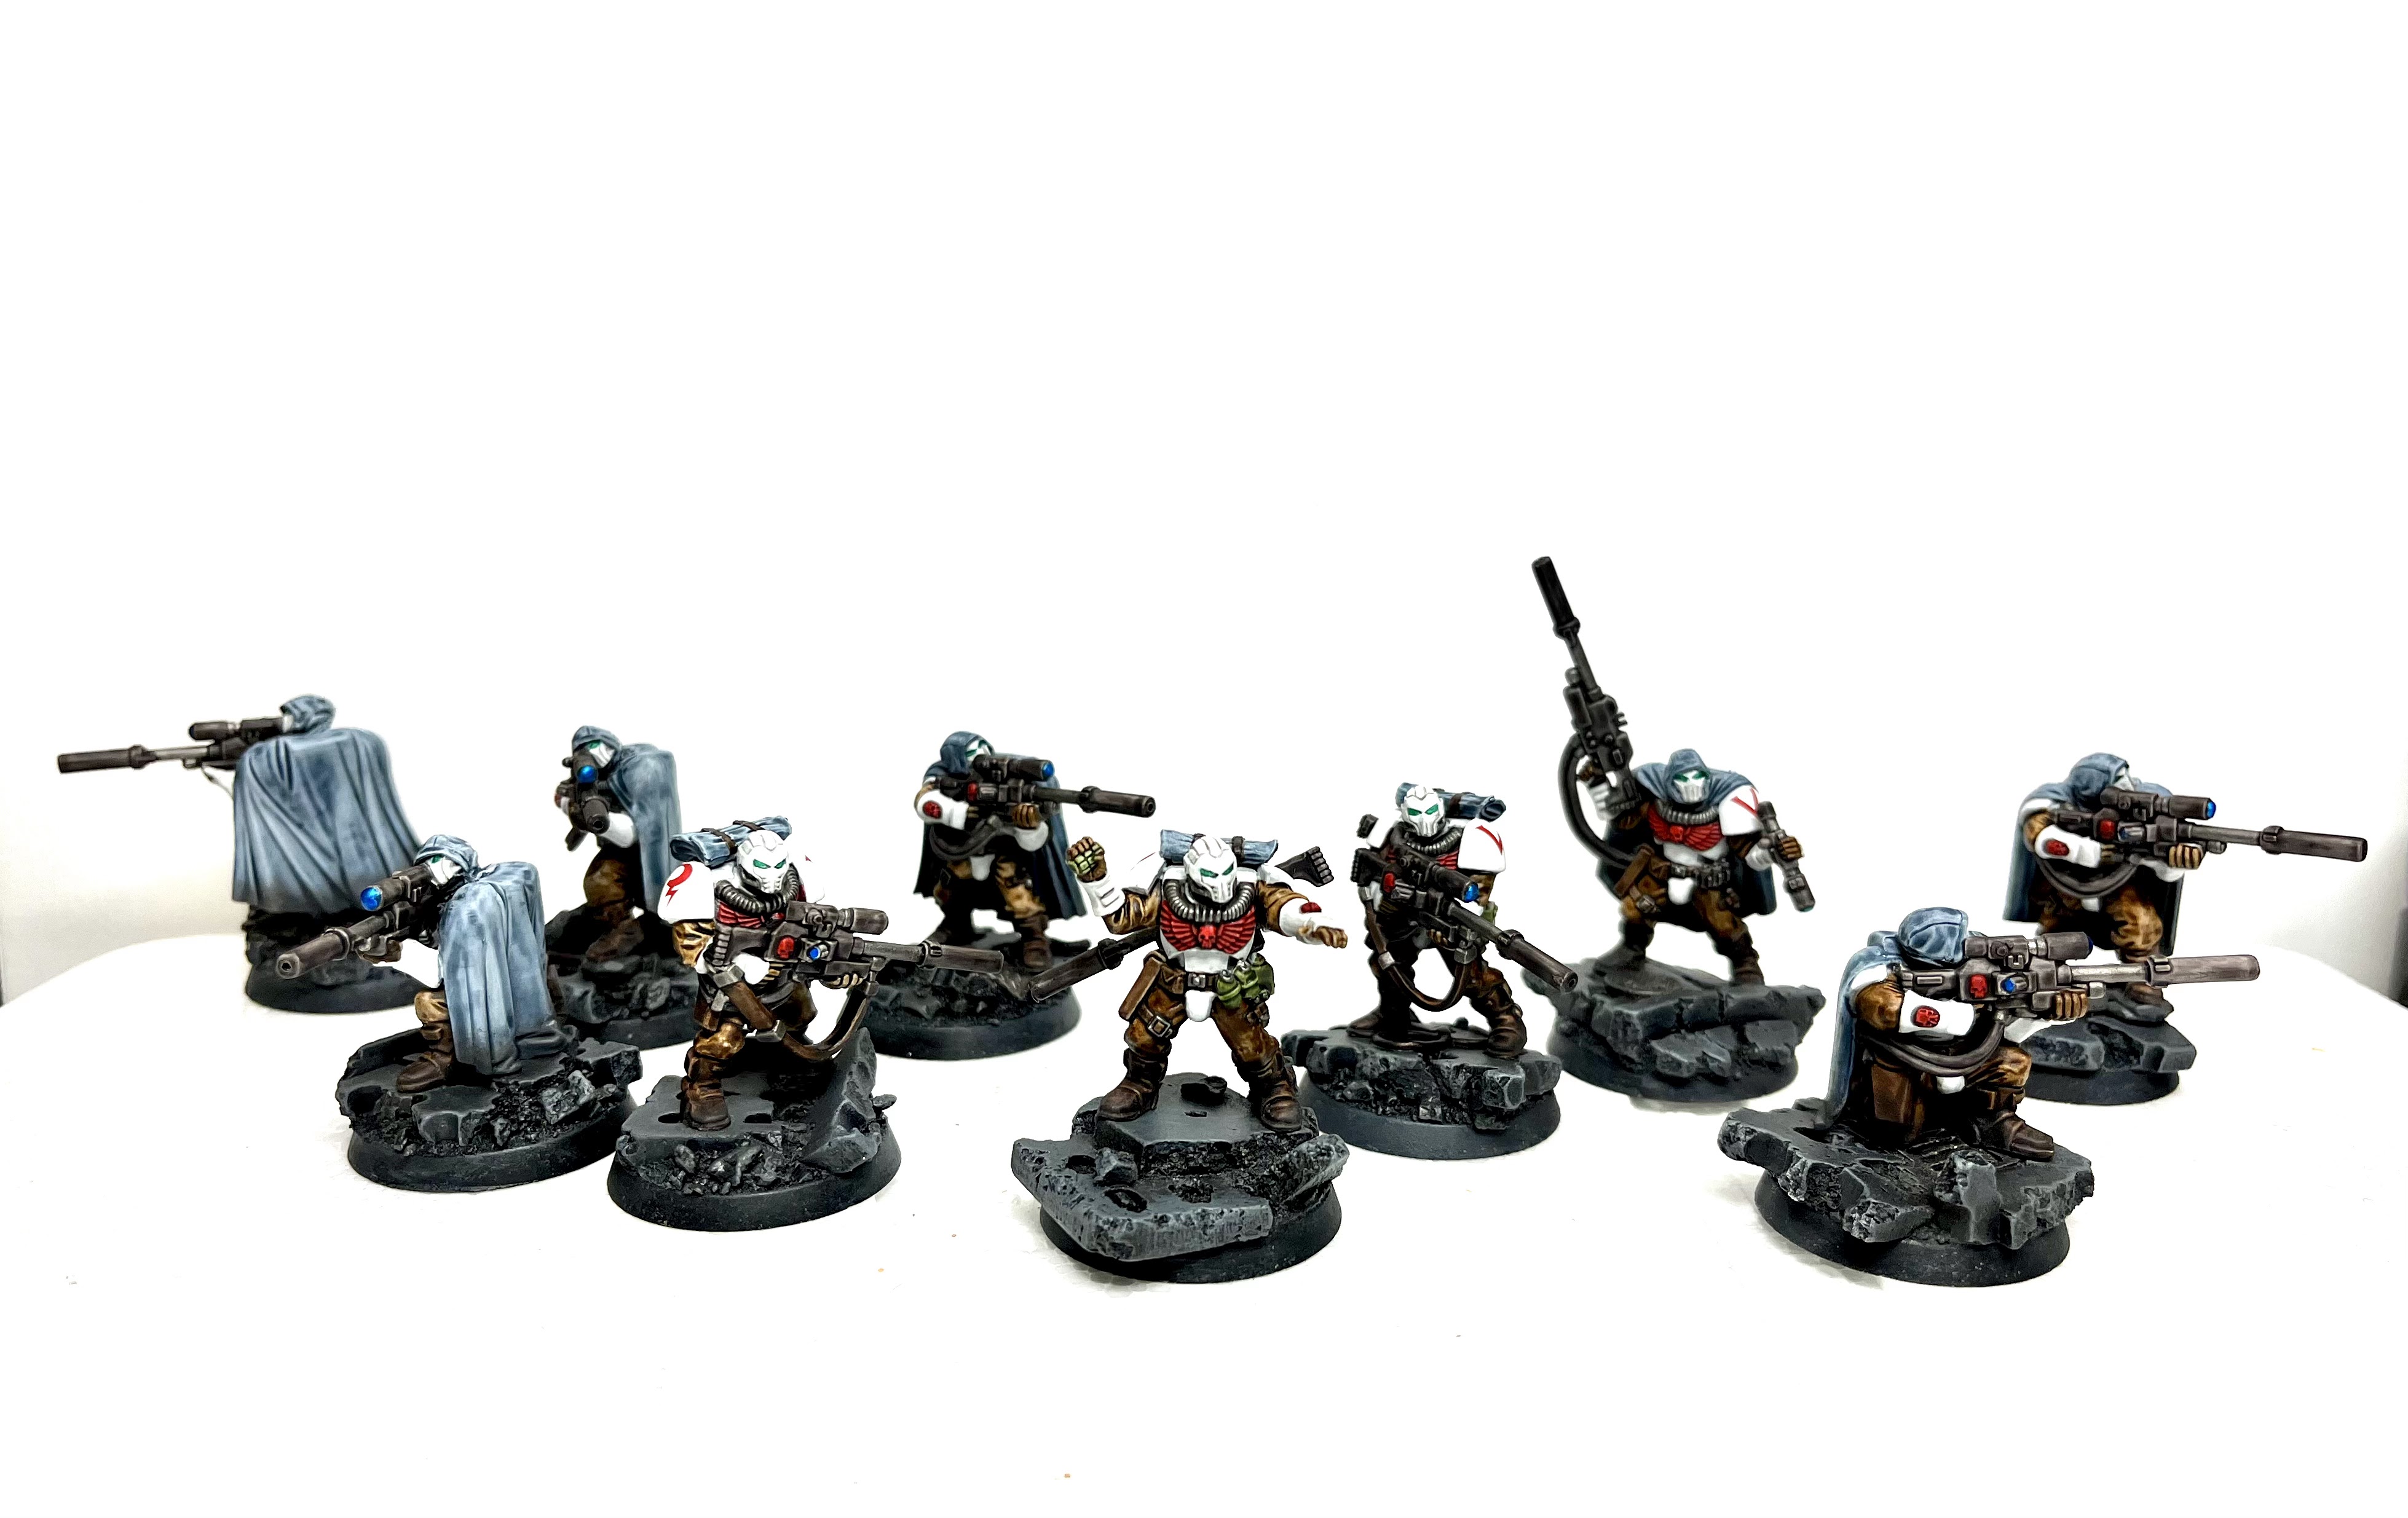
White Scars Sniper Scouts

In an effort to try to speed up my glacial pace of painting, I decided to try painting a unit almost entirely with Contrast and washes/shades. The cloaks and fatigues of the old space marine scouts seemed to make them a good set of models to try this approach. Of course they needed a head swap from their giant heads with buzz cuts and square jaws. I spent some time searching around for heads with the right look and size, and that came in a combination of hooded and bare options to match the mix of models with cloaks being worn or folded up. I think these heads give a great ninja-like stealth feel to the unit, perfect for snipers. 

The Contrast painting is still not perfect and there are some areas that still came out a bit blotchy but it is a huge improvement over where I was previously with these paints. I found you need to thin the paints with wash medium and then possibly apply multiple coats, depending on how dark you want the color. And the new Soulblight Grey shade does a really impressive job on white.


With this unit complete, my White Scars now have two 10-man scout squads and a 5-man recon squad. This gives me more than enough to build a force based around the Recon Company Rite of War. I always thought this sounded very flavorful for the V Legion, which started as a collection of recon companies for the Great Crusade. 


Saturday, June 10, 2023

Building a Better Bridge Table Part 1

 After Pete raised the bar with all of his new terrain (you can see it in the latest battle report Might Makes Right), I decided I needed to invest some time to improve the game experience at my place.

For years, we have played games on flat rectangles with a few hills or buildings to break it up, although we have also played a few battles on a circular battlefield for variety. For a long time, I have been wanting to make a table that utilizes the vertical element to a greater degree with more depth. Also, two years ago I built a huge bridge terrain piece and we even played a visually awesome battle with it, but I feel the current table setup to use the bridge is too limiting. 

So I have decided to try to build a table with the following charactersics:

  1. Non-rectangular shape
  2. Significant elevation changes (not flat)
  3. Accommodates the bridge terrain piece 

I sketched out some ideas for hexagon and octagon tables using trusty PowerPoint. Since my dining room table is round, these shapes seemed like a more natural fit to take advantage of the table support than a rectangle anyway (which was always hanging in one direction and leaving extra table in the other direction).

After looking at a few designs, this is the one that I landed on. The grey rectangles represent the road and bridge pieces. The blue rectangle represents the canyon/river/whatever that the bridge will cross. The black circle is the outside of my dining room table. 


The area is quite large at over 36 square feet, bigger than a 9 ft x 4 ft rectangle. I wanted a lot of area to accommodate bigger games and because the bridge piece is so large that it would overwhelm a standard 6 ft x 4 ft table. 

With the rough outline in place, I had to think about how to build it. Since it is so large, I decided to build it in two halves to make it easier to handle and store when it is not setup. With big 8 ft x 4 ft x 1 inch pieces of insulation foam, I could make two half-octagons that were 80" x 40" each, with some scraps leftover to make the hills. I bought some foam and started cutting these shapes out to be the base of the board. 


Now I just need to decide if I want to split the battlefield along the river (vertical cut in my image above) as I originally planned, or if I should split it along the road (horizontal cut in my image above). The advantage of having the two piece come together under the road is that I could leave the road off and then place it down for games to cover the seam between the two boards. 

I have some ideas for how to add elevation and to make sure there are still options for setting up additional terrain on the board. For the "river" the bridge is crossing, I am thinking to make it more of a ravine. A few reasons: I do not know how to get water effects with resin, this table will represent the eastern desert wastes of Xhorik Prime so it does not make sense to have a wide river, I want to ensure infantry can cross the gap in multiple places and not just at the bridge, and I can still come up with some ideas for the bottom that may be easier to model, such as nearly-dried up puddles of water or waste, etc. 

Plenty more planning and building to do! Updates to come. 


Sunday, June 4, 2023

The Grey Ghosts: White Scars Recon Squad

The White Scars were the original recon force for the Great Crusade, ranging far ahead of the main forces, so it is only fitting that my army incudes a recon squad. 

Of course, both of the antennae on the vox guy broke. I replaced the skinny one with a wire and replaced the segment that joins the fat one to the pack with a piece of brass rod. The only other change I made was to use White Scars MKIV shoulder pads from Forge World. This was a bit tricky because the vox guy already has a left shoulder pad built into the model, with the cloak covering half of it, so I could not replace that one. Instead I cut a decal in half and tried to line it up with the edge of the cloak. It is the same icon as the rest of the squad, but not 3D, of course. Other than that, I built them straight out of the box with no other modificaitons.


I tried some new painting techniques on this squad to speed things up, including using mostly Contrast paints and washes other than the grey armor and the metal. On the grey armor, I used a shade but no highlights, figuring the battle damage would act as a bit of a natural delineation of edges. Some aspects turned out better than others and some of the battle damage is not my best work, but overall I am happy with them for the amount of effort I put into them. Despite their armor being mostly light grey, they are immediately recognizable as White Scars with the white heads and shoulder icons. I like the way the blue/grey cloaks turned out with dusty fringes. I also like the simple technique of Contrast over metallic for the lenses. 

They came out well enough that I am inspired to try more units with Contrast to try to speed along the painting. I definitely learned a few things about how to make Contrast look better (I have struggled with the splotchy surface finish on most models in the past.) If nothing else, trying different techniques keeps the painting interesting and breaks up the monotony of painting a whole army with the same slow method. Units like this recon squad are the perfect opportunity to try new things since they do not need to look exactly like the other marines, as long as they tie in to the overall army. 

Saturday, June 3, 2023

Might Makes Right: 3-Way Istvaan Battle Report

"The strong get what they deserve. So do the weak."

Background:

This battle takes place during the Istvaan III atrocity when the traitors purged their legions of any who would potentially remain loyal to the Emperor, long before the Xhorik Campaign. This battle provides some back story to three of the Traitor leaders before they crossed paths again in the Xhorik System in the middle of the Heresy.


Scenario: Might Makes Right


Belligerents:

World Eaters: Pete
Primary Detachment: World Eaters The Crimson Path

  • Praetor Ghrodd the Slaughter Lord: artificer armor, iron halo, master crafted thunder hammer, jump pack
  • [Line] Tactical Squad The Skull Collectors: 17 marines with chain axes, sergeant with power fist, artificer armor and plasma pistol 
  • [Line] Recon Squad Butcher's Eyes: 5 marines, Nemesis bolters, bolt pistols
  • [Line] Rampager Squad The Pit Gladiators: 10 Rampagers with jump packs, 3 with falax blades, 4 with excoriator chain axes, 3 with meteor hammers, sergeant with artificer armor
  • Predator Severing Cut: Predator autocannon, lascannon sponsons
  • Predator Fires of Hell: Magna-melta cannon, heavy bolter sponsons
  • Tartaros Terminator Squad The Red Mist: 5 marines, 4 x dual lightning claws, 1 with heavy flamer and chainfist
  • The Red Butchers: 4 x dual power axes, sergeant with dual chain fists
    • Transport: Land Raider Organ Grinder: quad lascannon sponsons, twin-linked heavy bolter
  • Apothecary Bazrak: jump pack, frag and krak grenades, bolt pistol, chain axe
2000 points


Death Guard: Bill
Primary Detachment: Death Guard (No Rite of War)
  • Praetor Wolfgang: Catphractii terminator armor, volike charger, paragon blade, rad grenades
  • Deathshroud retinue: 5 terminators with hand alchem-flamers, power scythes and rad grenades
  • Tactical Support Squad Folterer: 8 marines with flamers and melta bombs, sergeant with artificer armor. 
  • [Line] Tactical Squad A: 14 marines with chainswords, sergeant with power fist and artificer armor and Apothecary Gerhard
  • [Line] Tactical Squad B Toddestraffe: 10 marines with chainswords, sergeant with power fist and artificer armor. 
    • Transport: Rhino with pintle-mounted heavy alchem-flamer.
  • Tactical Support Squad Blitz Schock: 7 marines with volkite calivers and apothecary
  • Heavy Support Squad Feuer Sturm: 7 marines with missile launchers
  • Predator Mittel Panzer 021 with Predator Autocannon and lascannon sponsons 
  • Contemptor Dreadnought Jürgen:  Gravis melta cannon, melta gun, Gravis power fist
  • Deredeo pattern dreadnought with Arachnus heavy lascannon battery, twin-linked heavy bolter, Aiolos missile launcher, and helical targeting array
2000 points


Sons of Horus: Phil
Primary Detachment: Sons of Horus Pride of the Legion 
  • Praetor Ezman Vyke with Cataphractii terminator armor, chain fist, combi-melta, digilasers, Armor of Pride
  • [Line] Tactical Squad (6th Squad, 12th Company): 20 marines with bayonets, vexilla, artificer armor, power fist
  • [Line] Cataphractii Terminator Squad Tempest: 10 marines with Cataphractii armor, combi-bolters, 3 power fists, 1 chain fist, 1 thunder hammer, 5 power axes
  • [Line] Cataphractii Terminator Squad Hammerfall: 5 marines with Cataphractii armor, 3 power fists, 2 chain fists, 5 combi-meltas
    • Transport: Land Raider Proteus The Bladed Hand
  • [Line] Veteran Tactical Squad Exomis ("The Remnants"): 10 marines with 2 power swords, 1 power axe, 1 power fist, vox, 2 meltaguns, 1 combi-melta, and artificer armor
    • Transport: Rhino
  • Contemptor Dreadnought Konax Silat with Gravis-melta and chainfist with inbuilt grav gun
  • Heavy Support Squad: 5 marines with lascannons
2000 points


Sunday, May 7, 2023

Cataphractii Terminator Squad Tempest

 As I slowly work through my Age of Darkness box set, I have to determine what to paint for my White Scars and what to paint for my Sons of Hours. So far, I have done the Contemptor and a Tactical Squad for my White Scars as they needed some basic troops and did not yet have any dreadnoughts. For the Cataphractii, being heavy and slow, I decided they fit better with my Sons of Horus. I decided to paint up all ten in one batch as a big foot slogging squad for our Traitor Bash game. I thought it would give me a very tough and formidable core to my army that could take and hold ground and go toe to toe with almost any unit in melee. (It turns out it did not quite work out that way...)


I gave them the old Forge World resin shoulder pads, and I used one set of Forge World power axes for five of them. The other five got a a thunder hammer, a chain fist and a few power fists. I equipped them with just combi-bolters for guns since I was trying to keep the squad cost from ballooning too much and I was assuming they would do most of their damage in melee. I also added a vexilla from the tactical squad sprue. The sergeant got a bare head and a mounted skull trophy to mark him out and help intimidate his foes. I also gave him the pointing hand to indicate that he is directing the unit. He also got golden trim on his thighs where the rest of the unit had green. I painted them pretty much the same as my first Cataphractii squad, except these have black outer shoulder pads to accentuate the brass iconography. 

 I really like this paint scheme with the super bright edge highlighting but after doing ten Cataphractii terminators. I will need to take a break from it. I think that is why I like having a few armies in the works at a given time. By the time I spend weeks painting the same thing, the thought of another squad of the same scheme is daunting and I am ready for a change. 

Sunday, March 19, 2023

Might Makes Right: 3-Way Scenario for Traitor Bash in April

We are planning our next three-player three-sided scenario in April. I am thinking about some clarifications for the rule in a three-sided game, as well as a scenario. 

Rules

Reactions:
Reactions will be tricky to balance in a three-way game. The base rule is that a player gets one per phase but with most warlord traits giving one extra in a specific phase. Each unit can only make one reaction per phase but the same unit can react in all three phases, if desired. In a three-way battle, this would result in a lot more reactions as you would be facing the potential for two reactions (one from each opponent) in each of your phases.

My initial thought is to let each player have their full reactions to each of the other two players, but that a given unit can only make one reaction per game turn, unless they have a special rule that allows more. In a relatively smaller game like we are planning (2000 points), the limitation that a unit can only make one reaction per game turn (instead of one per phase) could be a good constraint to keep reactions from dominating. 

The other option would be to keep the current rule that each unit can make one reaction per phase but limit a player's reaction allotment to one Movement phase reaction that can be used in either of the two opposing player's movement phase, but not both. (Same for Shooting and Assault reactions.)

The last option would be to have the full allotment of reactions. Reactions would play a bigger role in the game but maybe that is OK when you have to wait for two opponents to go in between each of your turns. More reactions keeps all three players more engaged all the time and gives more balance to the player that goes third. 

Fight Phase:
I think melee would only be fought during a player turn in which at least one engaged unit was controlled by the player with the current turn. So if units controlled by player A and player B are engaged, they would fight during player A's turn and again during player B's turn, but not during player C's turn. If all three players have a unit engaged in the same melee, then all units in that melee will fight during that player turn. 

Challenge:
If units from all three players are engaged in the same melee, then the player with the current turn gets the first option to issue a challenge. If both opponents have characters in the melee, he can issue the challenge to either of the opponents. Only if he does not issue a challenge, then the player whose turn is next can opt to issue a challenge to one of the other players. If he declines, then the third player can issue a challenge. It would still be only one total challenge per melee. 

What do you guys think of these?


Scenario:
We also need a good scenario that makes for a fun three-way battle where you are rewarded for diving in rather than hanging back and letting the other two players destroy each other. The one we used last time was great, because you earned points each turn for control of the central objective, meaning you had to get in there early and could not hang back until the end. This time, the battle takes place at the start of the Heresy as the Traitor legions purge their loyalist elements so we wanted to emphasize the animosity and rivalry between the leaders, and the desire to prove their dominance over each other.


Might Makes Right
"It is self-evident that the strongest should rule. The Emperor commanded mankind because he subjugated his rivals through force. When he a appointed the Warmaster to lead the Great Crusade in order to return to Terra, the Emperor abdicated his right to rule. Now Horus will prove he deserves control of the galaxy by crushing all who would oppose him."

-Praetor Ezman Vyke, XVI Legion


In the bloody chaos of the Battle of Istvaan III, as the Traitor Legions purged themselves of any elements that may have remained loyal to the Emperor, there were also old grudges to settle and a new hierarchy to be established under Horus. As they hunted and slew their enemies on the ravaged surface of Istvaan III, these three bitter rivals crossed paths. In the heat of battle, none of them were willing to give way to the other, for to do so would set the precedent of deferral and see a hated rival ascended in stature in the view of Horus. All three commanders insisted on marching their armies directly forward on their intended path and demonstrating their power and leadership. This would establish the victor at the pinnacle of the rebellion and lay claim to stand first at the side of the Warmaster.

Deployment
To determine deployment order, players roll off. The winner chooses to deploy first, second or third. The player with the second highest score then has the second choice of the two remaining deployment options.

Whoever deploys first, selects his deployment zone and deploys his army. 
Whoever deploys second, selects one of the remaining two deployment zones and deploys his army. 
The final player takes the remaining deployment zone and deploys his army. 

Turn Order
The turn order is the same as the deployment order.
The player with the second turn can attempt to Seize the Initiative from the player with the first turn.
The player with the third turn can attempt to Seize the Initiative from the player with the second turn.
(If both players roll a six, the player who originally had the first turn would end up with the third turn!)

Game Length
At the end of Turn 5, roll a die. Add 1 for each warlord that is still alive. If the result is 5+ there is a sixth and final turn. 

Primary Objectives
Slay the Warlord: 
3 VP for destroying an enemy warlord in turns 1 - 3 
2 VP for destroying an enemy warlord in turns 4 - 6

By My Own Hand:
+1 VP if your warlord destroys an enemy warlord in a challenge (stacks with Slay the Warlord; does not count if the warlord is lost to a sweeping advance or due to "spillover" wounds from outside the challenge)

Secondary Objectives
Glory Unto Me:
1 VP for each other enemy unit destroyed by your warlord or his attached unit (does not stack with Slay the Warlord)
1 VP any time an enemy unit fails a morale check caused by wounds inflicted by your warlord or his attached unit (destroying a unit with a sweeping advance counts as 1 VP, not 2 VP)

Assert My Will:
Controlling your objective at the end of the game is worth 3 VP.
If you  have two or more scoring units on your objective at the end of the game, you gain +1 VP.

Mission Special Rules
Reserves
Night Fighting


The focus of the battle is on the warlord's demonstrating their dominance over the opposing forces, justifying their claim to lead. Controlling your objective at the end represents marching your Troops along your intended path, forcing your rivals to stand aside. The emphasis is on the warlords but there is a solid benefit to bringing scoring units as well.

What do you think of the scenario? What would you change?


Sunday, March 5, 2023

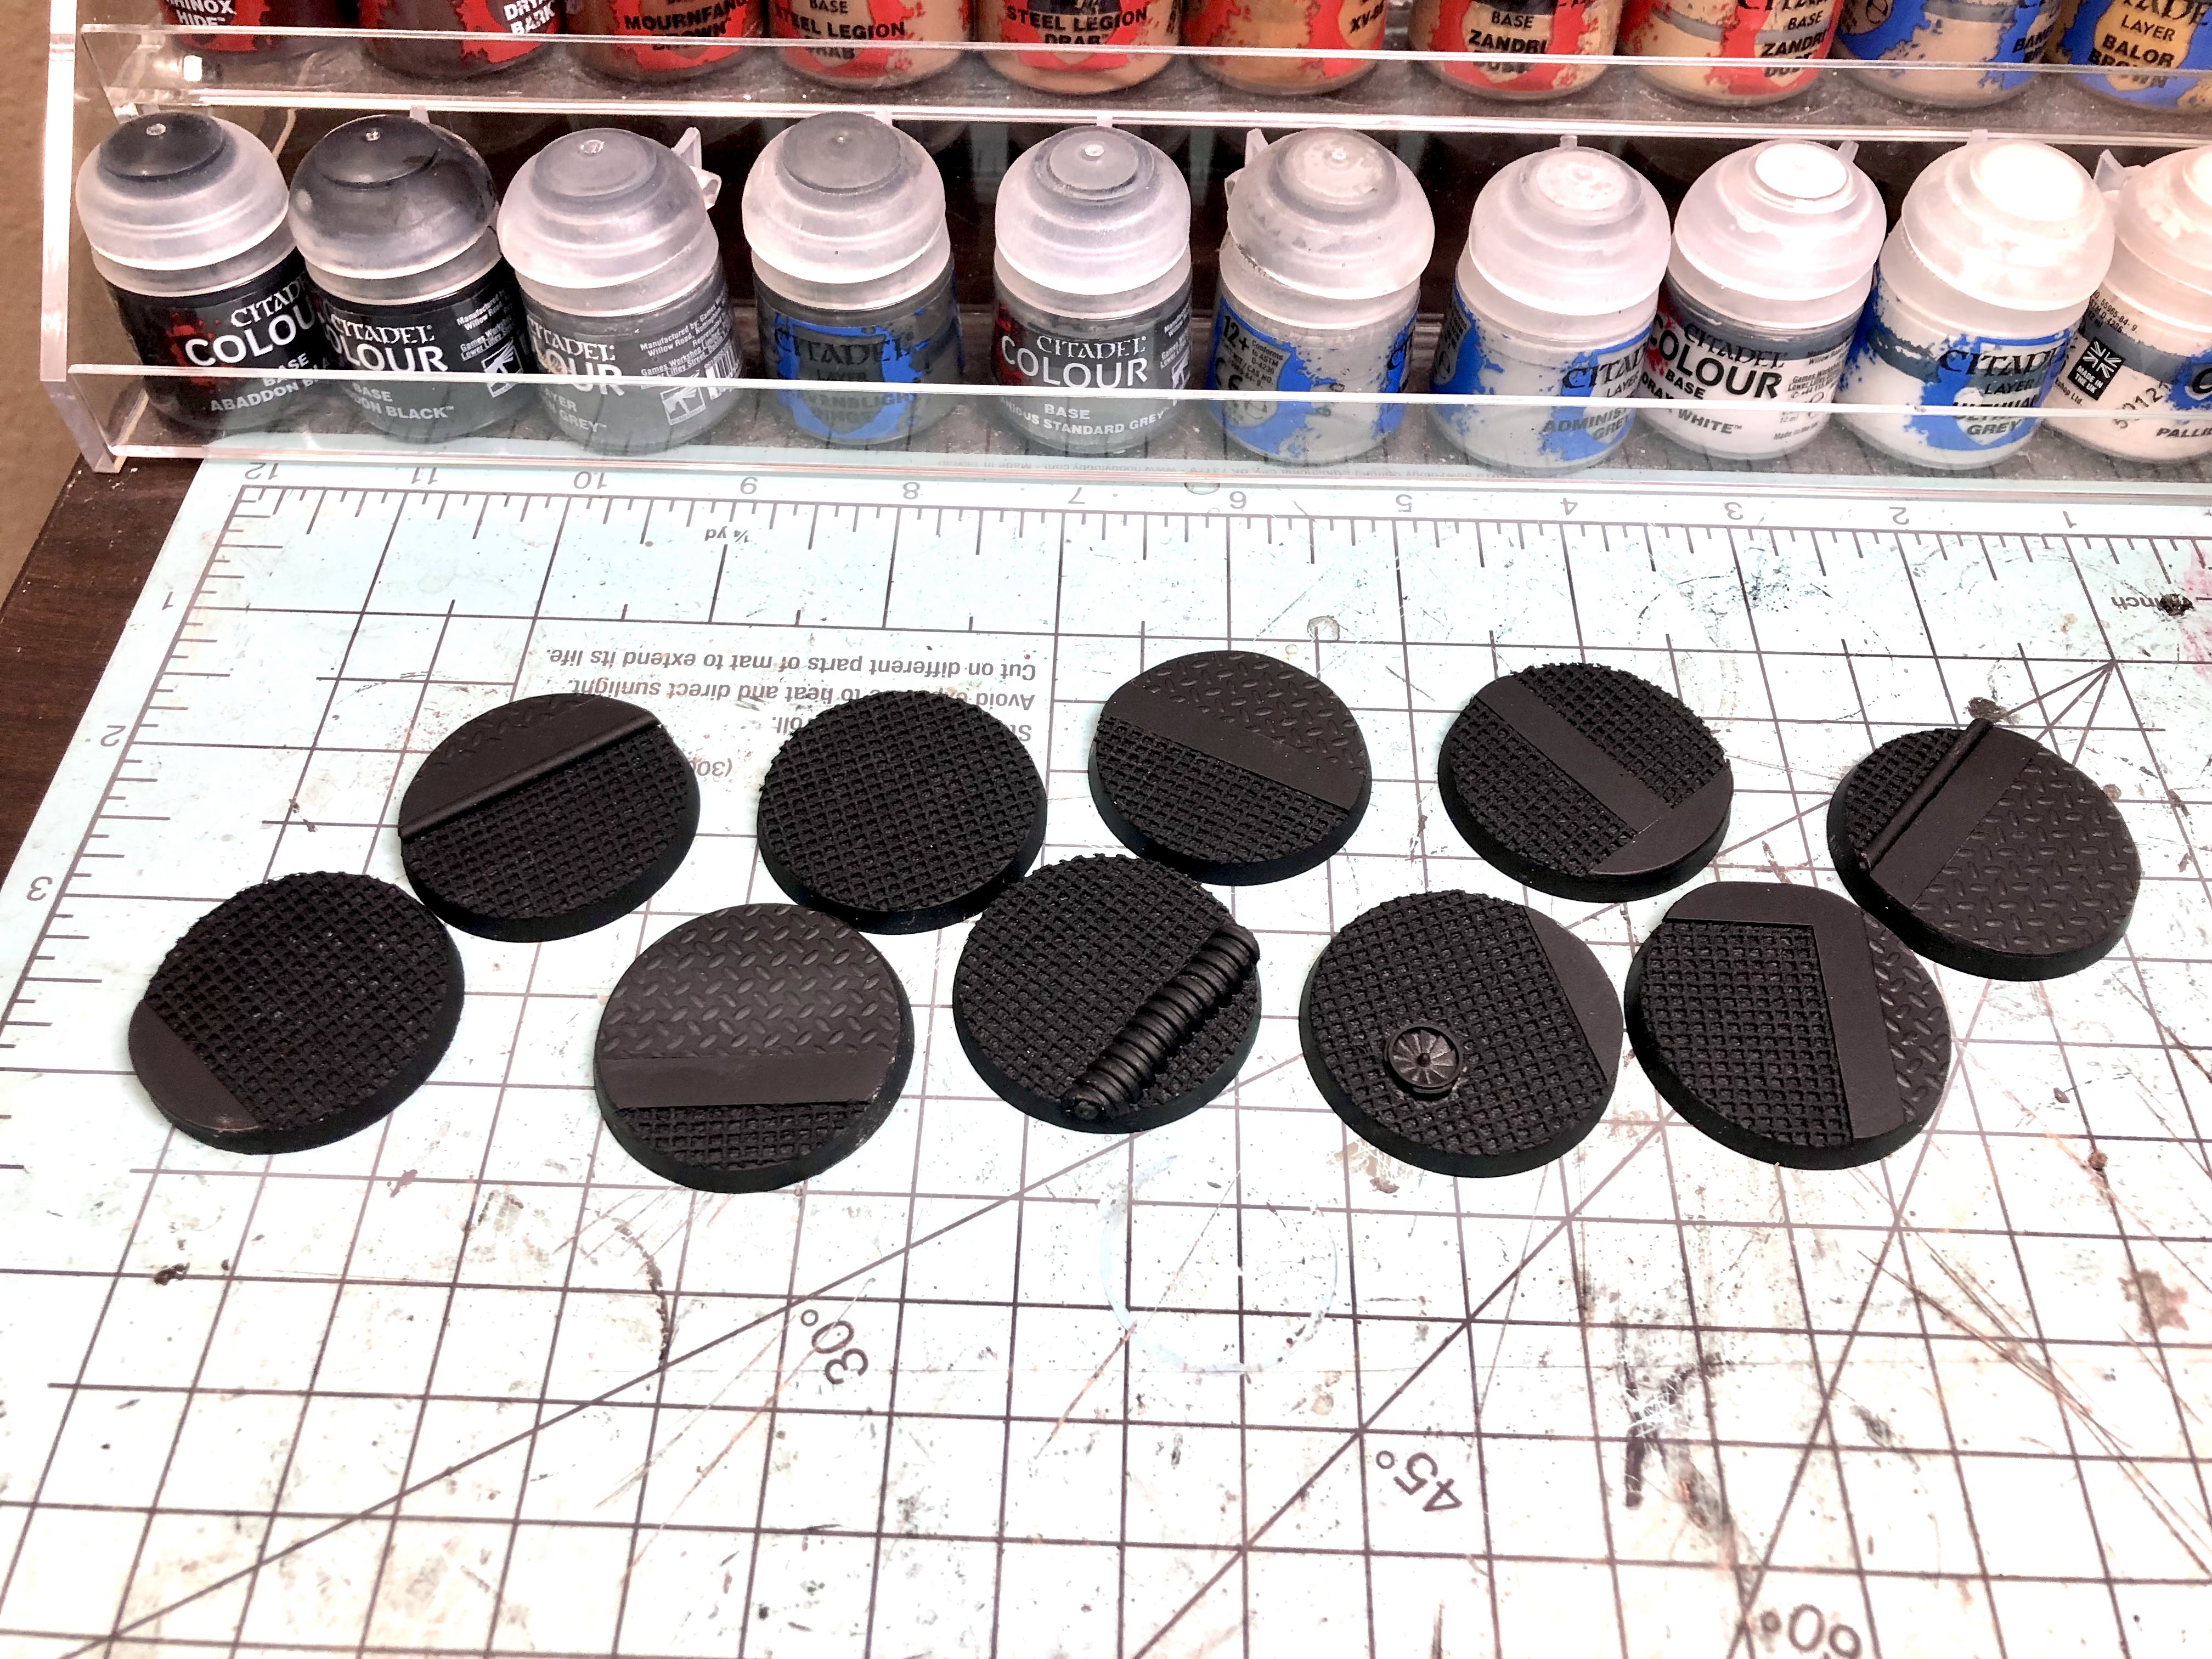
Sons of Horus Bases

 Quick update: I built some bases for my next unit of the Sons of Horus. These are built from a mesh with a grating texture, plasticard strings, textured plasticard, plasticard tubes, a Lego corrugated tub, and a random fan bit. I am going for the look of the interior of a ship or base of some type.


Thursday, March 2, 2023

White Scars Rhinos

I added two new Rhinos to the one I already had painted. I figure every unit of the V Legion would want some form of extra mobility, other than maybe Recon marines. 

One of these was the Forge World resin conversion kit for the old Rhino and one is the new plastic Deimos kit. I hate to say it, but I actually liked putting together the Forge World resin kit better than the new plastic kit. Although I do like the new plastic kit design of the treads and hunter-killer missile better.

I added the Forge World V Legion doors to both. 

I gave each one an optional hunter-killer missle. The Rhino with the heavy bolter has one that is magnetized and can be swapped for smoke launchers. The Rhino with the twin-linked bolters has its missile on a pin, stuck in a mounting hole, and it can be swapped for a generic radar. This will let me remove the missile when it is fired to help remember if it has been spent, or allow me to leave it off if I need to save the points. 

For the painting, I went with pure white with no highlights or shading. Instead, I black lined all recesses to create the contrast to make the details stand out on the white. I tried a new technique with a paint brush pen and the lines were quite thick, but it was faster than a conventional brush and the line width was more uniform. It looks a bit wonky when you are very close up, but looks great from a distance. The final picture with all three tanks that is just a little more zoomed out looks much better than all of these zoomed in photos. I am not sure yet if I will replicate this on future tanks or try to use a brush for thinner lines. 

After painting, I added the decals and then I sponged on dark grey battle damage/paint chipping. I then added dust, dirt, soot and rust to give the look of equipment that has been in years of active service in battle.

This one has obviously had some field modifications for extra protection.


Rhino number X

This one does not have the dozer blade, so I decorated the front a bit.

With smoke launchers instead of hunter-killer missile.

Rhino number I


Dozer blade


With optional hunter-killer missile from original kit


I left this one with the option to drop the rear ramp

All three side by side! 

Rhinos are not too tough and they can provide easy kill points to your opponent, but they are just fun to play with and against. And they are such a part of the look and feel of space marines and Heresy that I want to make sure they are well represented in our campaign.