PRE-GAME
Eternal War - Crusade (4 objectives worth 3 VP each)
Random deployment type: Corners
 |
| View of the battlefield from the south. |
Orks win roll to select deployment corner and select the southwest corner.
Marines win roll for first turn and elect to deploy and go second.
Orks rolled for Night Fighting and didn't get it.
Warlord Traits: No impact on game. (Orks got +1 STR for warlord. Marines got +1 to combat results, but forgot to use it all game.)
DEPLOYMENT
 |
| View of deployment from the north. Commander Kain was able to anticipate the Ork advance and prepare accordingly (Orks had to deploy first). |
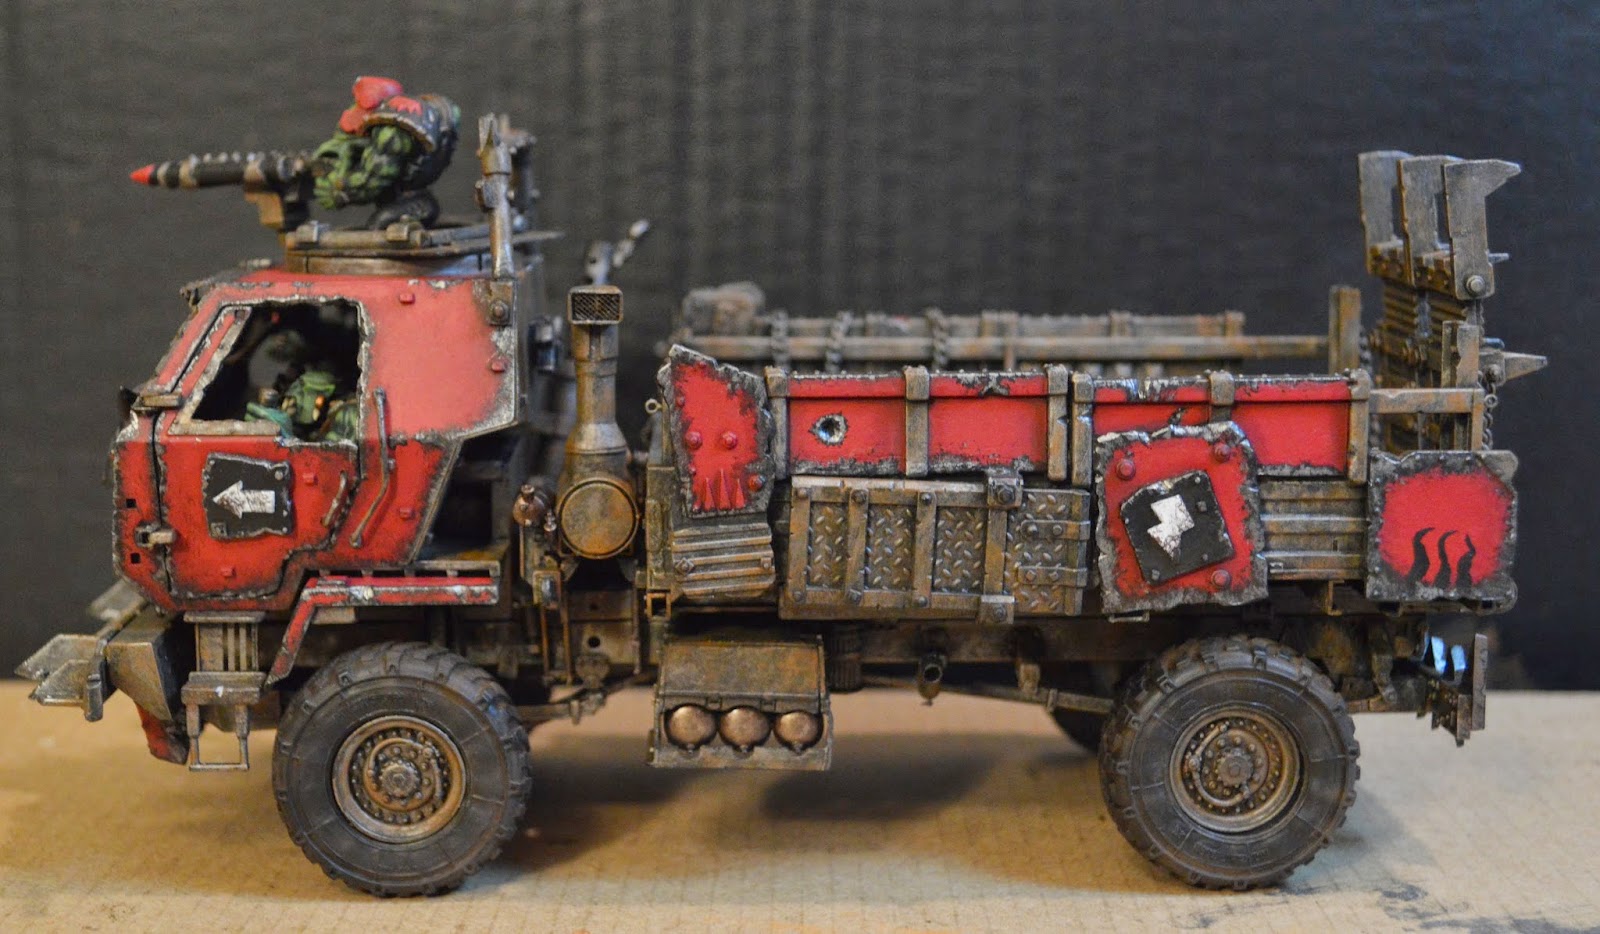
Ork Reserves: 'Ard Boyz in trukk and Skorcha Trakk.
Marine Reserves: None
Ork Deployment and Da Plan:
Where Maelstrom missions are all about maneuverability, flexibility and board control, Eternal war missions favor resilience and a long-term plan because the objectives are not going to change and you have to survive long enough to claim them. My plan was to hold the two objectives closest to me with a few small units, while advancing aggressively toward the Marines in the hopes of contesting or controlling one of Pete's objectives. I hoped to concentrate most the fighting on his side of the table so that he couldn't reach my objectives before the end of the battle with his relatively slower army. I figured the fighting would be fiercest for the objective just outside the Marine deployment zone and so deployed by main mob where they could head straight for it. I put the Trukk of Shoota Boyz and the Warbikes where they could race straight across the table to hit the marines in their right flank, jumping on them early and tying them down to keep them from advancing on my objectives. The Killa Kan and the Gretchin would stay back and hold my Objectives. Da Wreckin Krew ('Ard Boyz in Trukk) and the Skorcha Trakk would stay in reserve, allowing me to react somewhat to Pete's deployment and initial moves.
Marine Deployment and Strategy:
It was obvious that Pete meant not to repeat the mistakes of past games and kept all of his Marines bunched up together where they could support each other rather than spread them out where they could be overwhelmed one at a time. He was able to position his Land Raider Crusader with his Captain and Terminators directly across from the softer part of the Ork army, knowing full well that it faced no threats.
Infiltrator Deployment:
After the Space Marines deployed, I was very concerned that the Land Raider was facing off against a large portion of my army that had absolutely no way to damage it and would be very vulnerable to its weapons, so I Infiltrated the Kommandos behind some hard cover on that flank. Since it was fully loaded with heavy hitters, I assumed the Land Raider would be making a push toward my objectives and I had nothing that could stop it. With Stealth, the Kommandos would be very difficult to kill with shooting and I figured they would at least give me a chance at counterattacking his tank and the Terminators inside if they came after the nearby objective.
 |
| Kane and his Terminators deployed in the mighty Land Raider Crusader. |
 |
| The bulk of the Brotherhood forces deployed clustered together in order to support each other. |
 |
| Boss Blakfist and Dok Dagzog discuss a complex and cunning plan: charge! |
 |
| The massive Land Raider Crusader faces off against a cluster of ramshackle Ork vehicles advancing in a cloud of oily dust. |
Orks Turn 1:
I knew that with this type of mission, the Marines could afford to play defensively for the first few turns as long as they controlled the objectives by the end. So my plan was to advance as quickly as possible and try to get into close combat. The main mob ran forward at full speed. The Grotz moved to get into hard cover and out of line of sight, while staying close to the Kleinhaurker objective at the base of the hill. The Trukks and Bikes had no hope of damaging the Land Raider with their light guns so they had no choice but to race ahead at full speed to get at the softer part of the Marine army. The Kommandos held their high ground, waiting for a chance to counterattack when the Land Raider got closer. The Rokkit Buggy did the only shooting of the turn, managing to kill a single Tactical Marine from Squad Alpha.
 |
| The Shoota Boyz trukk and Warbikes attempt to race past the Imperial tank and get to the infantry. |
 |
| The Orks hope their high speed makes them harder to hit. Wait, that was only true back in 2nd Edition! |
 |
| End of Ork Turn 1, view from the east. The Orks surge forward, trying to get to grips with the humans. |
The Marines' first turn would prove to be a bit more eventful.
Space Marine Turn 1:
The Red Brotherhood held their ground and did not move a single model on Turn 1. Alpha Squad fired at the Warbuggy and destroyed it with a few glancing hits, earning First Blood for Pete. The Devastator squad on the ridge could see only one Ork past the edge of the central hill and promptly blew him away.
 |
| The Warbuggy is wrecked by Squad Alpha. I should have remembered to take those cover saves! |
 |
| The Multi-melta makes short work of the first trukk. Explosion! |
 |
| A total of 7 Orks died from the combined effect of the explosion and the mob rule result from the pinning test. |
 |
| The LRC fired everything else at the bikes, killing two and sending the other two fleeing for their lives. |
 |
| The survivors of the wreck. These Orks have learned to fear da Kroosader! |
 |
| End of Marine Turn 2, view from the east. The left prong of the Ork assault has been stopped dead in its tracks! |
Orks Turn 2:
I rolled for Reserves and got the Skorcha, but not the 'Ard Boyz; the exact opposite of what I wanted. I was hoping to hold the Skorcha back for a while so it had a chance of surviving until the end when it could zip over and contest an objective. And with my Shoota Boyz and Bikes devastated, I needed the 'Ard Boyz to support my main push into the Marines' lines. I knew I was going to take some punishment on the next Marine turn and I was hoping to have more bodies to help split their fire. To make matters worse, the Bikes failed to rally and kept falling back.
The main Ork mob had no real option but to continue the advance so they ran ahead through difficult terrain, just cresting the hill in front of the Marine position and claiming the Fuel Depot objective.
 |
| "Over the top, ladz!" The Orks clamber up the slope and finally see the enemy. |
 |
| The Marine gun line readies themselves as the Orks pour over the hill, holding their fire until the right moment. |
 |
| A Skorcha Outflanks the Marine position and attacks the Devastator squad with burning oil, but to no effect. |
 |
| End of Ork Turn 2, view from east. The Ork advance closes in. |
Again, not much action on the Ork turn other than moving up and some ineffectual shooting.
Space Marine Turn 2:
Commander Kane elected to concentrate his forces and throw everything at the main Ork advance, knowing that if he could break them, the remaining Orks would be too few and too spread out to pose a significant threat to his forces. He ordered his Land Raider Crusader to turn around and drive back to support the main battle line.
 |
| Kane leads the assault on the Ork center. |
 |
| Kane and his bodyguard charge forward toward the Ork invaders, supported by the firepower of his entire army! |
 |
| Everything in the Space Marine army opens fire on the Slugga Boyz mob. They kill 16 Orks and wound the nob. |
After most of the Ork center is obliterated by the Marine's firepower, the last few Orks and Boss Blakfist turn and retreat back down the hill. The Terminators attempt to charge. With the difficult terrain penalty, Pete will need to roll a 9... and he gets it!
 |
| The elite Terminators press the attack and charge the fleeing survivors, who turn and fight their pursuers. |
 |
| Boss Blakfist manages to slay one of the Terminators, but Kane's Storm Shield saves him from two of the mighty Ork's deadly blows. In return, he and the rest of his boyz are cut down. |
 |
| The Captain and his men are victorious. They consolidate toward the remaining Orks. |
 |
| End of Marine Turn 3, view from the east. The Ork horde has been decimated. |
At the end of the turn, the Marines had Slay the Warlord and First Blood and held one objective, while the Orks held two objectives, but had lost most of their army.
Orks Turn 3:
At this point, things were looking grim for the Orks. I figured my best shot would be to try to get Slay the Warlord and Linebreaker and hold my two objectives and try to force a Draw with Pete, who would have two objectives, Slay the Warlord and First Blood. I didn't have much of an army left, but most of the Marines were too far away and too slow (other than the Land Raider) to contest my objectives.
The bikes failed to rally and continued falling back.
 |
| After getting lost in a dust storm, the 'Ard Boyz mob known as Da' Wreckin' Krew finally arrived and had to be wondering where the rest of da boyz were. |
 |
| But when they saw the 'oomie leader and his big, white nobz standing in the open, their only thoughts were to get in a good scrap with them and claim their fancy helmets as hood ornaments for their trukk! |
 |
| The 'Ard Boyz and Shoota Boyz fire into the Terminators from both sides, making a lot of noise but not killing anything. They are probably lucky there are no rules for friendly fire in this game! |
 |
| The Orks charge in from both directions and a bloody melee erupts. |
 |
The Terminators are all killed and the Captain is wounded, but he fights on alone, killing a nob and two boyz.
One against 13. That sounds like good odds to this hero! |
 |
| Da Wreckin' Krew arrived in style! |
 |
| Meanwhile, the Skorcha takes another shot at the Devastators and manages to toast a Heavy Bolter Marine. |
 |
| End of Ork Turn 3. The 'Ard Boyz arrive and attempt to turn the tide by killing the Marine leader. |
Space Marine Turn 3:
The Land Raider Crusader moved flat out toward the Ork deployment zone. At this point, it was obvious the Space Marines were not going to make any attempt to take the Ork objectives. If they could hold two Primary Objectives, they could win on Secondary Objectives because of First Blood.
The Space Marine gun line destroys both the Skorcha and the Trukk with fire from their special and heavy weapons.
 |
| Commander Kane slays the Ork nob in a challenge, but takes another wound from the boyz. The Orks pass morale. |
Orks Turn 4:
The Warbikes finally rallied and Turbo-Boosted back to the middle of the table. The Kommandos finally realized the Land Raider was never coming for their objective and so they started descending the hill, too late and too far away to have any impact on the game.
The Space Marine commander killed a few more boyz in close combat.
 |
| End of Ork Turn 4. Commander Kane fights on alone against the savage Orks, striking down one after another. |
Space Marine Turn 4:
The Land Raider Crusader advanced and fired some snap shots at the bikes, but couldn't kill anything.
 |
| Commander Kane continues slaying Orks left and right. With their numbers dwindling and their leaders dead, the Orks try to flee, but the Captain is too quick and cuts the rest down in a whirl of green blood. |
 |
| End of Space Marine Turn 4. Kane stands victorious, having driven off three Ork mobz. |
Orks Turn 5:
Even with Slay the Warlord, I was not going to be able to win as I had no way to contest one of his objectives or deny him from getting Linebreaker. But we decided to fight on for one more turn.
 |
| The Warbikes finally come roaring back into the battle, targeting the exhausted and bloodied Marine Captain standing alone amongst a pile of Ork corpses. |
 |
| The Orks gun down the valiant warrior at point blank range for fun more than out of any higher sense of vengeance for their fallen brethren. |
Space Marine Turn 5:
The Land Raider Crusader shot apart the Ork bikes while the crew quickly leaped out and grabbed the wounded body of their master, dragging him back to the safety of the armored tank. By getting him to their on-board medical systems so quickly, they would be able to save his life and repair his wounded body.
The Red Brotherhood Tactical Squads moved forward to claim the fuel depot and communication tower objective.
Meanwhile, the last of the Orks grabbed the loot from the western edge of the battlefield and fled.
 |
| End of Marine Turn 5. The Red Brotherhood Second Company claims the fuel depot and communications tower and still holds the ammo dump. |
 |
| The Space Marines stand victorious! |
At this point, we decided to call it a game. The remaining Orks were too few and too far away to have any hope of challenging the Marines for their objectives in the last turn or two, assuming we would have got them.
Final Result:
Orks: 8 (2 Primary Objectives + Slay the Warlord + Linebreaker)
Space Marines: 9 (2 Primary Objectives + Slay the Warlord + Linebreaker + First Blood)
Space Marine Victory!
POST-GAME ANALYSIS:
Phil (Orks):
Well, that was ugly. All I can say is that Pete did an excellent job of concentrating his fire and obliterating my army piece by piece. Partially, he deployed perfectly to counter my army. But I also failed to use my trukks properly. By keeping one in reserve, I let him pick me apart one unit at a time instead of trying to overwhelm him with too many targets. I kept one trukk back because I wanted to maintain some tactical flexibility since I didn't know what his deployment would be.
Basically, I committed the rookie mistake of letting Pete dictate the game. I kept my trukk in reserve and kept my Kommandos back on a hill because I was reacting to what I thought he was going to do rather than attacking full force and making him react to me. I basically did a little of both and ended up splitting up my army too much. Pete took the opposite approach of the past few games and let his units support each other instead of spreading them out and leaving them isolated. He definitely played the better game and deserved to win.
This type of mission will be harder for my army and my playing style to win than Maelstrom because there is no reward for the fact that I held those two objectives in my backfield all game. Whereas the Marines can sit back and shoot for two or three turns and then start worrying about advancing to capture objectives only in the last few turns. But I am already devising a better plan for next time and I am confident my mean green machine can win in this type of mission if I play a little smarter. After all, despite getting crushed in the kill category (I lost 48 infantry, 4 bikes and 4 vehicles while killing only 8 infantry), I only lost by one single Victory Point because I stayed focused on the objectives throughout the game.
Ork MVP: Nothing in my army performed well. The only mildly satisfying moment was when the bikes finally gunned down that damn Captain, but at that point, the game was over for me and the kill made no real difference other than it felt good!
Ork Disappointment: I can't say any unit was a disappointment as much as my generalship. I definitely learned firsthand just how fragile trukks can be and how dangerous to the Ork passengers as well! But not many vehicles would survive a point-blank shot from a multi-melta so it is not really the trukk's fault. I guess I was most disappointed in my Orks' ability to kill that Captain in melee. After he sniped out my nobz in challenges (did I mention I hate that rule?), the rest of the boyz just could not deal any damage and only did a single wound in the next three combat phases before they were wiped out.
Key Moment: When the Captain and his Terminators made their 9" charge into the remnants of my slugga boy mob. If I could have charged them instead in the next turn, with the help of the 'Ard Boyz, it may have made enough difference to turn the tide.
--------------------------------------------------------------------------------------------------------------------
Grimklaw saw the last of the Ork bikes shot to pieces by the giant red tank and reconsidered his plan of charging his kommandos toward the beakie defenders.
"Alright, ladz, dat's enuff. Let's grab dis loot and leg it!"
After all, there was no fun or glory in getting shot apart from a distance while running across the open desert. It would be much better to come back later, sneak up and clobber the gitz up close and personal. He watched as two of his boyz grabbed the huge metal canister and lugged it away from the battlefield. He had no idea what this thing was, but he figured if he was going to have to tell da' big boss about what happened today, he better not show up empty-handed.
As he slunk away into the darkness, he noticed the grotz smashing the delicate wires and antennas of some 'oomie technology wot-not and fighting over the shiniest bits. He figured it looked too fiddly to be useful to any of the meks but at least it wouldn't be doing the 'oomies any good now! Hur hur hur.
...
Back at the abandoned mining camp that was serving as the forward base of the Blitzdreg Boyz, Filgakk brooded angrily. That stupid git Blakfist had failed to capture the fuel and ammo that his boyz needed to continue their racing advance across the desert. And the worst part was that he had gotten himself killed before Filgakk could pound him nice and proppa' for his failure! Now his forces would be stalled for days while they waited for additional supplies from the main landing zone hundreds of miles behind them or for his boyz to return from other raids with more supplies. To feel better, he kept trying to tell himself that the longer he waited to attack, the more beakies there would be for him to fight when he got there. But patience was never his strong suit.
The only good thing about this delay was that it gave his meks time to study the strange ore that Grimklaw had brought back from the failed assault on the 'oomie outpost. It didn't look like much to him, but Big Mek Zogtork had been curious enough to try some refining and testing and now he was assuring Filgakk that, with a little more work, it could be used to fashion the hardest armor imaginable. Imagination was another trait not found among Filgakk's strengths, but he had seen the impressive armor of the 'oomie tank firsthand in his last victory and barely survived. He knew he needed some way to go toe-to-toe with that thing. So Filgakk nominated three of his toughest nobz for a little 'eksperiment' over in the mek shop and all day long he had heard nothing but the sounds of welding, cutting, hammering and plenty of cursing and shouting.
Dis had better be good, thought Filgakk as he angrily kicked a scurrying grot who had wandered too close. After all, patience was never his strong suit.