"To each of us falls a task. And all the Emperor requires of us Guardsmen is that we stand the line and we die fighting. It is what we do best. We die standing."
Campaign To Date:It is the middle of the Horus Heresy and civil war rages across the galaxy on a thousand worlds. Everywhere, former brothers and sworn allies have turned against each other in a fury of betrayal and hatred. The Warmaster Horus has begun his long march to Terra, crushing all resistance before him. In his direct path is the Xhorik System, located at a strategic crossroads of Warp currents in a sector of space known for smooth transitions between realspace and the Warp. This prosperous system has become a focal point for the Traitor war effort as they attempt to seize control of the key spaceport facilities to enable a rapid refuel and resupply of the main Traitor war host as they make their way to the throne world.
On Xhorik Prime, the key trading and transport hub of the system, Traitor forces are newly victorious over those loyal to the Emperor in a massive planetary civil war that erupted along old, pre-Imperial factional rivalries. A combined force of Death Guard and World Eaters has crushed the stratocracy of Kozar and their small garrison of the White Scars Legion. The major space ports are now securely in the hands of the Traitors, although small bands of Loyalist survivors continue to wage a shadow war along the fringes of the high desert wilderness.
On Xhorik Secundus, the planetary governor has remained loyal to the Emperor and maintained control of most of the planet. As war raged on Xhorik Prime, armies began mobilizing for an invasion of the heart of Traitor territory, in the Federation of Unimund. The first phase of the invasion was codenamed Operation Downfall and called for a massive nighttime drop assault on key enemy installations in order to clear the way for the massive, lumbering landing craft that would be bringing the bulk of the invasion the next day.
Although suffering significant casualties in the war for Kozar, the Xhorik 87th Drop Troops Regiment, the Firebirds, were called upon to support Operation Downfall from Xhorik Prime, along with several dozen drop regiments from Xhorik Secundus attacking from orbit. They would be making simultaneous night drops to secure key landing zones, disable defense and communication capabilities, and clear roads and bridges to allow the Loyalist forces to move quickly out of the vulnerable landing zones, establishing a beach head. The target of the 3rd Company was a signal relay station that transmitted information from orbiting satellites back to the urban areas and Traitor command centers.
Pre-Game and Mission:
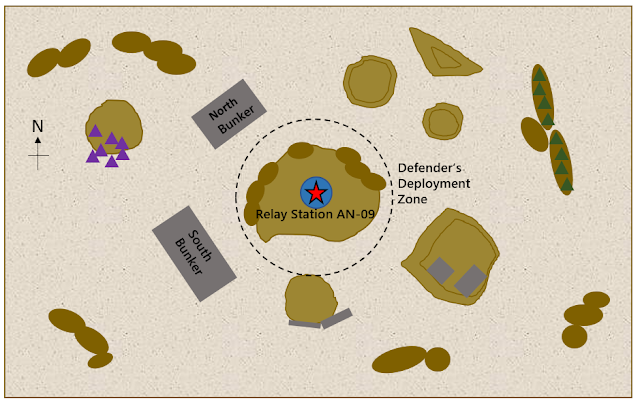
We played the mission Sabotage from the Fourth Edition WH40k rulebook with the Traitor Militia as the defenders and the Xhorik 87th Drop Troopers as the attackers. The defender can deploy any HQ and Troops choices around a central objective (and we added the ability to deploy a single Heavy Support choice to make it more fun and balanced with Pete's limited army). The attacker must get an infantry unit into melee combat with the central building objective and remain in base contact for one full turn until the attacker's next close combat phase. At this point, the demo charges are set and the objective is destroyed. The attacker chooses a narrow table edge and can deploy infiltrators within 12" of the edge. The rest of the force either moves on from that table edge in turn 1 or remains in reserve as normal. Defender's reserves have to roll for a random table edge when they arrive.
We did not include the sentries as Pete did not have the models for it and it seemed like it would just slow down the game without making much difference.
As part of Operation Downall, the drop would be taking place in the middle of the night so the old Night Fighting rules would be in effect for the entire game (when shooting, you must roll a spotting range of 2d6 x 3 to see your target or the shots are wasted) and the defender would get to use Hidden Deployment. We also decided the Hidden Deployment would not be revealed prior to the start of the first turn, as normal. Instead, the units would only be revealed if an attacker unit "spotted" it during the first attacker turn (as per Night Fighting rules), with any units still hidden being revealed in the defender's first turn. This would result in any attacker units deep striking on the first turn going in blind without knowing where specific targets would be located. Part of the hidden deployment rule was that any units held in reserves would have their hidden deployment marker become a bobby trap or minefield.
 |
| Night Drop scenario map: the outpost around Relay Station AN-09. |
Army Selection: 1200 Points
General Titus Ghoulv’s Iron Battalion – “The Marauders of Meddeon VII”, “The Pirates of the Northern Fringe”, “The Chem Hounds” - Pete
- Force Commander Saghesh the Sadistic: power sword, plasma pistol, refractor field, Alchem-Jackers, Warrior Elite
- Squad Alpha - The Tongue Collectors: 15 Grenadiers with plasma gun, flamer
- Squad Beta - The Psycho Slaves: 15 Grenadiers with melta gun, flamer
- 2 Auxilia Medicae: Dr. Cut and Dr. Cauterize
- Leman Russ Battle Tank
- Leman Russ Demolisher
- Leman Russ Vanquisher
- Malcador Battle Tank with armored ceramite
**Horus Heresy Imperialis Militia and Cults army list
 |
| An armored division of traitor militia is guarding the landing zones, including this sentry force at Relay Station AN-09. |
 |
| Traitor force map icons |
Xhorik 87th Drop Troopers, 3rd Company - Phil
I was excited to use my Drop Troopers in a mission where they could really shine. They will almost never win in a straight-up fight, but a night raid where the objective is to destroy a building allows them to utilize their main strength of launching a pinpoint attack anywhere on the battlefield with multiple infantry units. Keeping in mind the objective, I took a thematic force using my drop platoon for the five infantry units and the tank-killing support of the drop sentinels. I knew I would have a hard time dealing with four tanks (including a super-heavy) so I took all of the melta I had available: 9 meltaguns and multi-meltas altogether! My freshly-painted Stormtroopers would get their baptism by fire - I knew their stronger weapons would be helpful against the carapace armor of Pete's grenadiers and their ability to re-roll the scatter when deep striking would ensure they land on target. Finally, I brought some land units in the Tauros and Recon Bikers to ensure I had some units on the board to apply pressure early and to not allow a few bad rolls early on to leave me with no units on the board, resulting in automatic defeat.
- Company command section (5): regimental standard, medic, vox, power sword and plasma pistol
- Stormtrooper squad (10): melta gun, plasma gun, sergeant with power sword
Second platoon: Grav chute insertion force
- Platoon command squad (5) with power fist, vox, medic and two grenade launchers
- 1st Infantry squad (10) with melta gun
- 2nd Infantry squad (10) with grenade launcher
- Special weapons squad (6) with three melta gun teams
- Special weapons squad (6) with three melta gun teams
- Drop sentinels (2) with multimeltas
- Valkyrie with multilaser, 2 Hellstrike missiles, and 2 heavy bolters
- Tauros with grenade launcher
- Drop troop recon bikers White-Bolts (5) with demo charge
- Drop troop recon bikers Black-Bolts (5) with breacher charge
Sentry Guns (3) with twin-linked lascannons
Sentry Guns (3) with twin-linked heavy bolters
**WH40k Taros Campaign army list with 15% discount
 |
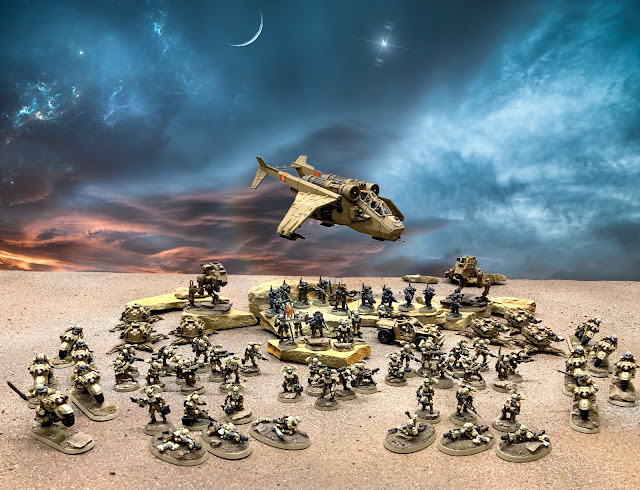
| Strike Force Glaive: Reinforced 2nd Platoon of the Xhorik 87th 3rd Company, under the command of Captain Xhaer. |
 |
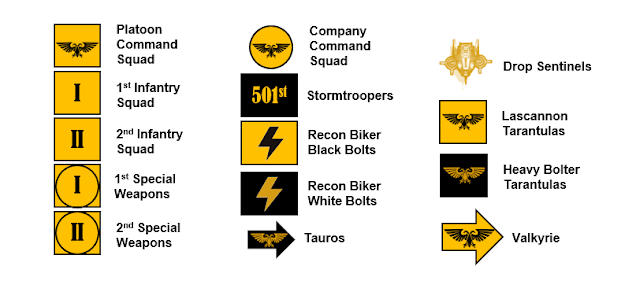
| Drop trooper map icons |
My strategy was to use the recon units (the bikes and Tauros) to try to spot the enemy to improve my positioning when the drop platoon arrived. They would harass the Traitors and draw fire away from the infantry, who would be focused on reaching the Relay Station and planting the demo charges. I decided to drop the Tarantulas in first (using the Combat Drop rules) to secure the drop zone and soften up the enemy a bit before my fragile and important infantry arrived to accomplish the mission. I knew I would struggle to destroy all those tanks, but I was hoping to overwhelm the defenders with numbers as I swarmed the objective. Onward for the Emperor!

