"The strong get what they deserve. So do the weak."
Background:
This battle takes place during the Istvaan III atrocity when the traitors purged their legions of any who would potentially remain loyal to the Emperor, long before the Xhorik Campaign. This battle provides some back story to three of the Traitor leaders before they crossed paths again in the Xhorik System in the middle of the Heresy.
Scenario: Might Makes Right
Belligerents:
World Eaters: Pete
World Eaters: Pete
Primary Detachment: World Eaters The Crimson Path
- Praetor Ghrodd
the Slaughter Lord: artificer armor, iron halo, master crafted
thunder hammer, jump pack
- [Line]
Tactical Squad The Skull Collectors: 17 marines with chain
axes, sergeant with power fist, artificer armor and plasma pistol
- [Line]
Recon Squad Butcher's Eyes: 5 marines, Nemesis bolters, bolt
pistols
- [Line]
Rampager Squad The Pit Gladiators: 10 Rampagers with jump packs, 3
with falax blades, 4 with excoriator chain axes, 3 with meteor hammers, sergeant
with artificer armor
- Predator Severing
Cut: Predator autocannon, lascannon sponsons
- Predator
Fires of Hell: Magna-melta cannon, heavy bolter sponsons
- Tartaros
Terminator Squad The Red Mist: 5 marines, 4 x dual lightning claws,
1 with heavy flamer and chainfist
- The
Red Butchers: 4 x dual power axes, sergeant with dual chain fists
- Transport: Land Raider Organ Grinder: quad lascannon sponsons, twin-linked heavy bolter
- Apothecary
Bazrak: jump pack, frag and krak grenades, bolt pistol, chain axe
2000 points
Death Guard: Bill
Primary Detachment: Death Guard (No Rite of War)
- Praetor Wolfgang: Catphractii terminator armor, volike charger, paragon blade, rad grenades
- Deathshroud retinue: 5 terminators with hand alchem-flamers, power scythes and rad grenades
- Tactical Support Squad Folterer: 8 marines with flamers and melta bombs, sergeant with artificer armor.
- [Line] Tactical Squad A: 14 marines with chainswords, sergeant with power fist and artificer armor and Apothecary Gerhard
- [Line] Tactical Squad B Toddestraffe: 10 marines with chainswords, sergeant with power fist and artificer armor.
- Transport: Rhino with pintle-mounted heavy alchem-flamer.
- Tactical Support Squad Blitz Schock: 7 marines with volkite calivers and apothecary
- Heavy Support Squad Feuer Sturm: 7 marines with missile launchers
- Predator Mittel Panzer 021 with Predator Autocannon and lascannon sponsons
- Contemptor Dreadnought Jürgen: Gravis melta cannon, melta gun, Gravis power fist
- Deredeo pattern dreadnought with Arachnus heavy lascannon battery, twin-linked heavy bolter, Aiolos missile launcher, and helical targeting array
2000 points
Sons of Horus: Phil
Primary Detachment: Sons of Horus Pride of the Legion
Primary Detachment: Sons of Horus Pride of the Legion
- Praetor Ezman Vyke with Cataphractii terminator armor, chain fist, combi-melta, digilasers, Armor of Pride
- [Line] Tactical Squad (6th Squad, 12th Company): 20 marines with bayonets, vexilla, artificer armor, power fist
- [Line] Cataphractii Terminator Squad Tempest: 10 marines with Cataphractii armor, combi-bolters, 3 power fists, 1 chain fist, 1 thunder hammer, 5 power axes
- [Line] Cataphractii Terminator Squad Hammerfall: 5 marines with Cataphractii armor, 3 power fists, 2 chain fists, 5 combi-meltas
- Transport: Land Raider Proteus The Bladed Hand
- [Line] Veteran Tactical Squad Exomis ("The Remnants"): 10 marines with 2 power swords, 1 power axe, 1 power fist, vox, 2 meltaguns, 1 combi-melta, and artificer armor
- Transport: Rhino
- Contemptor Dreadnought Konax Silat with Gravis-melta and chainfist with inbuilt grav gun
- Heavy Support Squad: 5 marines with lascannons
2000 points
Pre-Game Plans:
Pete: Upon winning the second place roll off for turn order, I decided to pick my deployment zone and take the first turn. Normally I prefer to deploy last so I can see my opponent’s deployment and strategy, but with my army being so melee focused, I needed to get into combat ASAP and limit the opponent shooting phases. But since my opponents had an additional army to focus on, deploying first wouldn’t be as severe of a disadvantage as usual.
I decided to go all-out and set up my Praetor-lead Rampagers on the edge of the deployment zone and streak into the Death Guard ranks on turn 1. I fully understood the danger of throwing my Praetor into the frontlines in a mission that specifically rewards killing an HQ above all else, but with his insane offensive potential, you’ve gotta throw him into the grinder and hope the dice gods favor boldness. I anticipated my scoring tactical squad would be able to follow the Rampager’s advance and make it to the objective on turn 4 or so. Seemed unlikely, but that was my strategy for that flank anyway. On the Sons of Horus flank, I set up my Land Raider with Butchers, Recon Squad and 2 Predators. I fully understood the elite nature of what Phil would be throwing at me, so I tried to match their power with some firepower of my own! I hoped to hold back the Sons of Horus onslaught for a couple of turns using a strategic retreat, allowing me to swing my tactical squad over to my objective vs. the Death Guard.
Bill: Not much to say here. Though I am a very enveterened fan and 40K enthusiast, this battle was a whole lot of "Well, let's see how this goes..." for me. I was playing with my bro's Death Guard army for only the second time, though most of the units were completely new to me. I was coming to grips with a whole new (and dramatically different) game edition. After only one practice game with only about half of Pete's army, I was attempting to demonstrate enough mastery of both troops and rules to do the Plague Father justice in a three-way traitor bash. Certainly a daunting task. However, one thing upon which I can rely for confidence is the fact that the new rule are equally alien to my opponents.
My army selection, unlike the practice game, required zero thought, since it was the entirety of Pete's painted DG HH army. Well, minus Big Bertha, the super heavy that unbalanced so many battles in the past. It was actually making Pete fight against his own god machine that had first inspired me to suggest a traitor bash battle. The berserkers of Khorne would surely be opposed to anyone owning such an opulent ranged unit. The only thing worse would be a super-psyker. The seeds of traitor conflict and strife had been laid. Once Phil had produced a SoH army, we all knew that the time was ripe. Only one can be the favorite of the gods!
I rolled best for deploying and taking the first turn, but chose instead to do both last. I figured that observing my bungling enemies and reacting (as well as getting the very last turn, no matter what) was the wisest course of action. Nurgle certainly always chose to take things slow. Let your options bubble and percolate.
Phil: The Sons of Horus Legion rules and the Pride of the Legion Rite of War gave me an elite force that would excel at close quarters fighting, perfect for a scenario that required forcing your way through an advancing enemy. For my Warlord Trait, I selected Chosen of the Dark Gods, thinking the +1 Strength and Toughness would make my warlord tougher to kill and improve his chances of besting his foes in a duel, which is what this scenario was all about.
My strategy was straightforward: a large infantry block led by my Warlord moving straight toward my objective, with my faster-moving elite units in transports on each flank to counter the most elite enemy units. The heavy support squad would provide covering fire and take out large threats. The Contemptor dreadnought would lend some durability to the more fragile flank with the veterans and the heavy support squad, hopefully drawing some fire away from these power armored units. The plan was that the large tactical squad could soak up fire or the first enemy charge, allowing the big Cataphractii squad to counter charge with my Praetor and crush the center of my enemy's force. My biggest advantage was my ample number of scoring units, with nearly my whole army having Line, so I knew I had the best chance out of all three players at achieving my secondary objective. I felt confident that my infantry could best any opponent, as long as the units could support each other.
Three-way battles are always tricky because it is easier to end up with your army split up, fighting on too wide of a front compared to fighting a single opponent. My plan was to commit the bulk of my force to No-Man's Land and stay focused on steadily moving multiple Line units toward the objective.
Deployment:
The Death Guard won the roll to select their turn order, but decided to go last. The World Eaters had the second highest roll and elected to deploy first and go first. The Sons of Horus had the lowest roll and therefore were left to deploy and go second.
Phil: I took the northern deployment zone. It looked like I would have a straight path to march my infantry to my objective and it had a nice elevated firing position for my heavy support squad. I kept my Land Raider far enough back that it would be out of half-range of Pete's magna-melta if he advanced his Predator. My veterans and the Contemptor would guard left flank and aim to disrupt either of my opponents' attempts to get their Line units to their objectives.
 |
| Deployment and Objectives |
 |
| Wolfgang leads the Death Guard |
 |
| Death Guard Deployment |
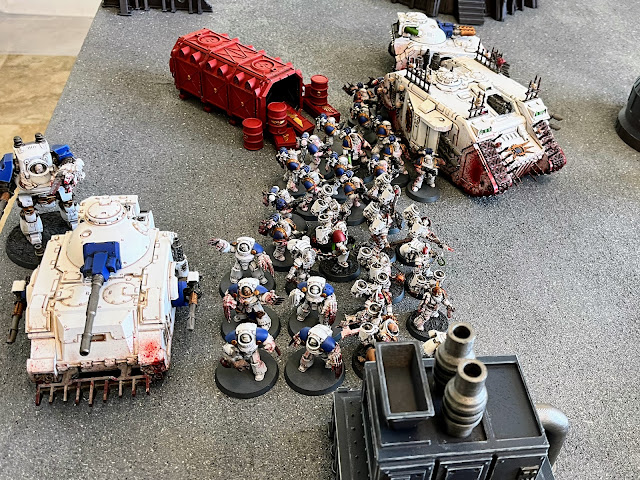 |
| Ghrodd the Slaughter Lord leads the World Eaters |
 |
| Ezman Vyke Leads the Sons of Horusl |
 |
| Sons of Horus Left Flank |
Battle:
Turn 1 Summary:
The World Eaters wasted no time getting stuck in with the Praetor and his Rampagers charging the Death Guard Contemptor right out the gate and brining it down. World Eaters shooting eliminates a few Sons of Horus infantry.
 |
| Ghrodd the Slaughter Lord leads the assault on the Contemptor Jürgen. |
 |
| Ghrodd the Slaughter Lord lives up to his name. |
 |
| End of World Eaters Turn 1 |
The Sons of Horus center marched forward, while the Land Raider Bladed Hand pulled back out of range of the World Eaters' Predator with the magna-melta and instead fires at the Land Raider Organ Grinder, taking off a few hull points and shaking the crew. The veterans in the Rhino and the Contemptor Konax Silat advance and fire into the Death Guard infantry. The Heavy Support squad fired at the distant Deredeo dreadnought. Not only did they not inflict a single wound, but the entire squad was wiped out with the Return Fire reaction!
 |
| The heavy support squad opens fire on the distant Deredeo but does no damage... |
 |
| ...and they are wiped out by Return Fire! |
 |
| Sons of Horus tactical marines advance. |
 |
| End of Sons of Horus Turn 1 |
The Death Guard encircle the Rampagers and the Slaughter Lord and fire everything they can into the blood-soaked World Eaters. The Predator, the Volkite Calivers, the flamers, the missile launchers and the tactical squad all fire into the unit but can only bring down half the squad! (Pete was able to tank a lot of wounds with the sergeant's artificer armor, and had Feel No Pain, and of course the Rampagers had two wounds each.) Since shooting wasn't working, Praetor Wolfgang and his Deathshroud launched an assault. The fighting was vicious with both sides killing a few enemies, but neither side landing the decisive blow. With so many special weapons with special rules, this combat was almost as grueling for the players trying to figure it all out!
 |
| Death Guard shooting whittles down the Rampagers but cannot destroy them. |
 |
| Wolfgang and his Deathshroud assault Ghrodd and his Rampagers. |
 |
| It was six vs six to start. . |
 |
| At the end it was just Ghrodd alone vs Wolfgang and two Deathshroud. |
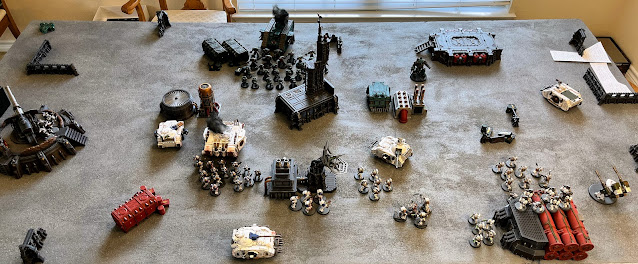 |
| End of Death Guard Turn 1 |
World Eaters: 1 VP (Glory Unto Me)
Sons of Hours: 0 VP
Death Guard: 1 VP (Glory Unto Me)
Sons of Hours: 0 VP
Death Guard: 1 VP (Glory Unto Me)
Turn 2 Summary:
The World Eaters continued to be aggressive. The stunned Land Raider fired snap shots at the Sons of Horus Land Raider. With some incredible rolling, it scored a penetrating hit and got an Explodes! result, destroying the transport deep in the enemy deployment zone and even taking down an unlucky nearby terminator! The Red Butchers disembarked and charged the huge tactical squad. Running into 40 bolter shots can be dangerous even for these monsters and two were killed by Overwatch. They killed a multitude of Tactical Marines in return in the assault. On the other flank, the terminators of the Red Mist squad charged in to support their warlord against the Death Guard Praetor. The extra bodies turned the tide and World Eaters destroyed the Death Guard and took down Wolfgang!
 |
| A snap shot from the Organ Grinder destroys the Bladed Hand! |
 |
| The Red Butchers charge into a hail of bolter fire. |
 |
| The Butchers revel in the slaughter! |
 |
| The Red Mist rush to the aid of Ghrodd the Slaughter Lord |
 |
| Down goes Wolfgang! Down goes Wolfgang! |
 |
| End of World Eaters Turn 2 |
The Sons of Horus left launched an attack on the Death Guard in retaliation for the loss of their heavy support squad. First, Veteran Squad Exomis disembarked from their Rhino and damaged the Death Guard Predator with melta fire, destroying its turret cannon. Then the Contemptor Konax Silat destroyed Rhino carrying Tactical Squad B, eliminating the mobility of one of the few Death Guard units with Line while they were still far from their objective. On the right flank, the XVI Legion Cataphractii Terminator Squad Tempest led by Praetor Ezman Vyke came to the aid of the overwhelmed Tactical Squad and saw off the threat from the Red Butchers.
 |
| On the left flank, the Veterans dismount and damage the Predator but cannot destroy it |
 |
| Konax Silat strides forward and destroys the Rhino, stranding the Line unit on board. |
 |
| The Sons of Horus right flank, led by Praetor Ezman Vyke, clears out Red Butchers. |
 |
| End of Sons of Horus Turn 2 |
The Death Guard throw all of their shooting at the advancing Terminator squad (volkite, missiles, Fury of the Legion and even the Deredeo) but only manage to kill a single one! The flamer squad douses the World Eaters Tactical Squad with noxious burning chemicals and kill four marines, while losing one of their own to Gets Hot! The damaged Predator gets vengeance by knocking a few more wounds off the Sons of Horus Contempor. Finally, out of shear determination and desperation, Tactical Squad B launches an assault on the Contemptor that wrecked their ride, hoping to inflict two more wounds to finish it off. They lose three men and are driven back by the overwhelming power of the dreadnought.
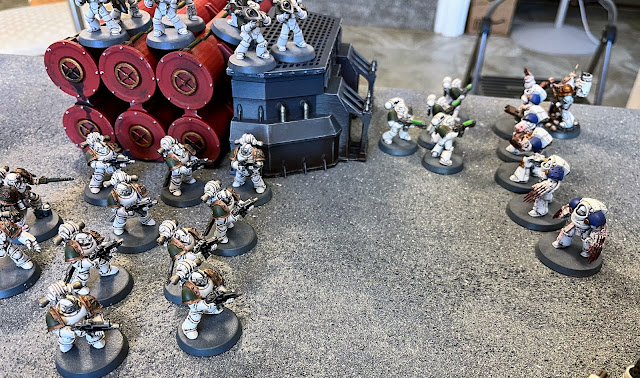 |
| Every available gun was turned on the Red Mist Terminator squad. When the smoke cleared, only one had fallen. |
 |
| Chem munitions give a horribly painful and foul-smelling death to four World Eaters Tactical Marines. |
 |
| The overmatched Tactical Squad is driven back before the wrath of the Contemptor. |
 |
| End of Death Guard Turn 2 |
World Eaters: 5 VP (Slay the Warlord; Glory Unto Me x 2)
Sons of Hours: 1 VP (Glory Unto Me)
Death Guard: 1 VP (Glory Unto Me)
Sons of Hours: 1 VP (Glory Unto Me)
Death Guard: 1 VP (Glory Unto Me)
Turn 3 Summary:
The World Eaters started Turn 3 by moving the Predator with the magna-melta and the Land Raider to good firing positions at a comfortable distance from the Sons of Horus infantry. Both tanks fired into Squad Tempest and together killed seven of the mighty Cataphractii! In the center, the Tactical Squad prepared to charge the Death Guard flamer squad. Apparently the Death Guard decided they would rather go down in a blaze of glory than get hacked to bits with chain axes: they fired overwatch and killed two World Eaters but somehow all three died due to Gets Hot!? On the World Eaters' right flank, Ghrodd the Slaughter Lord continued his rampage and led the Red Mist in an assault against the Death Guard Tactical Squad A, and soundly trounced them.
 |
| The Death Guard go down in a blaze of (putrid, rancid, chemical-burned) glory. |
 |
| Ghrodd and his adopted Terminators make short work of the Tactical marines. |
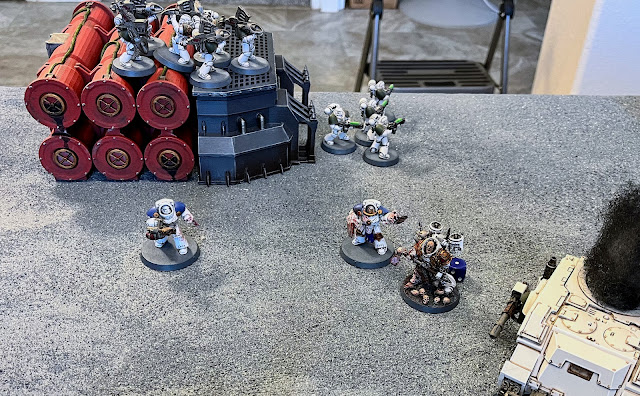 |
| The Death Guard do not go down without a fight and they manage to take Terminators down with them. |
 |
| End of World Eaters Turn 3 |
The Sons of Horus Veterans fired into the World Eaters Tactical Squad, causing them to break and fall back. The Veterans then charged and the World Eaters failed their morale and scattered, overwhelmed by the ferocity of their merciless foes. The Sons of Horus right flank was withering under a hail of fire from the World Eaters' tanks. Their only chance was to assault the vehicles and destroy them in melee. Praetor Ezman Vyke readied his chainfist and attempted the charge but could not reach the steadily-retreating tank, leaving him exposed staring the angry end of the magna-melta!
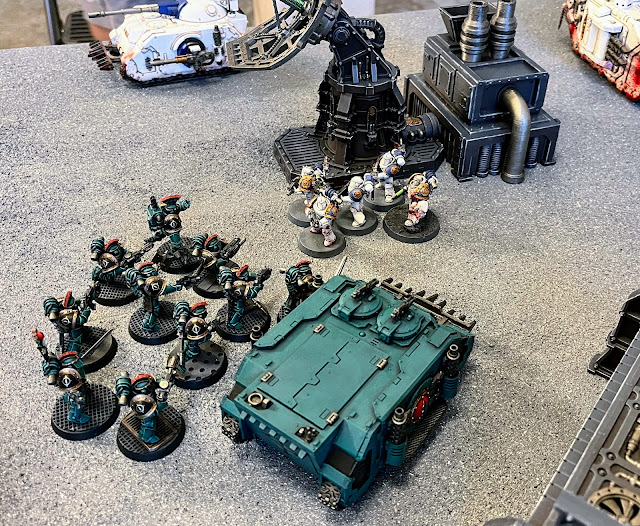 |
| Veteran Squad Exomis destroys the Tactical Squad, eliminating any chance for the World Eaters to claim their objective. |
 |
| Konax Silat, the Contemptor, kills one Terminator with his claws and survives the counter attack by Ghrodd, taking only one wound. |
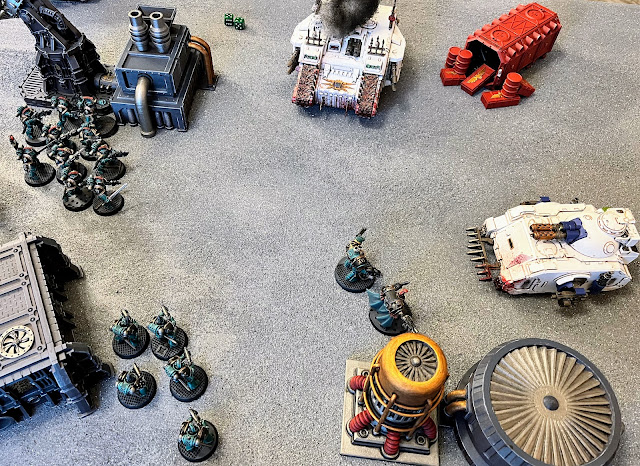 |
| Praetor Ezman Vyke cannot make the charge against the Predator. |
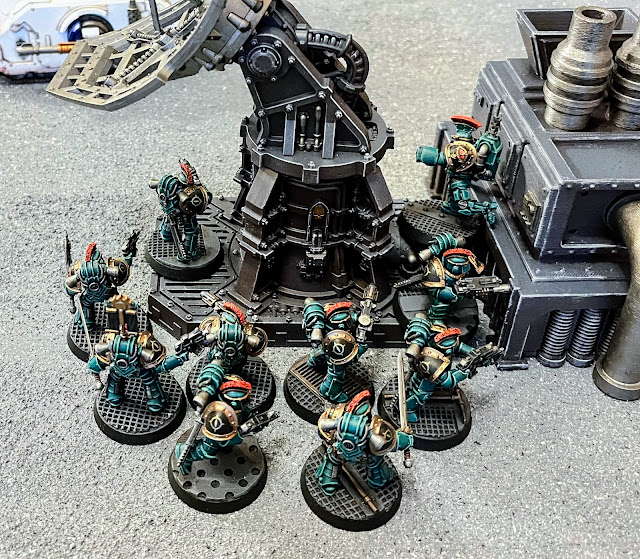 |
| After consolidating, Veteran Squad Exomis are the first Line unit of any army to reach their objective. |
 |
| End of Sons of Horus Turn 3 |
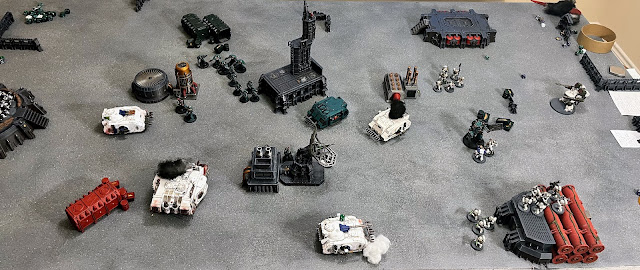
Unfortunately for the Death Guard, the World Eaters Warlord was in melee with the Sons of Horus dreadnought so he could not be targeted by shooting. (It is times like these where it would make sense to have a rule to shoot into melee.) Instead the Death Guard concentrated the missile launcher squad, the volkite squad and the Predator's remaining sponson weapons at the Sons of Horus Veteran Squad and killed 7 of the elite warriors as they approached the Sons of Horus objective. The Deredeo fired at the World Eaters Predator but only immobilized it. The remains of the last Death Guard scoring unit, Tactical Squad B, continued their long trek to the objective, hoping to make it by the end of the game.
 |
| The Death Guard continue to shoot while Ghrodd is safely engaged in melee! |
 |
| End of Death Guard Turn 3 |
World Eaters: 6 VP (Slay the Warlord; Glory Unto Me x 3)
Sons of Hours: 1 VP (Glory Unto Me)
Death Guard: 1 VP (Glory Unto Me)
Sons of Hours: 1 VP (Glory Unto Me)
Death Guard: 1 VP (Glory Unto Me)
Turn 4 Summary:
The World Eaters Predator continued to reverse engines while firing away at the Sons of Horus Praetor giving chase, bringing down the rival leader under a torrent of melta and heavy bolter shots. This kill would give them an insurmountable lead. The recon squad then dropped four Sons of Horus tactical marines with head shots. To put the nail in the coffin, the World Eaters Praetor finished off the Sons of Horus Contemptor for yet another VP.
 |
| Ghrodd finishes off the dreadnought |
 |
| End of World Eaters Turn 4 |
With their Warlord and most of their army knocked out, the best the Sons of Horus could hope for would be edge out the Death Guard for second place by claiming their objective and denying the Death Guard theirs. (And to get some revenge where possible!) To that end, the Rhino rammed the World Eaters Predator at full speed and managed to knock out its last hull point (thanks to Merciless Fighters)! The Veteran Squad finally charged the elusive Land Raider but the lone power fist was not able to penetrate the armor.
 |
| Ramming speed! The Predator is destroyed. |
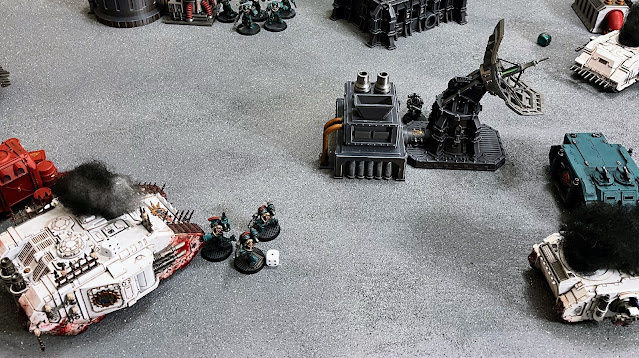 |
| The veterans finally reach the retreating Land Raider but cannot breach its thick armor. |
 |
| End of Sons of Horus Turn 4 |
The Death Guard point all of their guns at the only target that matters. Finally, after four turns, the Death Guard are able to lay low the mighty Ghrodd! Meanwhile, the last tactical squad continues their long march to the objective, trying not to draw attention to themselves.
Sons of Hours: 1 VP (Glory Unto Me)
Death Guard: 3 VP (Slay the Warlord; Glory Unto Me)
Turn 5 Summary:
With not much left on the table, the World Eaters concentrate on shooting what's left of their enemies. They only manage to bring down one of the slowly approaching Cataphractti terminators of Squad Tempest. Realizing the only way they could lose would be if they were completely tabled, the World Eaters begin their tactical withdrawal, moving the Predator out of line of sight of the Deredeo and moving the Recon marines safely behind terrain.
 |
| The World Eaters tanks continue to strike their slower-moving foes with impunity. |
 |
| The Butcher's Eyes begin their tactical withdrawal. |
 |
| End of World Eaters Turn 5 |
The Sons of Horus see their only chance is to claim their objective and send the last survivors of their Tactical Squad and their Veteran Squad to claim it. The Cataphractii Terminators exchanged fire with the Land Raider, losing one of their own. But they then finally managed to charge the mighty battle tank and use their chain fist to destroy it! The Rhino continued its rampage by ramming the Volkite support squad and killing two of the Death Guard marines. Now all that was left was for the scoring units to try to hold on through the Death Guard turn and hope the game ended without a Turn 6!
 |
| The Sons of Horus are truly Merciless Fighters, using their tank's treads to crush their enemies! |
 |
| The last few Terminators finally catch their quarry. |
 |
| The last tactical marines try to hold the objective. |
 |
| End of Sons of Horus Turn 5 |
In order to claim second place, the Death Guard had to prevent the Sons of Horus from claiming their objective. At the start of their turn, there were two scoring units at the objective. The Death Guard firepower was up to the task as the remaining Volkite, Missile Launchers and the Deredeo combined to inflict enough damage on each squad to push them out of scoring range. The Tactical Squad lost one man and the other fell back. The Veterans were reduced to only the sergeant, who was just outside of the radius to claim the objective!
 |
| The Tactical Squad approaches their objective. One more turn may be enough... |
 |
| The Death Guard concentrate fire on the Sons of Horus around their objective and drive them off. |
 |
| Three scoring units are close. On a Turn 6, they could all be within scoring range (if the Tactical Squad rallied). |
 |
| End of Death Guard Turn 5 / End of Game |
World Eaters: 10 VP (Slay the Warlord x 2; Glory Unto Me x 4)
Sons of Hours: 1 VP (Glory Unto Me)
Death Guard: 3 VP (Slay the Warlord; Glory Unto Me)
Sons of Hours: 1 VP (Glory Unto Me)
Death Guard: 3 VP (Slay the Warlord; Glory Unto Me)
WORLD EATERS DOMINANT VICTORY!
Post-Game:
Pete: What an amazing game that was! Whew! Every army had moments when it felt like they were in control and had a legitimate path to victory. Then an opponent would take THEIR turn and all hopes seemed dashed! And waiting two opponent’s turns in between your own turn felt like a long, stressful amount of time and required extra strategy and planning for. Thankfully there were reactions to make, which allowed some countering to the opposing general’s strategy.
Kudos to Phil for creating such a fantastic mission and battlefield set up. The game felt balanced and fair from deployment onward and rightfully focused us all on killing warlords and pushing the action to the center of the board. And there were enough secondary objectives to keep everyone in the action and have other paths to victory.
I have to say that my World Eater army performed better than anticipated as they were able to kill two warlords, and by two very different means! My new Praetor sporting a jump pack and thunder hammer was every bit the terrorizing force of nature I assumed he’d be – especially since he had his 10 Rampagers and then an adoptive terminator squad supporting him. And he and his squads rolled rather well on their armor saving throws vs. Billy’s onslaught of missiles, volkite, flamers and bolter shots. So obviously some luck factored into the victory, as is common in a game of chance like HH/40k. Also, I’m really glad I didn’t follow my usual tentative and cautious ways in this game – if I had, I would’ve been blown to bits back in my deployment zone by turn 2.
A few other thoughts:
• This is the second game while playing the new version of HH where the recon squad with their nemesis bolters had a stunning impact on the outcome of the game. I feel that nemesis bolters are too strong with both getting to pick your target out of a squad as well as getting rending on a 5+. I could see some house rules getting created soon to curb these guys’ effectiveness.
• Land Raiders and Spartans can still be wrecked by one good shot from a lascannon or multi-melta. While creating your battle strategy, you count on them to deliver a key close combat squad to a vital objective but then it never materializes and the squad ends up being totally out of position to make an impact on the game. Difficult to underestimate how massive this factored into my left flank vs. the Sons of Horus and its success at the end of the game.
• Five butchers with power axes just doesn’t have the same impact they used to, as they now can get overwatched and shot up, or their extra charging attack taken away by reactions. In this version of HH, you really need bigger squads of elites or troops to compete.
• That Deredeo Dred is a beast. Man is that thing killy! It’ll take a dedicated close combat specialist squad with Str 8 hits to bash it to pieces. But there’s no reason to move the Deredeo out of the controlling player’s deployment zone, so it’ll always be tough to reach it.
Bill: MVP: There is but one candidate for this title; the only unit to not only live up to its potential but to exceed it, dealing out way more points worth of death than its own cost: the Deredeo Dreadnought. My other shooters dumped buckets of dice worth of volkite, chem-flamer, and bazooka shots into the enemy lines with minimal effect, but the mighty Deredeo slew everything at which it pointed its mighty lascannons, heavy bolters, and missile barrages. On the very first turn, he obliterated the extremely intimidating leaf blower squad. Late in the game, he finally brought down the nearly immortal WE praetor. Another turn and he could have wiped out the WE scouts with indirect fire and tabled Pete's army. Basically, he did everything worth mentioning.
My only chance for halting the grinding attrition of Pete's berserkers was to hope that they would be so good at killing that they'd wipe out my squad during their turn and be left standing in the open on my turn so I could blast them. Well, Pete certainly obliged me, his bloody butchers chewing up a squad every turn, starting with my melee dreadnought, a beast that was once thought to be unkillable. Every turn, I rubbed my hands in anticipation of my revenge I would take against his CO, pointing an onslaught of missiles, bolters, and heavy volkite at him and his squad. Every turn, I hit them with what seemed like gross overkill, only to see them emerge from the smoke largely intact. When his meat shields were finally exterminated, the praetor switched to a new squad, forcing me to start all over again! My own melee specialists, the Reaper squad, were swept aside along with my praetor, leaving Pete free to rampage as he liked with no resistance. If the Deredeo hadn't finally zapped holes through the WE praetor big enough to drive a rhino through, he very well could have tabled me, given enough time.
Worst Performer: Though it's a title that has many candidates, I've gotta give it to the flamer squad. They had such potential; a full eight Marines equipped with Fleshbane template weapons in a game system that allows them to shoot during the enemy's assault OR shooting phases thanks to the new reactions, but they failed to have any meaningful contribution to the battle. Now, many of my squads were equally ineffective, but the flamer boys also killed themselves thanks to their 'Gets Hot!' rule. Three of the eight members melted themselves with their own toxic goo, adding insult to injury and distinguishing them as the biggest donk-ups which Nurgle had made the mistake of endorsing. Perhaps next time, I'll put an apothecary with them (sarcasm). Along with witnessing Phil's rotten luck with his White Scars killing themselves with plasma meltdowns, I'd have to say that I'll be very wary of weapons with Gets Hot! in future battles.
Overall, I must say that I enjoy the new edition and the addition of reactions. It adds a whole new, fresh level of strategy to a game system that was already well-refined and nearly perfect. Reactions force even veteran players, like my bros and I, to rethink their moves and look at 40k in a new light. For instance, in any previous edition, one would always use shooting attacks with impunity since, on your turn, your opponent can do nothing except roll armor saves. As the situation with the leaf blowers attempting to shoot my Deredeo Dread has shown, sometimes it's best to skip your own shooting phase or target enemies without powerful ranged attacks. This is a decision no player ever had to make in older editions. You would always target your enemy's strongest unit to destroy it before it's own turn came around. It was exactly this adherence to our classic sensibilties that allowed the Deredeo to annihilate it's counterpart across the battlefield. In my practice game with Pete, our dreadnoughts reacted to one another's shooting attacks each turn, effectively allowing them to double their firepower. Nothing is simple anymore.
None of this should give the impression that I disapprove of any of these changes. Keeping the old units and flavor alive and fresh is what has made 40K such a success. Long-time fans like my bros and I keep coming back year after year precisely because the game is ever evolving and improving. Back in second edition when we started, armor suffered from save modifiers instead of either fully resisting or failing to an attack. Terminators needed a 3+ unmodified save (on 2d6) instead of a 2+ on 1d6 with an invulnerable back-up to survive. Now, Terminators have 2 wounds! What constitutes a super tough unit is constantly shifting and changing. Likewise, what constitutes a good army is forever changing. However, the one thing that never changes is the fun, challenge, and thrill of battles in the forty-first millennium!
Phil: That did not exactly go to plan! Looking back, I actually executed on my strategy pretty well. My Warlord and his big infantry block controlled No-Man's Land throughout the game, I blocked both opponents from reaching their objectives, while I had multiple Line units on my objective on Turn 5. My tactical squad soaked up the charge of the fearsome Red Butchers, allowing my big Cataphractii squad and Praetor to counter-attack and wipe them out, just as I had planned. So what went so badly wrong?
First, my enemy Warlords tangled far from the center, leaving me without much chance to achieve Slay the Warlord. Normally in a three-way battle, it is good when your opponents destroy each other, but not in this case when you get VPs for destroying the enemy Warlords! My Warlord never had a chance to kill much.
Secondly, my fire power and mobility was decimated immediately. By the start of my second turn, all of my lascannons were gone, along with the mobility on my right flank. My enemies made better use of their firepower to destroy some key units in the first few turns, leaving me with a slow foot slogging force with no shooting, that could be picked apart at their leisure from a distance. I certainly did not anticipate being shot apart by the World Eaters, of all armies, as they continued to fall back just out of my reach!
What should I have done differently? Maybe I should have been more aggressive with the Land Raider early, but I knew it would not survive long against a magna melta and two gravis lascannons. But losing my transport in my own deployment zone left my slow units far out of position compared to if they had been stranded in a more forward position where they could have threatened the World Eaters. On target selection, maybe I should have ignored the Deredeo but my heavy support squad was one of the only things I had that could threaten it from a distance. I was probably doomed to lose that firefight no matter what, but luck seemed to be against me as well. My lascannons somehow failed to cause a single wound and I lost the entire squad in return. Against Pete, he managed to roll an Explodes! on my Land Raider with a snap shot from his Stunned Land Raider! Of course, I also missed a very makeable charge with my Praetor against the Melta Predator that was tormenting him from a distance. Of course, the same Predator then subsequently killed him on Pete's next turn, giving Pete an insurmountable lead in VPs.
None of my units really had a standout game., but I will select the Veterans as my favorite performer. They used their close range shooting to decimate a World Eaters Tactical Squad and then launched an assault to scatter them, eliminating any chance for Pete to claim his objective and clearing the way to my own objective. They also managed to hold my Objective until the very last shot of the game (combined with very dumb casualty removal by me) put them just out of range to score. Additionally, I had a great time ramming everything in sight with their Rhino (taking advantage of my Legion rule Death Dealers), first wrecking a Predator and then killing a few marines!


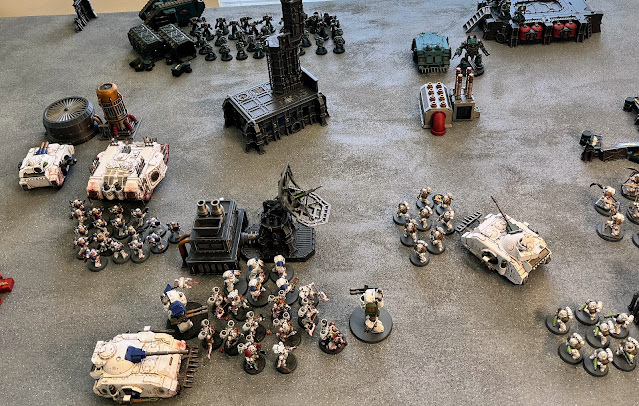


Wow! Great read. I totally felt all of the ups and downs. 40k truly is a fantastic game to be able to produce so many dramatic moments in only a few turns. For future games, we need third party photographers to get every image, even at the peak!
ReplyDeletePhil, I totally left Texas thinking that you had counted your guy to be within range of your objective and thusly gotten 2nd place. Reaching the end of this blog and seeing that you agreed w my rule that objectives were measured from the center and not the border, as Pete suggested, really brings a tear to my eye. You are either very fare or very kind, letting me think I got 2nd
ReplyDelete