
"If the road is easy, the destination is worthless."
- Khan Turan Jorma,
Brotherhood of the Wind,
White Scars Legion
Brotherhood of the Wind,
White Scars Legion
Campaign To Date:
It has been about 40 years since a combined force of Sons of Horus, Death Guard, and White Scars brought the Xhorik System into compliance during the Great Crusade. The major population centers of the largest continent were quickly brought under Imperial control in the typical fashion: a series of pinpoint attacks of overwhelming force by the Legions against the enemy's strong points, followed by rapid surrender. Due to the richness of the primary planet and the strategic location of the system on a sort of crossroads of warp currents, small garrisons of the Death Guard and White Scars legions were left on the planet to oversee the tithes of men and material to the Great Crusade and to help eradicate the threat of large ork populations in the eastern wastes.
In Phase 1 of the campaign, the Traitors pushed the Loyalists from the war-torn border city of Bielyr in a series of bloody street fighting.
In Phase 2, the war escalated across the badlands of the Valbaara Plateau in several pitched battles. In the end, the Brotherhood of the Wind was defeated and their leader Praetor Zherdan was killed by the Death Guard.
In Phase 3, the Death Guard marched to the major Kozar city of Berat, fighting their way through a number of Loyalist counter attacks. In the end, helped by taking control of low-planetary orbit over the city in a void battle, the Traitors smashed through the outer walls of Berat behind the might of their super heavy Fellblade battle tank.
---------------------------------------------------------------------------------
Phase 4 is the battle for the Kozar city of Berat. The Traitors have broken through the gates and are working their way toward the city center block by bloody block in a brutal street fight. This Phase uses a number of special rules:
Campaign Points: CP are earned by playing games and by achieving secret secondary campaign objectives (drawn randomly each game and kept secret). They can be used to gain advantages in games. The player with the most CP at the end of the phase wins.
Normal games:
Win: 5 CP
Draw: 3 CP
Loss: 1 CP
Final Game:
Win: 10 CP
Draw: 6 CP
Loss: 2 CP
- Spend 1 CP to re-roll the die to deploy first or to re-roll the die to steal the initiative. Can only be used once per game.
- Spend 1 CP to include a unit that would not be allowed due to the Grinding Attrition or Street Fighting special campaign rules below. The point cost of the unit still counts toward the army total. Can only be used once per game.
- Spend 1 CP to re-roll the die to see if the game ends. Can only be used once per game.
(Costs are doubled for the final game.)
Hunter Killers: Due to the very dense terrain providing ample hiding places, surprise attacks are extra deadly. Units who used Infiltrate, Scout or Outflank can charge the on the first game turn or the turn they come into play. If they don’t charge, they gain an extra +1 cover save for their first turn in play (stacks with any bonuses they have already).
Street Fighting: Narrow streets, debris, billowing smoke and crumbling towers limit the ability to utilize large vehicles and artillery. Other than the final battle, a max of one total unit can be selecged with any of the keywords: heavy, artillery, flyer, or over 3 HP. In the final battle, everything goes.
Grinding Attrition: Other than Troops choices, any unit that is destroyed cannot be used in the next battle. If the next battle is the final battle, it can be taken but must start in reserves. Any unit that is selected as Troops choice can be used even if it was destroyed in the previous battle.
Named Warlord: Choose your warlord trait. Must be the same for the whole phase. Can also can always re-roll LD and morale checks. Other warlords must roll for trait.
If named warlord dies in battle, roll die:
1-2: debilitating injury: can't use in the rest of the campaign phase until final battle
3-4: major injury: can't use in next game
5: close call: no effect
6: Miraculous Recovery (Chosen of the Emporer/Horus/gods of Chaos): can use as normal and has an inspiring presence for the next battle: all units within 12" can use his LD.
The Revenant: Once warlord returns after dying in a game, he has Hatred (Traitors/Loyalists) for the rest of the campaign phase.
Our standard Terrain Rules are in effect.
We created a new scenario. The board was split lengthwise into six 1-foot Zones of Control. At the start of each player's turn, he would earn a VP for each Zone he controls at that time. Control is established by:
- Having any unit in a Zone with no enemy units.
- Having a Troops unit in a Zone with enemy units that are not Troops.
- A single unit can only hold one Zone per turn if it is spread across multiple zones.
We elected to use the start of the turn rather than the end in order to give the opposing player a chance to react and try to shift the enemy units before they score. It prevents swooping in with a weenie unit and grabbing or contesting a zone without fighting for it.
There are no secondary objectives or Campaign Objectives for this mission.

We also wanted a chance for our newly painted Rhino and Predator to shine, so we decided it would be a "lighter" battle without the Land Raider, the Sicaran Omega or the Primaris-Lightning Strike Fighter.
ARMY SELECTION: 1900 points
Traitors - Pete
Death Guard
- Preator Wolfgang: terminator armor, volkite charger, paragon blade, digital lasers, rad grenades, Fearless, It will not Die
- Deathshroud Terminators with hand flamers, power scythes and rad grenades
- Tactical Support Squad Folterer: 8 marines with flamers and melta bombs, sergeant with artificer armor. Mounted in a Rhino APC with a pintle mounted heavy flamer.
- Tactical Squad Toddestraffe: 12 marines with close combat weapons, sergeant with power fist and artificer armor and Apothecary Gerhard
- Tactical Squad: 12 marines with close combat weapons, sergeant with power fist and artificer armor
- Tactical Support Squad Blitz Schock: 7 marines with volkite calivers
- Heavy Support Squad Feuer Sturm: 7 marines with missile launchers and Apothecary
- Predator with Predator Autocannon and lascannon sponsons and Machine Spirit
Army of House Harkhathe
- Grenadiers The Hero Hammers: 15 grenadiers with 2 plasma guns
- Support squad with 2 missile launcher teams and 3 lascannon teams
Loyalists - Phil
White Scars Brotherhood of the Wind
- Khan Turan Jorma: jetbike, paragon blade, cyber hawk
- Skyhunter Squadron Khujaa: 6 jetbikes, 2 x volkite culverin
- Tactical Squad Temgar: 10 marines with close combat weapons, sergeant has power glaive, artificer armor and Rhino with multimelta
- Recon Squad Chono: 10 marines with recon armor and camo cloaks, sergeant with power fist and artificer armor
Kozar Army, Berat Garrison
- Force Captain Xhaer: plasma pistol, iron halo, familiar, Warrior Elite, Duck and Cover (Cyber Augmented)
- Platoon command squad: power fist, 3 grenade launchers, vexilla, vox caster
- Medicae: 2 medics
- Infantry Squad Secondus: lascarbines
- Fire Support Squad Septima: 4 fire teams with missile launchers
- Recon Squad Decima: 5 infantry with sniper rifles and camo cloaks
- Recon Squad Tertius: 5 infantry with shotguns and a demolition charge
- 3 x Tarantulas sentry guns with twin-linked lascannon
- Tarantula sentry gun with heavy bolter
- 2 x Sentinels with lascannon
- Tauros with grenade launcher
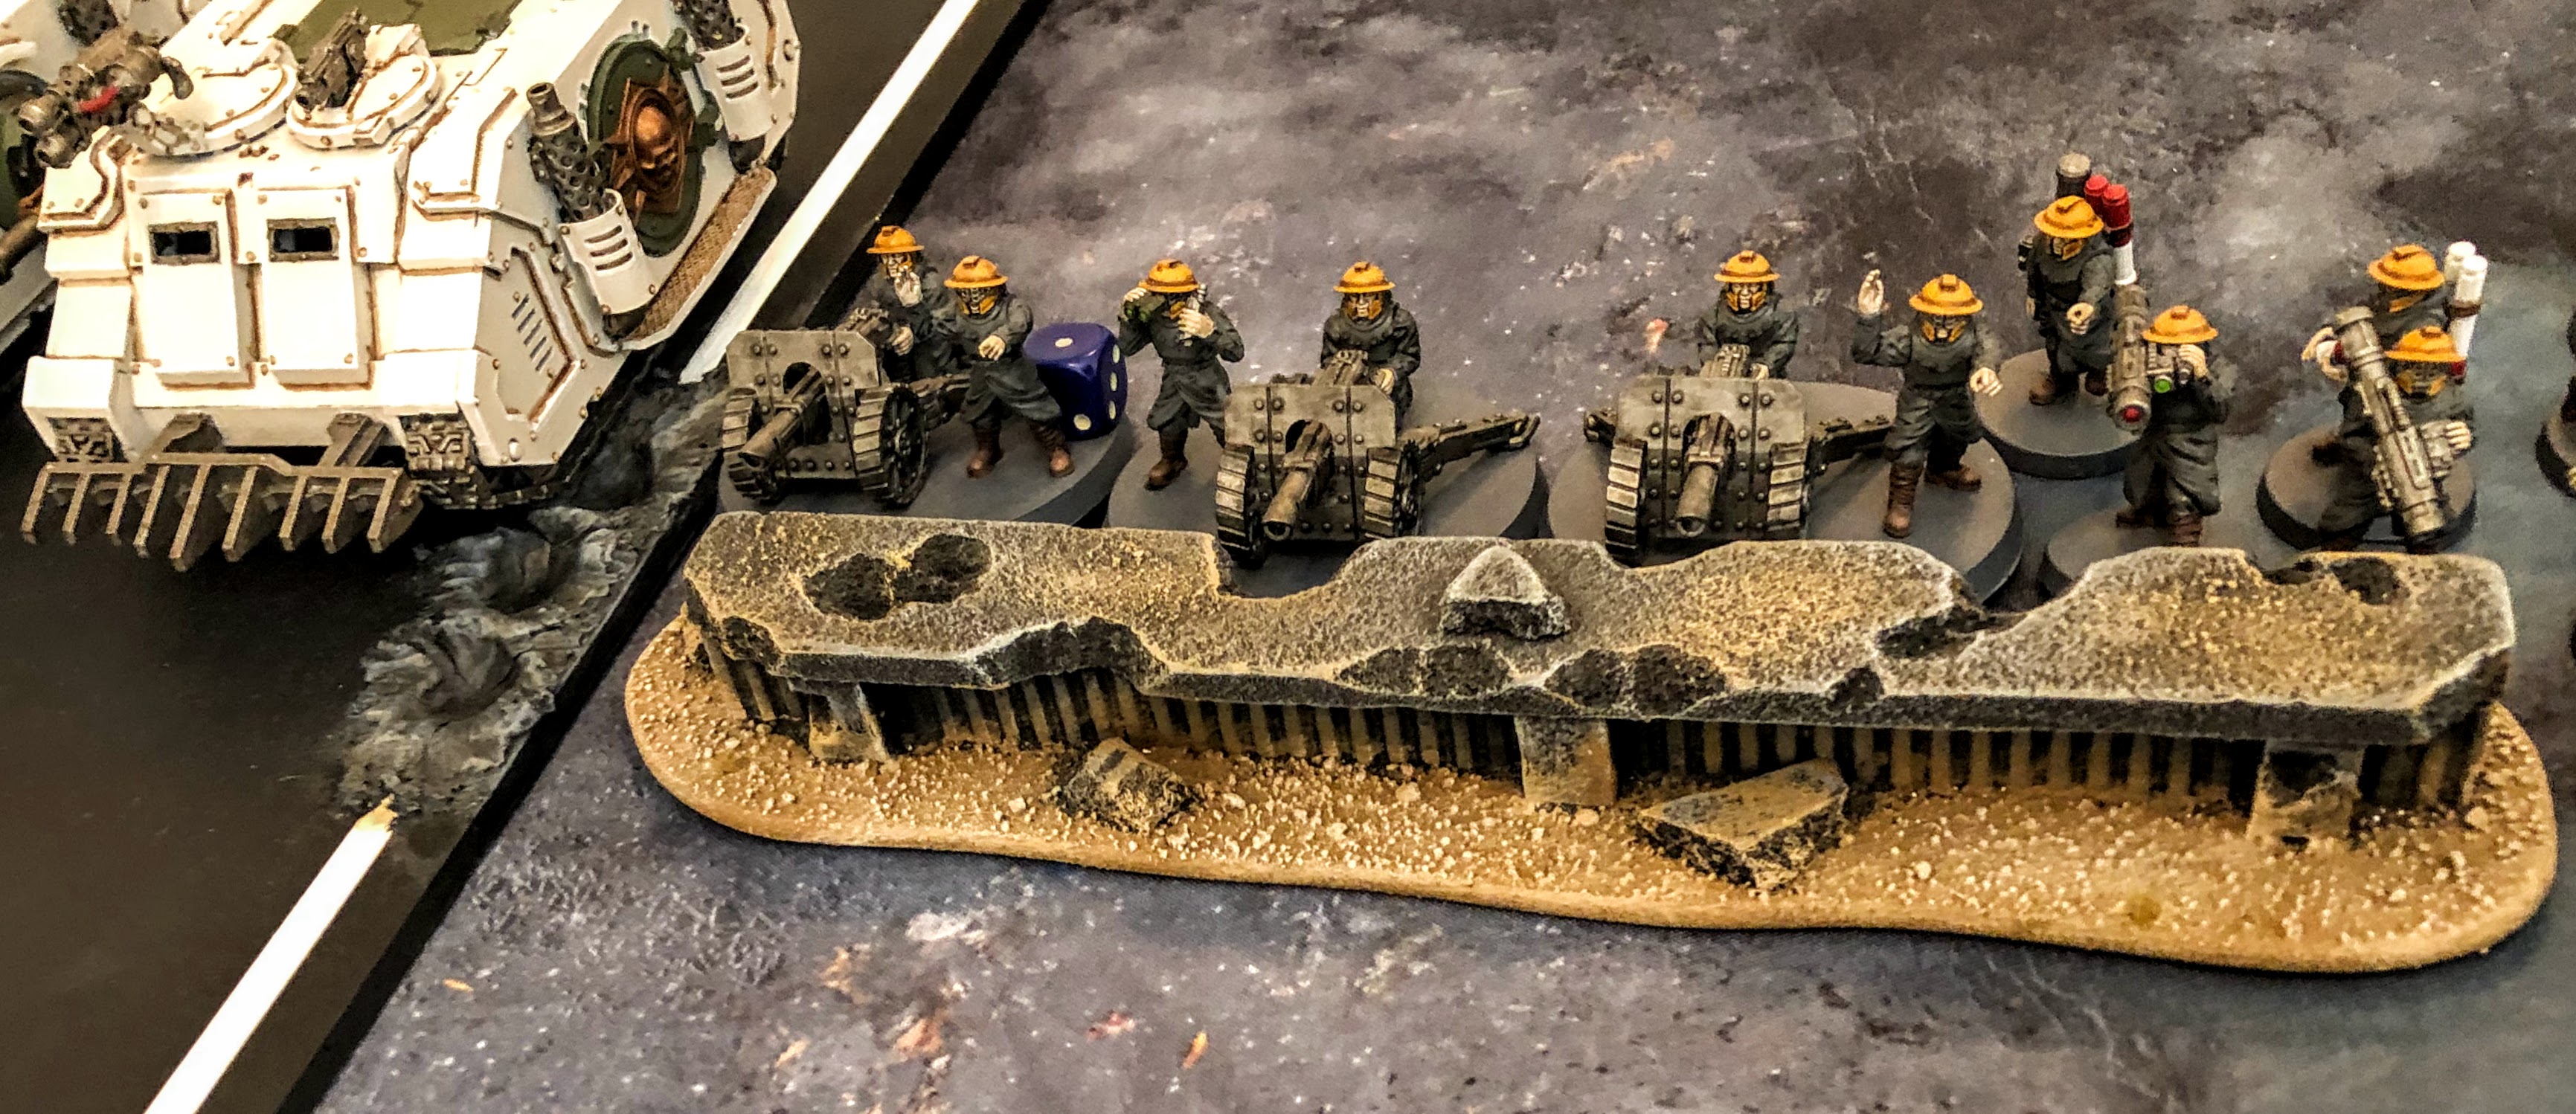
- Medusa Siege Cannon with 2 extra crew
++++++++++++++++++++++++++++++++++++++++++++++++++++++++++++
BATTLE:
Zone Control
 |
| This critical section of road and the surrounding buildings became a focal point for both armies as part of the wider battle for the control of access to the center of the city. Both sides vied to control as much of the area as possible to gain advantage in the conflict. |
 |
| Mobile detachments from both sides converge on the key section of road. Controlling as much of the area as possible would enable their forces to converge on the city center for the final battle. |
 |
| Praetor Wolfgang and his Deathshroud Terminators anchor the Traitor line and support a mass of infantry marching through the ruins along the road. |
 |
| Death Guard tanks rumble down the open highway. |
 |
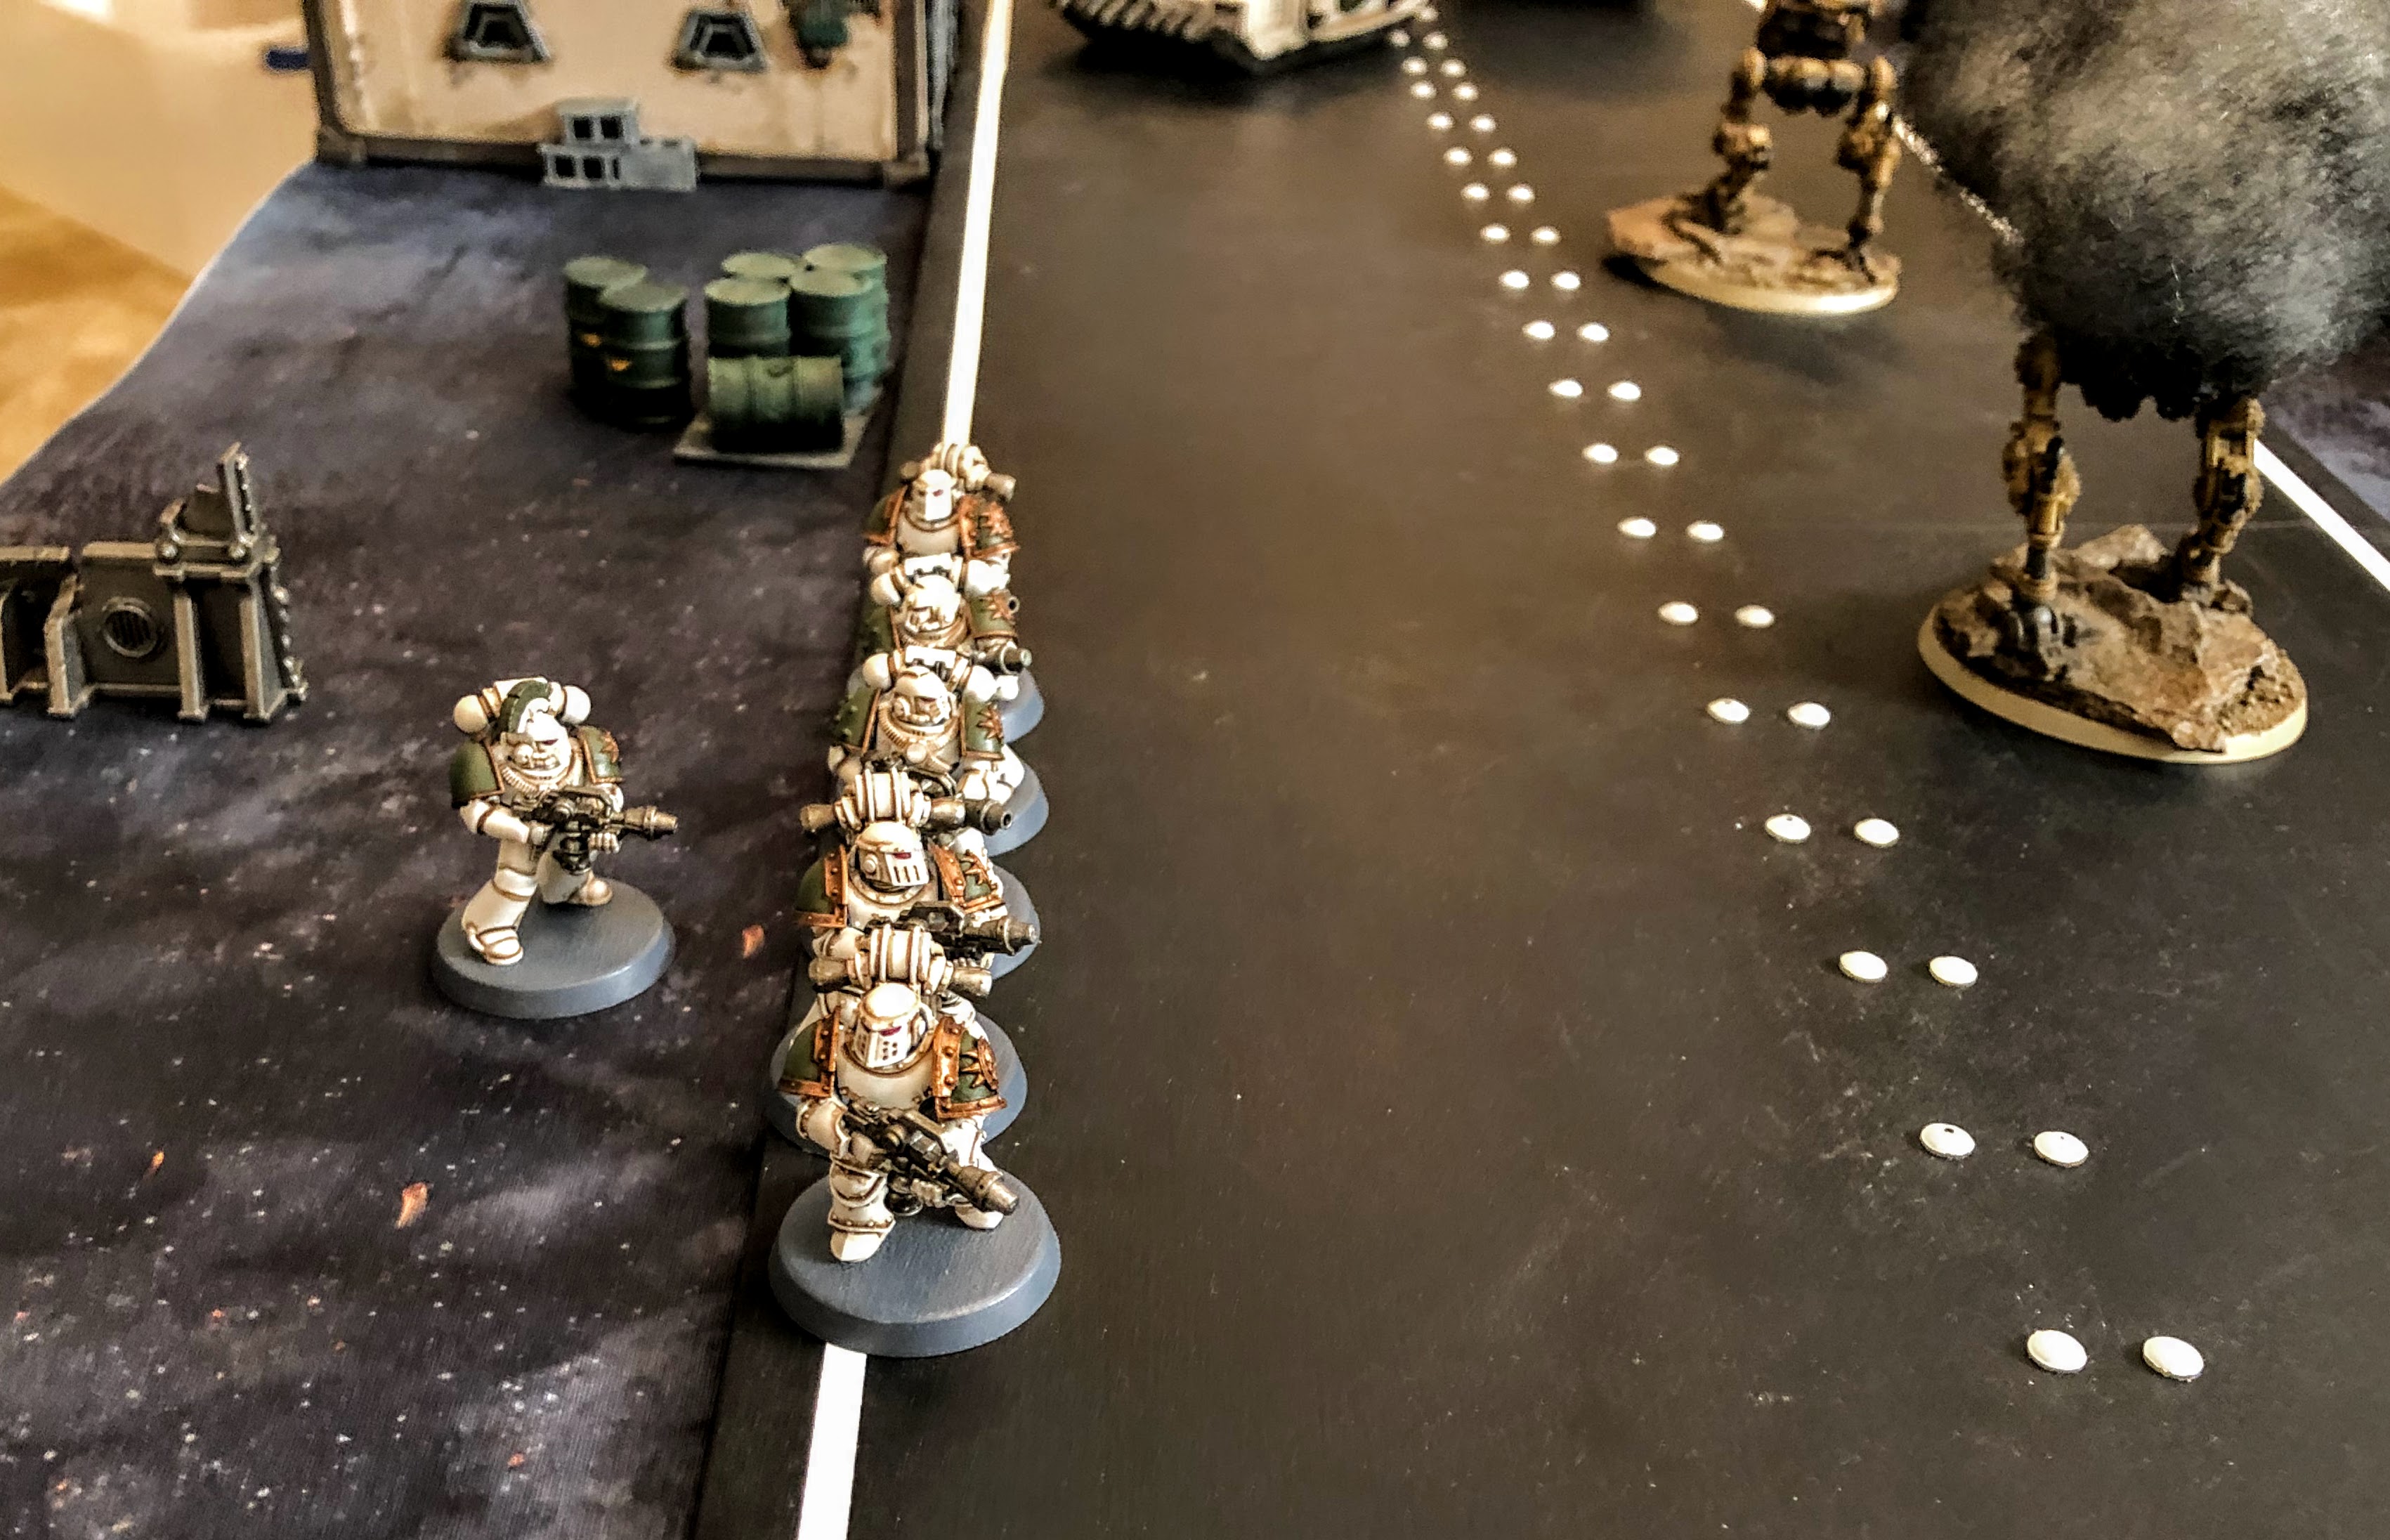
| The White Scars send a Tactical Squad in Rhino to advance up their right flank. |
 |
| The Loyalists place their Kozar Infantry in the center of their line, supported by heavy weapons. After suffering heavy Legion casualties in the last two battles, the Loyalists are forced to rely more on the Kozar army for defense of the city. |
 |
| On the Loyalist left is Khan Turan Jorma and his Skyhunters, along with some mobile Kozar light vehicles. |
 |
| Recon Squad Chono infiltrates forward into the ruins, to hold a key forward position before the Traitors can reach it. |
 |
| The Recon marines quietly creep through the ruined building. |
 |
| The Loyalists make the first move and advance, quickly taking ground. |
 |
| Squad Temgar advances to the middle of the battlefield. |
 |
| Khan Jorma and the Loyalist forces race down the road firing into the Traitor forces. |
 |
| Shooting is mostly ineffectual as the Harkhathe heavy weapons squads have the cover of ruined walls. |
 |
| The Kozar artillery must wait for the enemy to move into range. |
 |
| "Death Guard, advance!" |
 |
| Death Guard and House Harkhathe infantry march toward the chemical plant, using the buildings for cover. |
 |
| The bubbling toxic waste pits do not daunt the advance of Tactical Squad Toddestraffe. |
 |
| "Return fire!" |
 |
| The Predator fires everything at the White Scars jet bikes. The heavy support squad and Predator combine their fire to knock out two Skyhunters. |
 |
| Tactical Support Squad Folterer race forward in their Rhino, planning to flush the Kozar snipers out of the Tauros garage with their flamers. |
 |
| Both sides surge forward to capture ground. |
Turn 1 Score:
Loyalists: 4
Loyalists: 4
Traitors: 1
 |
| Khan Jorma and Skyhunter Squad Khujaa continue to pour fire into the Hartkhathe heavy support squad, destroying several heavy weapons teams. |
 |
| Kozar Recon Squad Tertius, specialists in urban warfare, spring a surprise attack and lob a demolition charge into the midst of Heavy Support Squad Feuer Sturm. |
 |
| When the smoke clears, three Death Guard marines are down. |
 |
| Squad Folterer disembarks and uses their deadly flamers to clear Recon Squad Decima from their fortified position. |
 |
| The fighting intensifies as both forces push forward to hold as much ground as possible. The Loyalists continue to build a large lead early thanks to their many infiltrating, scouting and outflanking units. |
Turn 2 Score:
Loyalists: 4 + 3 = 7
Loyalists: 4 + 3 = 7
Traitors: 1 + 1 = 2
 |
| The automated Tarantula sentry guns eliminate the Death Guard Rhino. |
 |
| Tactical Squad Temgar disembarks and fires on the Squad Toddestraffe, trying to hold them back as they cross the toxic waste pond. |
 |
| "Dismount! Take up firing positions!" |
 |
| The platoon command squad moves forward to get eyes on the enemy and radio the target coordinates back to the Medusa siege gun. |
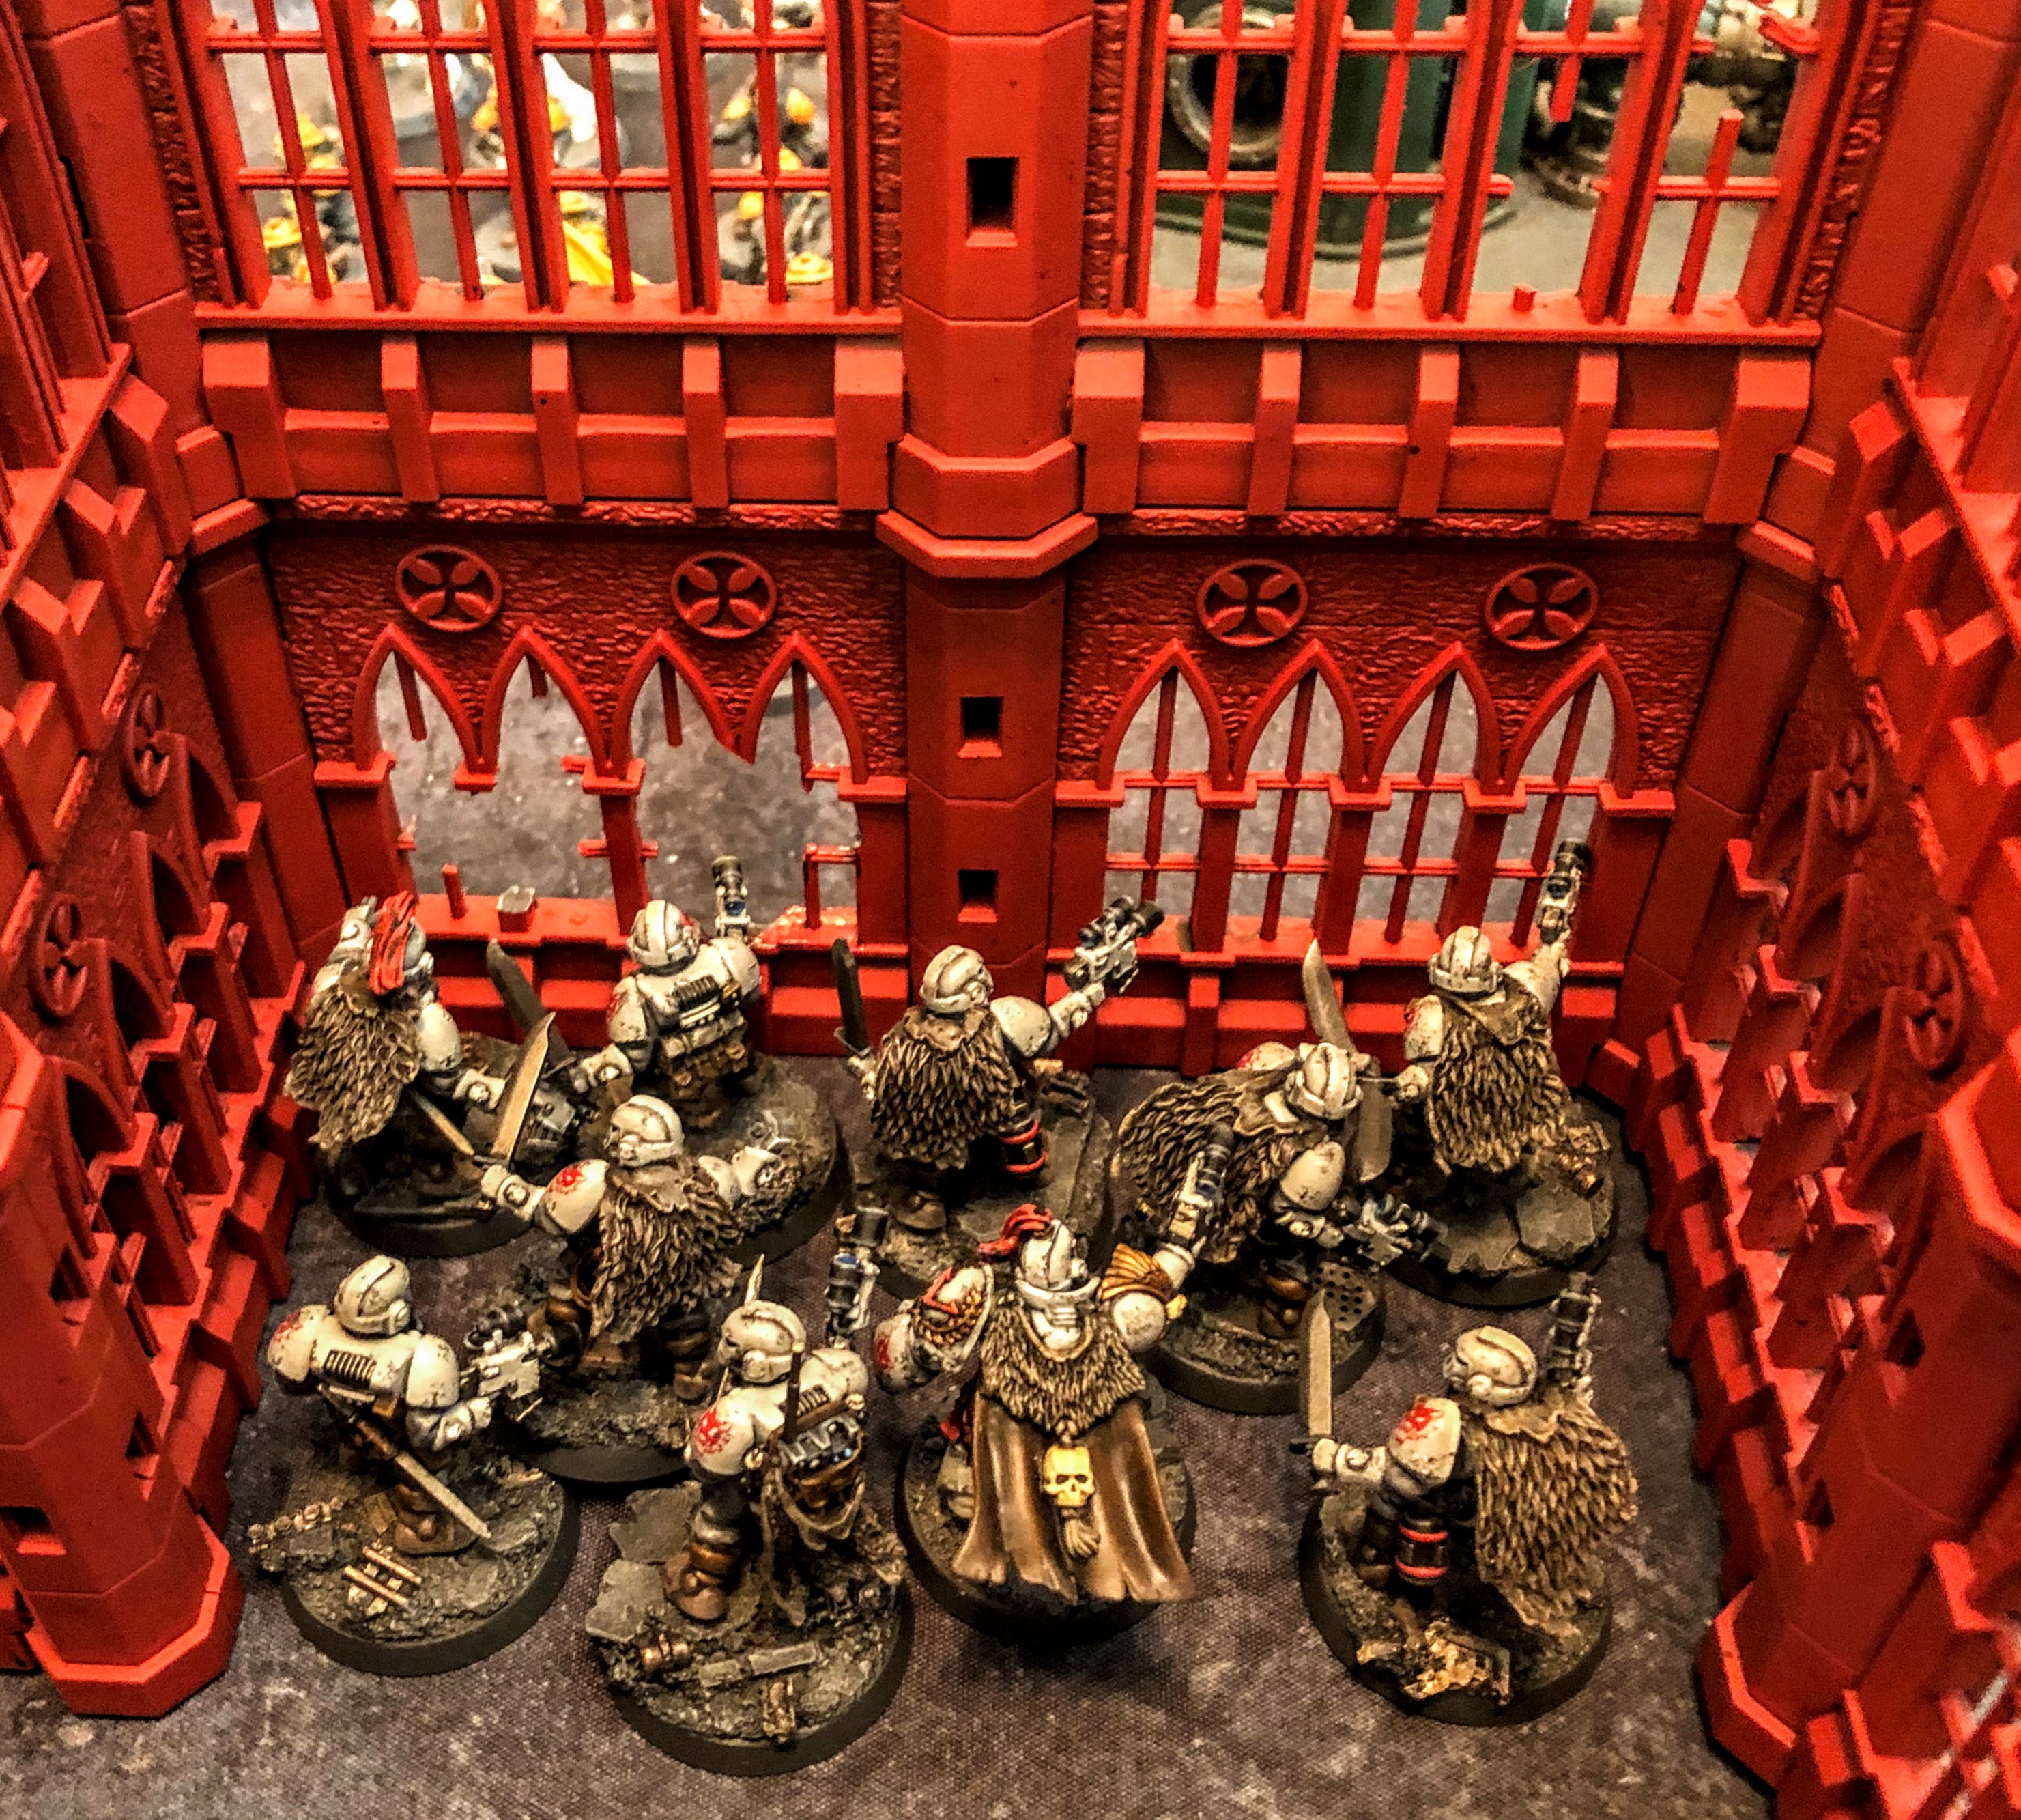 |
| Recon Squad Chono fires from cover, waiting for the enemy to advance close enough to strike. |
 |
| Khan Turan Jorma leads his squad into the teeth of the enemy forces, losing a few more to the Predator but slowing the Traitor advance and securing the ground behind them. |
 |
| Grenadiers of House Harkhathe continue to advance and claim ground. |
 |
| The Loyalists hold more ground, but the tenacious Death Guard continue their implacable advance. |
Turn 2.5 Score:
Loyalists: 7 + 3 = 10
Traitors: 2
 |
| Squad Toddestraffe slog through the toxic waste, immune to the ill effects, while Medusa siege shells burst around them. |
 |
| Tactical Squads Temgar and Toddestraffe exchange bolter fire. |
 |
| The Death Guard clear away a few nuisance Kozar units and each side now holds three Zones of Control, splitting the battlefield evenly. |
Turn 3 Score:
Loyalists: 10
Traitors: 2 + 3 = 5
 |
| Squad Temgar, drop back, firing their bolters. They do not want to charge into the toxic pit or stand still and be charged by the Death Guard emerging from the waste. |
 |
| Khan Turna Jorma launches his assault against the Traitor center. |
 |
| Recon Squad Chono and Skyhunter Squad Khujaa coordindate their strike. |
 |
| Squad Chono charges into the House Harkhathe Hero Hammers. |
 |
| The superhuman warriors tear apart the Grenadiers. The few survivors are broken and scattered by the ferocity of the White Scars Recon marines. |
 |
| At the same time, Khan Jorma leads the charge against the Death Guard tactical marines. |
 |
| The Death Guard stand against the charge, but the White Scars' speed and fury is immense. |
 |
| Jorma kills the Sergeant and another marine with his Paragon Blade and the rest flee before his wrath. |
 |
| The Loyalists strike hard at the Traitor center, destroying two units. With the midfield contested, the Loyalists now hold only two Zones of Control. |
Turn 3.5 Score:
Loyalists: 10 + 2 = 12
Traitors: 5
 |
| The Predator rolls forward and blasts the Kozar Sentinels: destroying one and crippling the other. |
 |
| Praetor Wolfgang and his Deathshroud terminators advance on the lightly-armored White Scars. |
 |
| The Deathshroud scythe through the Recon Marines, cutting them down like grass. |
 |
| Tactical Squad Todderstraffe charges the White Scars Rhino and quickly destroy it with melta bombs. |
Turn 4 Score:
Loyalists: 12
Traitors: 5 + 2 = 7
 |
| Squad Temgar advances and fires on the Death Guard who wrecked their transport. |
 |
| The two sides battle amongst the smoking wreckage. |
 |
| The Sentinels account for both enemy tank kills after they finish off the advancing Predator. |
 |
| The Kozar infantry fall back from the central redbrick ruin, ceding it to the Deathshround and Praetor Wolfgang. |
 |
| The platoon command squad has lost their vox caster to bolter fire from the Death Guard, preventing them from improving the accuracy of the artillery. |
 |
| The Khan turns his attention toward Squad Feuer Sturm. Disciplined overwatch fire brings down one Skyhunter as they speed into melee. |
 |
| Khan Jorma and Praetor Wolfgang have each dispatched an enemy unit in the center but did not meet directly before the currents of battle pulled them apart. Both sides cling to a couple of Zones of Control while the center two remain contested or empty. |
Turn 4.5 Score:
Loyalists: 12 + 2 = 14
Traitors: 7
 |
| Squad Toddestraffe decide to withdraw in order to reclaim an extra Zone of Control after the Predator is destroyed. |
 |
| Tactical Support Squad Folterer continue to advance deep into enemy territory and contest the Loyalist backline Zones of Control. |
 |
| Praetor Wolfgang and his Deathshroud move into the central ruin, taking ground as the Loyalists fall back rather than face him. |
Turn 5 Score:
Loyalists: 14
Traitors: 7 + 2 = 9
Turn 6 Final Score:
Loyalists: 14 + 2 = 16
Traitors: 9 + 3 = 12
Campaign Score:
Traitors: 16 CP (15 CP +1 CP Loss)
Traitors: 16 CP (15 CP +1 CP Loss)
Loyalists: 13 CP (8 CP + 5 CP Win)
Due to accomplishing more secondary Campaign objectives, the Traitors hold a 3 CP lead going into the final game, giving them more options to get advantages in the decisive battle.
POST-GAME:
Traitor Post-Game Analysis:
Pete:
Loyalist Post-Game Analysis:
This was also a mission where having many separate units, especially Troops, was very helpful. There were no VPs to give up for losing units and having a multitude of units gave the ability to spread out and contest most of the table. Pete obviously had the same thought as he picked an army with an impressive 7 Troops choices (thanks to his Heavy Support Squad counting as Troops for Death Guard) compared to my 6 Troops choices, but I had 15 total units compared to his 10, which allowed me more flexibility to cover the board. I also had a huge advantage in mobility with three infiltrating/outflanking units (all Troops), Sentinels with the Scout ability, one transport, the fast Tauros, and the mobile jetbikes. Pete had one transport and one tank and no units with infiltrate, outflank or scout to grab Zones early. My first two turns were pretty dominant as I used all of my special rules to earn 7 VPs compared to Pete's 2 and even though he clawed back somewhat later in the game as he started whittling down my forces, that big early lead was enough to win decisively.
Pete's one unit with a Transport, the flamer squad, was his MVP. They raced up the table early, the only unit of his to contest the middle of the board for several turns. They were also the only unit on the table capable of easily shifting my snipers out of their fortification and they put their flamers to good use by killing them and denying me a super durable (and scoring) nuisance unit. And it was really fun to see the flamers using their special rules to clear out bunkers, just like in Saving Private Ryan! Late in the game, they marched down the table and even contested the zone right outside of my deployment zone (as Troops), allowing Pete to finally earn more VP than me on the last turn and start closing the gap a bit. That is two games in a row that unit has been a star performer for him. If he had another couple durable units in transports like that, it would have been a very different game.
For me, the Praetor and his Skyhunters were the stars. Despite not being Troops in this game, their durability and mobility allowed them soak up a lot of firepower early and then strike deep into Pete's lines late, destroying two of his Troops units in the second half of the battle, costing him the ability to claim enough Zones to catch up. Like Pete's Butchers last game, this time it was my turn to pass save after save against a salvo of shooting.
Personally, I really enjoyed the lighter nature of the armies in this battle, where Predators, Rhinos, Sentinels, and scouting units could really shine, instead of always being overshadowed by the most dominant vehicles and units. The size of most Horus Heresy battles are small skirmishes so it just feels more appropriate to have armies that represent that sort of a force.
Despite the gap in VPs, both armies had moments to shine. His Predator had a nice debut, killing several jetbikes and Sentinels and surviving until Turn 5. The Deathshroud finally got to get in on the action as they easily wiped out my Recon Squad and pushed deep into the midfield by the end of the game. From my Auxilia forces, the Tarantula Sentry guns had their best game yet as they accounted for both tank kills, thanks to being setup with clear line of sight to the road.
This was the most enjoyable game of the phase so far. Despite being in a huge hole early with little hope of coming back to win, Pete played hard and good-naturedly all the way to the end.
No comments:
Post a Comment