"When presented with the opportunity to turn the tide and destroy your enemy, you must take it. Even when there is little hope of survival."
- Khan Turan Jorma,
Brotherhood of the Wind,
White Scars Legion
It has been about 40 years since a combined force of Sons of Horus, Death Guard, and White Scars brought the Xhorik System into compliance during the Great Crusade. The major population centers of the largest continent were quickly brought under Imperial control in the typical fashion: a series of pinpoint attacks of overwhelming force by the Legions against the enemy's strong points, followed by rapid surrender. Due to the richness of the primary planet and the strategic location of the system on a sort of crossroads of warp currents, small garrisons of the Death Guard and White Scars legions were left on the planet to oversee the tithes of men and material to the Great Crusade and to help eradicate the threat of large ork populations in the eastern wastes.
With the advent of the Horus Heresy, the Warmaster ordered that the Xhorik System be taken to act as a way station for resupply on his long march to Terra. The Death Guard and their human allies on Xhorik Prime launched an attack on the White Scars and their allies, the Stratocracy of Kozar.
In Phase 1 of the campaign, the Traitors pushed the Loyalists from the war-torn border city of Bielyr in a series of bloody street fighting.
In Phase 2, the war escalated across the badlands of the Valbaara Plateau in several pitched battles. In the end, the Brotherhood of the Wind was defeated and their leader Praetor Zherdan was killed by the Death Guard.
In Phase 3, the Death Guard marched to the major Kozar city of Berat, fighting their way through a number of Loyalist counter attacks. In the end, helped by taking control of low-planetary orbit over the city in a void battle, the Traitors smashed through the outer walls of Berat behind the might of their super heavy Fellblade battle tank.---------------------------------------------------------------------------------Phase 4 is the battle for the Kozar city of Berat. The Traitors have broken through the gates and are working their way toward the city center block by bloody block in a brutal street fight. This Phase uses a number of special rules:
Campaign Points: CP are earned by playing games and by achieving secret secondary campaign objectives (drawn randomly each game and kept secret). They can be used to gain advantages in games. The player with the most CP at the end of the phase wins.
Normal games:
Win: 5 CP
Draw: 3 CP
Loss: 1 CP
Final Game:
Win: 10 CP
Draw: 6 CP
Loss: 2 CP
- Spend 1 CP to re-roll the die to deploy first or to re-roll the die to steal the initiative. Can only be used once per game.
- Spend 1 CP to include a unit that would not be allowed due to the Grinding Attrition or Street Fighting special campaign rules below. The point cost of the unit still counts toward the army total. Can only be used once per game.
- Spend 1 CP to re-roll the die to see if the game ends. Can only be used once per game.
(Costs are doubled for the final game.)
Due to the very dense terrain providing ample hiding places, surprise attacks are extra deadly. Units who used Infiltrate, Scout or Outflank can charge the on the first game turn or the turn they come into play. If they don’t charge, they gain an extra +1 cover save for their first turn in play (stacks with any bonuses they have already).
Street Fighting: Narrow streets, debris, billowing smoke and crumbling towers limit the ability to utilize large vehicles and artillery. Other than the final battle, a max of one total unit can be selecged with any of the keywords: heavy, artillery, flyer, or over 3 HP. In the final battle, everything goes.
Grinding Attrition: Other than Troops choices, any unit that is destroyed cannot be used in the next battle. If the next battle is the final battle, it can be taken but must start in reserves. Any unit that is selected as Troops choice can be used even if it was destroyed in the previous battle.
Named Warlord: Choose your warlord trait. Must be the same for the whole phase. Can also can always re-roll LD and morale checks. Other warlords must roll for trait.
If named warlord dies in battle, roll die:
1-2: debilitating injury: can't use in the rest of the campaign phase until final battle
3-4: major injury: can't use in next game
5: close call: no effect
6: Miraculous Recovery (Chosen of the Emporer/Horus/gods of Chaos): can use as normal and has an inspiring presence for the next battle: all units within 12" can use his LD.
The Revenant: Once warlord returns after dying in a game, he has Hatred (Traitors/Loyalists) for the rest of the campaign phase.
Our standard
Terrain Rules are in effect.
We played the Suicide Mission scenario from Horus Heresy Book VI. The Attacker (Loylaists) would score a VP for each scoring unit in the Defenders deployment zone at the end of each game turn. The Defenders (Traitors) would score 2 VP for each Attacker unit destroyed.
We would also each be drawing a random, secret Campaign Objective from a pile. These are objectives that are not related to the specific battle, but are part of the overall strategic plan for winning the campaign phase. These cards are kept secret until they are either achieved or the end of the game and are worth 1 or 2 Campaign Points, as stated on the card.
The Traitors drew Silence the Big Guns: Destroy all enemy Heavy Support choices (2 CP)
The Loyalists drew Hold Ground: Select a terrain piece outside of your deployment zone and hold it at the end of the game (1 CP).
ARMY SELECTION: 2000 points
Traitors - Pete
Death Guard
- Preator Wolfgang: terminator armor, volkite charger, paragon blade, digital lasers, Fearless, It will not Die
- Tactical Support Squad Folterer: 7 marines flamers, sergeant with artificer armor. Mounted in a Rhino APC with a pintle mounted heavy flamer.
- Tactical Squad Toddestraffe: 20 marines with close combat weapons, sergeant with power fist and artificer armor and Apothecary Gerhard
- Tactical Support Squad Blitz Schock: 7 marines with volkite calivers
- Heavy Support Squad Feuer Sturm: 7 marines with missile launchers and Apothecary
- Contemptor Dreadnought Friedrich with multimelta, melta gun and close combat weapon
World Eaters- Chaplin Zungarz: Artificer Armor, plasma pistol, refractor field, crozius arcanum
- Tactical Squad Hell Hounds: 17 marines – 16 with bolters, bolt pistols and chain axes. 1 sergeant with artificer armor, power fist and plasma pistol
- The Red Butchers: 1 Devoured with dual chain fists, 4 Butchers with dual power axes
- Land Raider Phobos Flesh Grinder: side sponson twin-linked lascannons, twin heavy bolter, armored ceramite, machine spirit
- Contemptor Dreadnought Delrog the Diabolical with twin-linked lascannon and chainfist
Loyalists - Phil
White Scars Brotherhood of the Wind
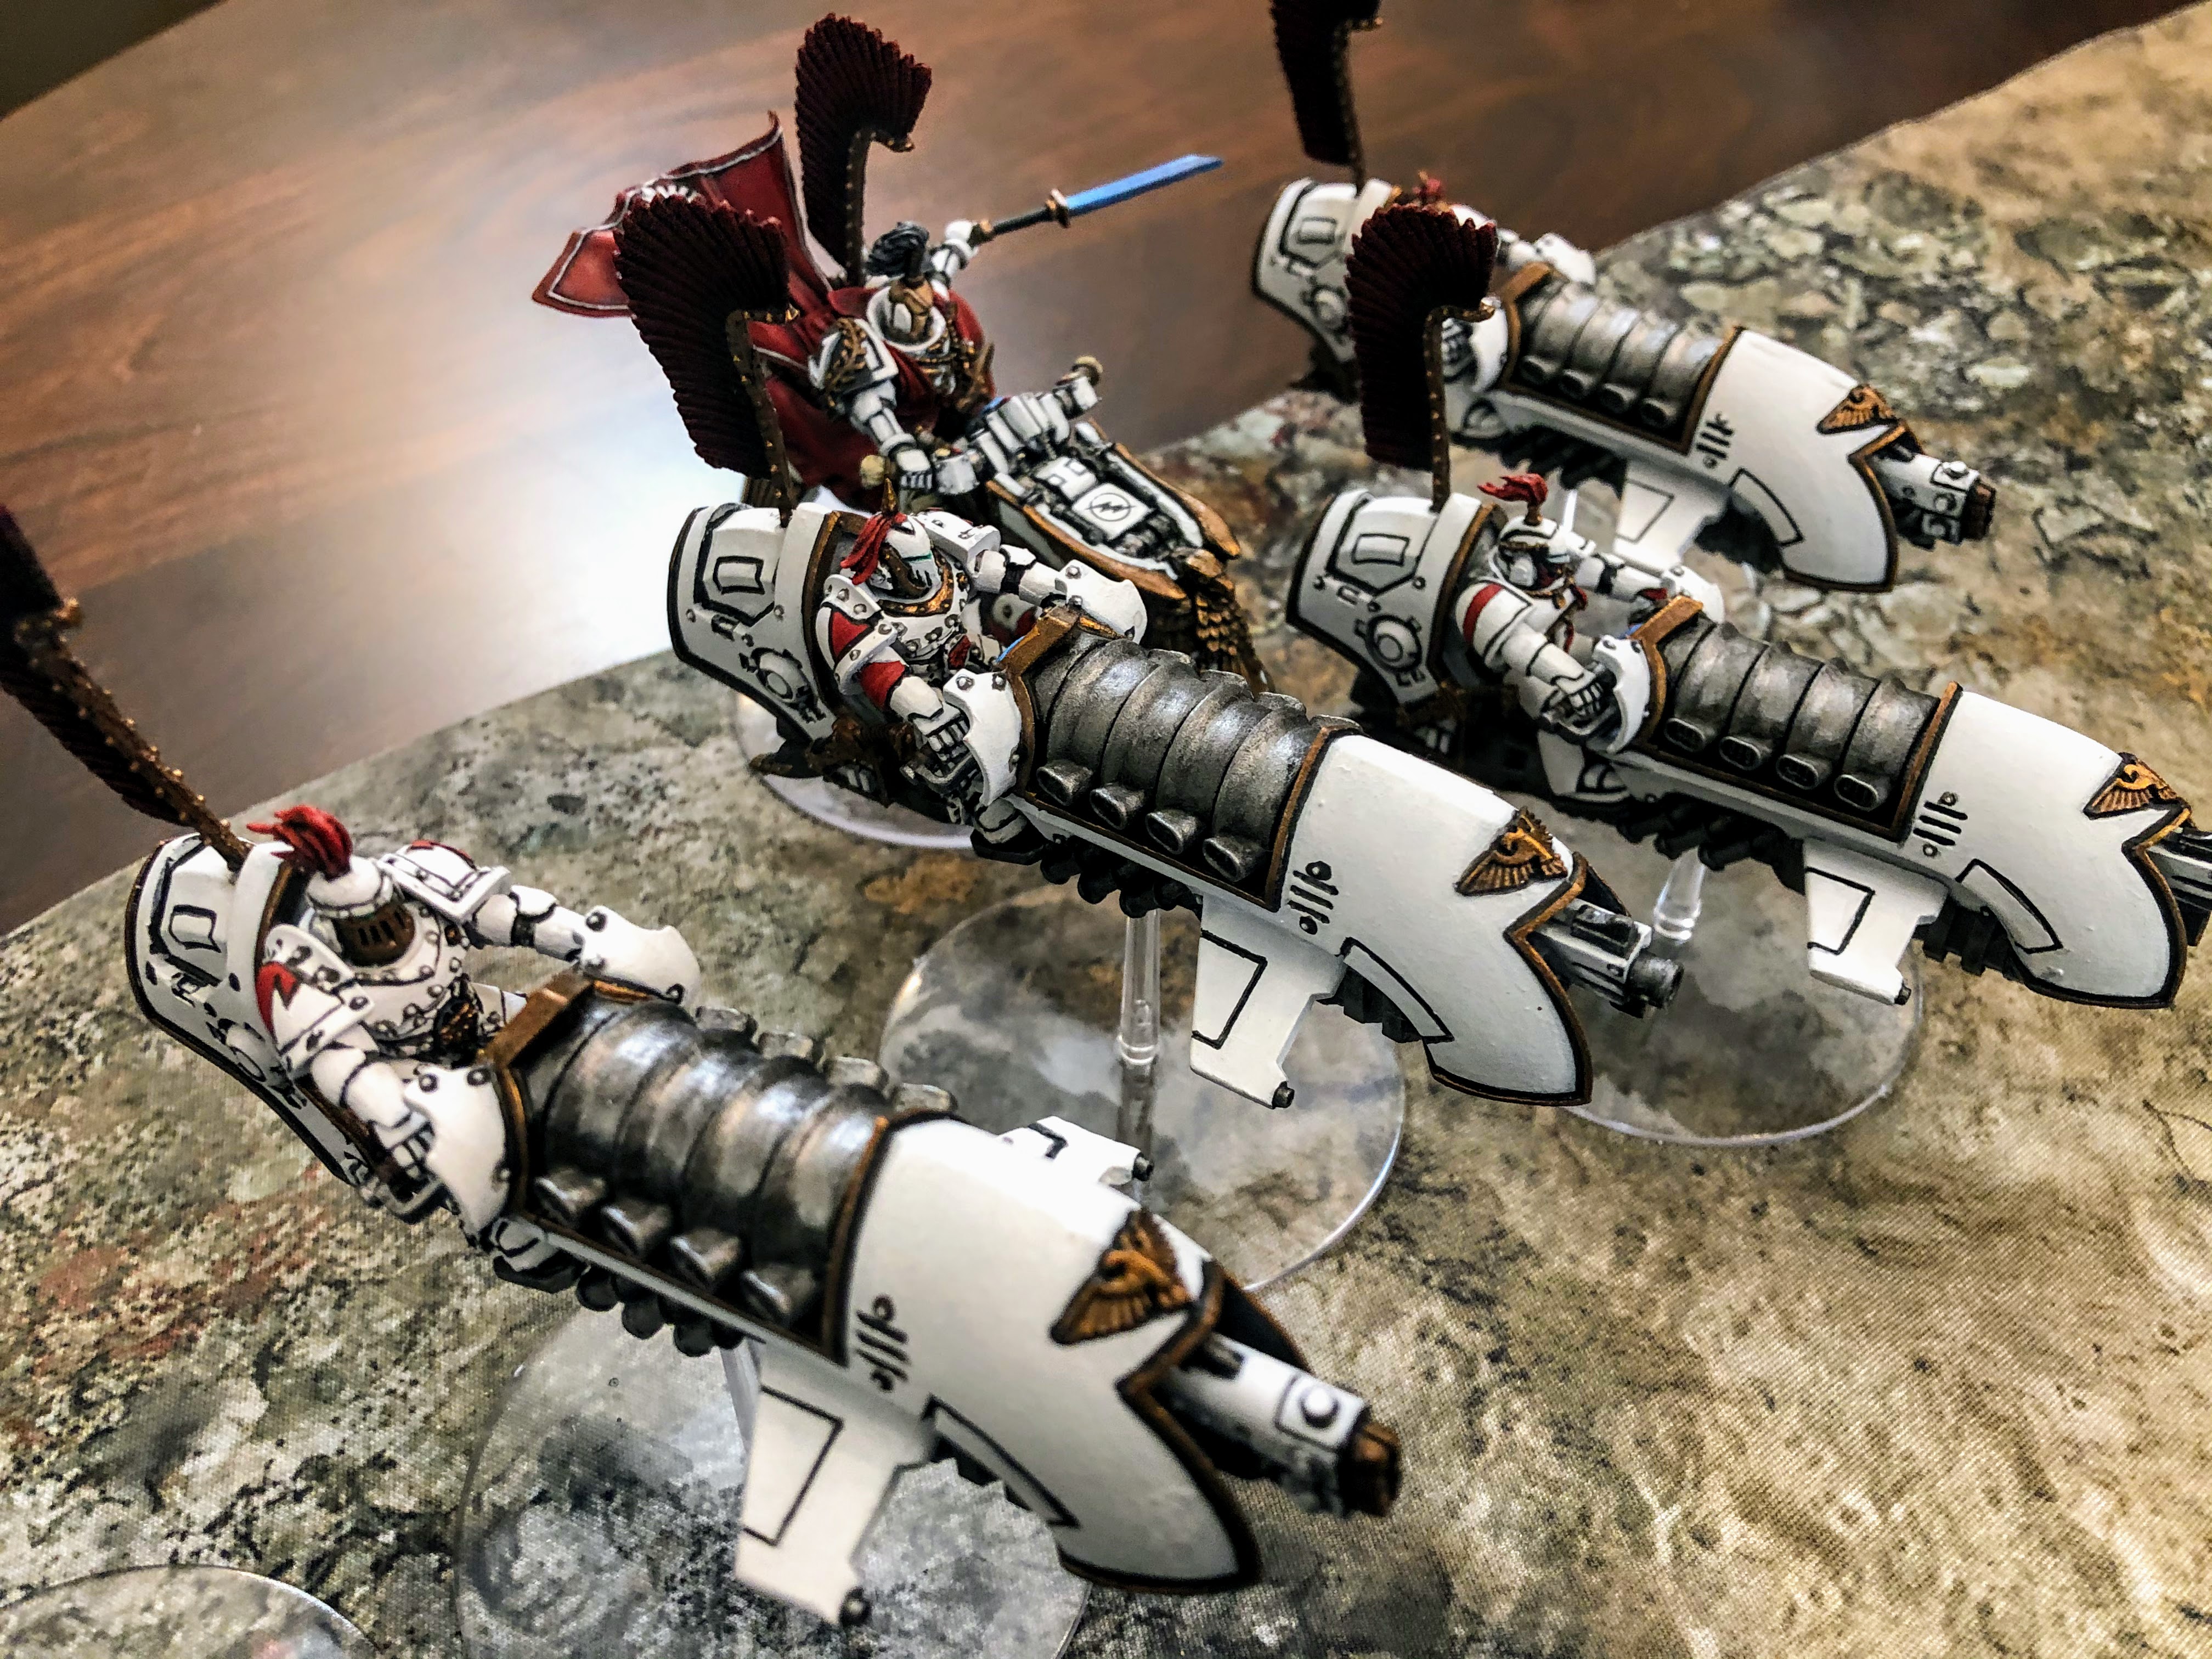
- Khan Turan Jorma: jetbike, paragon blade, cyber hawk
- Skyhunter Squadron Khujaa: 6 jetbikes, 2 x volkite culverin
- Outrider Squad Tsujen: 5 Outriders with plasma, sergeant
- Tactical Squad Temgar: 10 marines with close combat weapons, sergeant has power glaive, artificer armor
- Tactical Support Squad Khoer: 8 marines with plasma guns
- Recon Squad Chono: 10 marines with recon armor and camo cloaks, sergeant with power fist and artificer armor
- Ebon Keshig: 10 terminators, 8 power glaives, 2 power fists, 1 melta gun
- Sicaran Omega Tank Destroyer Flamespear: lascannon sponsons
- Primaris Lightning Strike Fighter Ariunbold: twin-linked lascannon, 6 x Kraken Heavy Penetrator Missiles, Battle Servitor Control, Ground-tracking Auguries, Ramjet Diffraction Grid
++++++++++++++++++++++++++++++++++++++++++++++++++++++++++++
++++++++++++++++++++++++++++++++++++++++++++++++++++++++++++
BATTLE:The Suicide Mission
 |
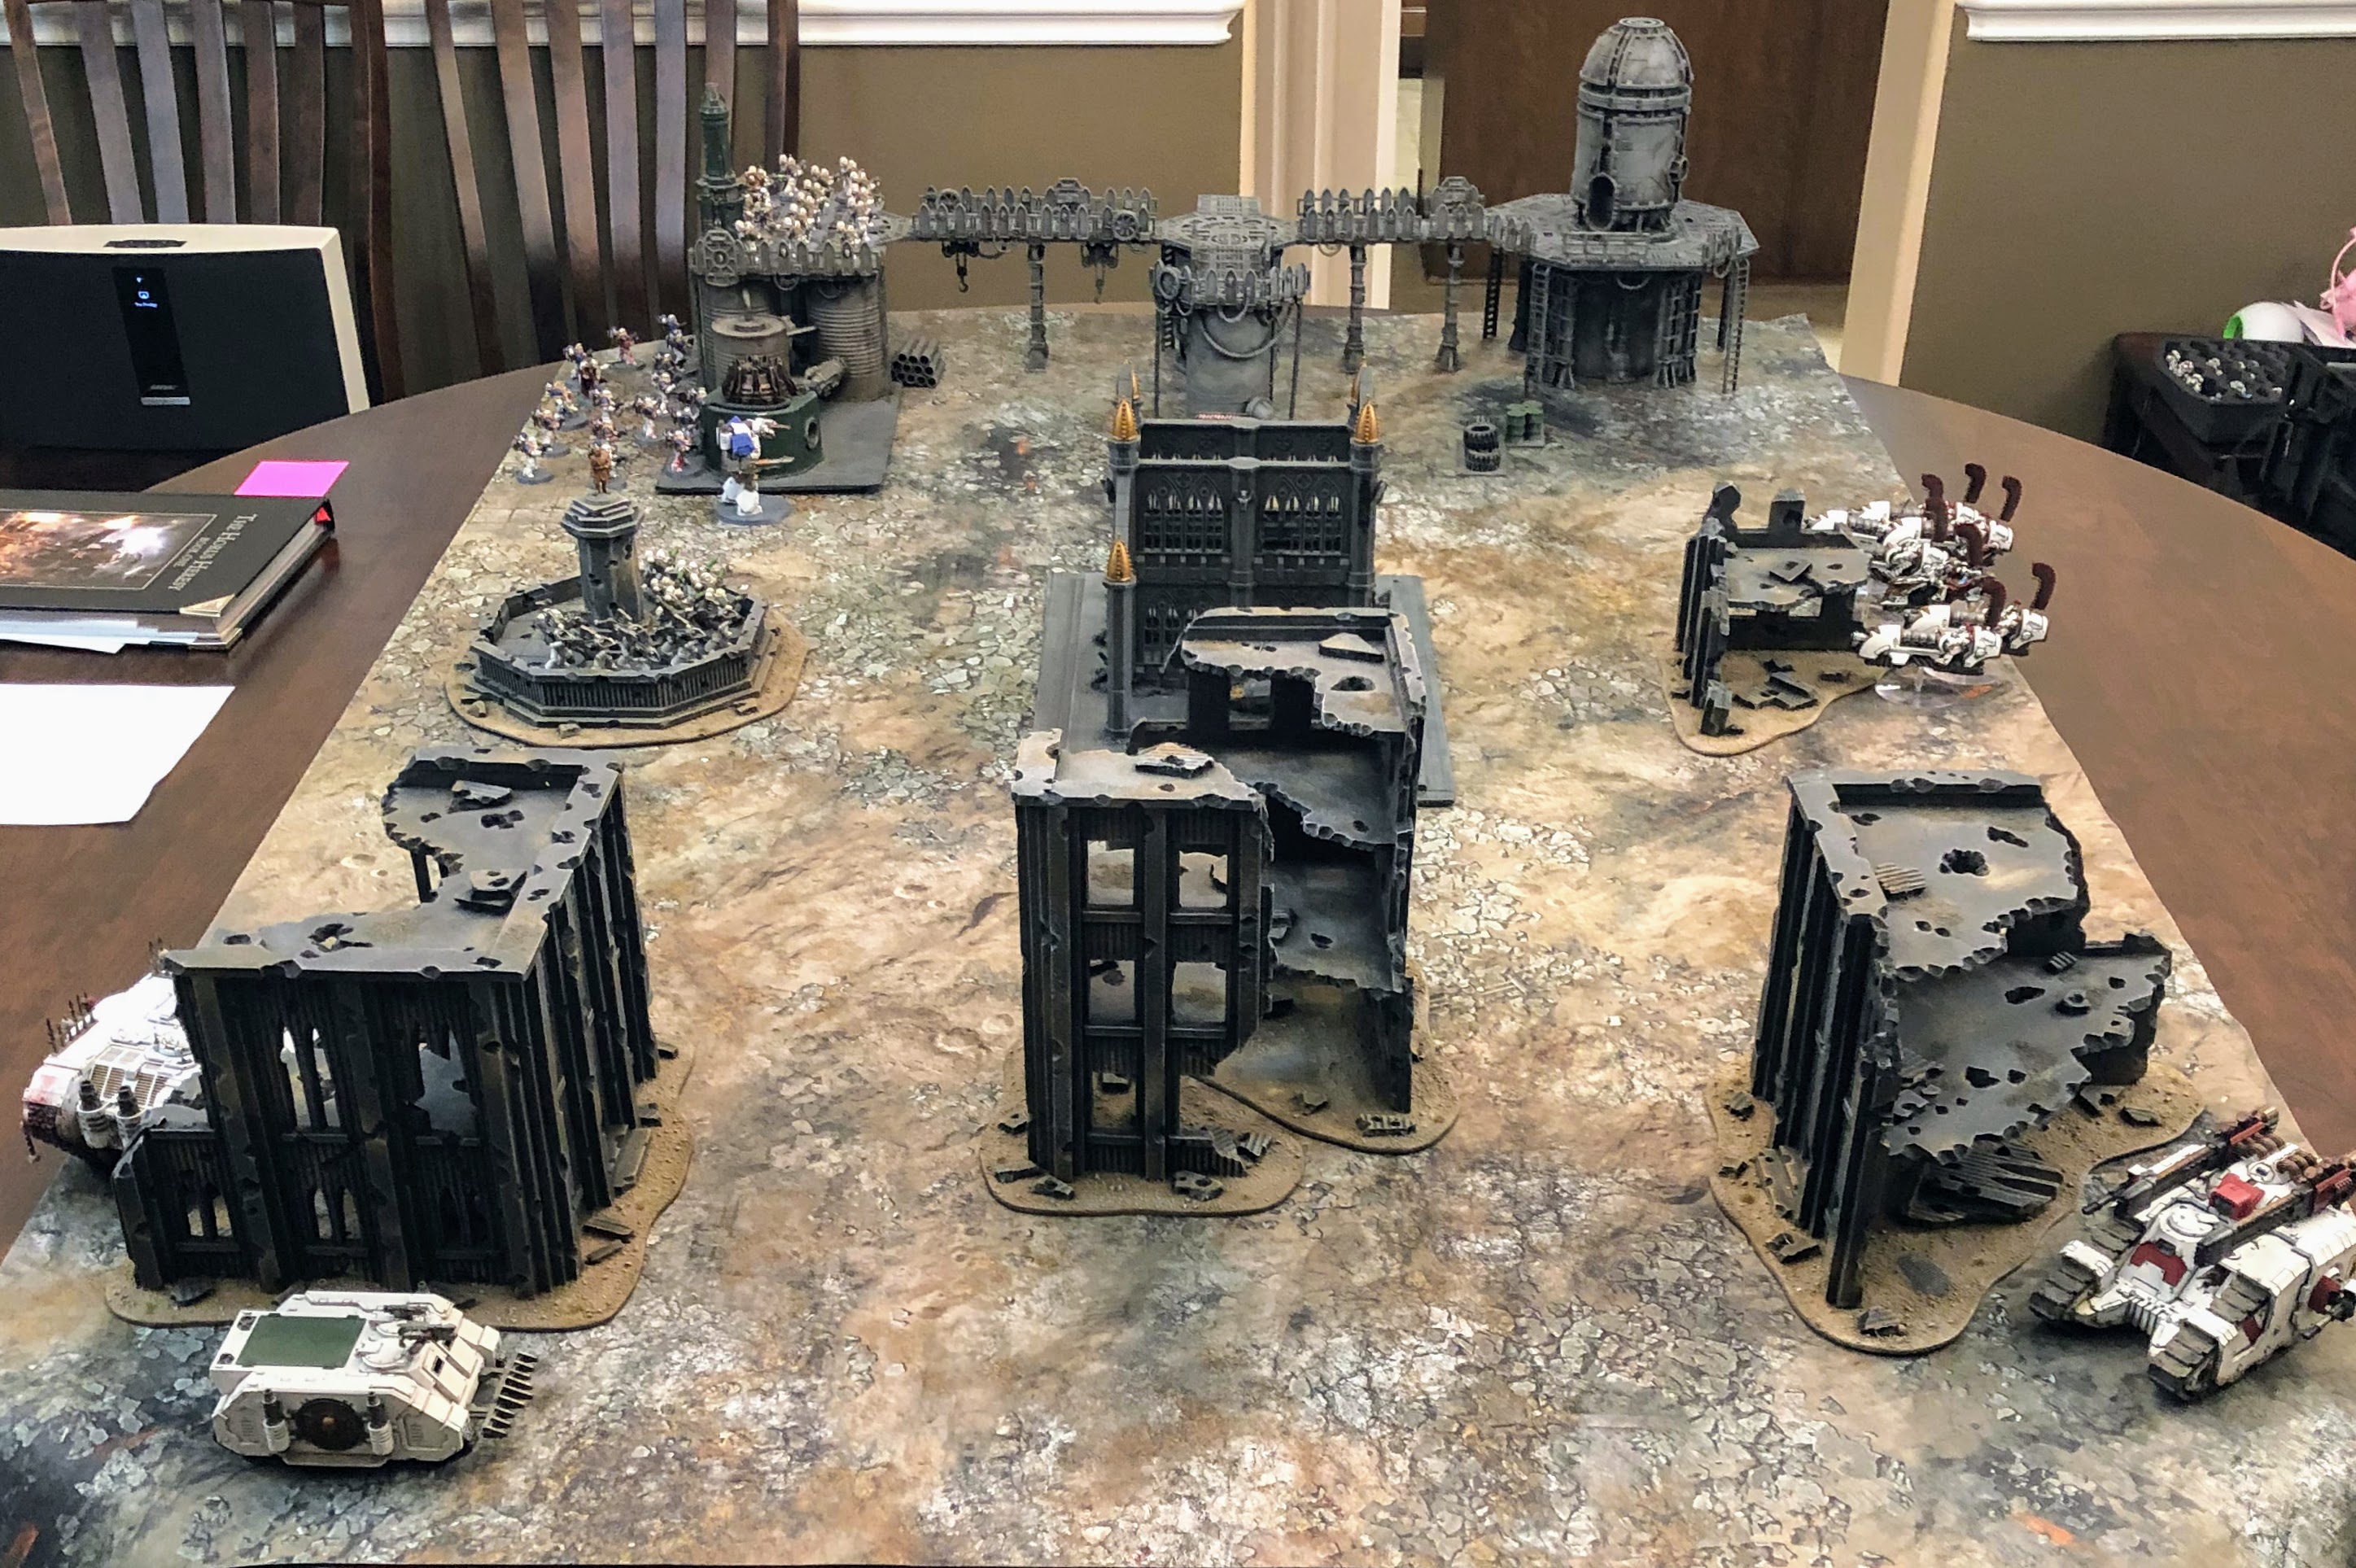
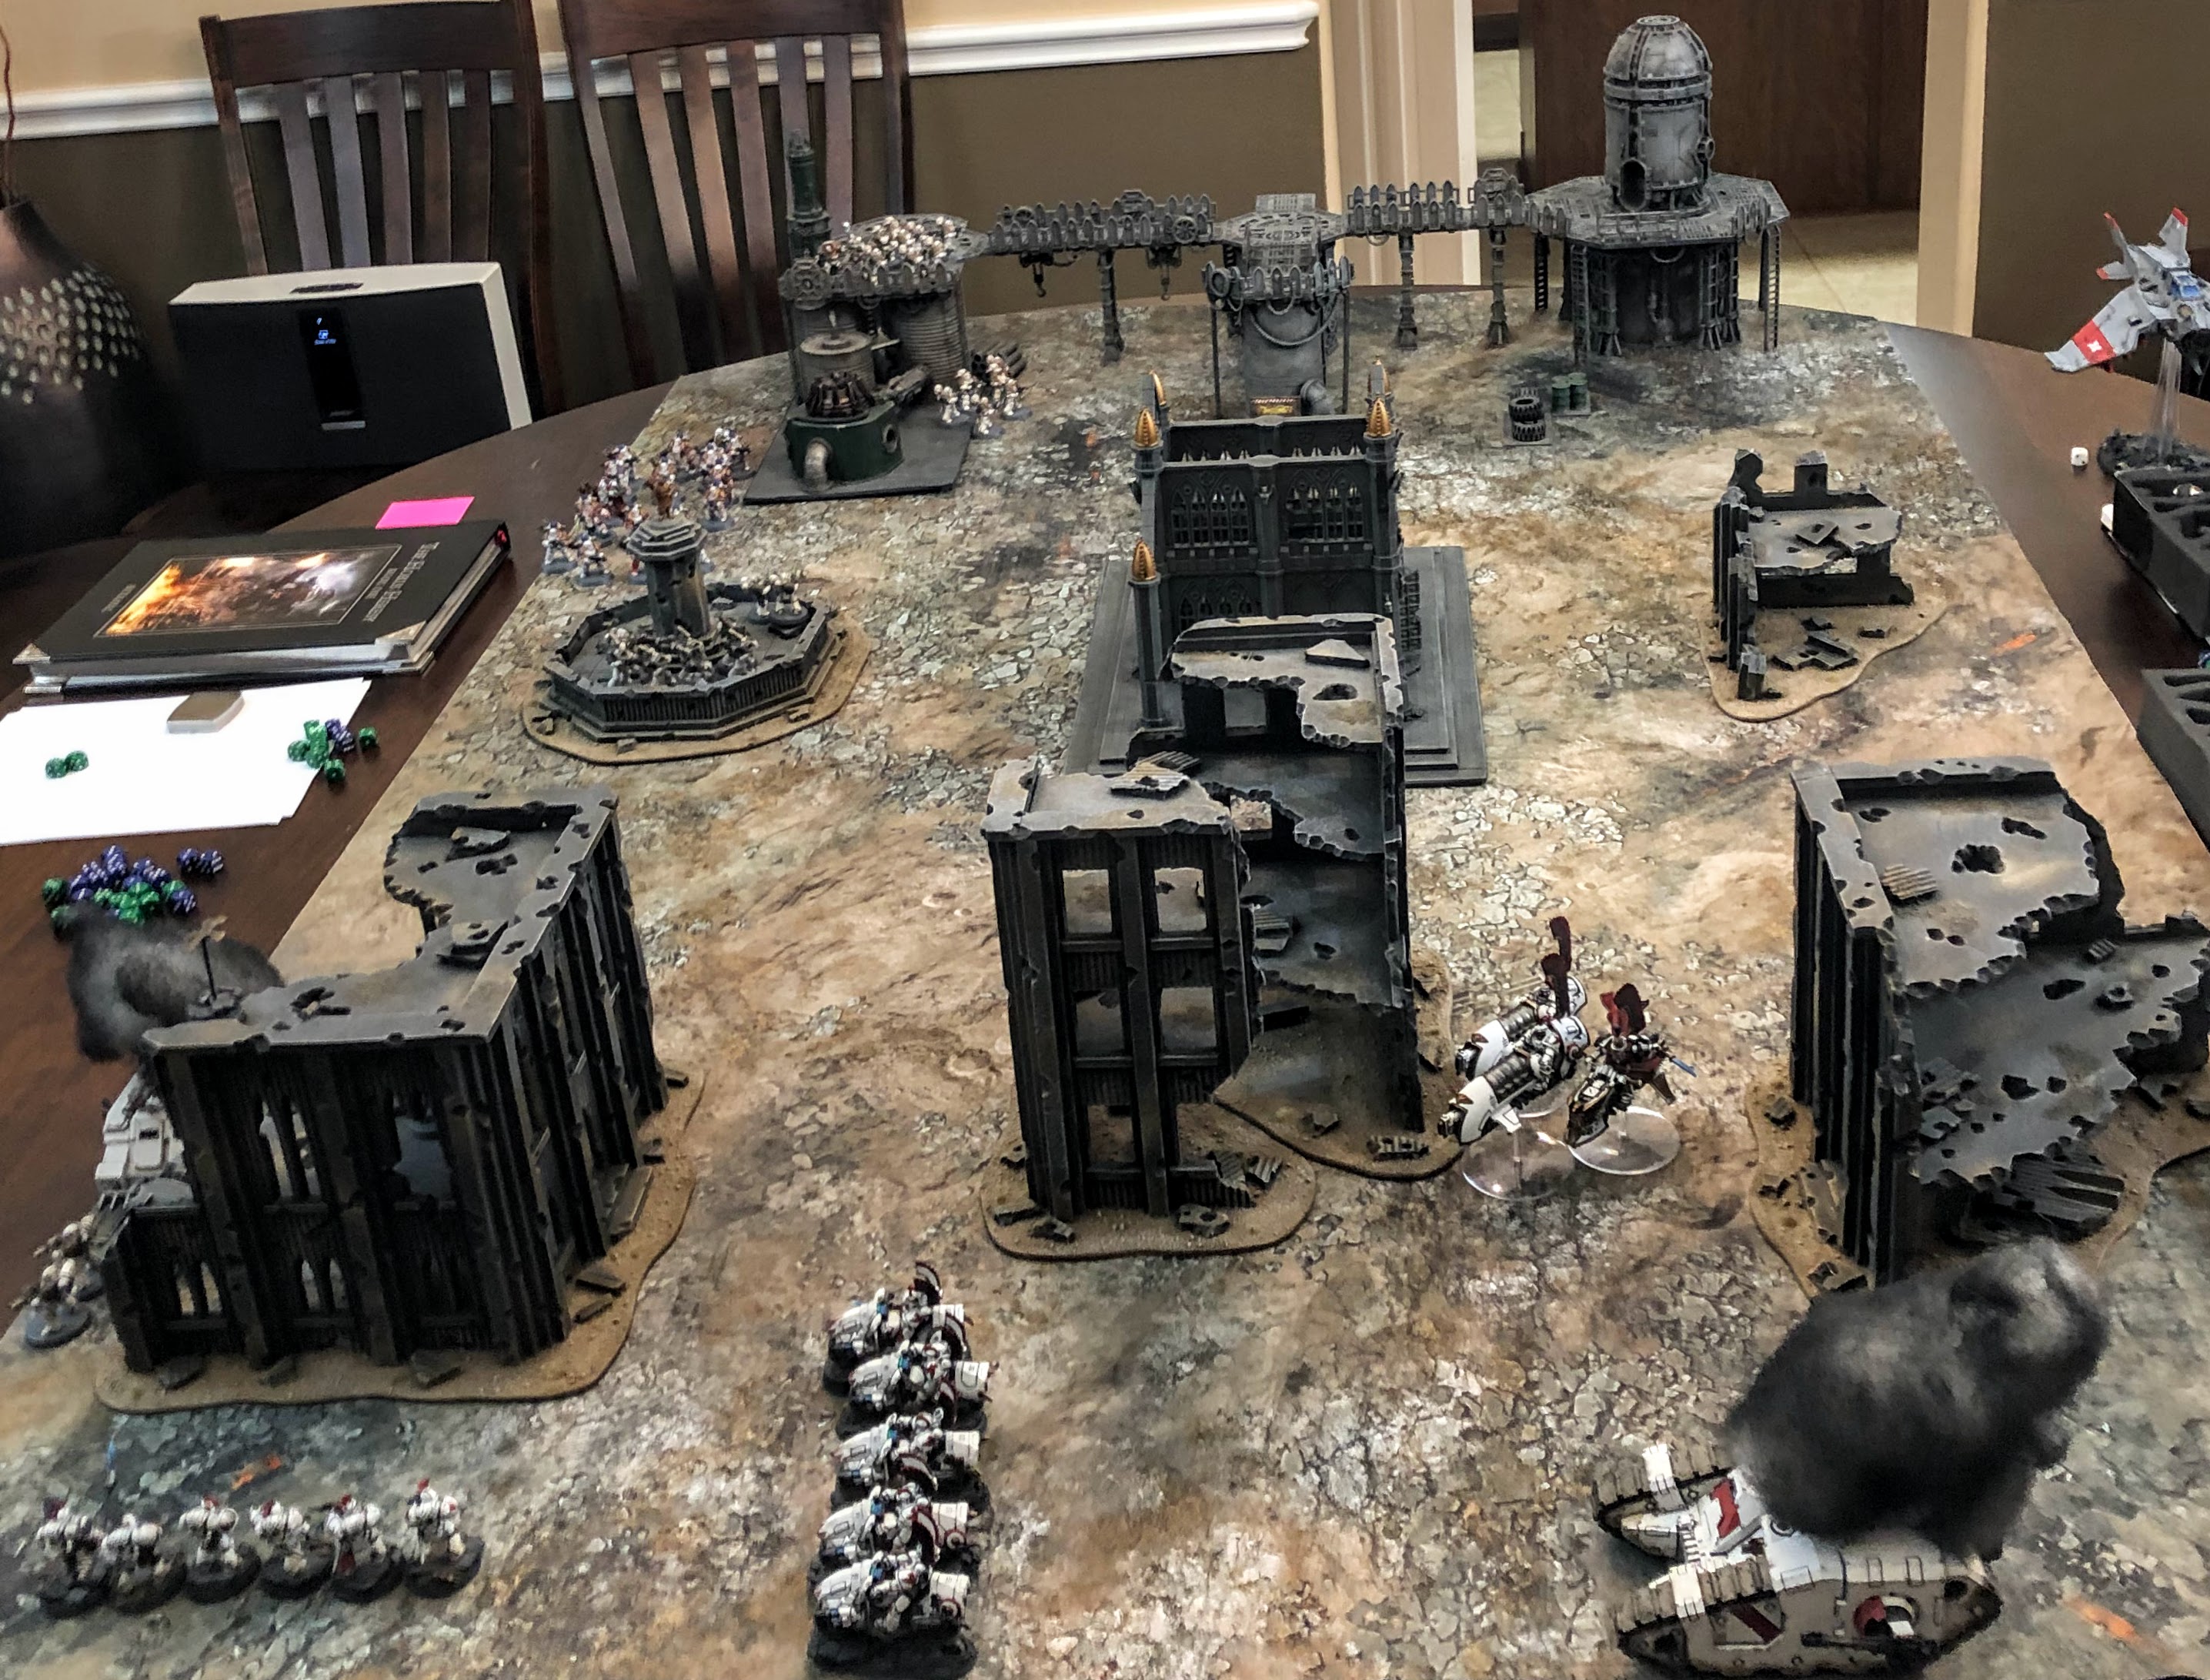
The battlefield from the south.
|
 |
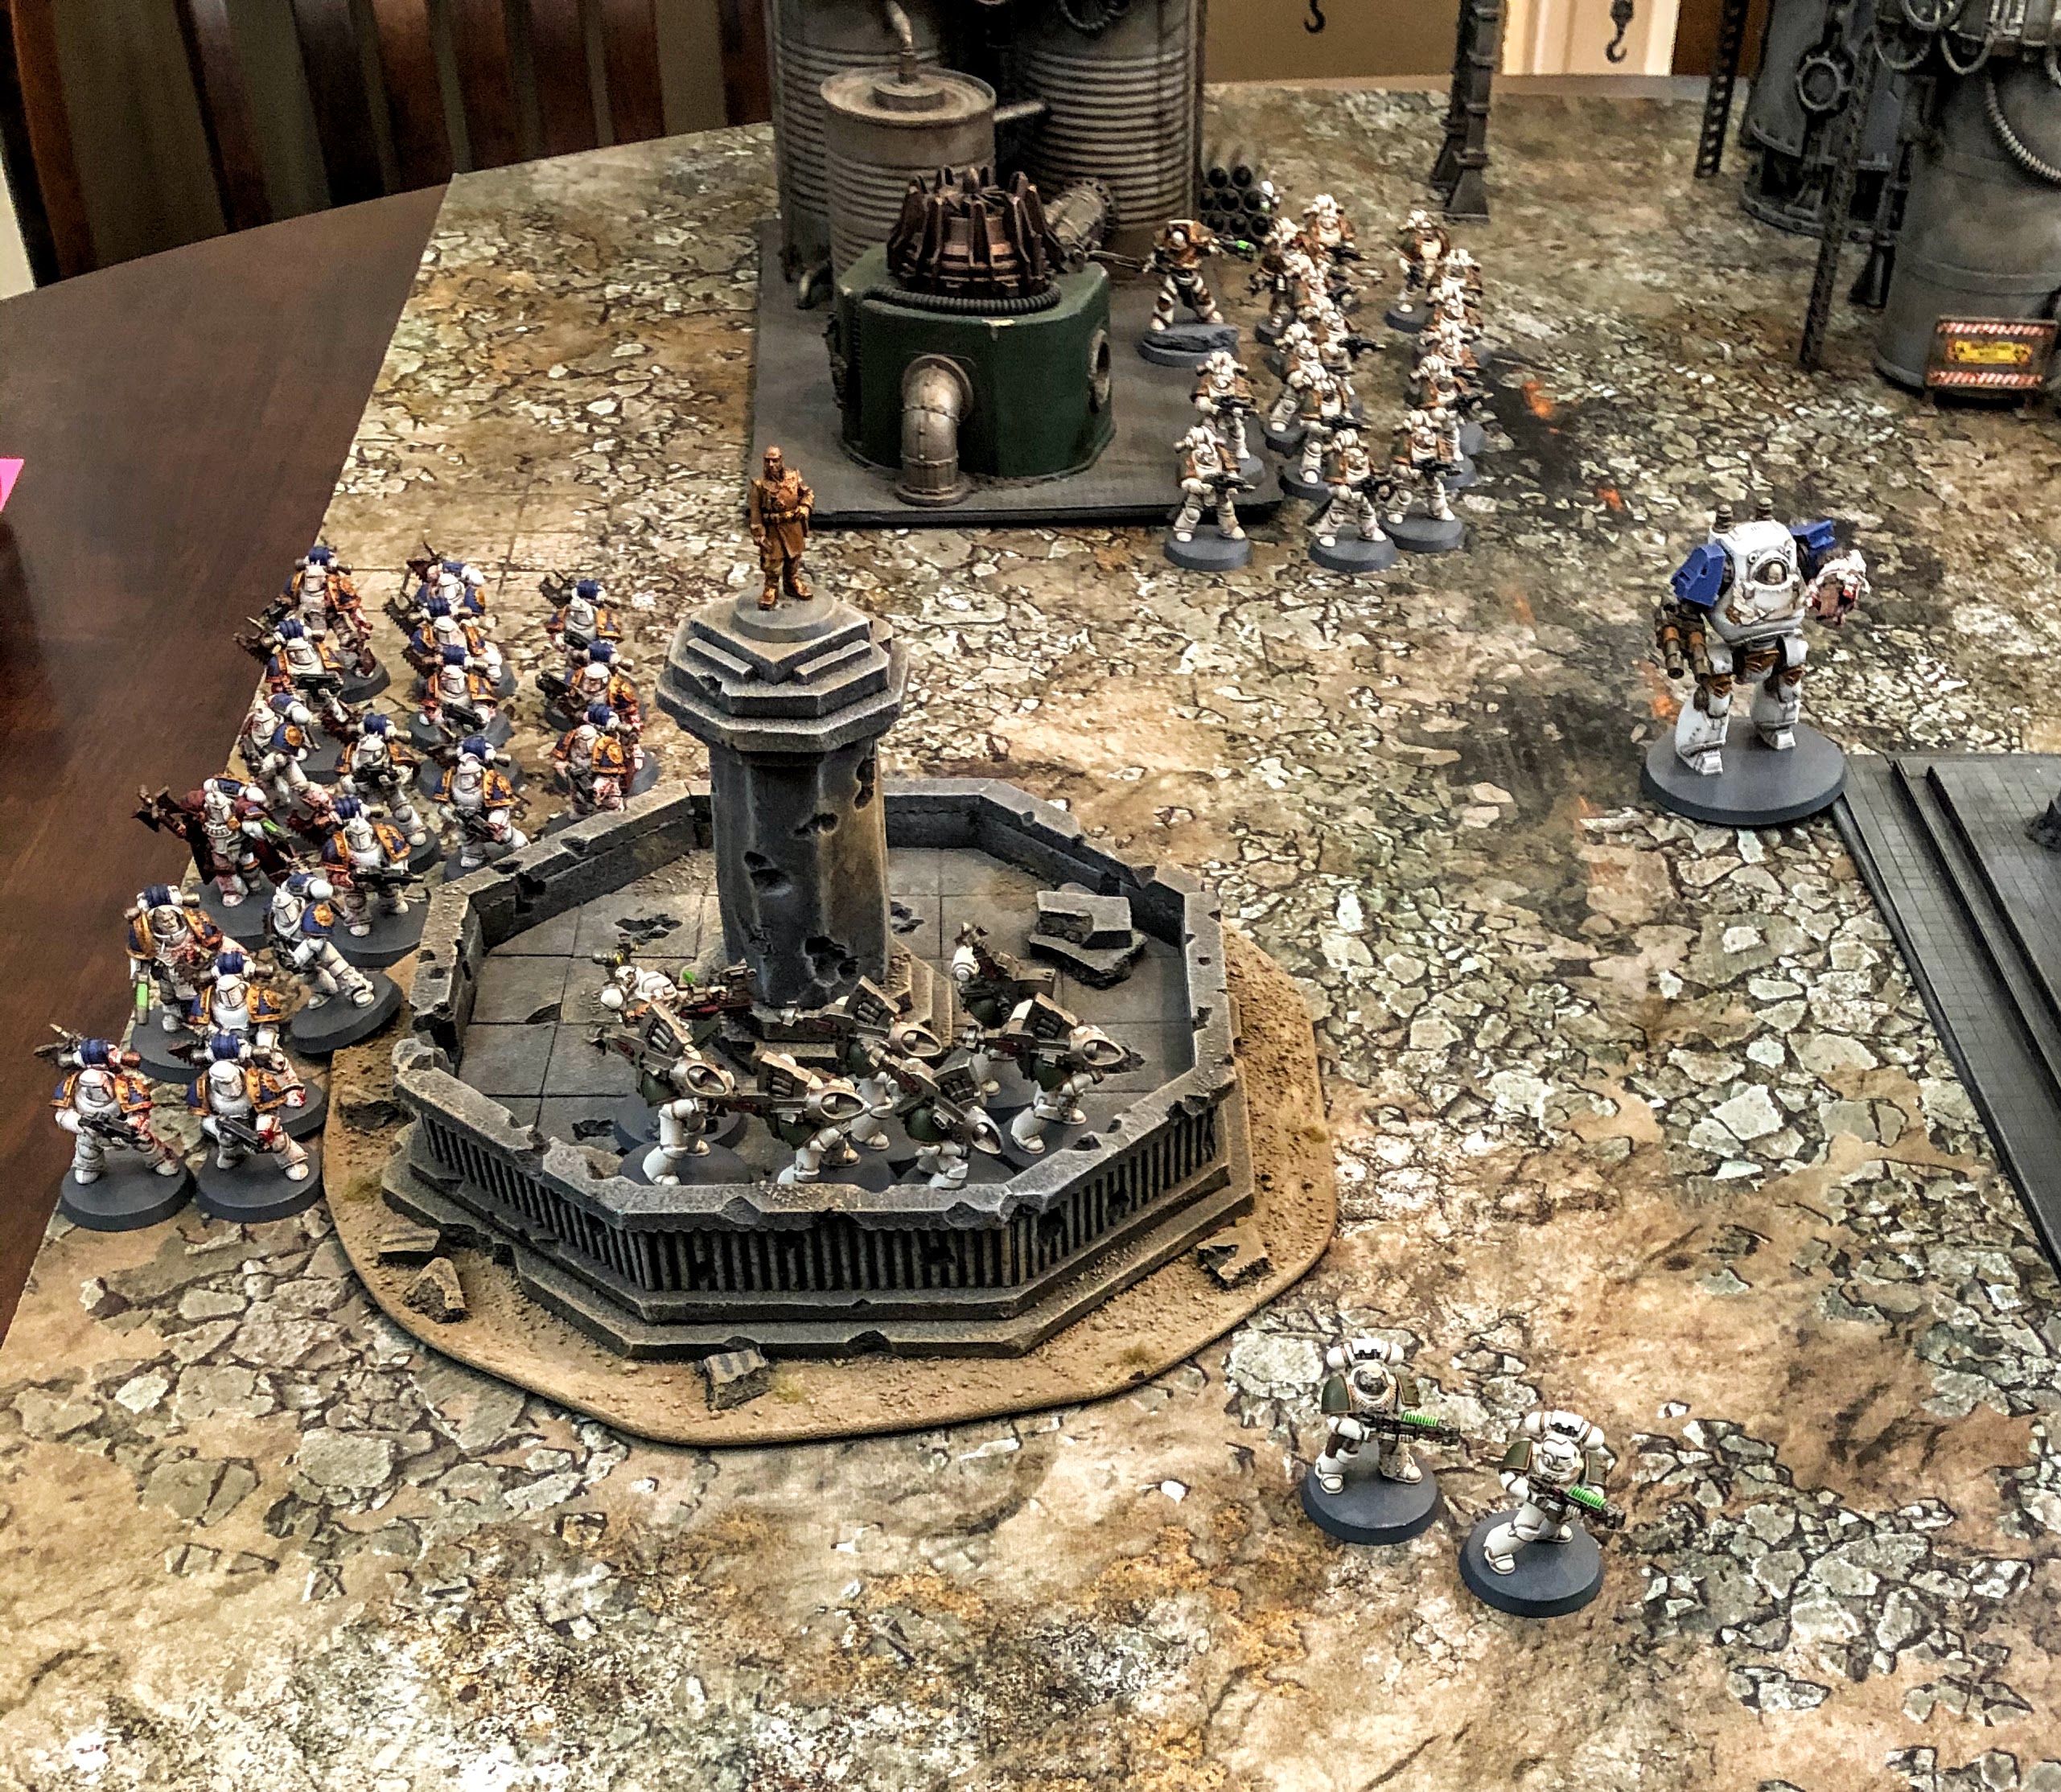
The battlefield from the north.
|
 |
A small force of White Scars attack from the west while most of their units outflank the Traitors.
|
 |
| Masses of traitor infantry hold the industrial facility on their left flank. |
 |
| Praetor Wolfgang once again commands the Traitors. |
 |
World Eaters tactical squad, the Hellhounds.
|
 |
The World Eaters infantry are supported by Delrog the Diabolical, a contemptor dreadnought.
|
 |
| The Traitor center consists of two heavy weapons squads: missile launchers and volkite calivers. |
 |
Traitor vehicles guard their right flank at the north end of the battlefield.
|
 |
Squad Folterer hides in the ruins with flamers, while the Flesh Grinder prepares to race toward any enemy that approaches.
|
 |
The Flamespear, a Sicaran Omega Tank Destroyer, advanced on the Loyalist left flank.
|
 |
Khan Turan Jorma leads Skyhunter Squadron Khujaa in the center.
|
 |
| They attempt to draw the enemy's attention to allow their flanking force to strike. |
 |
One of the Skyhunters is downed by the twin-linked lascannon of Delrog the Diabolical.
|
 |
The Land Raider advances and the Rhino pulls back into cover.
|
 |
With the help of the cyberhawk to provide targeting details, the Skyhunters decimate Squad Blitz Schock.
|
 |
| The Primaris-Lightning Strike Fighter Ariunbold is the first to reach the battlefield. |
 |
It opens up with lascannon fire...
|
 |
... and then launches a salvo of three Kraken Heavy Penetrator Missiles into the Flesh Grinder, destroying the mighty Land Raider.
|
 |
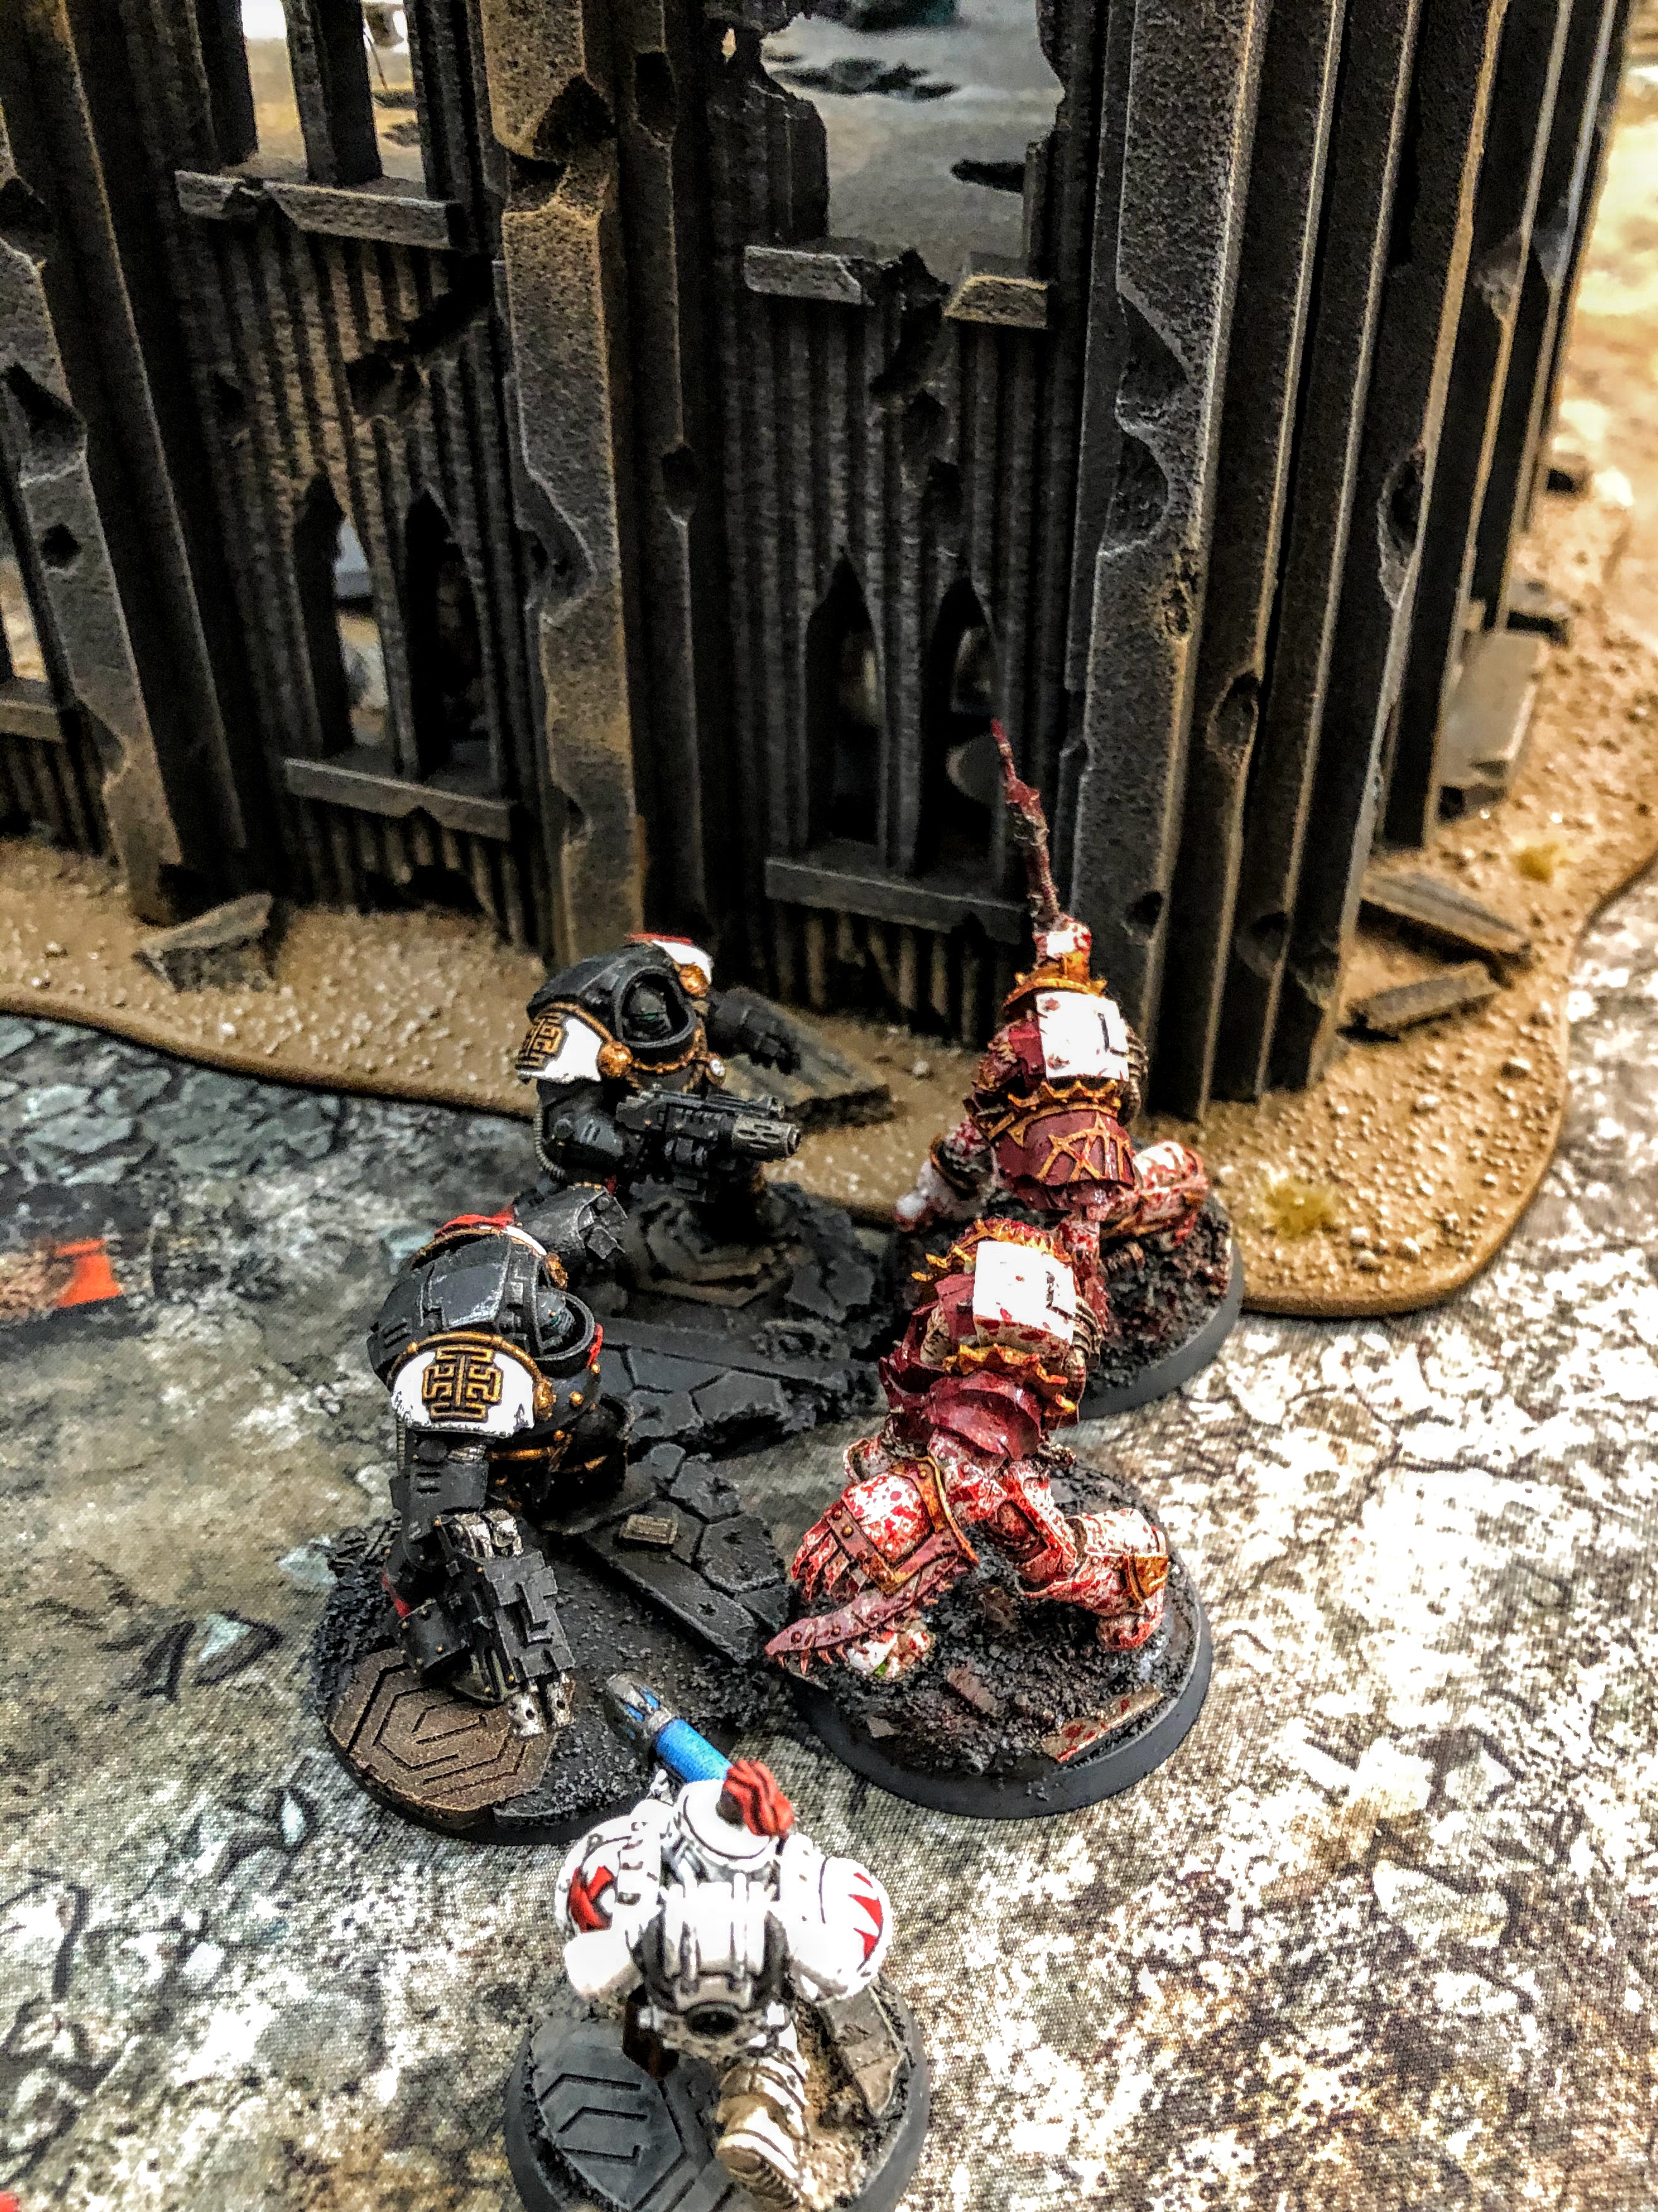
The battle-crazed Red Butchers emerge from the flaming wreckage unharmed.
|
 |
The Ariunbold soars overhead to the cheers of Squadron Khujaa.
|
 |
A force of White Scars infantry arrives from the north.
|
 |
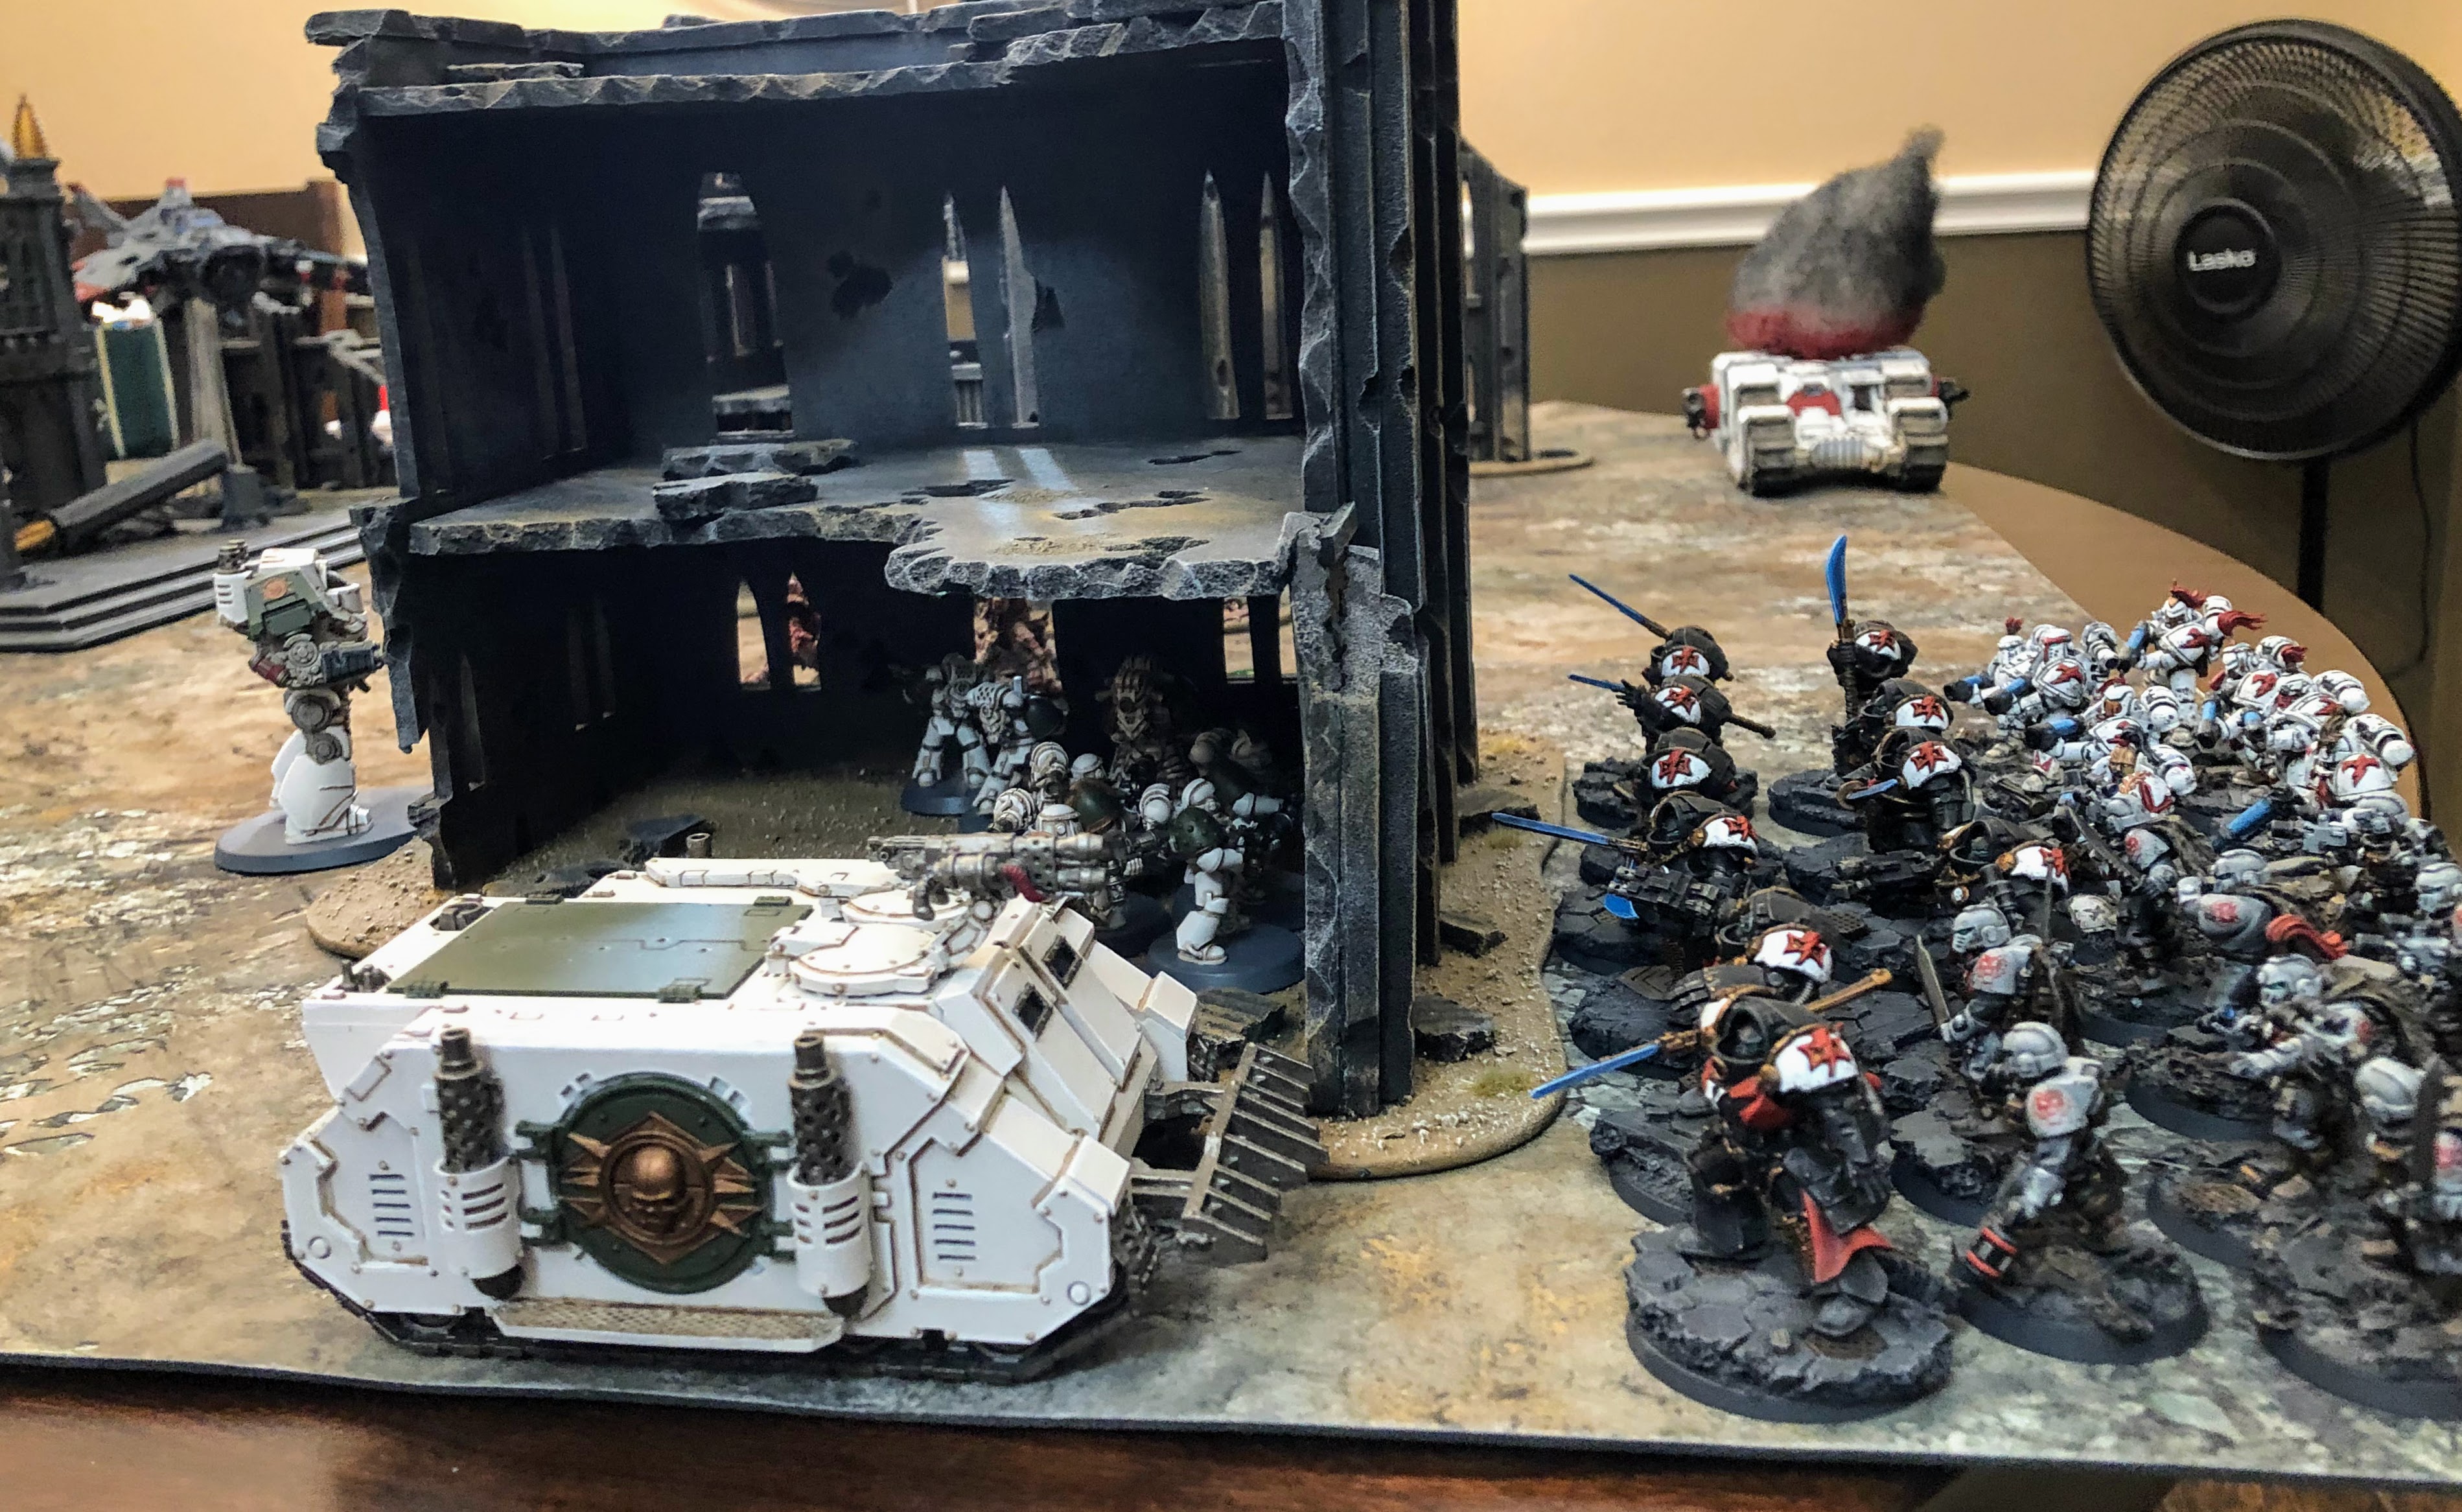
The White Scars flanking force approaches the Death Guard's fortified position.
|
 |
The Ebon Keshig lead the charge.
|
 |
Plasma fire from Squad Khoer is only able to wound one Red Butcher.
|
 |
The Loyalists concentrate their attack at the north of the battlefield.
|
 |
Delrog continues to shoot down Skyhunters with his twin-linked lascannon.
|
 |
Squad Folterer send gouts of flaming toxic chemicals into the approaching White Scars.
|
 |
The White Scars take heavy losses from the Traitors' shooting and now the Red Butchers charge.
|
 |
| Mighty terminators from both sides clash. |
 |
After a brutal melee, only two survivors remain from each squad.
|
 |
| The northern end of the battlefield is in flames as the fighting intensifies. |
 |
| The Ebon Keshig decide to hit and run, breaking away from the Red Butchers to enable their brothers in Squad to get a clear line of fire. |
 |
The Ariunbold cannot get a line of sight to the Contemptor Dreadnought so has to settle for destroying the Death Guard Rhino.
|
 |
The Ebon Keshig make a desperate charge against the Contemptor Dreadnought in an effort to protect the rest of the White Scars flanking force.
|
 |
| The Ebon Keshig make a desperate charge against the Contemptor Dreadnought in an effort to protect the rest of the White Scars flanking force from the war machine. |
 |
Two armies clash for control of the Traitor deployment zone.
|
 |
The fiercest fighting is centered around a ruin in the northeast corner of the battlefield.
|
 |
The Outriders arrive and fire at the Red Butchers but cannot bring them down.
|
 |
Tactical Squad Temgar clamber up to the second story of the ruin.
|
 |
The Butchers, furious at being denied a chance to kill the last of the Ebon Keshig, charge Tactical Support Squad Khoer.
|
 |
| Before the Red Butchers can charge, Tactical Support Squad Folterer kills 7 marines from the two White Scars squads with their flamers. |
 |
The Butchers quickly finish off the last of Squad Khoer.
|
 |
The Traitors destroy most of the Loyalist flanking force.
|
 |
The last of the Ebon Keshig prepares to sacrifice himself to regain his honor. He chares Squad Folterer, taking their flamer overwatch fire so his brothers in Squad Temgar can charge from the flank without being fired upon.
|
 |
Squadron Tsujen finally gun down the last of the blood-soaked World Eaters bereserkers.
|
 |
| Tactical Squad Temgar charges Squad Folterer, killing four and forcing the survivors to fall back. |
 |
| Squad Temgar delivers a blow to Squad Folterer and continues to hold their position as ordered. |
 |
Seeing his right flank under pressure, Praetor Wolfgang leads his men on the long march across the battlefield to lend support.
|
 |
Chaplain Zungarz leads his Hell Hounds towards the action.
|
 |
| Contemptor Dreadnought Friedrich approaches the remnants of Squad Temgar. |
 |
Bolter fire whittles down Squad Temgar and then Sergeant Doro is killed by Contemptor Friedrich.
|
 |
The Traitors left flank and center find themselves out of position and starting moving toward the action.
|
 |
| With no hope of harming the Dreadnought, Squad Temgar tries to break away from combat but they fail to escape and are killed. |
 |
The Aruinbold makes another pass over the battlefield and adds its firepower to Outrider Squadron Tsujen. Together, they knock the Death Guard Contemptor Dreadnought out of the fight.
|
 |
With the Dreadnought down, the Outriders race into the enemy territory.
|
 |
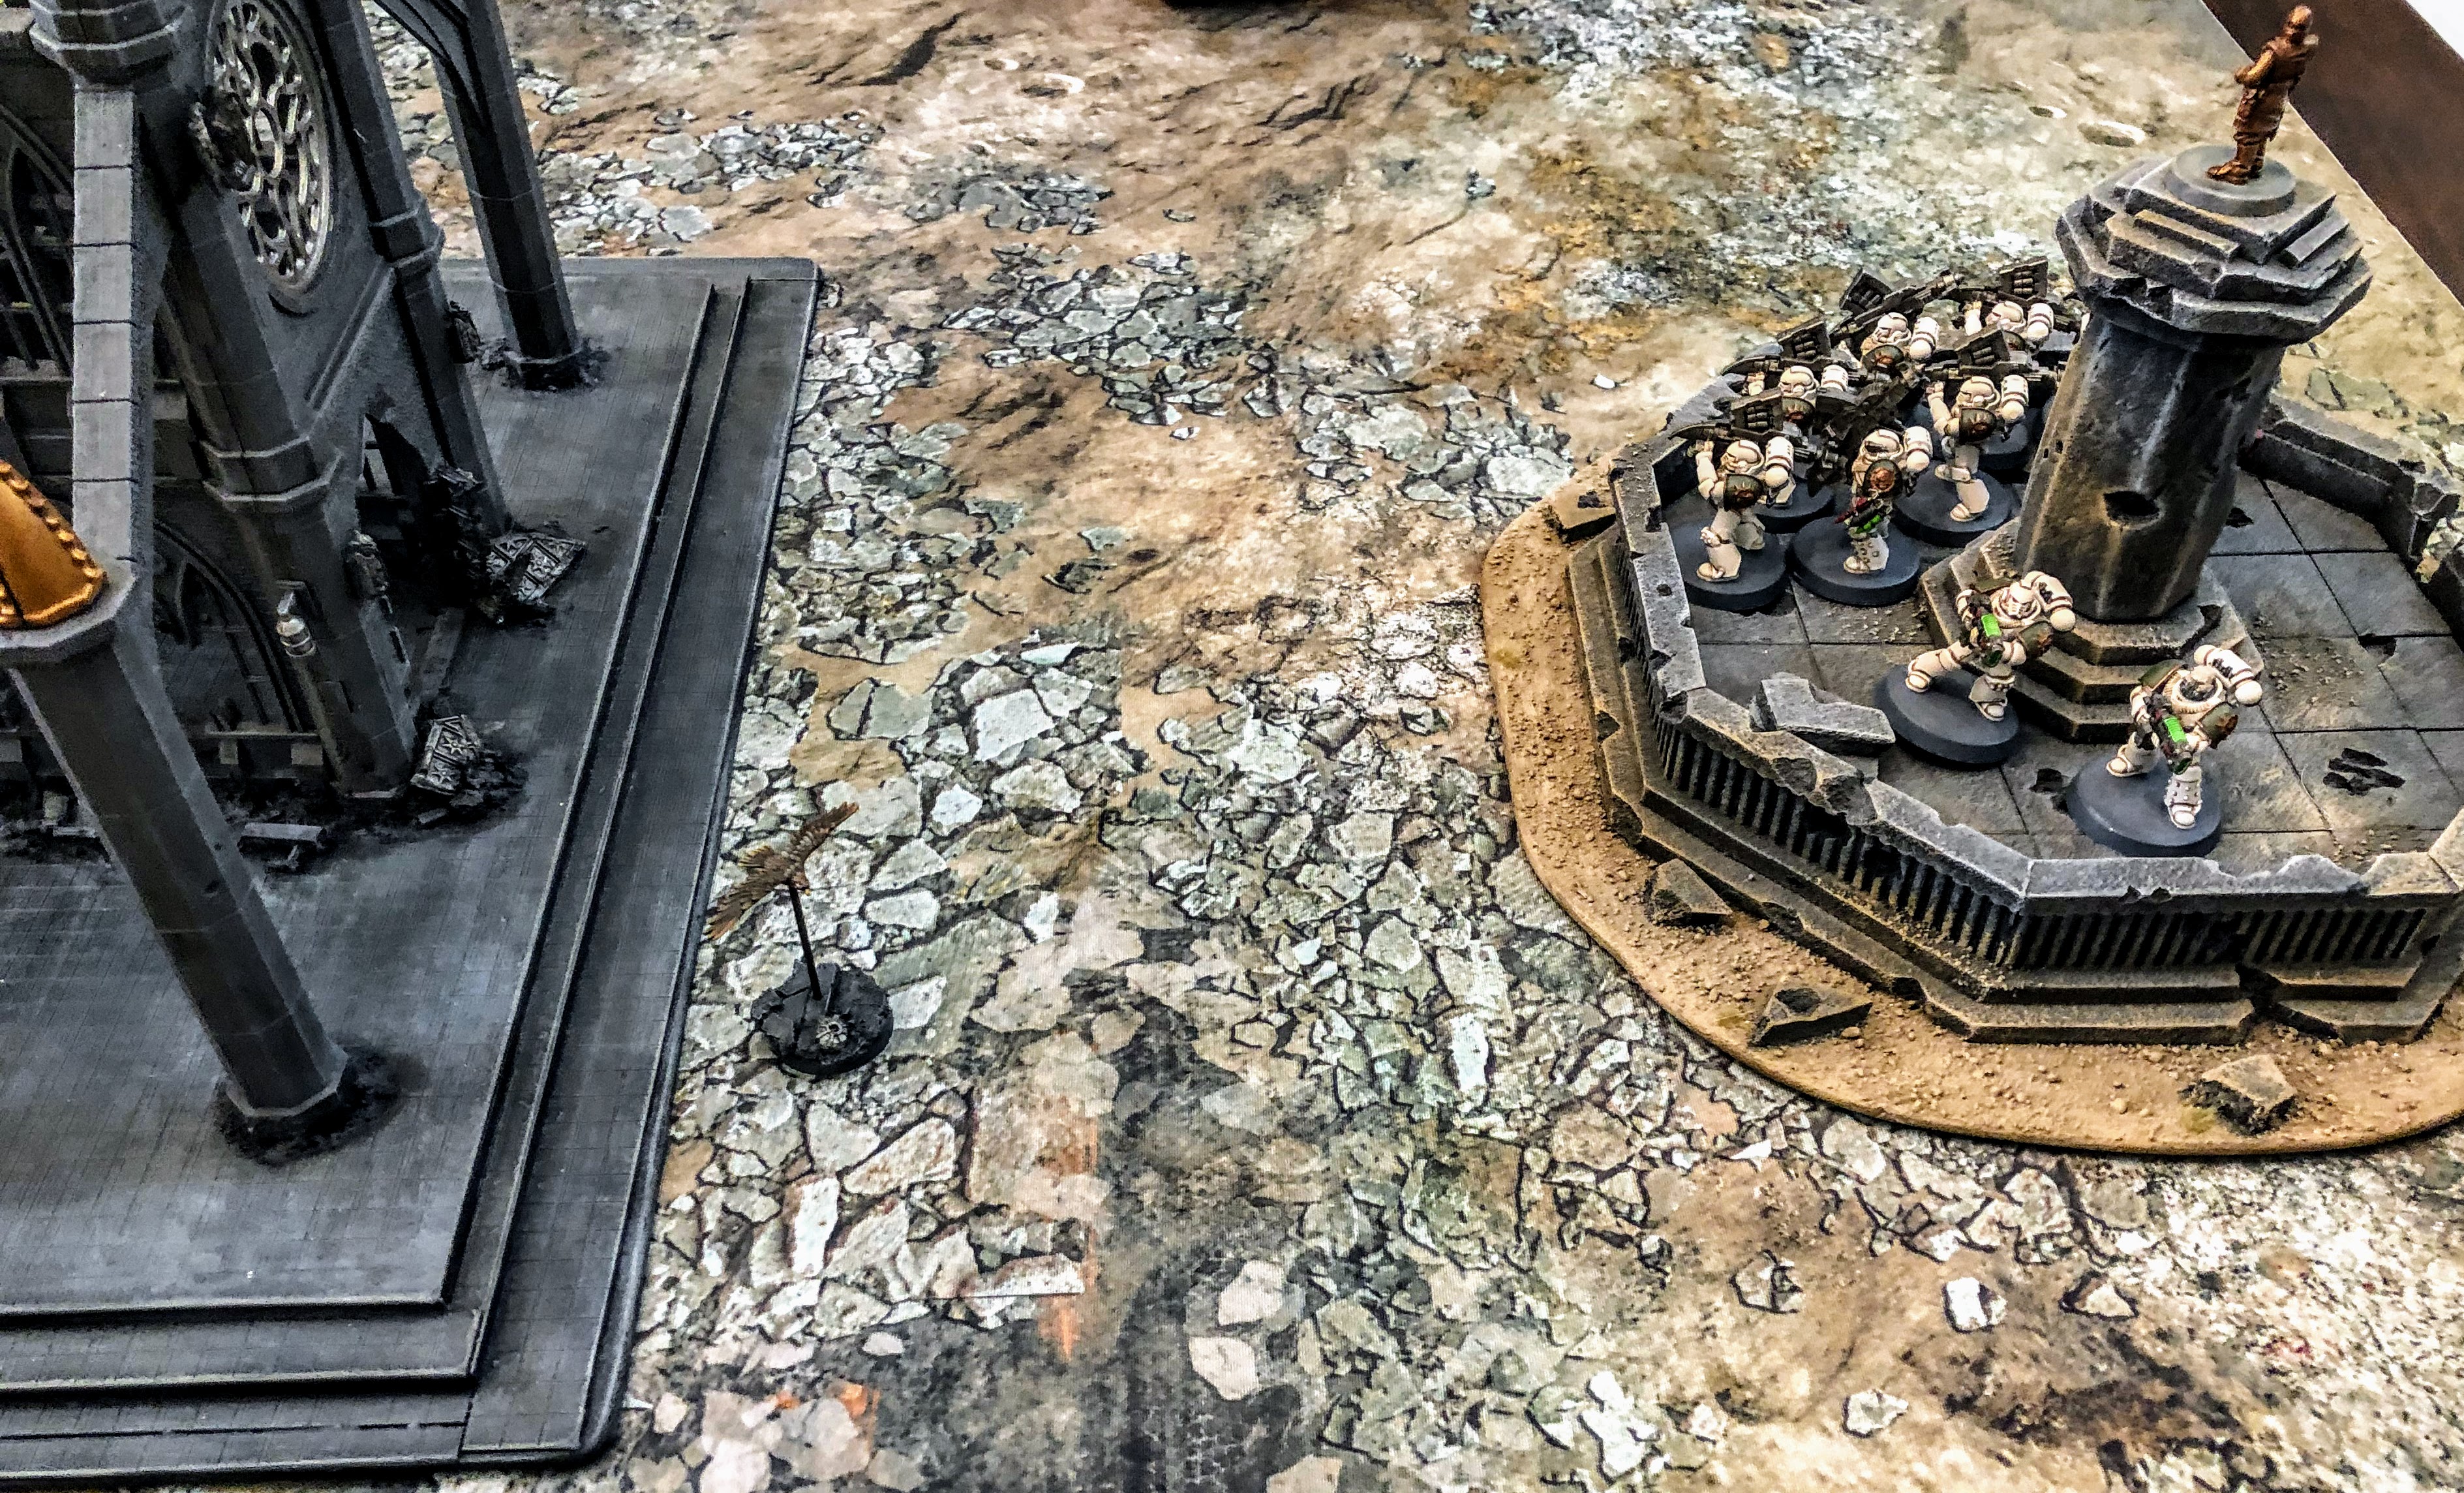
Khan Turna Jorma and the last of his Skyhunters maneuver over to hold a building that was deemed critical for the war effort prior to the battle.
|
 |
| The end of the battle: |
The Traitors destroyed 4 units (Sicaran Omega, Recon, Tactical, Tactical Support) and had one successful sweeping advance (Dreadnought vs Tactical Squad) for a total of 9 VP. (Ebon Keshig do not give up VP for being destroyed.)
The Loyalists scored victory points for having Scoring Units in the enemy deployment zone at the end of each game turn: Tactical Squad (2), Tactical Support Squad (2), Recon Squad (1), and Outriders (1) for a total of 6 VP.
Traitors: 9 VP
Loyalists: 6 VP
Secret Campaign Objectives Revealed:
Traitors: Silence the Big Guns (2 CP): Achieved!
Loyalists: Hold Ground (1 CP): Achieved!
Campaign Score:
Traitors: 15 CP (8 CP +5 CP Win + 2 CP campaign Objective)
Loyalists: 8 CP (6 CP + 1 CP Loss + 1 CP Campaign Objective)
POST-GAME:
Traitor Post-Game Analysis:
Pete:
Loyalist Post-Game Analysis:
Phil: That was an interesting scenario that let each army take advantage of their strengths: the White Scars mobility and the Traitors durability. My plan was to engage most of my army against half of Pete's, overwhelming him on one flank and holding it long enough to score enough points to overcome the inevitable losses of units as the game ground on. I know my force is no match for his in a straight-up slugfest but if I could have a two-to-one advantage on one flank, I might be able to hold my own.
As it turned out, the overall flow of the battle went mostly as I planned with all of my reserves able to strike at one of his flanks, allowing me to concentrate my army on half of his. Even with that, it was an equally-matched fight and we roughly traded units one for one; I don't want to imagine what it would have looked like if I was facing his entire force!
But where the plan fell apart was in the details. I made a number of tactical errors in the heat of the moment. Twice I forgot to issue a Challenge in melee, where I could have earned an extra VP for each character killed: first with my Ebon Keshig against his Butchers and second with my Tactical Squad Sergeant with Power Glaive against his Tactical Support Squad Sergeant with only a bolt pistol (that would have been a guaranteed victory point as I killed two men with the Sergeant in that round).
I also had some key dice rolls go against me. When I had his Tactical Support Squad badly beaten in melee and on the run, I missed my Sweeping Advance roll, which would have netted me another VP. I also failed my Hit and Run roll against his Dreadnought, allowing him to sweep me for 3 VPs (2 for destroying the unit, 1 for the Sweeping Advance) and it cost me a VP on my turn as they would have scored again so the grand total of that one roll was a 4 VP swing!
The other big blunder I had was to have my Recon Squad charge his Tactical Support Squad. I needed to get into melee because those flamers were so effective against my bunched-up troops and my shooting was doing little in return. But their overwatch fire killed my entire squad of seven! That cost me the ability to have the Recon Squad score at the end of my turn and did nothing to suppress his firepower on his turn; it just gave him a free round of shooting and I handed him a net 3 VPs on a platter.
Another big blunder was exposing the Sicaran Omega to the missile launchers. There were ruins that blocked line of sight to it, but there was a small gap between them that let Pete's missile launchers hit it in the side and destroy it, killing it before it could do a single point of damage to anything (as usual) and giving him 2 Campaign Points. I should never have risked it just for the low-probability of taking a HP off his Land Raider (which it failed to do anyway). I should have held it back and either drawn his Butchers away from where my flanking force would strike or used it to shoot the Butchers once the Primaris Lightning destroyed the Land Raider. Although that is easy to say in hindsight, it is hard to sit back and not attack during the heat of the game!
The Red Butchers once again were nigh unstoppable. They absorbed so much punishment, it was unreal. On my turn 3, I fired at them with all five Outriders (ten twin-linked plasma shots) and the Tactical Support Squad (twelve plasma shots, re-rolling ones) and I only managed to inflict two wounds! Pete was on fire for rolling saves and Feel No Pain rolls. I was really happy that I finally brought them and their tank down for the first time ever, but it took several rounds of concentrating most of my firepower and melee units on them and cost me several units in return.
The Primaris Lightning Strike Fighter had a very nice debut, finally destroying the Land Raider (first time I have destroyed it in five games!), a Rhino and helping to take down a Contemptor Dreadnought. After almost a year and a half of facing his Land Raider with almost no hope of killing it, I finally have something that can threaten it. Although I am sure now that Pete has seen the damage it can do, he will be bringing some anti-aircraft firepower in future games.
Pete played a good game by using his flamer squad in a ruin to hold his flank and do serious damage to my force. Shooting at them in hard cover was ineffective and charging into that many flamers proved to be suicidal, as two units found out (Recon and Ebon Keshig). He also smartly deployed his tactical squads right up to the table edge on his left flank, not leaving me anywhere to enter into his deployment zone from Outflank.
I think this mission favors the Defender, who gets to sit back in his deployment zone while the Attacker has to move very aggressively to get enough scoring units across the board. Also, the defender getting 2 VP for killing any unit while the Attacker gets 1 VP only for each scoring unit in the enemy deployment zone seems a bit unbalanced. It means each scoring unit needs to survive two or three turns before being destroyed in order to outscore an enemy who is also destroying non-scoring units. Still, I am a bit frustrated because I feel that I could have won this mission if I had played smarter. My strategy worked out mostly how I wanted but I just couldn't pull off the win due to a number of small errors in forgetting rules at the wrong times and making a few bad decisions with individual units. And the general frustration that even with over a third of his army totally uninvolved in combat, his force was superior to mine. Now I really face an uphill climb to win this phase of the campaign as I will need to win both of the remaining battles!


No comments:
Post a Comment