
"Where your enemy applies strength, disappear like mist before a sword blow. Strike again where conditions are favorable."
- Khan Turan Jorma,
Brotherhood of the Wind,
White Scars Legion
Brotherhood of the Wind,
White Scars Legion
Campaign To Date:
It has been about 40 years since a combined force of Sons of Horus, Death Guard, and White Scars brought the Xhorik System into compliance during the Great Crusade. The major population centers of the largest continent were quickly brought under Imperial control in the typical fashion: a series of pinpoint attacks of overwhelming force by the Legions against the enemy's strong points, followed by rapid surrender. Due to the richness of the primary planet and the strategic location of the system on a sort of crossroads of warp currents, small garrisons of the Death Guard and White Scars legions were left on the planet to oversee the tithes of men and material to the Great Crusade and to help eradicate the threat of large ork populations in the eastern wastes.
In Phase 1 of the campaign, the Traitors pushed the Loyalists from the war-torn border city of Bielyr in a series of bloody street fighting.
In Phase 2, the war escalated across the badlands of the Valbaara Plateau in several pitched battles. In the end, the Brotherhood of the Wind was defeated and their leader Praetor Zherdan was killed by the Death Guard.
In Phase 3, the Death Guard marched to the major Kozar city of Berat, fighting their way through a number of Loyalist counter attacks. In the end, helped by taking control of low-planetary orbit over the city in a void battle, the Traitors smashed through the outer walls of Berat behind the might of their super heavy Fellblade battle tank.
---------------------------------------------------------------------------------
Phase 4 is the battle for the Kozar city of Berat. The Traitors have broken through the gates and are working their way toward the city center block by bloody block in a brutal street fight. This Phase uses a number of special rules:
Campaign Points: CP are earned by playing games and by achieving secret secondary campaign objectives (drawn randomly each game and kept secret). They can be used to gain advantages in games. The player with the most CP at the end of the phase wins.
Normal games:
Win: 5 CP
Draw: 3 CP
Loss: 1 CP
Final Game:
Win: 10 CP
Draw: 6 CP
Loss: 2 CP
- Spend 1 CP to re-roll the die to deploy first or to re-roll the die to steal the initiative. Can only be used once per game.
- Spend 1 CP to include a unit that would not be allowed due to the Grinding Attrition or Street Fighting special campaign rules below. The point cost of the unit still counts toward the army total. Can only be used once per game.
- Spend 1 CP to re-roll the die to see if the game ends. Can only be used once per game.
(Costs are doubled for the final game.)
Hunter Killers: Due to the very dense terrain providing ample hiding places, surprise attacks are extra deadly. Units who used Infiltrate, Scout or Outflank can charge the on the first game turn or the turn they come into play. If they don’t charge, they gain an extra +1 cover save for their first turn in play (stacks with any bonuses they have already).
Street Fighting: Narrow streets, debris, billowing smoke and crumbling towers limit the ability to utilize large vehicles and artillery. Other than the final battle, a max of one total unit can be selecged with any of the keywords: heavy, artillery, flyer, or over 3 HP. In the final battle, everything goes.
Grinding Attrition: Other than Troops choices, any unit that is destroyed cannot be used in the next battle. If the next battle is the final battle, it can be taken but must start in reserves. Any unit that is selected as Troops choice can be used even if it was destroyed in the previous battle.
Named Warlord: Choose your warlord trait. Must be the same for the whole phase. Can also can always re-roll LD and morale checks. Other warlords must roll for trait.
If named warlord dies in battle, roll die:
1-2: debilitating injury: can't use in the rest of the campaign phase until final battle
3-4: major injury: can't use in next game
5: close call: no effect
6: Miraculous Recovery (Chosen of the Emporer/Horus/gods of Chaos): can use as normal and has an inspiring presence for the next battle: all units within 12" can use his LD.
The Revnent: Once warlord returns after dying in a game, he has Hatred (Traitors/Loyalists) for the rest of the campaign phase.
Our standard Terrain Rules are in effect.
We played The Break scenario from the Chondax Campaign in Horus Heresy Book VIII. The defender needs to get scoring units to their Escape Zone. In this mission any unit with either the Legions Astartes rule or infantry type is counted as scoring, but they cannot be falling back or engaged in melee. The attacker needs to destroy enemy units in the first turn, destroy more units than the defender, and get his Warlord to the Escape Zone. Both sides can achieve Slay the Warlord.
This battle represents the Loyalists falling back after being defeated at the city walls at the end of the last phase of the campaign. Their goal is to save as much of their fighting strength as possible while the Traitors are aiming to utterly crush the survivors, preventing them from mounting counter attacks in the battle for the heart of the city of Berat. This battle follows immediately after the end of the last one and even the terrain at the "Traitor" end of the table was setup to look like the terrain just inside the city walls from the last battle!
This battle represents the Loyalists falling back after being defeated at the city walls at the end of the last phase of the campaign. Their goal is to save as much of their fighting strength as possible while the Traitors are aiming to utterly crush the survivors, preventing them from mounting counter attacks in the battle for the heart of the city of Berat. This battle follows immediately after the end of the last one and even the terrain at the "Traitor" end of the table was setup to look like the terrain just inside the city walls from the last battle!
 |
| Scenario Map |
We would also each be drawing a random, secret Campaign Objective from a pile. These are objectives that are not related to the specific battle, but are part of the overall strategic plan for winning the campaign phase. These cards are kept secret until they are either achieved or the end of the game and are worth 1 or 2 Campaign Points, as stated on the card.
The Traitors drew Silence the Big Guns: Destroy all enemy Heavy Support choices (2 CP)
The Loyalists drew Decapitate: Destroy all enemy HQ choices (1 CP)
ARMY SELECTION: 2000 points
Traitors - Pete
Death Guard
- Preator Wolfgang: terminator armor, volkite charger, paragon blade, digital lasers, Fearless, It will not Die
- Tactical Support Squad Folterer: 7 marines flamers, sergeant with artificer armor. Mounted in a Rhino APC with a pintle mounted heavy flamer.
- Tactical Squad Toddestraffe: 20 marines with close combat weapons, sergeant with power fist and artificer armor and Apothecary Gerhard
World Eaters
- Chaplin Zungarz: Artificer Armor, plasma pistol, refractor field, crozius arcanum
- Tactical Squad Hell Hounds: 17 marines – 16 with bolters, bolt pistols and chain axes. 1 sergeant with artificer armor, power fist and plasma pistol
- The Red Butchers: 1 Devoured with dual chain fists, 4 Butchers with dual power axes
- Land Raider Phobos Flesh Grinder: side sponson twin-linked lascannons, twin heavy bolter, armored ceramite, machine spirit
- Contemptor Dreadnought Delrog the Diabolical with twin-linked lascannon and chainfist
Loyalists - Phil
White Scars Brotherhood of the Wind
- Khan Turan Jorma: jetbike, glaive, cyber hawk
- Skyhunter Squadron Khujaa: 6 jetbikes, 2 x volkite culverin
- Outrider Squad Tsujen: 5 Outriders with plasma, sergeant
- Tactical Squad Temgar: 10 marines, sergeant has power glaive, artificer armor
- Sicaran Omega Tank Destroyer Kharvaak: lascannon sponsons
Kozar Army, Berat Garrison
- Force Captain Xhaer: plasma pistol, iron halo, familiar, Warrior Elite, Duck and Cover (Cyber Augmented)
- Platoon command squad: power fist, 3 grenade launchers, vexilla, vox,
- Medicae: 2 medics
- Infantry Squad Secondus: lascarbines
- Grenadiers Arnauts: 11 infantry with lascarbines, 1 plasma gun
- Fire Support Squad Septima: 6 fire teams with heavy flamers
- Recon Squad Decima: 5 infantry with sniper rifles and camo cloaks
- Recon Squad Tertius: 5 infantry with shotguns and a demolition charge
- 3 x Tarantulas with twin-linked lascannon
++++++++++++++++++++++++++++++++++++++++++++++++++++++++++++
BATTLE:
The Break!
 |
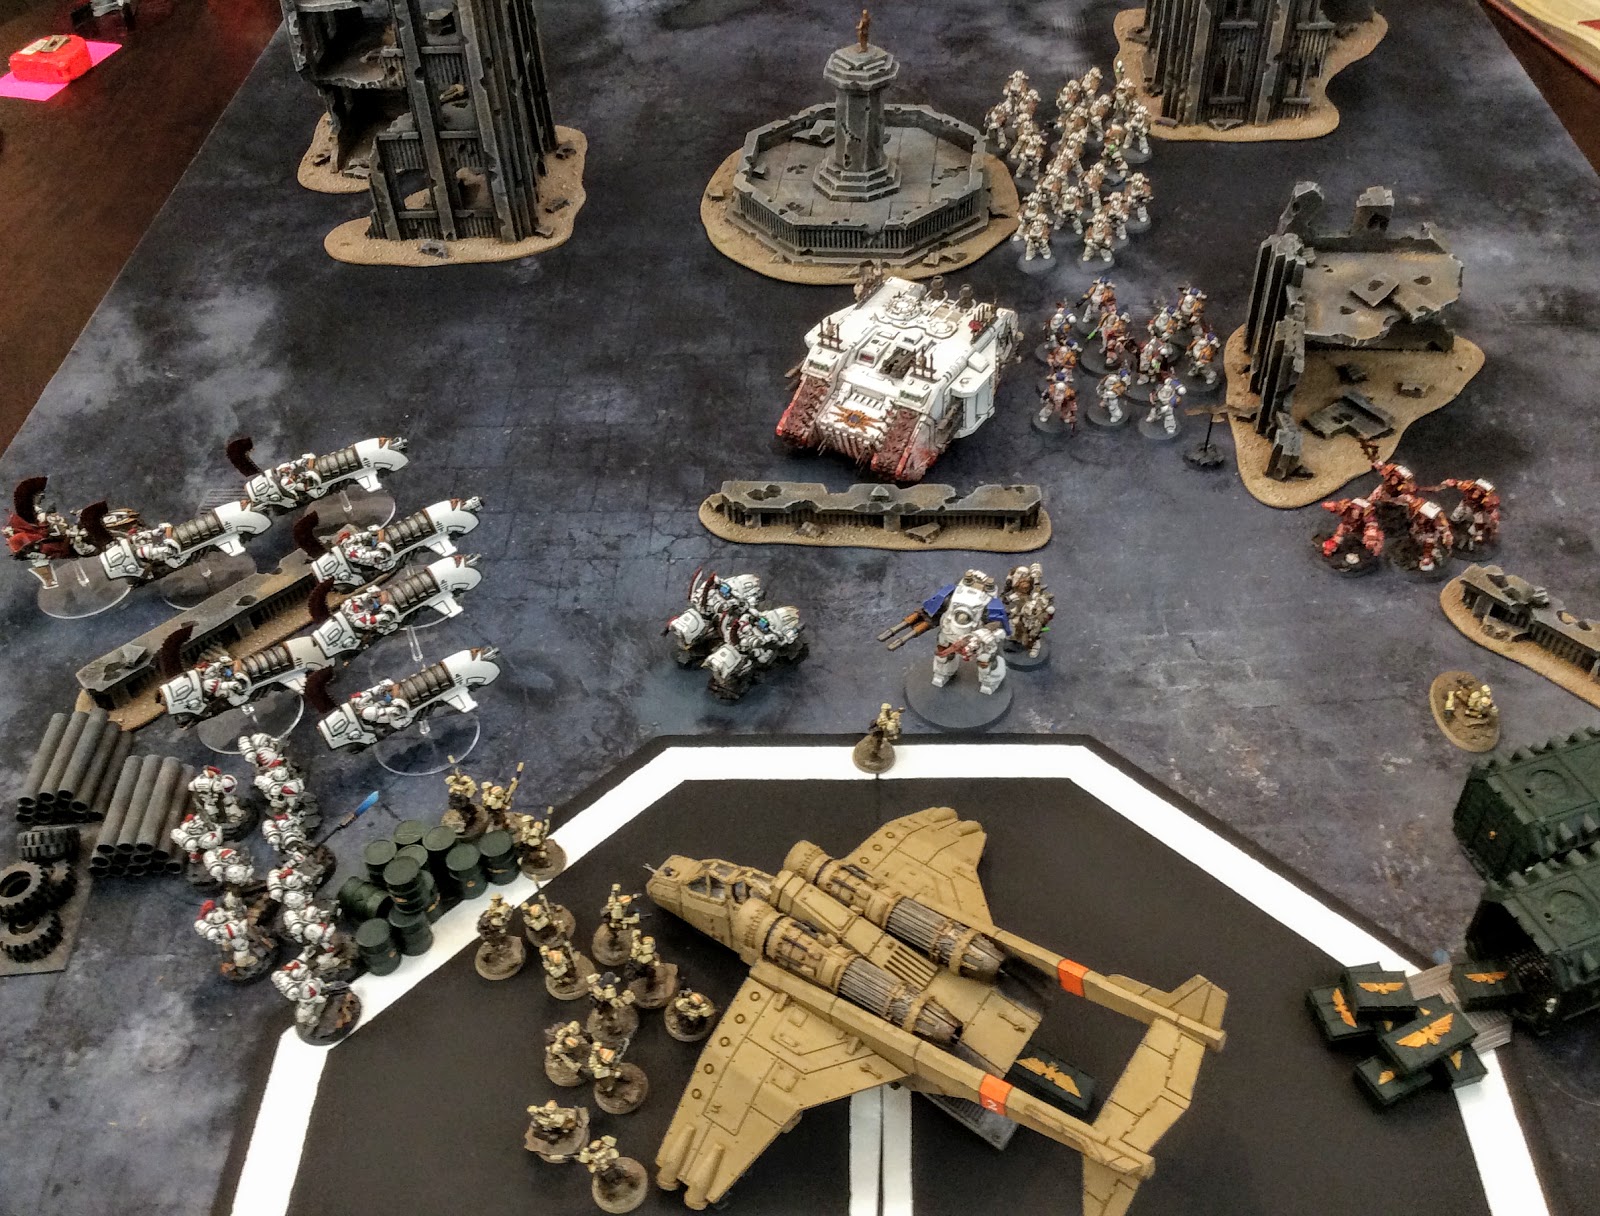
| The Loyalists fall back before the Traitors, making for the landing pads and the waiting Valkyries. |
 |
| After breaking through the city walls, the Traitors push deeper into Berat, pursuing the beleaguered defenders. |
 |
| Tactical Squad Temgar hurries through the ruins. They know the wisdom of falling back from a hopeless position in order to strike again when the situation is favorable. |
 |
| Khan Turan Jorma and his Skyhunters hold the center to give the infantry a chance to fall back behind the lines. |
 |
| Khan Jorma and the Skyhunter Squadron Khujaa attempt to slow down their enemy with fire from a distance while staying out of reach. The battle tank Kharvaak also prepares for a fighting withdrawl. |
 |
| Fire Support Squad Septima has the unenviable task of holding their position to slow down the Traitors and allowing the rest of the force to esacpe. |
 |
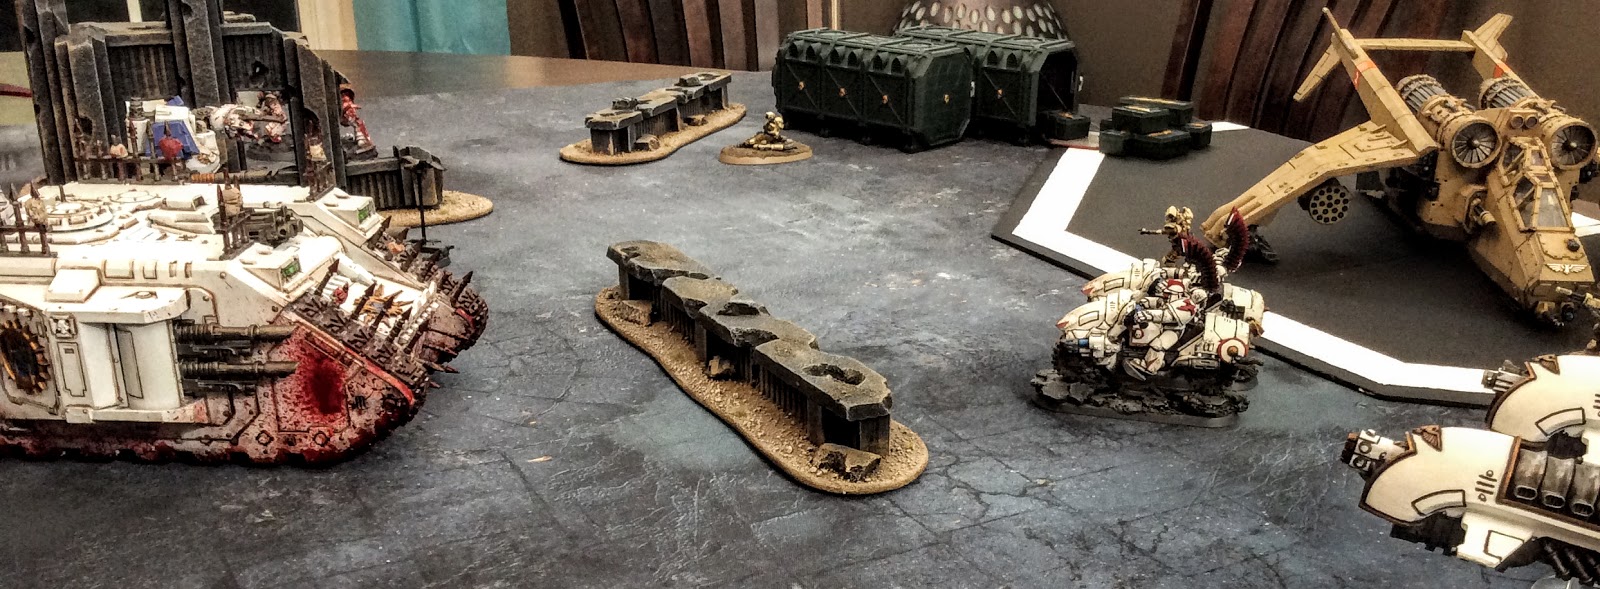
| The line of retreat is partially covered by Recon Squad Decima. They take up an advantageous position in small ruin. |
 |
| The Traitors concentrate their forces on their left flank to avoid the Kozar sentry guns in the ruined tower. |
 |
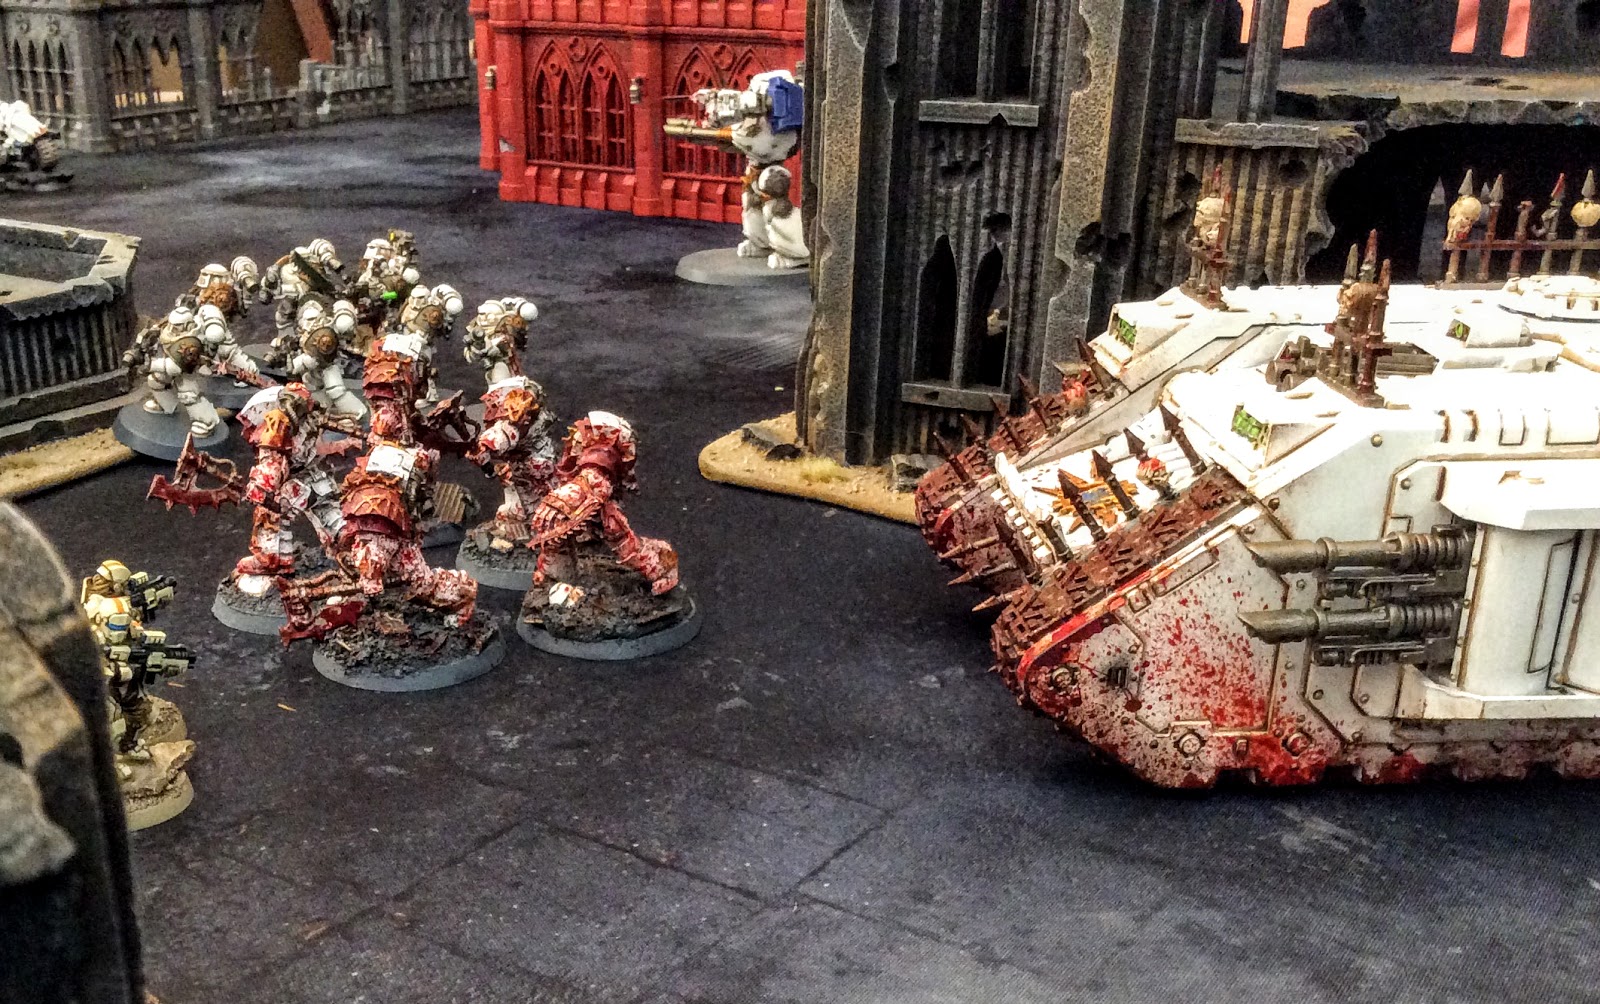
| The World Eaters' gore soaked monstrosity The Flesh Grinder carries the fearsome Red Butchers. |
 |
| Praetor Wolfgang continues to personally lead the spearhead of his assault on Berat. He hopes to catch and destroy the bulk of the defenders before they can reach the heart of the city and regroup. |
 |
| The Loyalists immediately start falling back while the Skyhunters and Sicaran provide covering fire. |
 |
| The Kharvaak trains its Omega Plasma Array on Delrog the Diabolical but the atomantic shielding protects the dreadnought. |
 |
| The infantry make a run for the landing zone. |
 |
| The Valkyries were being loaded with gear when they received the change of orders: "Urgent evac needed! Fuel up and prepare to liftoff under fire." |
 |
| The Traitor infantry cautiously advance, wary of the heavy flamers hidden in the ruins. They concentrate their bolter fire into the Kozar support squad, killing nearly the entire unit despite their cover and their medic; the lone survivor falls back. |
 |
| The Flesh Grinder has nothing to fear and kicks up a cloud of dust as it races forward at full speed. |
 |
| Tactical Support Squad Folterer likewise move flat out in their rhino APC. |
 |
| The Traitor infantry move forward slowly and cleanse the Kozar fire support squad from the ruin while their transports quickly close the distance with the escaping Loyalists. |
 |
| The White Scars continue their fighting retreat, firing as they move. Outflanking reinforcements strike at the Traitors from both sides in order to give the Loyalist infantry time to fall back. |
 |
| The Sicaran Kharvaak fires everything at the rapidly-approaching Land Raider Flesh Grinder but cannot penetrate the mighty ceramite armor. |
 |
| Skyhunter Squadron Khujaa fire at the approaching Rhino as they withdraw. They inflict minor damage but cannot slow the rugged APC. |
 |
| Suddenly, the Kozar Urban Recon Squad Tertius ambushes the Hell Hounds and tosses a demolition charge into their midst! |
 |
| The attack is devastating on the tightly-bunched tactical squad and seven marines are taken out of action. |
 |
| But the brave recon troops are left facing the wrath of the remaining marines. |
 |
| Outrider Squad Tsujen makes a flanking attack from the other side and fires a salvo of plasma into the rhino carrying Tactical Support Squad Folterer, destroying the transport. |
 |
| The implacable Death Guard are unfazed by the explosion of their transport. Refusing to be pinned, they march stoically from the wreckage and continue their advance. |
 |
| The Flesh Grinder rounds the corner of the ruin and prepares to disgorge the Red Butchers into the heart of the Loyalist line. |
 |
| The gore-soaked Red Butchers emerge, psychotic with bloodlust. |
 |
| The Butchers move surprisingly quickly for their size and close the distance to their target: the Sicaran Omega Tank Destroyer. |
 |
| Squad Folterer also advance with their horrible chemical weapons. |
 |
| The Butchers bellow out their rage as they charge. |
 |
| The Devourer's chainfists rip into the heart of the Kharvaak. The plasma core erupts in a massive explosion, killing several nearby Kozar infantrymen! |
 |
| Chaplain Zungarz and his Hell Hounds make short work of Recon Squad Tertius, enacting a bloody revenge for the demolition charge strike. But it is not enough to satiate their bloodlust and they move forward quickly, looking for their next victims. |
 |
| With their only battle tank destroyed and their immobile Tarantulas out of position, the Loyalists realize they have no way to slow the Land Raider and Contemptor Dreadnought. Their only hope is to escape before the warmachines kill them all. |
 |
| Kozar Infantry Squad Secondus reaches the waiting Valkyries. But can they survive until they are fueled and ready for takeoff? |
 |
| The Traitors continue to push forward as the Loyalists fall back. |
 |
| The Red Butchers turn their attention to the nearby Kozar Grenadiers The Arnauts. |
 |
| The Arnauts are helplessly hacked apart under the axes of the Butchers. |
 |
| The Traitors claim the center of the battlefield as the Loyalists continue to hit and run. |
 |
| Recon Squad Decima abandons their position in the ruins as the World Eaters close in. |
 |
| The White Scars fire at the Red Butchers from a distance. A few shots find weak points in the tactical dreadnought armor, but the immense bulk and chemically-fueled rage of the berserkers mean only one succumbs to the storm of bullets. |
 |
| The White Scars and Kozar force continues their fighting retreat. The lone survivors of various squads flee. |
 |
| The Red Butchers, eager to continue their rampage, pursue Recon Squad Decima. |
 |
| Delrog the Diabolical and the Traitor infantry continue to press their advance. |
 |
| The massive terminators slaughter the defenseless recon troops. |
 |
| Kozar Infantry Squad Secondus and Tactical Squad Temgar have reached the escape zone. The surviving Outriders of Squad Tsujen move forward to slow the enemy advance, even if it means giving up their lives. |
 |
| The speed of the Outriders meets the armor and firepower of the Flesh Grinder. |
 |
| The Traitors close in and gun down several more members of Squad Secondus, vowing that none shall live. |
 |
| The Traitors are on the doorstep of the landing zone. The Loyalists are desperate for evac: "Get to the choppa!" |
 |
| Khan Turan Jorma orders all fire concentrated on the Red Butchers and two more of the monstrosities are felled. He puts Skyhunters between the enemy and the fleeing infantry, giving them a chance to board the waiting Valkyries. |
 |
| The remaining Butchers chase down and kill the last fleeing member of Fire Support Squad Septima. |
 |
| They then turn their attention to the lone survivor of the Platoon Command Squad and quickly cut him down. |
 |
| The remaining two Loyalist infantry squads clamber into the Valkyries and liftoff as the Skyhunters also flee. Delrog the Diabolical takes out his anger and frustration on the Outriders. Khan Jorma saves enough of his force to remain a significant threat to the Traitors as they try to claim the city of Berat. |
RESULT:
Loyalist Victory!
The Loyalists had three scoring units in the Escape Zone that were not engaged in melee. The Traitors did not destroy any units in the first turn and failed to get their Warlord to the Escape Zone, but achieved Attrition for destroying more units (7 units to 2!).
Secret Campaign Objectives Revealed:
Traitors: Silence the Big Guns (2 CP): Achieved!
Loyalists: Decapitate: Denied!
Campaign Score:
Loyalists: 5 CP (Victory)
Traitors: 3 CP (Loss + Secret Objective accomplished)
POST-GAME:
Traitor Post-Game Analysis:
Pete:
[Pete slowly shakes his head, looks down, then begins to type]
Well, looking back on this battle I see I really brought the wrong army list to have any chance at winning. What was I doing bringing a huge blob of Death Guard tactical marines, without a transport, that cannot make run moves, to a battle where I needed to cover the entire LENGTH of the table to win? Ugh, that was dumb. There was no value to having them on the table unless Phil assaulted me and brought the battle to my side of the table, but it was far wiser to just hit and run and keep falling back to his table edge. Missions like this really highlight just how slow my Death Guard are and are making me consider adding that one fast attack slot I’m allowed per my rite of war, The Reaping. Perhaps a Skimmer with scout or outflank, or maybe some bikers of my own.
So what I should have brought to this fast mission where speed and offense is everything is my World
Eaters reconnaissance squad, my World Eaters assault terminator squad with lighting claws and cut out Wolfgang and his slow-assed retinue. Not that that solves all my problems, but it’d be far more
effective. The Chaplain Zungarz could have led the army on his own.
However, I still may have won or drawn if I could have committed everything I had, including the Flesh Grinder and the Red Butchers, to the complete destruction of the entrenched heavy flamer squad in the ruins on turn 1. At the time I still incorrectly assumed I’d be able to get my entire army across the field and decimate enough of Phil’s units that we’d win a type of overpowering victory that we’d been known for. I should have calculated the VP possibilities pre-game or before I made my final moves on turn 1, because once I lost out on those early VPs, I think my eventual defeat was assured.
But alas, we live to fight another day and the Traitors are not significantly behind in CPs after Battle 1 of Phase 4. And we didn’t lose any specialty units, so our entire arsenal of war is available for the next battle in the phase, which should be an exciting Zone Mortalis game – a Death Guard specialty!
Kudos to Phil for playing it calm and cool, an overall strategic battle, and doing exactly what he needed to do to evac his units and win the mission.
Loyalist Post-Game Analysis:
Phil: What made this game so enjoyable to me was the strong tie-in to the last game played as a direct continuation of the action, featuring many of the same units that finished that battle and even the same terrain along one edge to show how the battle was shifting back farther from the wall. It really adds to the story of the game when right from turn 1 you are already starting with the mindset of an ongoing battle.
This mission was certainly going to be extremely tough for Pete's army to win. Looking at the victory conditions, the attacker needs to deal significant damage on turn one, have a chance at getting his warlord to the Escape Zone and/or be able to swarm the escape zone in the last turns and tie up the defender's troops in melee (units in melee cannot score in this game). There is no doubt that if Pete would have got his big tactical squads into the Escape Zone, he could have tied up or destroyed my scoring units in melee. This scenario really punishes a slow attacker and in hindsight was going to be very tough for Pete to play with his available painted units. He needed to be very aggressive and try to charge the Fire Support Squad in the ruins with the heavy flamers on Turn 1 with his World Eaters Tactical Squad. But when I used my Warlord Trait to give them AP3, the fear of all those templates and Overwatch hits really caused him to hold back initially! Not wiping out that squad cost him 2 VP and it also slowed his advance.
I made a few mistakes as well. The worst one was putting my immobile Tarantulas on the left flank instead of in the dead center. I thought he would have to advance along both sides of the red building and did not figure he could cram his entire army on one flank, but using transports really shrinks your army's footprint! The three guns fired a total of maybe two shots all game and spent the rest of the time hopelessly out of range. As my only heavy weapons other than the tank, I had no answer for the Land Raider once the Sicaran Omega was destroyed. That poor tank is destroyed every game and once again it did absolutely no damage before it died, not even removing a single hull point from either of Pete's vehicles. It seems horribly overpriced for 275 points. This is the sixth game in a row that it has been destroyed, and in all six games it has only killed a handful of infantry in total and not a single enemy vehicle... It definitely earns the title as worst performer yet again as it inflicted no damage, gave up 2 Campaign Points when it died, and in the end killed more of my own men than Pete's by taking out a handful when it exploded!
I think my best moves were sacrificing a few units (the Fire Support Squad and the urban Recon Squad) to slow Pete's advance and keep him from reaching the Escape Zone. Such is the life of a lowly guardsman...
Recon Squad Tertius also provided my highlight of the game by Outflanking and taking advantage of the tightly-packed World Eaters tactical squad to take out 7 marines with their demo charge! The highlight for Pete's army was obviously the Red Butchers again. They destroyed three units and finished off the remnants of two others, and despite me concentrating fire on them for several turns, they were still a major threat in melee at the end of the game and were his only unit threatening the Escape Zone.
This mission certainly favored me and it would have been tough for Pete to win, but it was fun to play such a different game where very different army composition and tactics were needed compared to most games that are almost solely focused on who can inflict the most damage. In this game, Pete utterly crushed me in damage dealt yet again, but I still won a solid victory because of the unique victory conditions. I say this every time but I really need to paint up some units with some firepower and durability to match his as once again my entire army only destroyed a 10-man tactical squad and their Rhino while I lost seven units in return!
It was a lot of fun to play a game that continued our story directly and made you think differently for tactics. Despite my victory, the Campaign Point score is very close with Pete accomplishing his secondary objective and me missing mine. There is still a long way to go in the Battle for Berat!
Wonderful, beautiful, sensational pictures of expertly painted armies w fun special effects on top. Great read! Also... one of the biggest tactical bung-ups I've ever witnessed! Sorry Pete. You won't read this anyway. ;) The traitors did have a very difficult task ahead of them: stopping Phil's guys from booking it down the battlefield away from the fight. All Pete's toughness and numbers wouldn't help one bit and they'd be puffing impotently all game across the ruined streets, chasing dust clouds. I don't think Pete appreciated the importance of getting his CO into the escape zone since Captain Maggot-pants was left thoroughly at the tail of the attack. If he had put his CO in a different squad (ideally w the terminators if he could fit) and charged him down the side at full throttle, they could have disembarked on turn 4 on the landing pad and assured that no one would be able to score. A crazy melee would break out, tying everyone up. The rhino could die being a distraction or follow in the land raider's wake, dropping off the flamer posse to really put the nails in the coffin. In the batrep, Pete disembarked the berserkers much too far away and didn't take the opportunity to have a different squad jump in. The death guard or world eaters could have embarked and been in the thick of it by turn 4 or 5. The terminators had a jolly ol' time ripping up helpless guardsmen again but failed to make much impact. Obviously, an army of a few extremely durable units will kill more units than one w tons of weak squads, some of which are intentionally sacrificed. I was disappointed that your groovy jetbikes once again were reduced to simple weapons platforms, laying down ineffective fire while slowly backing up. Surely the pilots yearn to open up the throttle and fly! I'd love to see a battle in which they can show off. Zipping around grabbing objectives while Pete's foot troops watch helplessly. It was very enjoyable to watch those heavy-footed golems embarrassed in this battle. Normally, their prey comes to them but it's not so fun when the prey runs away and they can't catch up.
ReplyDeletePete's tried-and-true standard, the refused flank, totally ruined his chances of winning. By avoiding the lascannons, he denied himself a chance to charge or at least shoot with his footsloggers. They totally could have killed some squads and got Pete an early game lead that you would have had to beat, preventing you from sacrificing as many units since you'd need them all to score. The world eater infantry deployed in the unenviable position of being behind a silo and the tank. If they had been in front of the tarantulas, no doubt a couple would have taken a lascannon blast to the chest but most would have survived to flay loyalists. By resigning himself to not killing a single squad on turn one (but tons throughout the other turns), he made it impossible to win. You only needed a minimum of scoring units to win. Plus, by keeping Captain Soggy-britches in the back, he gave you a VP! Luckily, his conservative nature in battle allowed you a solid victory 4 - 1 despite barely damaging him at all. The kill count was so low that battlefield was choked w units at the end! It looked like turn 1 of a slightly smaller game. Too bad Pete got such a perfect secondary objective: smash the tank that's like a keg of gasoline on stilts. He certainly denied you yours.
ReplyDelete