
ARMY SELECTION: 850 Points
Da Blitzdreg Boyz: Battle Forged Combined Arms Detachment (Phil)
- Warboss Grimsmak: 'Eavy armor, shoota, power klaw, boss pole
- Painboy
- 'Ard Boyz: 12 boyz with 'eavy armor. Nob with boss pole and power klaw
- Trukk with rokkit launcha
- Shoota Boyz: 14 boyz. Big shoota. Nob with boss pole and klaw.
- Meganobz: 3 Meganobz
- Trukk with rokkit launcha
- Bikes x 7. Nob with boss pole and power klaw.
- Warbuggy with twin-linked rokkits
- Skorcha Trakk
Hive Fleet Tarasque: Unbound (Bill)
Ork Deployment and Da Plan:
Tyranids Turn 1
The difficult terrain meant the shoota boyz struck first and were able to inflict heavy losses on the termagants before the Tyranids could attack. The genestealers and power klaw orks all struck simultaneously with both sides inflicting heavy damage. The warboss and two nobs were ripped apart by rending claws, leaving only a single wound on the last nob, while six genestealers were crushed and mangled by the orks in return. The Tyranids got two victory points for killing the ork warlord and were back in the game.
- Broodlord with rending claws and 9 Genestealers with scything talons
- 10 Genestealers
- 5 Warriors with 3 deathspitters, 1 devourer, and 1 barbed strangler. All have scything talons.
- 2 Zoanthropes with Warp Blast, Warp Fields, and one that never got used
- 10 Termagants
- 10 Termagants
- 10 Termagants
- 10 Termagants
- 11 Hormagaunts
PRE-GAME
Mission: Purge the Alien
Primary Objective: 1 VP for each unit destoryed
Secondary Objectives: Slay the Warlord, First Blood, Linebreaker
Random game length.
Deployment Type: Long table edges
Roll for deployment and Tyranids win, opting to deploy and go second
We decided not to roll for night fighting.
Warlord Traits:
Boss Grimsmak: Units within 12" of Warlord can use his Leadership
Broodlord: Gains Outflank.
An Ork force of trukks, bikes, and other vehicles is en route to bolster the ranks of the main Ork offense when suddenly, a huge plasma blast rips apart the lead vehicle, the ork passengers only just leaping to safety in time. The rest of the column screeches to a halt, engines grumbling noisily as the drivers and their cargo of warriors look about for the source of the attack. What should have been war cries and blazing weapons was instead silence. Only the occasional sigh of chill wind broke the unnerving calm.
Without warning, a war party of Tyranid bio-weapons scuttled up a hilltop and descended upon the Orks, still as silent as before making their presence known. They had a simple mission burned into their unquestioning minds: destroy the Ork vehicles before they could lend aid to the ever-growing army at the Ork settlement. The Hive Mind demanded it.
The leader of the Ork mobile battalion caught sight of the armored forms racing toward his position and cried out for his confused minions to face the onslaught and prepare for battle.
"But Boss, why don't we just ditch Gobdakka's boyz and get on to da camp?" inquired the nearest Ork.
Warboss Grimsmak never even met his subordinate's gaze.
"Doz rottin' bugs blasted my wagon. My favorite trophy was in dare."
He raised his massive sword in an armored fist and pointed the tip toward the aliens. His voice could be heard even above the roar of revving engines.
"Alright boys, deez bugs made me mad. We iz gonna squish 'em all. We'll show up at camp wit da snazziest trophies o' anyone."
As the sun's light began to spread across the unforgiving tundra, the Tyranids and Orks squared off for what was sure to be a bloody and merciless battle.
DEPLOYMENT
 |
| View of deployment from the west. The Tyranids chose to deploy second and both broods of Genestealers infiltrated. |
I had selected my army based on a few priorties: using some of the models I had recently painted (some of the bikers, the meganobz and the trukks), taking things that were useful against the Tyranids last time (the shoota boyz), and having plenty of mobility to grab tactical objectives if we played a Maelstrom of War game (which didn't turn out to be the case). In my group's first nine games of 7th Edition so far, we had always played objective-based games, whether they be Eternal War or Maelstrom of War so I didn't have a solid pre-determined plan of attack for how to approach a game where the only objective is to destroy the enemy. Since I was deploying first, I just went with a standard deployment of infantry in the center supported by fast moving units on the flanks. I feel this approach gives me the most flexibility to respond to my opponent's deployment and maneuver without risking my army getting split up and dealt with piecemeal.
My overall strategy was to stay about 18" from the horde of bugs and use my superior medium range shooting to force them to move into my assault range so I could get the charges whenever possible. I knew I didn't have the numbers or durability to win a massive slugfest in the center of the table so I would have to use my mobility to break up and stagger the swarm so they couldn't surround my smaller units and overwhelm me. As always in 40k, and especially for orks and assault armies, I feel the key is to use your units to support each other and avoid throwing one unit at a time into the enemy.
Once I saw Bill's deployment, I knew my first priority would be to handle the genestealers as they would be charging into my deployment zone on his second turn thanks to their infiltrating and I knew from our last game how deadly they could be in melee. By putting such quick and hard-hitting units on his flanks, I knew I would not be able to use one of my favorite tactics, the Gorkamorka, where the bulk of army advances up the middle while a fast strike force of da wheelz shoots up a table edge and strikes the priority targets in the enemy flank and rear. In this case, I was looking for an opportunity to swing one of my trukks into the Tyranid rear to chop up his only two synapse units and disrupt his entire army, but the deadly genestealers protecting his flanks meant I needed a new plan. I decided my only chance was to try to break up and disrupt his force using terrain and sacrificial units so he could not swamp me.
Tyranid Deployment and Strategy (Bill):
Ok, time for my Nids' second battle report against Phil's Orks, which narrowly defeated me in our last encounter, This time, there would be no tricks, no objective cards, just straight up carnage. The only rule: every unit, character, and vehicle that gets destroyed is worth 1 VP. Fleeing units count as destroyed at game's end. This would be the bugs' big hit against the brutish greenskins after the last encounter in which they gathered data about their strengths and weaknesses.
My army was huge, a total of around 80 models for only 850 points, consisting of 7 troops choices supported by warriors and Zoanthropes for synaptic control. My plan was to simply drown my enemies in waves of cheap creatures until nothing remained. Anything too stubborn to die would be shot up and then shredded in close combat by the warriors. On the flanks, my genestealers would infiltrate and then run up toward the enemy deployment zone to catch the whole army in a huge synchronized pincer, the center battle line meeting Phil's horde. That was the plan anyway. However, Phil's daunting mobility soon made a mockery of that strategy.
Since neither of us knew what kind of battle we would be fighting, army creation was an act of guessing and hoping for the best. I simply took all of the models I had w me and Phil made a vehicle-heavy force w only 2 squads of regular foot troops. He had clearly prepared for another objective-grabbing battle in which he would have to compete w my Nids' superior foot speed and ability to cover most of the tabletop through sheer numbers. In a straight battle, particularly against another close combat specialist army that WANTED to get into melee range, rushing in with trukks seemed less useful, especially when the trucks themselves were flimsy and worth a VP each. I felt confident that if I kept the heat on and rushed at him as quickly as possible, I would have an advantage in that his trukks, trakks, and whatnot would be costing points for mobility that they wouldn't use. Additionally, they were all low armor, low enough for even termagants to damage, and were worth a VP apiece.
The terrain was thick with many ruined buildings blocking lines of sight and movement. The ruins in the table's center broke the board into two halves, requiring me to either cram everything together or split the army with warriors and Zoanthropes each commanding a half. I decided to spread out my 50 gaunts since making one huge horde would be clumsy to move and would prevent more than one or two squads from charging at a time. Plus, I anticipated Phil sending his boys howling like maniacs toward me, creating a huge bloody melee in which my superior initiative tyranids would have the advantage. However, the spirit of Mork was strong in his warboss and the orks never fell into the trap I had baited and set. Rather, thanks to Phil's unrelenting cunning, my army was largely unmet by the orks and instead wasted several turns footslogging across the length of the board. I ended up spending the game responding to Phil's movements and fighting where and how he saw fit. Still, tyranids are tenacious and vicious and would not be easily defeated.
I had a total of 9 units versus Phil's 10, giving me a slight advantage in potential VPs earned.
 |
| The broodlord prepares to lead his deadly kin around the flank, shielded by the large ruined building. |
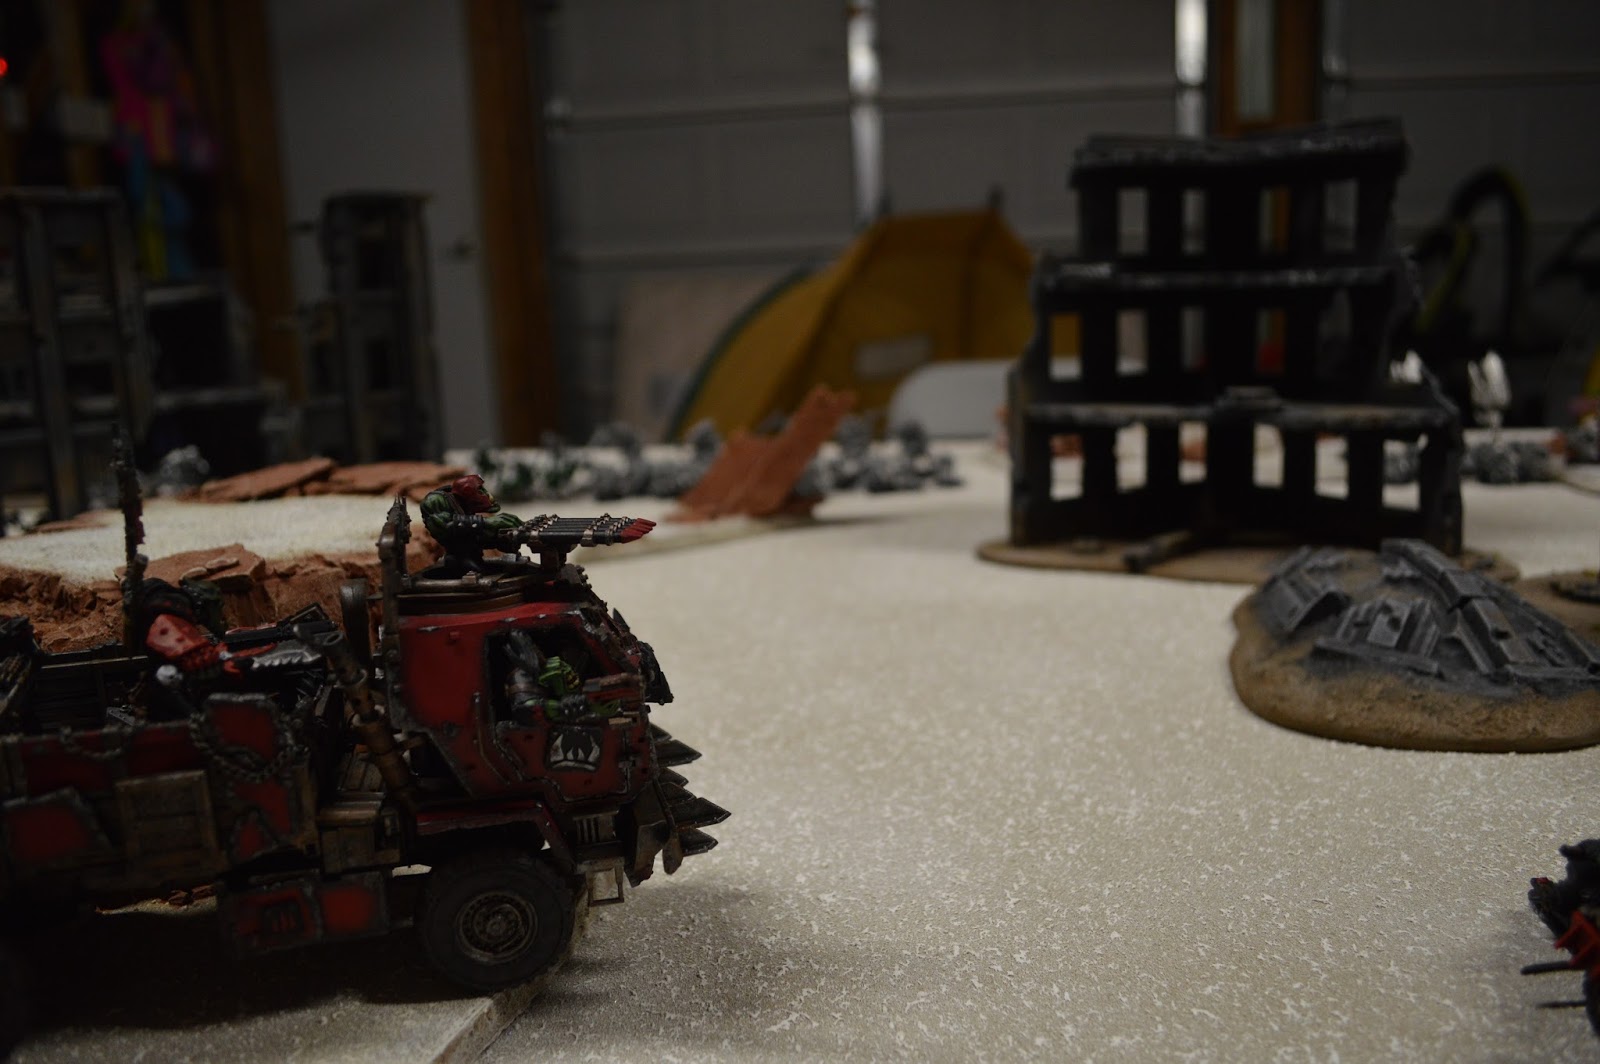 |
| Boss Grimsmak and his meganobz scan the horizon from his prized megatrukk. |
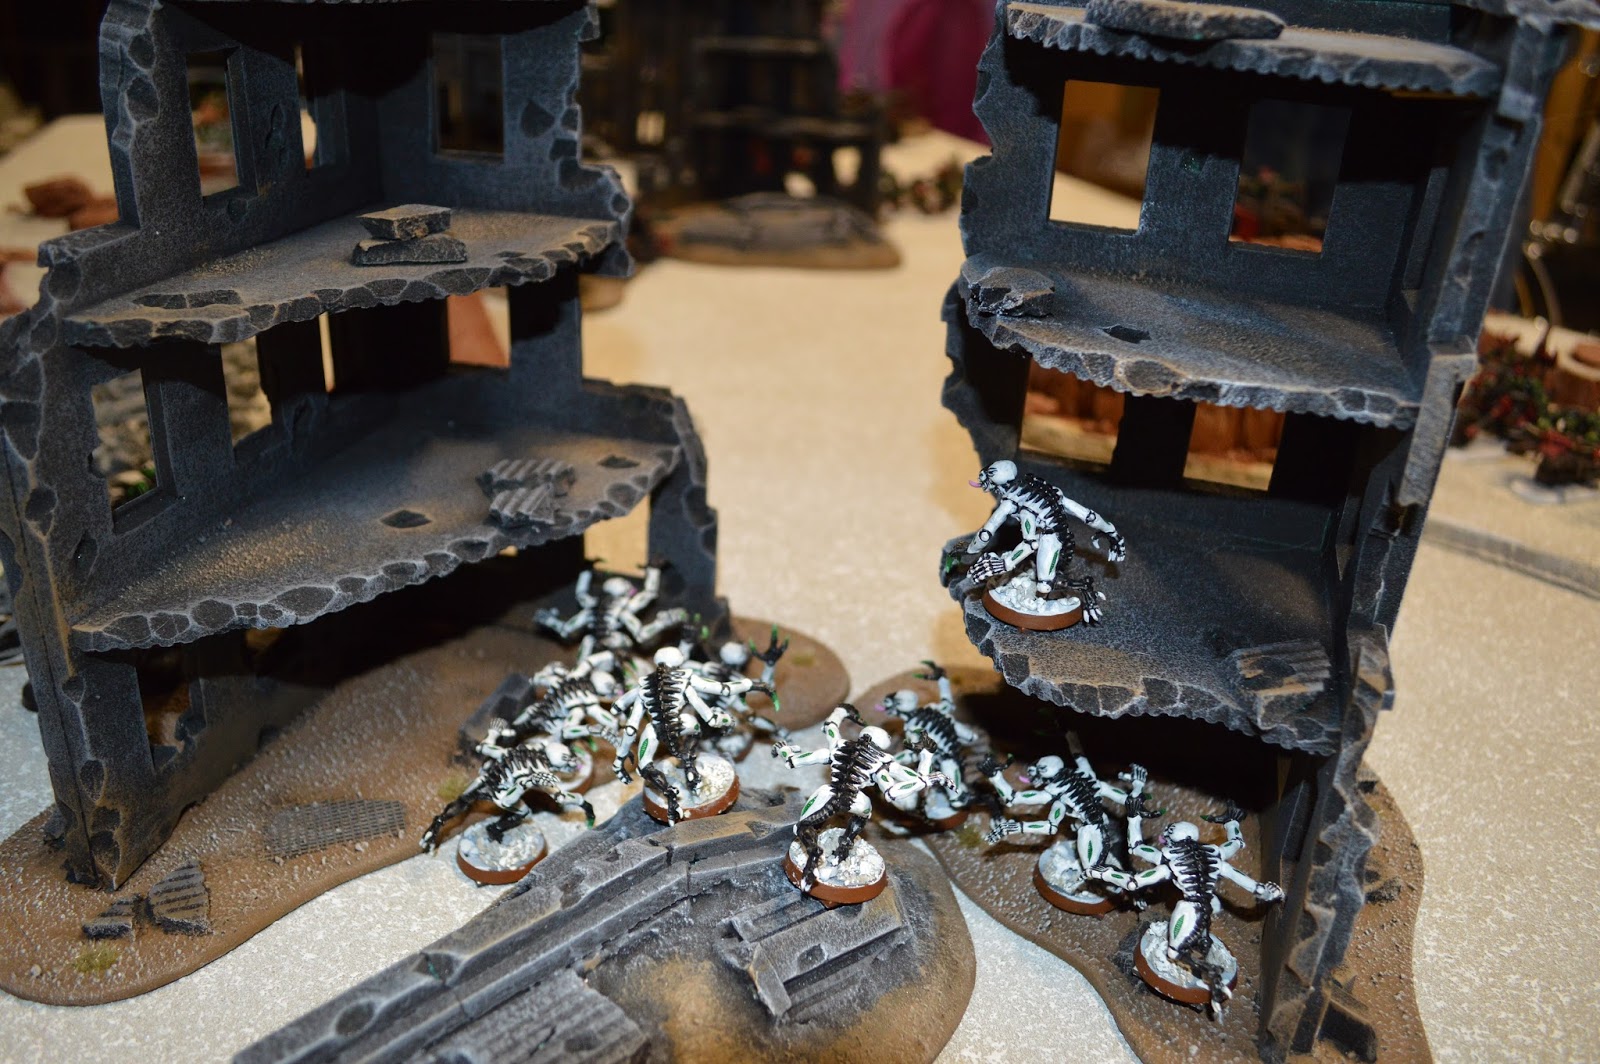 |
| Genestealers skulk in the ruins on the north end of the battlefield |
Orks Turn 1
I moved forward just slightly, knowing the tyranids would be coming straight at me and I wanted to be able to get the charges whenever possible. Without objectives to grab, I threw my first sacrificial unit straight into the middle of the table by running my Skorcha flat out into the central ruins. I was hoping the cover would give it the resilience to force Bill to stall a unit or two to deal with it or risk having his forces fried from the flanks and rear. Unfortunately, despite re-rolling dangerous terrain tests, it failed both and became immobilized and lost one of its two hull points!
Seeing that the Gorkamorka would not work here, I also moved my meganobz more into the center where they could support my shoota boyz. Meganobz are pretty slow and if their trukk gets immobilized or destroyed far from the action, they would be stranded and useless for several turns so I needed them to be closer to the center where they could stay relevant even if their fragile trukk went down.
 |
| The skorcha trakk zooms into position in the ruins and fails the dangerous terrain test and re-roll to become immobilized! |
As usual for orks, I didn't have much shooting within range on turn 1 and most of it missed. The only casualties inflicted were two genestealers in the northern ruins.
 |
| The warbiker gang rolls forward slightly and unleashes a storm of dakka on the genestealers in the northern ruins, killing two. |
 |
| Ork turn 1: The orks re-position and move forward slightly before doing minimal damage with shooting. |
Orks: 0
Tyranids: 0
On their first turn, the forces of the hive mind wasted no time in riddling the unprepared crew of the skorcha with armor-tipped larvae, wrecking the vehicle and scoring First Blood. The mega trukk suffered a hit from the Zoanthropes' warp blast in the psychic phase and was immobilized, condemning the mega-nobz to a long walk in their heavy metal suits. The warriors fire their barbed strangler onto the tightly-packed bikes but scatter woefully far and the blast marker lands off of the table. Otherwise, turn 1 is uneventful with the entirety of the army moving at maximum speed toward the enemy.
 |
| The swarm surges toward their prey, |
 |
| The termagants unleash a stream of fleshborers into the skorcha, killing the crew and igniting the fuel tanks. |
 |
| 'Ere dey come, ladz. Let's squash dem bugs. |
 |
| The hormogaunts and genestealers race toward the bikers, heedless of the incoming bullets. |
 | |
|
Orks: 0
Tyranids: 2 (killed skorcha + First Blood)
Orks Turn 2
At this point, I was tempted to have the warbikers fire into the approaching Tyranid horde and inflict some significant damage, but I knew they could only damage one of the two broods and that there would be plenty of survivors to swamp my bikes and gut them in melee. So I fought my instincts to blast away and instead raced the bikes as far as I could to the south, deciding to lend their support to the ork right flank and leaving the Tyranid right flank with nothing to fight. Tyranids are pretty quick, but ork warbikers have speed on another level and flew safely away from the incoming melee specialists.
The nobs dismounted their immobilized trukk and moved as far as they could to support the shoota boyz.
 |
| The warbikes sweep back to the south, leaving the genestealers and hormogaunts in their dust. |
On the ork right flank, the 'ard boyz roll up in their trukk and dismount, attempting to coordinate with the shoota boyz to crush the dangerous genestealers.
 |
| The orks catch the genestealers in a crossfire, killing six. Unfortunately, the removal of so many genestealers caused the shoota boyz to fail their charge roll. They were having so much fun shooting up the bugs, they forgot they were supposed to charge in and support the 'ard boyz! |
Unfortunately, the 'ard boyz were left assaulting the genestealers alone after the shoota boyz shot themselves out of charge range with a deadly salvo. The Broodlord used a Challenge to assassinate my nob before he could strike [I forgot about "Look Out, Sir"] and the half-strength unit of genestealers was able to force a draw with my charging orks even though I killed all but the Broodlord.
 |
| The 'ard boyz charge the genestealers and the carnage begins in earnest. The first round ends in a stalemate with four wounds per side. |
Orks: 0
Tyranids: 2
Tyranids Turn 2
The Tyranid war machine unleashes its ranged might, a biker being slain by acidic death hurled by the warriors. Once again though, the large blast marker scattered 12" and off of the board. The bikers had been left tightly bunched and would have been entirely covered by the bio-cannon. The Zoanthropes again manifested warp blast but directed it toward the shoota boys, shocking four of them to death with psychic wrath. This emboldened the termagants to charge the remnants but they were outmatched. Meanwhile, the termagant brood on the northern flank fired a volley of ten fleshborer shots which took another hull point off of the mega-trukk.
 |
| One brood of termagants prepares to charge into the 'ard boyz, while another brood fires into the shoota boyz, killing one. |
 |
| His comrades slaughtered, the broodlord continues relentlessly hacking the 'ard boys to ribbons, joined by some much less powerful but nonetheless welcome minions. The orks get the worse end of it and try to fall back, but are quickly cut down by the quicker Tyranids. |
 |
| Rushing headlong into a wall of grinning green faces with machine guns is not the best strategy. A full half of the termagants are killed by overwatch fire. |
 |
| After a brief melee in which a single ork is killed, the termagants are soundly crushed. The victorious tyranids from the melee with the 'ard boyz consolidate toward the shoota boyz. |
 |
| Tyranid turn 2: The bikers thought better of taking on a full half of the tyranid army and split, forcing the nids to run lengthwise across the board to catch up. Meanwhile, the 'ard boys are killed in a sweeping advance by the broodlord. |
Orks: 1 (killed termagants brood)
Tyranids: 3 (killed 'ard boyz mob)
Orks Turn 3
At this point, I was getting a bit concerned. I was mostly cornered into the southwest quadrant and my plan of overwhelming the Tyranid right flank before the bulk of his force arrived was stalling. The meganobz were too slow and far away to contribute much this turn, the 'ard boyz were dead and the shoota boyz had taken significant casualties. Meanwhile, the Tyranid horde looked as big as ever and was closing in fast.
I knew the key to this turn (and the game) was going to be the shoota boyz. I had to neutralize both the Broodlord and the Zoanthropes, but I would have to charge whichever unit I shot at. So I used the turkk and the rokkit buggy to shoot at the Broodlord and scored a lucky hit, blasting the melee monster into chunky soup. This was huge as it allowed the shoota boyz to focus on the Zoanthropes and the bikes moved up close enough to fire into the termagants, killing half their number.
 |
| The shoota boyz fire into the Zoanthropes and charge. |
 |
| The Zoanthropes' superbly developed brains and psychic powers are no match for the ferocious assault of a mob of angry orks! |
 |
| Ork turn 3: The orks use their mobility to concentrate their forces to the south and overwhelm the Tyranid left flank. |
The ork sweep maneuver is successful and the Tyranid left flank is mostly crushed! I now had the Tyranids right where I wanted them: strung across the table lengthwise with a bunch of difficult terrain and wrecked vehicles between them and my boyz. The momentum had swung decidedly toward the orks at this point.
Orks: 4 (killed Zoanthropes and genestealer brood {Broodlord} + Slay the Warlord)
Tyranids: 3
Tyranids Turn 3
This turn saw the Tyranids surge to the south, trying to engage the main ork force.
 |
| The termagants finish off the megatrukk with fleshborer fire while the hormogaunts speed around the massive wreck. |
 |
| The bikers wheel around to face the hormogaunt charge, killing three with overwatch but the gaunts still make the charge roll and a melee ensues. |
The hormogaunts have a difficult time with the warbikers due to their high toughness and good armor saves. After losing combat slightly, they are forced to fall back due to their charge taking them just outside of synapse range!
 |
| Tyranid turn 3: The tyranid army pushes south to engage the remaining orks. The hormogaunts are seen off by the warbikers |
Orks: 4
Tyranids: 4 (killed trukk)
Orks Turn 4
Da plan was still working perfectly. In turn 4, I was able to engage and destroy two isolated Tyranid units with all of my remaining army. I moved into the ruins to utilize the cover and difficult terrain. The meganobz had a good time squishing termagants, but hungered for more challenging fights and bigger kills. They would soon get their chance...
 |
| Ork turn 4: The core of the remaining orks move into the central ruins. The greenskins wipe out two broods through a combination of point blank shooting and assault. The rokkit buggy takes down the warrior with the barbed strangler while the warbikers obliterate the hormogaunts with massed dakka. |
 |
| The warboss and his meganobz consolidate back into the ruin after squashing the last termagant in a brief assault. |
Orks: 6 (killed termagants and hormogaunts)
Tyranids: 4
Tyranids Turn 4
For the Tyranids, it was time to do or die. They could not afford to get caught in the open in a crossfire between the shoota boyz and bikes. The warriors fired into the meganobz and wounded Warboss Grimsmak before the genestealers made an enormous charge (thanks to fleet) through the difficult terrain into the massive armored orks. At the same time, the termagants take down a few shoota boyz with fleshborers and then charge. Crucially, the warriors did not make the charge.
 |
| The Tyranids charge over the rubble and into the waiting orks! |
 |
| In the dark of the ruined building, rending claws meet power klaws. |
The difficult terrain meant the shoota boyz struck first and were able to inflict heavy losses on the termagants before the Tyranids could attack. The genestealers and power klaw orks all struck simultaneously with both sides inflicting heavy damage. The warboss and two nobs were ripped apart by rending claws, leaving only a single wound on the last nob, while six genestealers were crushed and mangled by the orks in return. The Tyranids got two victory points for killing the ork warlord and were back in the game.
 |
| Tyranid turn 4: The genestealers and gaunts charge the orks in the ruins. They absolutely needed to kill the warboss and they did, but at a heavy cost. |
Orks: 6
Tyranids: 6 (killed warboss + Slay the Warlord)
Orks Turn 5
There wasn't much for me to do this turn since most of my army was tied up in melee. I swung the bikes around the wrecked trukk and fired into the Tyranid warriors, trying to weaken the unit enough that I would have a chance against them in close combat.
In the assault phase, the genestealers kill the last nob before he can strike thanks to Rending. The ork shoota boyz finish off the termagants, but the bugs had done their job of preventing the orks from moving back and shooting and instead tied them up long enough for the last genestealers and the warriors to close in!
 |
| Both melees reach their bloody conclusions. The genestealers kill the last meganob and the orks finish off the termagants. |
 |
| The surviving genestealers consolidate toward the few remaining orks. |
 |
| Ork turn 5: The bikes open up on the warriors and kill another. Each side wins one of the melees in the center. |
I managed to hold off the genestealers from charging for the first three turns, but when they finally hit in turn 4, it was just as bad as I feared as they cut down my best unit and my warlord, despite the massive advantage I had from being in the ruins; in the open, they would have killed most of my nobs before I even had a chance to make a single attack.
It was starting to look bad for the orks as I knew if the Nids killed my shoota boyz, they would get two more victory points for the mob and the painboy.
Orks: 7 (killed termagants)
Tyranids: 7 (killed meganobz)
Tyranids Turn 5
At this point, the action was so intense, that we didn't get many pictures. Shockingly, the termagants on the far south edge of the battle rallied and moved straight toward the shoota boyz, killing one. The Tyranid warriors also fire into the shoota mob and kill three more.
The genestealers assault the rokkit buggy and score a penetrating hit thanks to the rending claws, taking off a hull point and shaking the crew. But the tyranid warriors fail to make their charge into the shoota boyz due to the difficult terrain! This would leave the shoota boyz free to move shoot and charge in their own turn, able to inflict serious damage on the depleted Tyranid units. So once again, the termagants sacrificed themselves for the hive mind and charged the shootas, killing none and losing two of their own in the exchange.
We rolled for a turn 6 and got it.
Orks: 7
Tyranids: 7
Orks Turn 6
At this point, my bikers were too far away to help the shoota boyz in melee and were forced to continue to lay down fire support at the only target available, dropping another warrior. With the end of the game staring me in the face, I suddenly remembered the Linebreaker secondary objective and moved my buggy flat out into the Tyranid deployment zone.
In the melee, the termagants fail to do any damage and the last few ork boyz manage to kill one of the two remaining bugs. All that was left was for the nob with power klaw to finish off the last termagant and earn me a crucial VP. He rolled three hits and then... three ones to wound!! Aaargh!
 |
| Tyranid turn 5 and Ork turn 6: The shoota boyz and rokkit buggy survive the tyranid assault while the bikes continue to pound the warriors. The rokkit buggy races away for linebreaker. |
At this point, I knew my last few shoota boyz and painboy were likely doomed to a gruesome death in close combat with the remaining Tyranids. All I could do was hope for some unlikely dice rolls or a seventh turn where my bikes and last vehicles would have a chance to finish off a unit or two safely from afar.
Orks: 7
Tyranids: 7
Tyranids Turn 6
The genestealers and warriors charged into the last of the ork boyz and butchered them before the slower orks could strike back. They consolidated toward the buggy.
 |
| Tyranid turn 6: The remaining tyranids charge into the shoota boyz from all sides and wipe them out for two victory points. |
We rolled for turn 7 and didn't get it. End of game.
Final Result:
Orks: 8 (Linebreaker)
Tyranids: 9 (Kill shoota boyz and painboy)
Tyranid Victory!
POST-GAME ANALYSIS:
Phil (Orks):
What a fantastic game! The momentum swapped back and forth with each of us experiencing the dread of an ugly loss staring us in the face only for it to turn into the rush of excitement of turning the tide. Despite the loss, I am very happy with the way I played. When the mission was selected, I thought it would be an uphill battle as I had several flimsy units that would give up easy kill points and there were just sooo many Tyranids to kill in return. Overall, I think I played it about as well as I could, using my mobility to mostly dictate the flow of the game, but ultimately, it just wasn't enough against Bill's overwhelming numbers and ceaseless aggression. I give him credit for continuing to throw unit after unit into my lines in order to wear down my lesser numbers through attrition and try to hold me still in combat. In the end, it was the near-suicidal charge of a few termagants that pinned my shoota boyz in place for the rest of his force to finally sink their teeth into, while also preventing me from shooting in my own turn. It was an aggressive and risky move, but it paid off and was probably the key to his victory.
I feel that deployment and movement are generally the keys to victory in 40k. Just like a manager, my job is to put my units in position to succeed as I ultimately can't make them fight any harder or roll any better on the dice. In this game, I felt I mostly used my movement and charges and consolidate moves to control the flow and tempo of the game. I just couldn't quite pull it off in the end, but that makes the game no less fun and rewarding.
Ork MVP: Despite the bikes tallying up an impressive kill tally of models, pulling off a crucial feint and surviving the battle, it was the mob of shoota boyz that truly impressed throughout the entire game and almost earned me a draw if it wasn't for a three-eyed snake showing up at the wrong time! They accounted for three full kill points on their own (they killed a total of 32 models), as well as absorbing a significant amount of the Tyranid attack, thanks to Feel No Pain. Their versatility in shooting and melee makes them really useful in small games like this and their overwatch fire was devastating, allowing them to twice take termagant charges and easily come out on top.
Ork Disappointment: The 'ard boyz and meganobz both failed to have much impact, but I think it was just because the genestealers are so damn impressive in close combat! The bucket load of rending attacks just overwhelms even good armor saves. Those things are deadly.
Key Moment: I think it goes without saying that the shoota nob rolling three ones to wound with his power klaw against the last surviving termagant in Ork turn 6 was crushing! In the end, that VP was the difference between a draw and a narrow defeat.
But I never blame the dice for the result of the game, so why do I think I lost? Ultimately, it was Bill's gamble of charging those last termagants into my shoota boyz that won him the game, in my opinion. Even had I killed that termagant in my own turn, I would still have gotten charged and wiped out in Bill's turn, thus only earning a draw. The only other thing I could have done to win would have been to charge in with the bikes in the end in order to either earn another VP by wiping out a Tyranid unit or by absorbing enough hits for the shoota boyz to survive. I don't know if that would have helped or just gave him another kill point, but it was probably worth a try. If I had to do it again, I would probably leave out a buggy and maybe a trukk in exchange for more boyz (except I don't have any more shoota boyz painted!) to give me enough resilience to survive since I already had plenty of mobility.
Ultimately, Bill played a great game and used his hordes to good effect, throwing wave after wave into my lines, slowly grinding me down and eventually closing the jaws around the core of my army in the ruins. He also used his quick units to get the matchup he wanted with genestealers against my meganobz, where I was aiming for my meganobz to take on the warriors, if possible. But he had his warriors screened well with a mass of termagants and he recognized the danger enough to quickly immobilize my megatrukk on his first turn to leave my meganobz footslogging for the rest of the game, greatly reducing their threat range.
Bill (Tyranids):
I'm still trying to comprehend what just happened. I... won? I won??? After it seemed impossible, I finally managed to pull off a win. I owe it all to Tyranids being virtually unbreakable and fighting to the very last model. In fact, I had only 5 models left standing at the end. Any of them fleeing like any normal unit would have done would have cost me my victory. However, synaptic control saved the day and kept every one of my units in the fight until the bitter end.
I am obviously elated at pulling off the win and the game was a roller coaster of exciting moments for both sides. What a game! Phil's strategy of heading south from the early stages of the game and concentrating his attack on my smaller force on that side certainly made me doubt that I could catch him in time to assist my much overwhelmed troops. When my northern force finally caught up with him, the trukk wreckage and central building blocked my shooting and movement enough to further delay my attack. When I did finally engage him, his troops had hard cover and proved very tough to dislodge. I salute him and his masterly strategy which so thoroughly destroyed my once-proud horde. He controlled the battle and sucked my troops into engagements at locations he dictated. It was only due to phenomenally unlucky rolling that he didn't tie me.
Now, enough honoring the vanquished! Let's celebrate the Tyranids that made this victory possible. First off, the broodlord and his retinue once again took down many enemies in close combat and absorbed a lot of their opponent's hits. The broodlord himself killed a hefty number of Ork elites and chased down and gutted those that fled. I can't imagine an army list in which I didn't take him.
The other squad of genestealers killing the mega-nobz and warboss in a single flurry of claw strikes is an even more impressive feat, earning them my eternal respect and gratitude. Luckily, they managed to pass their 10 inch charge roll to get into close combat. If they had failed, they would have no doubt been blown to smithereens by the bikes. Such an indignity would have been almost too much to bear - shot by the bikes on turn 1 and then finished off after spending the entire middle of the game running toward the action. That would not have been cool.
I must tip my hat to the Ork driver who plowed his wartrakk into the rubble and got stuck, allowing me an easy kill for First Blood.
Tyranid MVP: Before I gush about the awesomeness of the genestealers, I should mention that the only reason I won was because of the warriors' toughness and ability to make everyone around them fearless. I would have no doubt suffered moral failures all across my battle lines without their synaptic influence. The shot up unit of termagants on the southern side of the board would have most likely been falling back at the game's end without the warriors to automatically rally them and prevent another moral check after getting nearly wiped out fighting the shoota boyz. Even a single model still standing denies my enemy the victory point.
However, the central melee between my armor crackers and Phil's heaviest unit was undoubtedly the climax of the game. If only they hadn't charged through difficult terrain, the battle would have been a crushing victory for my stealers. Only a single wounded nob would have remained to counterattack instead of the entire squad. Oh well, they *still* got the job done, squeezing in a final rending hit the next turn. The total 3 VPs earned is the highest of any squad in my army. If only they could have finished off that buggy for 4...
Tyranid Disappointment: The barbed strangler. Dumb thing scattered off the table both times it fired. I somehow managed to roll box cars and an arrow for scatter both times. What should have devastated the troublesome bikes only made their riders laugh, watching the alien weapon's huge, living projectile sail high overhead and land harmlessly.
Key Moment: Everything came down to the final moments of the battle, my desperate and tattered army remnants trying to kill enough Orks to win while keeping themselves alive to deny Phil any precious victory points. When the termagants made it into melee with the shoota boyz and their leaders but the warriors failed their charge my a mere inch, it seemed like victory was impossible. Surely the four T3 models I had just suicidally thrown at a superior force of Orks would be laughably ineffective and give Phil the VP he needed to tie me. Thankfully, his power klaw Ork was suffering from brain damage from leaping from his transport and hitting his head and totally botched his attacks. The next turn, the combined fury of the warriors and genestealers killed him before he could bring his fearsome weapon to bear again. Whew. Then, the game ended just as I had the slightest of leads. Another turn would have seen my troops being riddled with dakkagun shots yet again and likely wiped out. The dice may have been cruel in a few instances but they landed just as I needed them to at the dramatic conclusion.
The boss was dead, his muscled bulk barely visible among the armored mass of fallen meganobz and heaped corpses of their alien adversaries. The painboy was next in command but he too was down after sustaining massive lacerations across his body and trying, unsuccessfully, to operate on himself. The remaining boyz had had their fill and gunned their motors and raced away back to the camp from whence they had come. The main horde would not receive the mobile detachment they were expecting.
The Tyranid warriors and genestealers that remained from the assault brood stood motionless, devoid of the celebratory emotions that might have gripped another being in their situation. The field of victory brought no satisfaction to these unfeeling killers. Soon, a hive ship, the same one that had initially dropped them onto the planet's surface and soon afterward fired a bio-plasma volley at the frontmost ork vehicle, came slowly into view. It hung low in the snowy air and eventually hovered closely overhead. Hundreds of rippers began to pour forth, swarming across the carnage left behind by the violent encounter, and greedily devouring all of the flesh and bone they could. As they reached their limit, they returned to their parent vessel and deposited all the bio-mass into the bank for producing future broods. Even the surviving Tyranids were quickly devoured and re-absorbed for use in another battle. Soon, nothing remained except twisted metal and empty armor.
No comments:
Post a Comment