"Preservation lies in the defense, but the possibility of victory lies only in the attack."
- Khan Turan Jorma,
Brotherhood of the Wind,
White Scars Legion
Campaign To Date:
It has been about 40 years since a combined force of Sons of Horus, Death Guard, and White Scars brought the Xhorik System into compliance during the Great Crusade. The major population centers of the largest continent were quickly brought under Imperial control in the typical fashion: a series of pinpoint attacks of overwhelming force by the Legions against the enemy's strong points, followed by rapid surrender. Due to the richness of the primary planet and the strategic location of the system on a sort of crossroads of warp currents, small garrisons of the Death Guard and White Scars legions were left on the planet to oversee the tithes of men and material to the Great Crusade and to help eradicate the threat of large ork populations in the eastern wastes.
With the advent of the Horus Heresy, the Warmaster ordered that the Xhorik System be taken to act as a way station for resupply on his long march to Terra. The Death Guard and their human allies on Xhorik Prime launched an attack on the White Scars and their allies, the Stratocracy of Kozar.
In Phase 1 of the campaign, the Traitors pushed the Loyalists from the war-torn border city of Bielyr in a series of bloody street fighting.
In Phase 2, the war escalated across the badlands of the Valbaara Plateau in several pitched battles. In the end, the Brotherhood of the Wind was defeated and their leader Praetor Zherdan was killed by the Death Guard.
Phase 3 of the Campaign for Xhorik Prime finds the battered Loyalists unable to stand against the Death Guard heavy armor and so they are resorting to guerrilla tactics as the Traitor army advances north toward the major cities of Kozar. This phase will culminate with a large Traitor assault on a fortified Loyalist city. There will be four missions that will impact the deciding battle of the phase.
PRE-GAME AND MISSION:
The defender selects an army of 3000 - 3500 points and splits his forces into two parts: Sentries and Reserves. Only units with the Infantry or Artillery type may be selected as Sentries. At least one HQ and one Troops choice must be included. This portion of the army can cost up to half the army total points cost and may be deployed anywhere up to 6" in front of the city walls. The HQ unit must be deployed inside a piece of ruins designated as the Defenders Headquarters. The Defender Reserves force starts in Reserve as normal and enters using the normal rules for those units. The Warlord may be part of either force.
The Attacker can select an army of 3500 - 4000 points following the normal army selection rules. Any points chosen in excess of the Defender's total must start in Reserve and are ineligible to enter on Turn 1 even if normally allowed to do so. The Attacker may deploy any units with Infiltrate as per the normal rules. The Attacker automatically goes first (no chance to seize the initiative) and may move as much of his army onto the table from his board edge as desired. Any unit with the Deep Strike rule that is chosen to enter the table on Turn 1 may deploy using Deep Strike on Turn 1. Any unit that does not enter the table on Turn 1 starts in Reserves as normal. The Attacker's army can include a Lord of War.
There are three primary objectives: the gate, the loyalist headquarters and the defensive artillery platform. Holding an objective at the end of the game is worth 3 VPs. Or the attacker can earn 2 VPs for destroying the gate or the artillery platform (the headquarters must be held). Holding a destroyed objective at the end of the game is still worth 1 VP. Secondary objectives: Slay the Warlord (1 VP) and Annihilation (whichever side destroys more points worth of enemy units gets 1 VP). Additionally, the Attacker can earn Line Breaker (1 VP) and, as always, the Defender can earn The Price of Failure (1 VP) if they destroy the Attacker's Lord or War.
Gate: AP 14, 5 Hull Points, fortification damage table. If you control the Gate Controls at the start of your turn, you may choose to open or close the gate. The Gate can still be attacked in the open position. The Gate controls count as the objective for holding purposes.
Artillery Platform: AP 14, 5 Hull Points, fortification damage table. Any units on the platform count as being on the ramparts. Any artillery units on the platform can re-roll scatter.
Command Post: Uses standard rules for a ruin. Any unit (of either side) in this ruin may re-roll failed morale and leadership tests.
City Wall: This counts as a terrain piece and not a fortification. Units on the wall receive a 3+ cover save from the front a 6+ cover save from behind. Multiple units from opposing sides may simultaneously be on the walls. Although not a fortification, the walls can be attacked. AP 15, 5 Hull Points (Mighty Bulwark). If destroyed, a 5" x 5" hole opens through the wall. The ramparts are unaffected.
The battle lasts for a minimum of six turns. At the end of the sixth turn, there is a seventh turn on a roll of a 4+. The Attacker determines if Night Fighting is in effect in Turn 1. No need to roll.
Additionally, the four games already played have an impact on this battle.
(1) The Conclave of the Damned: If the traitors win, they have successfully coordinated their assault in the final battle. One unit from the allied detachment (and any transport) gains Outflank and the allied detachment counts as "Sworn Brothers".
(2) The Boarding of the KVS Defiant: If the Traitors win, they control geosynchronous orbit above the city and can launch bombardments (as per the Damocles Command Rhino) at the start of the shooting phase of their first two turns. Also, one unit of Terminators gains Deep Strike.
(3) Night Raiders: If the Traitors win, they have successfully defended their depot of war materiel and can use the supply lines to push their attack farther. The attacker can re-roll the result when determining if the game ends.
(4) The Road to Berat: If the Traitors win, they have successfully blitzed the approach to the city. The attacker can select three units to gain the Scout rule and move on from their table edge prior to Turn 1. The attacker can also re-roll reserves rolls.
The Traitors won battles 2 and 4 and would gain those advantages in this game.
ARMY SELECTION:
Traitors - Pete
Death Guard
- Preator Wolfgang: terminator armor, volkite charger, paragon blade, digital lasers, fearless, It will not Die
- Tactical Squad Folterer: 10 marines with close combat weapons, sergeant with power first and artificer armor. In a Rhino APC with a pintle mounted heavy flamer.
- Tactical Squad Toddestraffe: 14 marines with close combat weapons, sergeant with power fist and artificer armor and Apothecary Gerhard
- Tactical Support Squad Blitz Schock: 7 marines with volkite calivers
- Heavy Support Squad Feuer Sturm: 7 marines with missile launchers and Apothecary Gerhard
- Contemptor Dreadnought Friedrich with multimelta, melta gun and close combat weapon
- Legion Fellblade Super Heavy Battle Tank Welt Zerstörer
World Eaters
- Tactical Squad Hell Hounds: 17 marines – 16 with bolters, bolt pistols and chain axes. 1 sergeant with artificer armor, power fist and plasma pistol
- Chaplin Zungarz: Artificer Armor, plasma pistol, refractor field, crozius arcanum
- Reconnaissance Squad Butcher's Eyes: 5 marines with power armor, sniper rifles, cameleoline
- The Red Butchers: 1 Devoured with dual chain fists, 4 Butchers with dual power axes
- Land Raider Phobos Flesh Grinder: side sponson twin-linked lascannons, twin heavy bolter, armored ceramite, machine spirit
- Contemptor Dreadnought with twin-linked lascannon and chainfist
- Unending Slaughter: Terminator squad with lightning claws
Army of House Harkhathe
- Grenadiers The Hero Hammers: 15 grenadiers with 2 plasma guns
- Support squad with 2 missile launcher teams and 3 lascannon teams
Loyalists - Phil
White Scars Brotherhood of the Wind
- Khan Turan Jorma: jetbike, glaive, cyber hawk
- Centurion with glaive
- Skyhunters: 6 jetbikes, 2 x volkite culverin
- Outrider Squad Tsujen: 5 Outriders with plasma, sergeant
- Tactical Squad Temgar: 10 marines, sergeant has power glaive, artificer armor
- Tactical Support Squad Khoer: 8 marines with plasma guns, with drop pod
- Ebon Keshig: 10 terminators, 8 power glaives, 2 power fists, 1 melta gun
- Sicaran Omega Tank Destroyer Kharvaak: lascannon sponsons
Kozar Army, Berat Garrison
- Captain Xhaer, plasma pistol, power sword
- Command squad: 6 veterans, medi pack, missile launcher, plasma gun, carapace armor
- 2nd Platoon, 3rd Company
- Infantry squad: 10 infantry with grenade launcher
- Valkyrie with heavy bolter sponsons, lascannon, Hellfury missiles
- Infantry squad: 10 infantry with melta gun
- Special weapons squad: 6 infantry with 3 melta guns
- Special weapons squad: 6 infantry with 3 melta guns
- 2 x Sentinels with multi-meltas
- Veteran squad: 10 veterans with carapace armor, 3 sniper rifles, 1 missile launcher
- Tauros with grenade launcher
- 3 x Tarantulas with twin-linked lascannon
Imperial Fists
- Terminator Squad Stalwart Blade: 5 marines with plasma blaster, volkite charger, two power fists, chainfist, lighting claw
++++++++++++++++++++++++++++++++++++++++++++++++++++++++++++
++++++++++++++++++++++++++++++++++++++++++++++++++++++++++++
BATTLE:
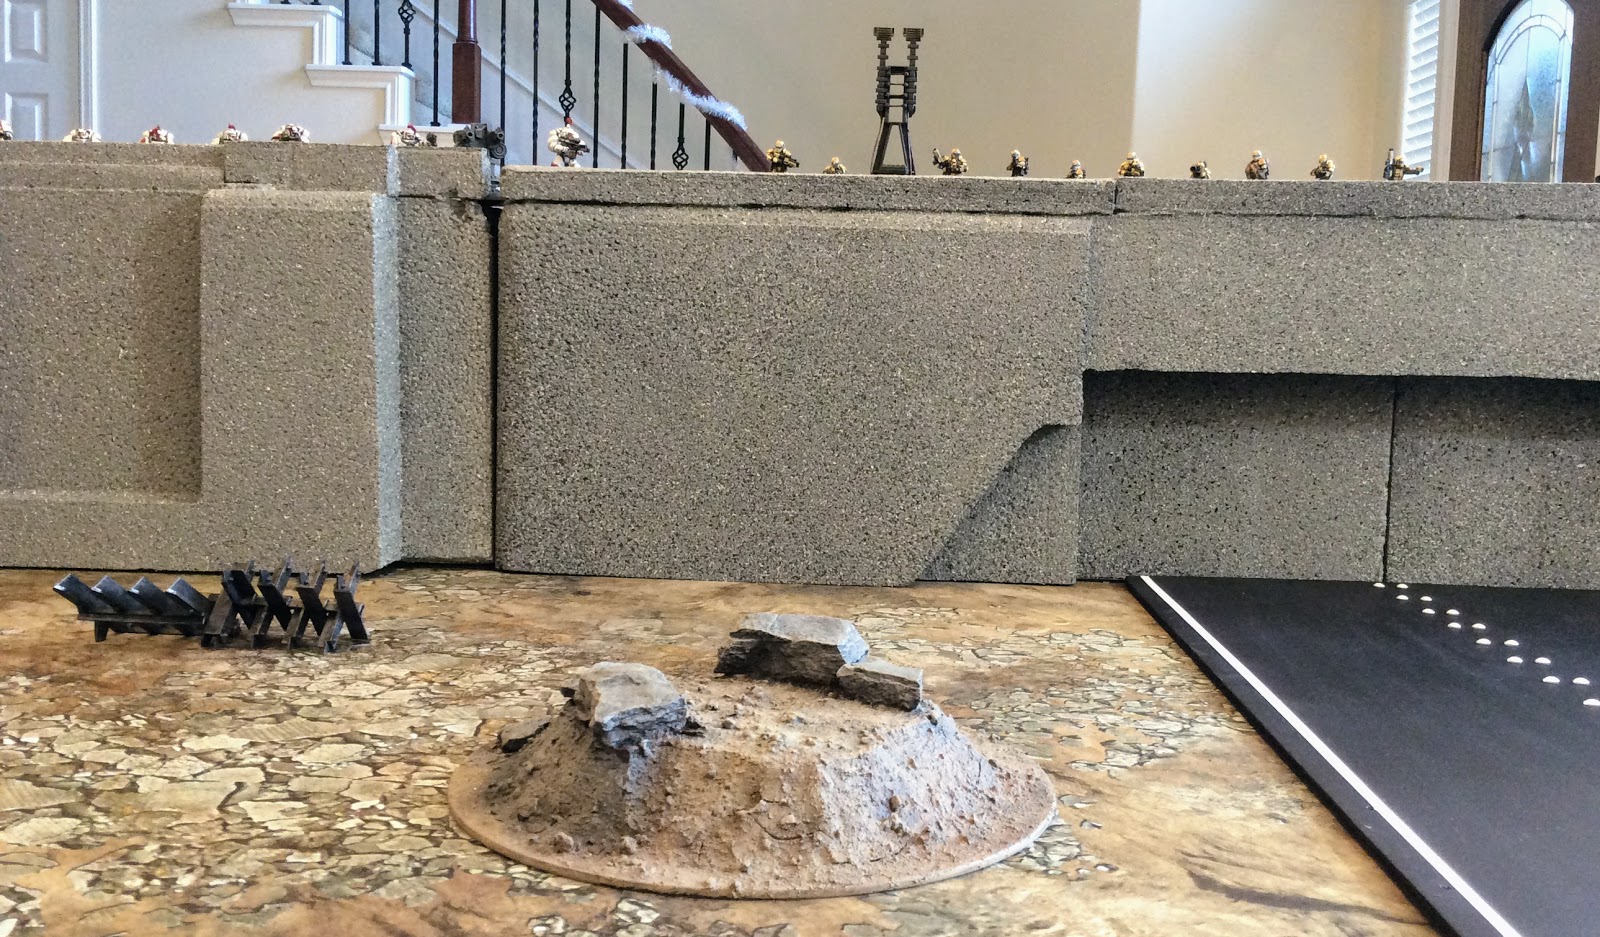
Assault on the Walls of Berat
 |
| Battlefield overview. Objectives shown in green. |
 |
| Aerial view of the battlefield from the east, prior to deployment. The main gate of Berat is closed. |
 |
| The defenders guard the gate controls. |
 |
| Kozar Army veterans patrol the battlements alongside tactical marines of the Brotherhood of the Wind while Tarantula sentry guns are stationed in the foreground. |
 |
| View from city (western) side of the wall. Terminators wait inside the walls to defend any breach. |
 |
| Warriors of the Ebon Keshig prepare to be the first to counterattack if the enemy breaks through the gate. |
 |
| Only through the heroics of glorious combat can these tarnished heroes regain their honor. |
 |
| The small contingent of Imperial Fists also await the enemy just inside the gates. |
 |
| Captain Xhaer and his command squad use this ruin as a front-line command post. |
 |
| Kozar soldiers await the coming storm. |
 |
| One of the city defense turrets armed with an Earthshaker cannon. |
 |
| To the White Scars, defending a wall holds little appeal but they know their duty. |
 |
| The defenders can see the oncoming dust cloud of the Traitor army approaching. |
 |
| World Eaters Recon Squad, The Butcher's Eyes, surprises the defenders by infiltrating their positions atop the wall! They start the attack by dropping two White Scars marines with well-placed head shots. |
 |
| At the same time, an orbital barrage rains down on the defense turret, owing to the traitor fleet in geosynchronous low orbit over the city (due to their victory in The Boarding of the KVS Defiant). Some crew are killed and the gun is damaged, but the crucial heavy weapon remains capable of firing. |
 |
| Traitor forces use the highway to march onto the battlefield early due to their victory in The Road to Berat. |
 |
| Their unexpected arrival lets the heavy weapons teams setup firing positions quickly and start laying down covering fire for the rest of the advance. |
 |
| The World Eaters Contemptor dreadnought also uses the road to push ahead of the main advance, in an attempt to breach the wall with its chainfist. |
 |
| The rest of the Traitor army arrives and the attack begins in earnest. |
 |
| The White Scars man the sentry turrets and watch the massive Traitor force advance. |
 |
| The defenders watch the giant Fellblade approach and can only hope their walls will hold. |
 |
| The defenders are vastly outnumbered, but reserves are on the way. |
 |
| Traitor heavy weapons pound the defenders from a distance, destroying several sentry weapons. |
 |
| An enormous blast cascades over the din of the battle as the twin-linked Accelerator cannons score a direct hit and blow the gate wide open with a single shot! |
 |
| From inside the city, the defenders have a view of the mighty Fellblade through the smoke and burning rubble. |
 |
| The Contemptor runs through the tree line, heading straight for the wall to force a second opening. |
 |
| The defenders return fire with the Earthshaker turret but the indirect fire just misses the Death Guard tanks. |
 |
| The first reinforcements arrive via drop pod. Tactical Support squad Khoer quickly clear The Butchers' Eyes from the ramparts with a volley of plasma fire. |
 |
| The defenders fire off a few shots from the walls but inflict no serious damage. |
 |
| A second orbital barrage rains down from the Traitor fleet, killing several marines of Squad Khoer. |
 |
| The Traitor forces surge toward the walls. |
 |
| The Contemptor's chainfist starts carving a hole through the ferrocrete wall. Within minutes, a tunnel is cut through to the other side. |
 |
| Along the road, the attackers advance slowly and keep the Fellblade screened on the flanks and rear, wary of the expected Kozar counter attack from the skies. |
 |
| The attackers fire does only modest damage to the defenders, thanks to the cover of the ramparts, but the Traitors have already forced two openings in the city defenses, one on each end of the battlefield. |
 |
| The rest of the Loyalist reinforcements finally arrive, racing toward the destroyed gate and the torn-open wall. |
 |
| A Valkyrie screams over the city and fires its Hellfury missiles through the open gate at the attacking vehicles, but does no damage. |
 |
| Khan Turan Jorma and his Skyhunters also arrive and prepare to kill anything that comes through the gate. |
 |
| The recently-repaired Sicaran Omega Tank Destroyer Kharvaak races into action and begins firing on the attackers through the gaping hole in the wall. |
 |
| The surviving members of Squad Khoer also lend their fire to bringing down the Contemptor making its way through the tunnel. |
 |
| Most of 2nd Platoon (3rd Company of the Kozar 87th Drop Troops regiment) land perfectly as part of a desperate counter attack to turn back the Traitors' southern thrust. |
 |
| Their melta weapons prove deadly at point blank range and the Contemptor is destroyed with assistance from the White Scars inside the walls while supporting fire from Outrider Squad Tsujen helps bring down the World Eaters terminator squad. |
 |
| The Kozar infantry open fire on the Traitor grenadiers. |
 |
| The dreadnought and the terminators are destroyed, stalling the Traitor advance and giving the Loyalists some breathing space on the southern flank. |
 |
| The drop sentinels also land on target and fire at the weaker side armor of the Fellblade, but the armored ceramite protects the super heavy tank from their melta weaponry. |
 |
| The brave crew of a Tauros assault vehicle attack the Legion Rhino head-on, but cannot inflict any damage with their krak grenades. |
 |
| Kozar veterans continue to rain down lasgun and sniper rifle fire on the attackers to little effect. |
 |
| Marines of Tactical Squad Temgar keep their heads low and take snap shots at the huge enemy force below. |
 |
| The Loyalists launch a viscous counter attack that deals heavy damage to the traitors' southern assault force, but they have failed to inflict any significant damage on the main force along the highway. |
 |
| Early battle overview: The Traitors advance slowly and break two holes in the city defenses while the Loyalist reserves arrive and blunt the Traitors' southern offensive. |
 |
| With the Loyalist counter attack now committed and no more threat of a rear or flank strike, the tank column moves boldly forward toward the gate. The Fellblade fires on the Outriders, destroying two. |
 |
| The sentinel pilots are brave but their machines are no match for the World Eaters' Land Raider. |
 |
| Praetor Wolfgang and his Death Guard advance through the tree line alongside his auxiliary allies. |
 |
| A salvo of point-blank bolter and lasgun fire wipes out two squads of the Drop Troops' 2nd Platoon. |
 |
| The auxiliary heavy weapons continue to pound the defenders from afar, forcing them to keep their heads down. |
 |
| The attackers quickly deal with the Loyalist counter attack and continue their slow advance toward the gate. |
 |
| The main thrust of the Traitor assault is slowed by the Loyalist strike but they continue to move inexorably forward. |
 |
| Through the gate, the city defenders can see the giant Fellblade and the terrifying, blood-splattered Land Raider slowly approaching. |
 |
| Squad Tsujen has helped to dramatically slow the southern arm of the Traitor attack. Realizing this flank is temporarily secure, the Outriders decide to lend their firepower to the defense of the main gate. They race back through the hole in the wall and head north. |
 |
| The first infantry squad of 2nd Platoon jumps from their Valkyrie so they can support their leader in holding the command post. |
 |
| The Valkyrie and Earthshaker continue to fire on the approaching Death Guard vehicles. |
 |
| The Valkyrie's lascannon does no harm, but the Earthshaker finally manages to damage the Land Raider. |
 |
| The crew of the Tauros race and skid around the enormous battle tanks, willing to give their lives to slow the Traitor advance. |
 |
| The Tauros launches krak grenades into the Rhino, causing damage but not enough to stop the transport. |
 |
| The last of the Kozar Drop Troops outside the walls continue to fight, killing a few marines with melta gun fire. |
 |
| The mighty Fellblade finally leads the charge through the destroyed gate, using the extra speed enabled by the road. |
 |
| The attackers have finally entered the walls. |
 |
| The waiting Ebon Keshig are blasted by the twin Accelerator cannons before they can assault. Several men are incinerated. |
 |
| The Tactical Support Squad use their Volkite weapons to finally kill the brave crew of the Tauros. |
 |
| Likewise, the Death Guard tactical marines advance and finish off the Drop Troopers outside the walls. |
 |
| The Traitors have fully eliminated all threats outside the walls and are now pushing into the city. |
 |
| The defenders prepare to launch their final counter attack with everything they have on the first attackers through the gate. |
 |
| The Outriders race to support the defense of the gate, while the Kharvaak fires everything at the Fellblade, inflicting slight damage on the near-unstoppable war machine. |
 |
| The surviving Ebon Keshig decide this is their chance for redemption and prepare to assault the Fellblade. |
 |
| The Imperial Fists and Ebon Keshig spring their trap and assault the tank from both sides, attacking with melta gun, plasma blaster, power fists and a chain fist. They penetrate the armor over and over but its not enough! |
 |
| The defenders throw everything they have against the Fellblade but they cannot stop it... |
 |
| The last of the Kozar veterans on the wall continue to hold the gate controls while hopelessly firing on the attackers streaming through the gate. The Valkyrie continue to hover and fire at the Fellblade. |
 |
| Mid-battle overview: The Traitor southern offensive stalls in the face of heavy resistance, while the northern offensive on the road finally pushes into the city. The defenders launch a ferocious counter attack but cannot destroy the super heavy tank. |
 |
| The auxiliary grenadiers run through the hole in the wall created by the Contemptor before it was destroyed. The Traitors have now penetrated the defenses in two places. |
 |
| At the main gate, the Land Raider opens its maw and the Red Butchers emerge in a frenzy to kill. |
 |
| The mass of Traitor marines charge through the gate toward the overwhelmed defenders. |
 |
| Massed firepower brings down three of the Loyalist terminators before the Traitors launch their assault, tipping the numbers even more in their favor. |
 |
| In an attempt to regain their honor, the last of the Ebon Keshig fight to hold the gate for as long as possible. |
 |
| The Imperial Fists face a mass of World Eaters along with the Contemptor Dreadnought Friedrich. |
 |
| In the end, all of the outnumbered Loyalists are struck down by the ferocious attackers. |
 |
| The Fellblade destroys the Sicaran Omega. With the loss of the battle tank and the Terminators, the Loyalists have lost their entire left flank and nearly all of their limited anti-tank weapons, leaving the Traitor vehicles in a dominant position. |
 |
| Khan Turan Jorma and his Skyhunters emerge from behind the ruins to strike at the Red Butchers. |
 |
| The Skyhunters combine their fire with the Outriders against the Butchers, but the tactical dreadnought armor lives up its reputation and only one of the beasts is felled. |
 |
| The Valkyrie soars forward over the wall to avoid being assaulted by the Traitors below. |
 |
| The Earthshaker drops a shell on the World Eaters as they run through the gate, killing a few. |
 |
| The Valkyrie lays down supporting fire in an attempt to save the last of the Kozar troopers holding the gate controls. |
 |
| With the path to the Loyalist front line command center open, the Traitors charge forward, filled with bloodlust. |
 |
| The Fellblade continues its rampage unchecked and destroys the defense platform housing the Eartshaker turret, achieving another of the attackers' objectives. Survivors crawl from the wreckage and fight on out of hatred. |
 |
| Jorma rallies the last of his forces and they converge near the command post for a final desperate counter attack. |
 |
| All of the remaining Loyalists combine their fire on the advancing Traitors, killing several but they cannot turn back the tide. The Loyalists can only desperately hope for the Traitor assault to stall due to lack of ammo and fuel, but it was not to be. |
 |
| The Red Butchers and Contemptor Friedrich assault the Loyalist command post overwhelm the few outmatched defenders just in time before the last of their fuel and ammo runs out. |
 |
| The Loyalists still hold the controls to the destroyed gate and the destroyed defense platform, but it is clear the fight is lost. |
 |
| The Traitors have destroyed the gate and the artillery platform and have taken the command post, giving their reserves an open route into Berat. The remaining Loyalists grudgingly fall back in preparation to mount a guerrilla defense of the city. |
 |
| Late battle overview: The main Traitor force smashes aside the defenders at the gate and just barely has time to push on to the command post and destroy the defenders. Their heavy vehicles prove the difference-makers as the Loyalists lack the heavy weapons and armor of their own to stand against them. |
Traitors: 6 VP
Destroyed the gate: 2 VP
Destroyed the artillery platform: 2 VP
Annihilation: 1 VP (Units destroyed 13 - 3!)
Linebreaker: 1 VP
Loyalists: 2 VP
Hold the gate controls (destroyed): 1 VP
Hold the artillery platform (destroyed): 1 VP
(No one held the command post as the Traitors only had Elites near the objective.)
Traitor Victory!
The Traitors win the third phase of the campaign, taking all three phases so far with a total combined record of 10 - 5 over the Loyalists in the main battles.
POST-GAME:
Loyalist Post-Game Analysis:
Phil: With over 7000 points of painted models and 33 square feet of painted terrain, that was definitely the largest and most cinematic game of Warhammer we have ever played, a fitting culmination to our Third Phase of the campaign. I think the design for this phase was fun and thematic where the preliminary battles give particular advantages in the final deciding game, which really ties them all together. And the final scenario worked out well, being pretty balanced and giving an opportunity for some interesting tactical choices from both players. Does the attacker blitz right away with potential Scout, Deep Strike and Outflank attacks to hit the defender before his reserves have arrived? Or does he keep his forces together with a slow and steady approach? Does the defender launch a counter attack outside the walls to hold the attacker back long enough that he runs out of time to reach the objectives? Or does he keep his forces inside the walls in an attempt to create an impregnable defensive shell? With Pete's and my very different play styles, I think this scenario could look quite different if played in reverse roles!
From a tactical standpoint, things went mostly according to plan. I was able to parry Pete's secondary offensive along the southern flank and then use my mobility to send the Sicaran and the surviving Outriders up to support the defenses at the Gate. I made a concentrated effort to destroy the Fellblade, focusing my fire on it from Turn 1 and then throwing everything I had at it on Turn 4 when it entered the gate: three lascannons, Omega Plasma Array, missile launcher, melta gun, plasma blaster from the rear, 12 power fist attacks, and 3 chain fist attacks, but it wasn't enough. That was the deciding moment. Had the Fellblade been destroyed, I would have still had a tough time with the Land Raider, Butchers, remaining Contemptor and a mass of tactical marines, but with the Sicaran Omega, Outriders, Skyhunters, Valkyrie and Earthshaker, I would have had a chance. As it was, the Fellblade survived and then proceeded to destroy both the Sicaran Omega and the Artillery Platform, eliminating the last of my heavy weapons. Between the armored ceramite on the Fellblade and Land Raider and Pete's screening force all around the Fellblade, my Deep Striking melta guns and plasma guns would have been unable inflict any damage on the super heavy vehicle and had to settle for destroying a dreadnought and terminators instead. With the armored ceramite, the Fellblade just proved too tough.
The risk of Pete's conservative strategy of hugging the board edge until I committed my reserves was that he barely had time to reach the command post objective by Turn 7, only making it because of the extra movement granted by the road and my inability to hold him at the gate for more than a turn. My counter attack in Turn 2 did slow his vehicles a bit, but in hindsight maybe I should have thrown more at the tanks to bog them down even more.
The biggest disappointment of the game was the Ebon Keshig: 485 points and they were wiped out without killing a single model in return. Its difficult to pick an MVP as none of my units really dominated. The Drop Troopers get a nod for their very effective drop that contributed to the destruction of the World Eaters Contemptor and Terminators, but they had a lot of help from three White Scars units. The award may have to go to the Drop Trooper Veteran Squad on the wall that held the Gate controls for six turns, using some great cover save rolling to absorb turn after turn of Pete's firepower, only finally falling when Pete fired at them from inside the wall. But they forced Pete to spend a lot of effort on them and holding that VP meant Pete had to be more aggressive to get his own VPs. When they were finally killed, the last White Scars tactical marines took their place on the objective.
In the end, this was a very enjoyable game with plenty of action that allowed units from both armies to shine
After going 0 - 3 in the first three phases of the campaign, the fourth phase takes on a particularly dark and desperate feel for the Loyalists. If they lose the next phase, we should probably just end it there and call the campaign a crushing victory for the Traitors.
Traitor Post-Game Analysis:
Pete: That was the most amazing battle I’ve ever seen. Hands down. I can’t believe that we just put that experience together. The terrain, the models, vehicles – truly epic! And I gotta say Phil really went above and beyond with the city wall and removable gate.
As for my strategy in the battle, I’m not sure if my conservative nature was the reason I won or the
reason I nearly lost. If I didn’t hustle it at the end I wouldn’t have contested the command post or
destroyed the artillery platform. I spent so much time planning a strategic entrance through the gate for the Fellblade, supported by the Butchers and Tactical Squad Folterer, that I might have taken too much time creeping up the road. However, I feel like if I would have shot Big Bertha forward as fast as possible, unsupported from the rear and open to Phil’s Drop Troopers and Bikers, the Fellblade would have had a lot more HP removed before being assaulted by the terminators. Equating to a fiery, burning wreck and a ridiculous amount of defenders to try to defeat with what would be left of my right flank.
So again, I truly feel that being too aggressive would have led to defeat.
My left flank was never all that likely to be the origin of the winning stroke. But A) there were too many models in a 7,500 point game to congregate them all on one side of the table, and B) there had to be some kind of distraction to keep Phil concerned that they could be a major problem if he didn’t take them seriously. When the dreadnaught and lightning claw terminators were gunned down into melted goo pretty early, it was worrisome, but not crippling to the end goal.
I’m surprised at how little the heavy weapons teams did against the defenders on the city wall. Volley
after volley, those damn defenders just shrugged it off. If we ever switch sides and I get to line the walls with Death Guard – it’ll be a magnificent nightmare for any would be attackers.
Now I’m looking forward to campaign Phase 4, inside the city of Berat, fighting street by street for
ground and key objectives. Sewers, zone mortalis, inside buildings and factories – I’m sure we can make it a very memorable phase, and a lot of fun!


The quote in the beginning is true. Only the attacker can win (in these games)... I'm completely out of ways to write "another beat down to the loyalists". I was on the edge of my seat as the immortal fellblade stuck it's neck through the hole and got double assaulted by terminators but the phone slid wearily from my hand as it repulsed both squads and continued blasting every objective in sight. You'll never get an opportunity like that again; the fellblade willingly driving in an ambush after getting shot w everything you've got. If you could have destroyed it, it would have forced Pete to use it more conservatively in future games but nope.
ReplyDeleteThe worst thing about Super Heavies is that they are 100% full strength until destroyed. No Immobilized, Weapon Destroyed, or even Crew Shaken to slow it down or limit its effectiveness. So doing 10 HP of damage to it is the same as doing 0 and all of that effort is completely wasted, where it could have been spent destroying other stuff. If I rolled 10 times on the damage table, I am sure I could have immobilized it and destroyed a few weapons so that it would not have been able to dominate for the last few turns.
DeletePhotos were great again. I loved the one of troopers leaping from the Valkyrie. Great effort and a masterpiece of visual appeal but another uninteresting read. Things almost seemed to be going your way until near the end when two new heavy squads and another dreadnough appeared to drive home how miserable the situation was. Your deep strikers and fast units once again were wasted sitting in your deployment zone, flailing helplessly at Pete's unshakable offense.
ReplyDelete