Campaign To Date:
It has been about 40 years since a combined force of Sons of Horus, Death Guard, and White Scars brought the Xhorik System into compliance during the Great Crusade. The major population centers of the largest continent were quickly brought under Imperial control in the typical fashion: a series of pinpoint attacks of overwhelming force by the Legions against the enemy's strong points, followed by rapid surrender. Due to the richness of the primary planet and the strategic location of the system on a sort of crossroads of warp currents, small garrisons of the Death Guard and White Scars legions were left on the planet to oversee the tithes of men and material to the Great Crusade and to help eradicate the threat of large ork populations in the eastern wastes.
With the advent of the Horus Heresy, the Warmaster ordered that the Xhorik System be taken to act as a way station for resupply on his long march to Terra. The Death Guard and their human allies on Xhorik Prime launched an attack on the White Scars and their allies, the Stratocracy of Kozar.
In Phase 1 of the campaign, the Traitors pushed the Loyalists from the war-torn border city of Bielyr in a series of bloody street fighting.
In Phase 2, the war escalated across the badlands of the Valbaara Plateau in several pitched battles. In the end, the Brotherhood of the Wind was defeated and their leader Praetor Zherdan was killed by the Death Guard.
Phase 3 of the Campaign for Xhorik Prime finds the battered Loyalists unable to stand against the Death Guard heavy armor and so they are resorting to guerrilla tactics as the Traitor army advances north toward the major cities of Kozar. This phase will culminate with a large Traitor assault on a fortified Loyalist city. There will be four missions that will impact the deciding battle of the phase.
PRE-GAME AND MISSION:
The third battle of the phase represents a raid by the Loyalist forces on a Traitor outpost and supply depot. The Loyalists are trying to capture and destroy enemy supplies in order to reduce the Traitors' ability to wage war and assault the city. This is a scenario from the Taros Campaign. Each player takes turn places objectives. The defender (Traitors) deploys anywhere within 12" of any of the objectives and chooses a table edge. The attacker does not deploy, but can move on any units from their table edge at the start of Turn 1, including Deep Striking with units that have that ability. Each objective is worth 3 VPs at the end of the game. Secondary objectives are Slay the Warlord and First Blood. The special rule is "Night Raid", which means the Night Fighting rule is in effect for the first 3 - 4 turns.
ARMY SELECTION: 2000 Points
Traitors - Pete
Death Guard
- Tactical Squad Folterer: 10 marines with close combat weapons, sergeant with power fist, artificer armor, rhino with heavy flamer
- Tactical Squad Toddestraffe: 14 marines with close combat weapons, sergeant with power fist, artificer armor
- Tactical Support Squad Blitz Schock: 7 marines with volkite calivers
- Heavy Support Squad Feuer Sturm: 7 marines with missile launchers and Apothecary Gerhard
- Contemptor Dreadnought Jürgen: multi-melta, melta gun, dreadnought close combat weapon
World Eaters
- Chaplain Zungarz: with power weapon and plasma pistol
- Tactical Squad Hell Hounds: close combat weapons, sergeant with power fist, plasma pistol and artifcer armor
- Recon Squad Black Vultures: with sniper rifles
- Contemptor Dreadnought Delrog the Diabolical: twin-linked lascannon, melta gun and chain fist
Army of House Harkhathe
- Grenadiers The Hero Hammers: 15 grenadiers with 2 plasma guns
Loyalists - Phil
White Scars Brotherhood of the Wind
- Khan Turan Jorma: jetbike, glaive, cyber hawk
- Skyhunters: 6 jetbikes, 2 x volkite culverin
- Outriders: 5 Outriders with plasma, sergeant
- Tactical Squad Temgar: 10 marines, sergeant has power glaive, artificer armor
- Sicaran Omega Tank Destroyer: lascannon sponsons
Kozar Drop Troops, 2nd Company
- Captain Xhosa and Command Squad: medic, vox caster, plasma pistol, carapace armor, missile launcher
- Infantry Platoon
- Infantry squad with vox caster and melta gun
- Infantry squad with grenade launcher
- Special weapons squad with melta guns
- Special weapons squad with melta guns
- 2 x Drop Sentinels with multi-meltas
- 3 x Tarantulas with twin-linked lascannon
Imperial Fists
- Terminator Squad Stalwart Blade: 5 marines with plasma blaster, volkite charger, two power fists, chainfist, lighting claw
++++++++++++++++++++++++++++++++++++++++++++++++++++++++++++
The White Scars force was a streak of white moving across the black sand. The silhouettes of Valkyries passed overhead, only noticeable from the way they briefly winked out the stars. They had been pushing hard for two days, ever since they got the shocking news of what was happening back west, the mind-wrenching idea that their sworn brothers had betrayed their honor and turned their guns against their fellow Astartes. The Brotherhood of the Wind forces in the west had been beaten back and, impossibly, the great Khan Zherdan was dead. Turan Jorma knew that made him Khan of the Brotherhood now and he had to make it to Berat in time to turn the tide.
The traitors had chosen their moment well. He had been in the Far East for weeks with fully half the Brotherhood, hunting down the remnants of the vast Ork populations that had once plagued this planet. The enemy had clearly done a good job of choking any communications while they launched their attack. But now the winds had awakened and they could not be stopped. Their speed would give them surprise. The traitors would not expect a full fighting force to cover the breadth of the continent in two days.
As they approached the Death Guard facility in the predawn blackness, Turan felt the hatred and sense of betrayal rising to boiling. These wretched traitors had murdered his brothers and broken their sworn oaths. He meant to rip this outpost apart and prevent this traitor force from bringing aid to the assault on Berat. He would tear through this scum like a hurricane, leaving only wreckage and desolation in his wake as he carved a path to his besieged brothers.
The night vision sensors on his jet bike lit up with the distant targets. He growled into the comm link, “Engage at will. Take no prisoners. Purge the betrayers.”
++++++++++++++++++++++++++++++++++++++++++++++++++++++++++++
BATTLE:
 |
| Game map highlighting the four objectives. The traitors chose the near table edge, leaving the far edge for the Loyalists to enter the table from on turn 1. |
 |
| View of the Traitor facility from the east. |
 |
| View from the west. Most of the defenders are positioned on high ground behind cover around the central control station objective. |
 |
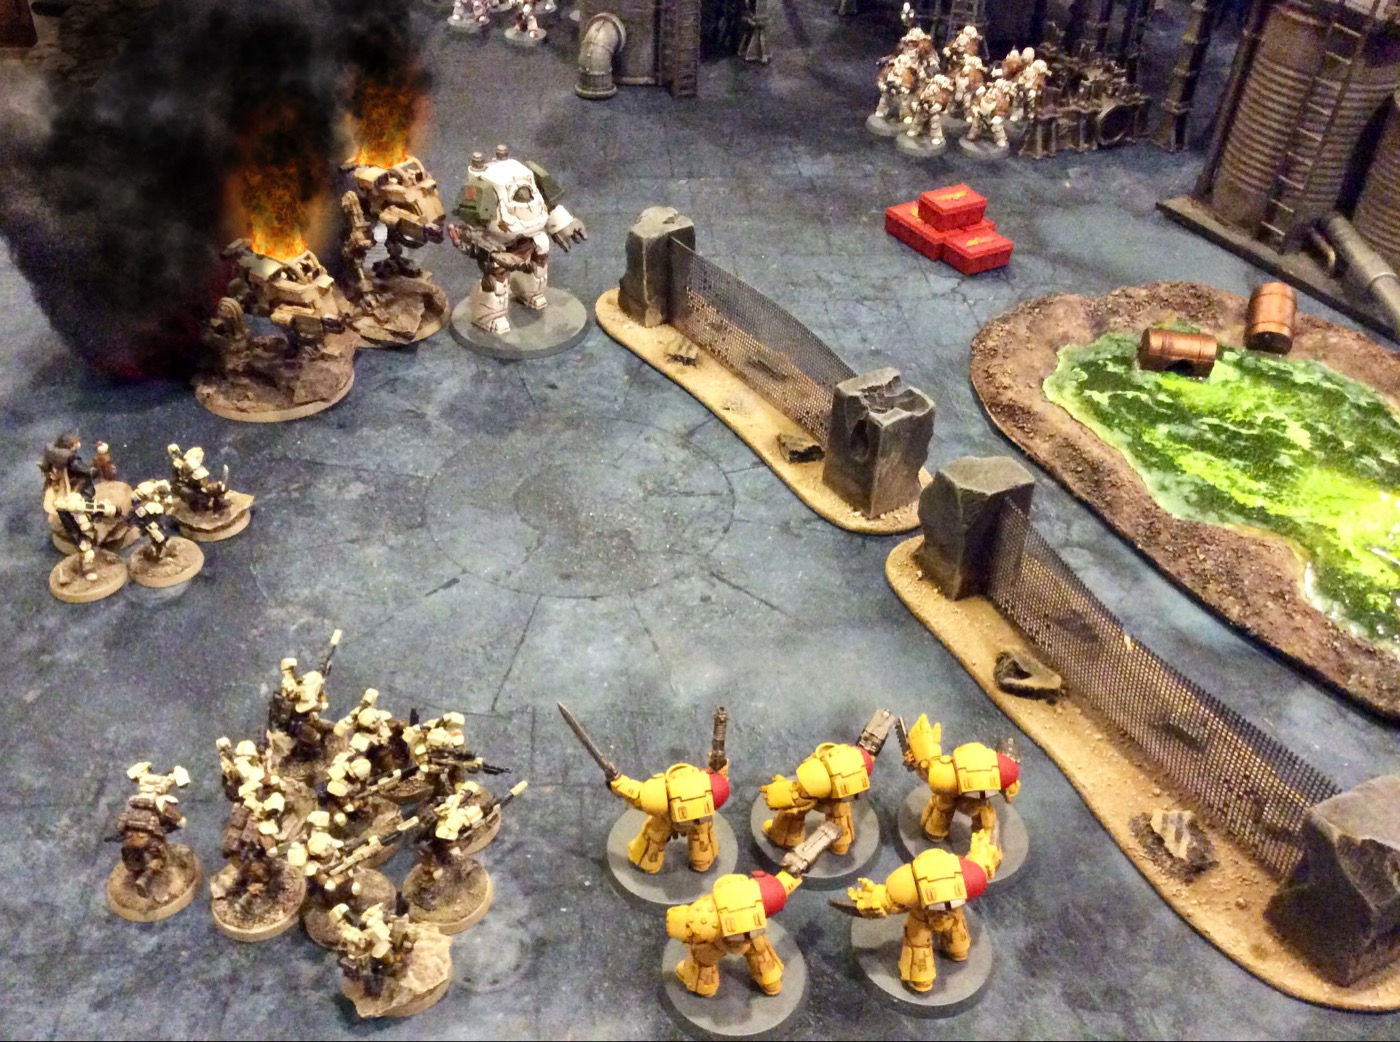
| The World Eaters are on the ground where they can more easily reach the enemy. They are supported by a Death Guard tactical squad in a Rhino with heavy flamer. |
 |
| They guard the stocks of critical materiel to ensure a sufficient supply for the upcoming assault on the city of Berat. |
 |
| The Traitor gunline occupies the catwalks of the facility: heavy support squad with missile launchers, support squad with volkite chargers, and recon squad with sniper rifles. Holding the central objective is a squad of auxiliary grenadiers. |
 |
| A Death Guard tactical squad supported by an apothecary and a Contemptor Dreadnought hold the other stockpile of war materiel. |
 |
| The Death Guard with deadly volkite chargers await the enemy from a high vantage point. |
 |
| The auxiliary squad is tasked to hold the control systems for the facility, ensuring sufficient fuel for the Traitor tanks (and flamers) for the planned assault on the city walls. |
 |
| The snipers of the recon squad hold high ground overlooking the facility's supply depots. |
 |
| Without warning, the highly-mobile Loyalist forces strike the facility in the early pre-dawn hours. |
 |
| Valkyries zoom overhead through the blackness, discharging a platoon of Kozar drop troopers in grav chutes with sentinels for a support, along with a command squad. However, one Valkyrie ends up off course in the darkness and is delayed in dropping the other critical squad of melta gunners. |
 |
| One Valkyrie drops a set of Tarantula sentry guns near the communications tower. These automated weapons are tasked to defend the objective until reserves arrive. |
 |
| The White Scars of Khan Jorma swoop into the facility under the cover of darkness. Unlike the defenders, they are ready for the night battle and are fully equipped with night-vision equipment, negating the poor visibility. |
 |
| Only one of the two support squads with the vital melta guns is able to make the initial drop, but they land right on target behind the fearsome Death Guard dreadnought. |
 |
| The drop troops and sentinels unleash a mass of point-blank melta gun fire but the amazing shields of the Contemptor stop every shot! |
 |
| The Sicaran Omega Tank Destroyer turns its mighty firepower on the Death Guard with the volkite weaponry, trying to neutralize their deadly long-range firepower before it can decimate the drop troops. The Skyhunters and Outriders add their fire as well, decimating the Traitor squad. |
 |
| The auxiliaries return fire at the attackers and the plasma gunner manages to bring down one of the skilled White Scars riders. |
 |
| The mighty dreadnought rips through the facility fence and stomps toward the guardsmen, eager to make them pay for their audacity to attack space marines! |
 |
| The tactical marines advance on the vulnerable drop troop support squad while the dreadnought aims for the infantry squad. |
 |
| The World Eaters advance and fire their bolters at the enemies dropping out of the night sky. |
 |
| The bolter fire damages one of the drop sentinels. |
 |
| The battle rages along the outer fence of the base. |
 |
| The ruthless Death Guard eradicate the helpless Kozar troopers at point-blank range with bolt guns. |
 |
| The men of First Squad are torn apart by the unstoppable dreadnought's power claw. |
 |
| After dealing with the infantry, the war machine turns to face the puny enemy walkers. |
 |
| The Tarantula weapons battery destroys the advancing Death Guard Rhino. |
 |
| The second melta gun squad finally arrives and drops near the communications tower objective. The Death Guard marines scramble from the wreckage of the Rhino. |
 |
| After landing right on target, the squad quickly drops into firing position, some of the melta gunners discarding their cumbersome grav chutes in order to take more careful aim. |
 |
| The Kozar troopers fire at the terrifying World Eaters Dreadnought, but once again the Atomantic Shielding stops the melta blasts. |
 |
| Tactical Squad Temgar finishes their flanking maneuver and arrives at the communications tower. |
 |
| On the other side of the facility, Imperial Fists Terminator Squad Stalwart Blade marches out of the darkness, adding some support to the beleaguered drop troopers. |
 |
| Company Captain Xhosa issues orders to the remnants of First Platoon. |
 |
| Turan Jorma and the Skyhunters and Outriders swing up the left flank to get firing angles on the Death Guard tactical marines on the other side of the cesspool. They loose a salvo of fire, but thanks to their apothecary, the Death Guard casualties are limited. |
 |
| The Dreadnought destroys one Sentinel with its multi-melta and then charges in and destroys the other with its power fist. |
 |
| The Contemptor Dreadnought turns to face the advancing Terminators after easily wrecking the two Sentinels. |
 |
| The snipers of the recon squad fire at the Outriders, killing one and forcing the squad to take evasive maneuvers, limiting their ability to return fire. |
 |
| The Death Guard advance and fire at the Tarantulas, disabling one of the sentry guns. |
 |
| The Dreadnought towers over the out-matched drop troopers. |
 |
| A salvo of missiles from the Death Guard Heavy Support Squad punishes the drop troopers and enrages the World Eaters Dreadnought by depriving him of more kills! |
 |
| In an act of futile defiance, the lone survivor of the melta squad tosses a grenade at the charging dreadnought. |
 |
| The Death Guard tactical marines destroy another of the automated artillery in close combat. |
 |
| Jorma's cyber hawk swoops low over the position of the Death Guard, giving the Khan and his men excellent information on the enemy position, even in the dark. |
 |
| The mobile White Scars units continue their sweeping maneuver along their left flank, pounding the Death Guard Tactical Squad. But they live up to their reputation for resilience and survive another salvo. |
 |
| Terminator Squad Stalwart Blade prepare to charge the Contemptor Dreadnought that is wreaking havoc among the Kozar Drop Troops. |
 |
| The Dreadnought kills one Terminator and is then brought low by the Terminator's chainfist. |
 |
| The Sicaran lines up the World Eaters Dreadnought for a sustained burn from the Omega plasma array... but, despite the impressive pyrotechnics, fails to destroy its target. |
 |
| The White Scars bide their time behind the communications tower, waiting for the perfect moment to strike. |
 |
| The Death Guard marines finish off the Tarantulas and clear the area in front of the comm tower. |
 |
| Tactical Squad Temgar and Tactical Squad Folterer exchange bolter fire. |
 |
| Two of the Imperial Fist Terminators are brought down by enemy fire, but the Loyalists push the Traitors back around the toxic pond. |
 |
| The Loyalists advance and finish off the Death Guard tactical squad as it was scrambling up the ladder to the platform. |
 |
| Through sheer weight of sustained fire, the Skyhunters and Khan Jorma finish off the Death Guard as they fall back. |
 |
| The Sicaran was badly damaged by krak missiles and now tries to return fire on the Death Guard heavy support squad but can't inflict any damage through the hard cover of the outpost. |
 |
| The Death Guard keep their distance and return fire at the White Scars tactical squad behind the comm tower. |
 |
| The snipers continue to fire at the White Scars jetbikes. |
 |
| Jorma and his men seek vengeance for the betrayal and the death of Zherdan. |
 |
| The Loyalists take control of the war materiel objective near the toxic pond, but they are exposed to a large number of traitor guns... |
 |
| The World Eaters are forced to hold their position near the other supply dump and fire at the Terminators from a distance, doing no damage. |
 |
| On the other side, the heavy support squad continue to bombard the Sicaran with krak missiles until it erupts in a plume of flame and smoke. |
 |
| The Imperial Fists continue their unrelenting advance through a hail of enemy fire and make it to the ladder. Meanwhile, the Outriders race under the catwalk of the facility to help Tactical Squad Temgar near the comm tower. |
 |
| The Skyhunters glide forward slightly but keep their distance from the dangerous World Eaters tactical squad. They finish off the recon squad. Under that covering fire, the Drop Troopers scramble forward to grab the war materiel in order to free up the Terminators to charge the central platform. |
 |
| The Terminators charge up the ladder and into the traitor auxiliaries. Incredibly, one of the mighty champions is knocked out of the fight by a lucky hit from the grenadiers! The lone survivor kills a few in return and the melee continues. |
 |
| The Outriders zip to the other side of the battlefield. With the Sicaran out of commission, they need to provide support to Tactical Squad Temgar facing a Contemptor Dreadnought and a Death Guard tactical squad. |
 |
| The Death Guard advance and claim the comm tower, which will be extremely helpful to the Traitors in the city assault to come. |
 |
| The Death Guard heavy support squad turns and charges the enemy Terminator, throwing themselves forward without hesitation in order to hold the central control station of the facility. |
 |
| The lone Imperial Fist Terminator lives up to the legends. He first survives a swarm of attacks and then crushes an enemy in return. His fury is so great that the enemy are thrown back in disarray and scatter from the field. |
 |
| The hero stomps forward triumphantly to claim the control station so it can be destroyed before the assault on Berat. |
 |
| The Outriders come flying around the corner and blast the Death Guard in the rear, softening them up before Squad Temgar assaults. |
 |
| Squad Temgar charges in kills most of the Death Guard, the lone survivor electing to fall back against overwhelming odds. |
 |
| Khan Turan Jorma and his forces take control of the facility and ensure the Traitor forces will not have open supply lines during their assault on the Kozar city of Berat. |
Traitors: 3 VPs (1 objective)
Loyalists: 10 VPs (3 objectives + First Blood)
Loyalist Victory!
With this result, the Traitor forces would not have access to extra war materiel to help them press the attack against Berat. They would not gain the advantage of being able to re-roll the result to determine if the game ends or an extra turn in played in the City Assault scenario.
POST-GAME:
Loyalist Post-Game Analysis:
Phil: That game was a lot closer than the final score indicated. On Turn 5, Pete controlled three objectives to my one. Thankfully, the game went to Turn 6 and I had a chance. The lone terminator routing two units on the platform was miraculous and really swung the whole situation. And then my tactical squad, with support from the Outriders, was able to clear his tactical squad away from the communications tower objective. This game definitely came down to the wire with both armies having a chance to win, depending on the outcome of a few rolls.
The key moment was obviously the single terminator scattering about twenty enemy models. It was a crazy sequence. He won combat by one wound. Then Pete failed both morale checks (one for each unit) and then he failed to escape my sweeping advance with either unit! If he had passed any one of those four rolls, then none of his guys would have been lost and they may have killed the terminator in the next round before he could strike back. That terminator marine really lived up to the stories and deserves a medal!
The scenario was fun and flavorful with a defined attacker and defender to give it a different feel than a standard mission. The terminators were the stars for me, and not just because of the lucky melee result at the end. Despite the fun of deep striking the Drop Troopers into excellent positions behind enemy lines, they were unable to inflict any damage whatsoever on the Death Guard forces near the toxic pond. The terminators arrived and saved that entire flank from crumbling by destroying the dreadnought. The Drop Troopers were once again useless, with ~700 points of models only killing a rhino and one or two marines. The Sicaran also continues to underwhelm, only killing a couple of infantry and failing to knock out the World Eater Contemptor before being destroyed. The Outriders and Skyhunters did well by keeping their distance and maintaining steady fire on the Death Guard, slowly whittling them down (those Apothecaries make a big blob of power armor extremely durable!). Another absolute key was getting lucky enough to wipe out the volkite marines in Turn 1 before they could deal their normal damage.
This game was so competitive because Pete left out the heavy tanks that my army just cannot handle, and it would have been a very different outcome had his Land Raider been involved. As it was, it all came down to a few key decisions and dice rolls near the end. Win or lose, it doesn't get much better than when a game hangs in the balance on the final turn with both players intently leaning over the table to see the result of a critical die roll!
Traitor Post-Game Analysis:
Pete: Wow, what a close, great game! I can’t believe the pinnacle moment was a single Imperial Fists terminator fighting off two full squads, breaking them and then destroying them. So unlikely, but that’s sometimes what can happen in this game! I feel like we would have had a draw if I could have waited back with my heavy support squad and blown that termie to kingdom come once he cleaned-up the grenadiers.
It was fun to see the new jet bikers this game too! They are very powerful and fast, plus look amazing. The armies are getting downright professional out there! And the sludge pit too. Finally, my Death Guard are feeling at home!
Looking back, I think I deployed fairly well for what I needed to accomplish. I had cover for all my heavy weapons teams and the squishy regular humans. I never got my World Eaters into the action, but they reliably held their objective and would have been a tough out to destroy or scatter. But great game played by Phil. He brought his units in on my flank and never let up until he destroyed all the Death Guard and moved into the objectives. He should have been able to quickly knock out the DG Dread if not for the numerous force field saves. A little lucky to last so long.
In the end, it was a stinging defeat to my forces. There were many times throughout the evening that I felt like I would be able to keep at least two of the objectives and maybe even collect a third for the win, but alas, it was not to be. We’ll see if next game we can regain the momentum.


So many great theatrical picks! The fearsome dreadnought turning to grimly face the brilliant and hopeful terminators, both squads bathed in flickering orange from the burning sentinels w charred pilots still inside.
ReplyDeleteGr, I meant pics. The shower of explosive rocket blasts was great too. That editing software is the bee's knees. I'd say your batreps exceed the quality of the old white dwarf ones we read growing up
ReplyDeleteNow, on to the battle. A huge, infantry-heavy clash w so many models, I wondered how they all fit on the table. Pete gratiously left out his big tanks and unkillable warlord and instead included an uncharacteristically soft unit of guardsmen. At first, it seemed his defense position was too solid and your offensive was largely absorbed to little effect (his squads soaked up so much heavy bolter and plasma fire) but eventually the dice gods smiled on you. Or rather, on the yellow beetle men waddling into the battlefield. Pete flubbing all his dice rolls for a double single handed sweeping advance was the universe paying you back for those triple 1s in our game.
ReplyDeletePete totally could have plopped a tank on an objective and held onto it indefinitely. Your spiffy jetbikes would have been like mosquitoes to one. We'll have to presume that the chaos marines didn't have time to deploy large vehicles. Plus, I notice he broke up his immortal death guard into 2 normal-sized squads for easier killing. It's a very solid win since even if you hadn't gotten ridiculous luck in the catwalk battle, you still would have won w first blood, and I hope it is indicative of things to come. Some day, your guardsmen will melta attack something without crazy force fields and actually do something before being stomped to pieces. I feel like maybe you would have a chance against a tank...
ReplyDeleteA couple of thoughts upon a second viewing; you don't list the apothecary amoung the members of the larger death guard squad and you fail to mention how close to annihilation your guardsmen CO was. He was literally wiping the blood and ashes of his men off of his face. Yet his nerves of steel never failed!
ReplyDelete