
"He who stays on the defensive does not make war; he endures it"
- Praetor Wolfgang, XIV Legion
Background:
While the White Scars and Blood Angels were assisting in Operation Downfall, the Traitors were not sitting idle. They had discovered the location of one of the White Scars' remaining hidden strongholds in the Uhrtar Mountains and had sent a force of Death Guard to eliminate it. Led by Praetor Wolfgang, the White Scars' longtime nemesis in the war for Xhorik Prime, the Death Guard breached the secret entrance and commenced the deadly business of fighting to clear the underground fortress, tunnel by tunnel. Both sides were desperate to hold key Sectors within the stronghold where their forces could re-arm and defend key choke points.
Scenario:
Sector Control (Zone Mortalis mission from The Siege of Cthonia campaign book)
Game Length: 4 turns with 2+ for turn 5 and 4+ for turn 6.
Primary Objective
Six objectives. At the end of each game turn, each players gains 1 VP for each objective they control.
Secondary Objectives
Counter Strike: The player without strategic advantage gains 1 VP if the first unit destroyed belongs to the player with strategic advantage.
Champions of Renown: 1 VP for destroying any Character
Blood Toll: 1 VP for destroying an Elite or HQ
6 Reinforcement Points. +2 Reinforcement Points at the end of each game turn.
Critical Objective: Random objective critical each turn. +2 Reinforcement Points for controlling it.
System Override: Active player can expend a Reinforcement Point to try to gain control of all doors.
Counter Assault: Units can enter from other table edges for extra Reinforcement Points.
Belligerents:
Death Guard: Pete
Cataphractii Terminator Praetor
Cataphractii Terminator Squad
Deathshroud Terminator Squad
Contemptor Dreadnought
Tactical Squad
Tactical Squad
Tactical Support Squad with flamers
Tactical Support Squad with volkite
White Scars: Phil
Praetor
Ebon Keshig Terminator Squad
Contemptor Dreadnought
Tactical Squad
Tactical Squad
Tactical Support Squad with plasma
Outrider Squadron with plasma
Battle:
The White Scars have the first turn.
 |
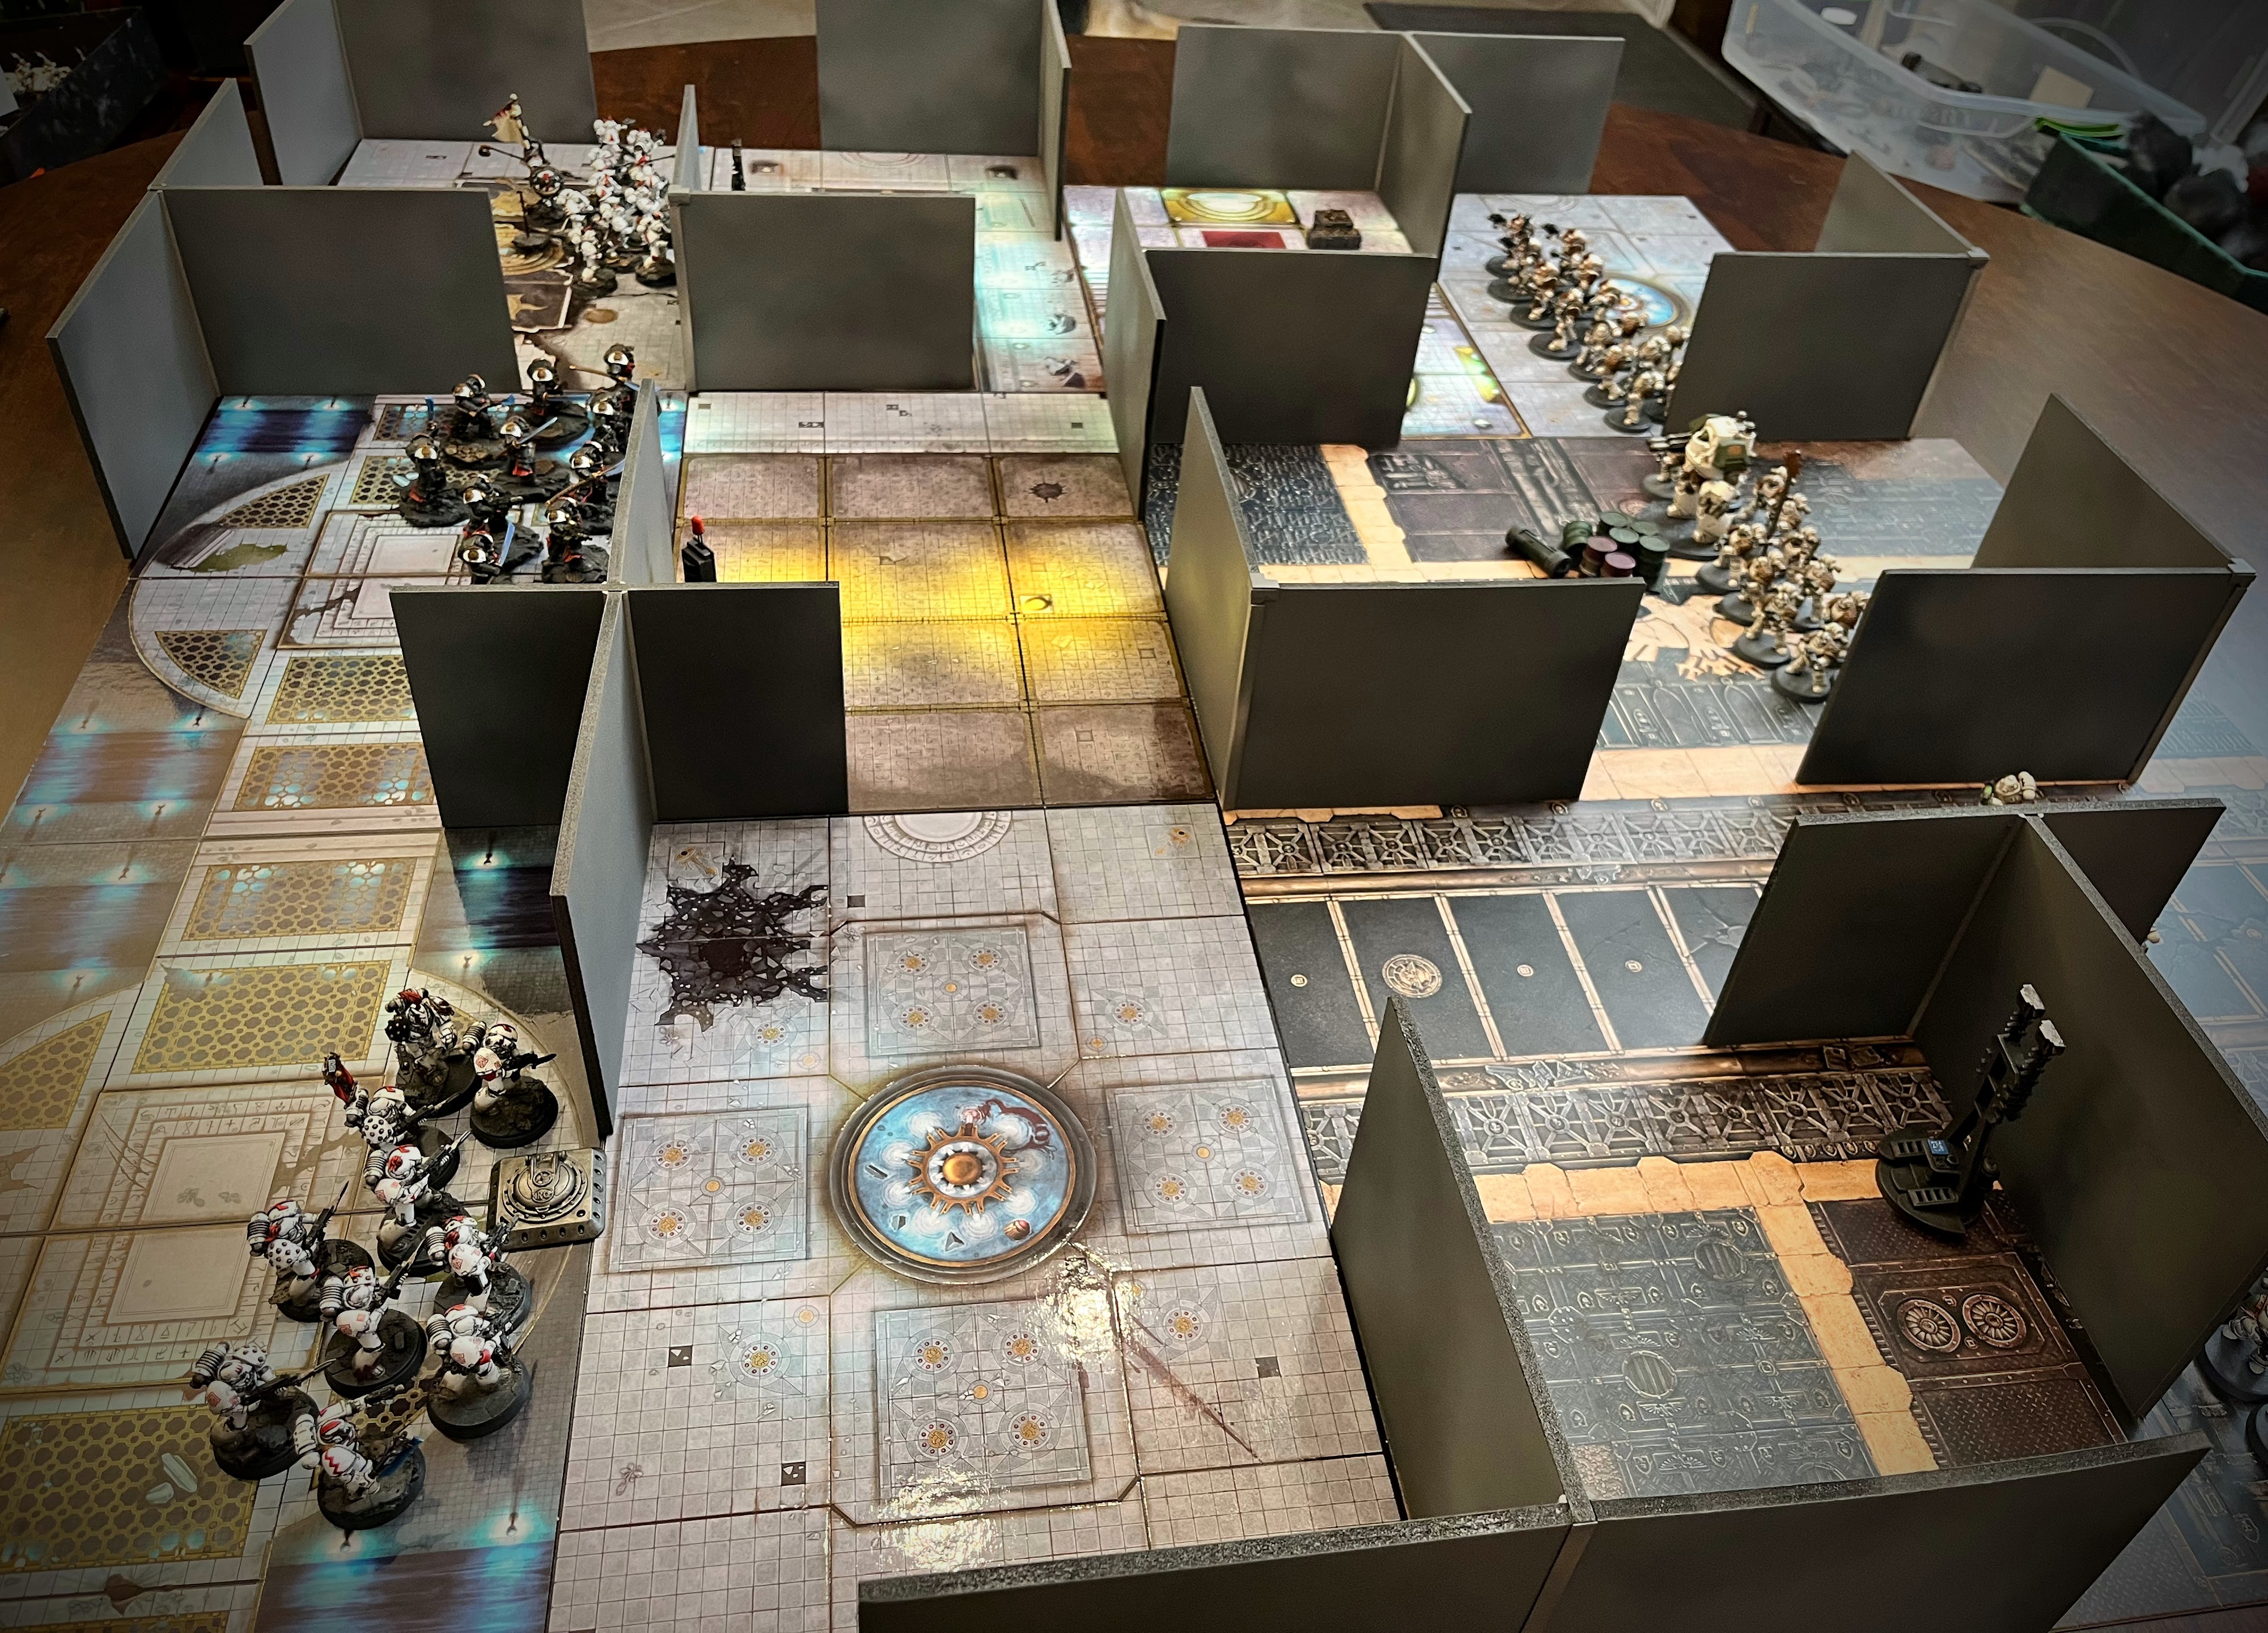
| The battlefield is the underground rooms of the White Scars hidden mountain stronghold. |
 |
| White Scars face off against Death Guard in the subterranean corridors. |
 |
| A Death Guard Tactical Squad supported by a Contemptor holds the supply depot. |
 |
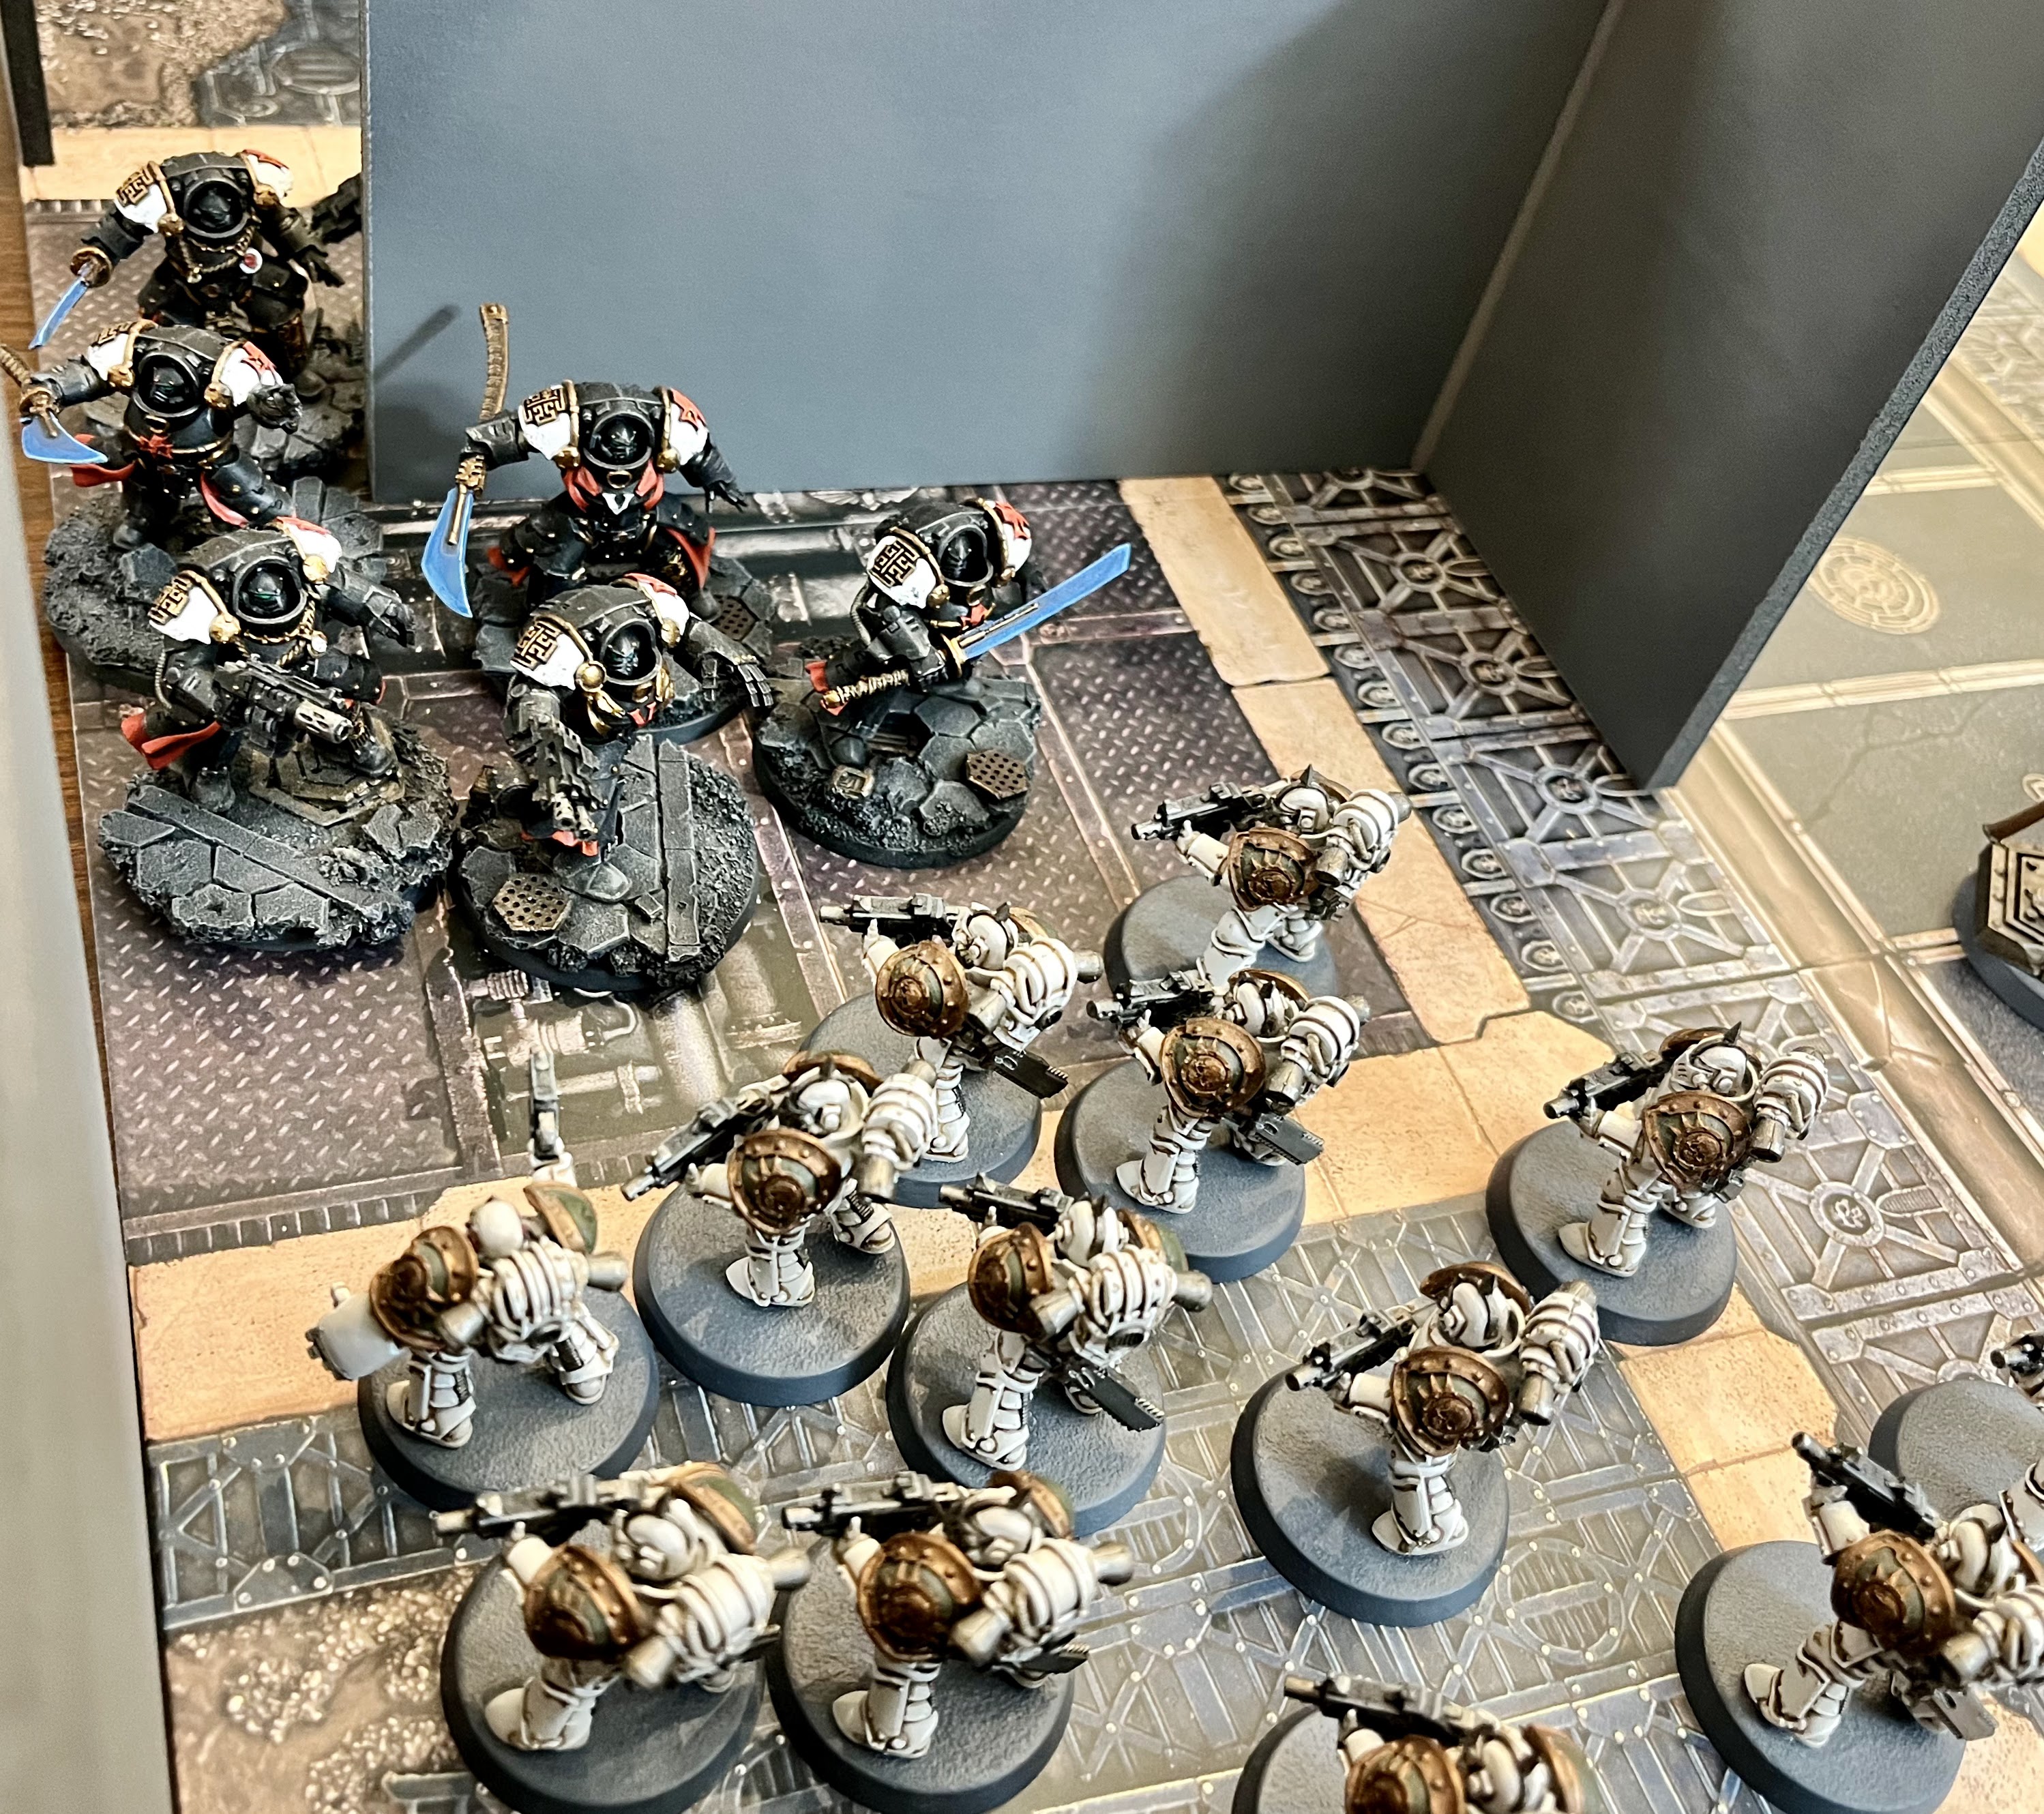
| Ebon Keshig advance up the center. Their mission is to clear the corridors of threats so the Line troops can secure the objectives. |
 |
| A White Scars Tactical Squad in the foreground protects a hatch leading deeper into the fortress. They are protecting this access point to give their brothers time to prepare additional defenses. |
 |
| A second Tactical Squad of the XIV Legion prepares to take a critical console that can control the defense systems. |
 |
| The White Scars take cover behind the wall from the deadly Volkite firepower of the Death Guard. |
 |
| The Ebon Keshig advance through the dark depths. |
 |
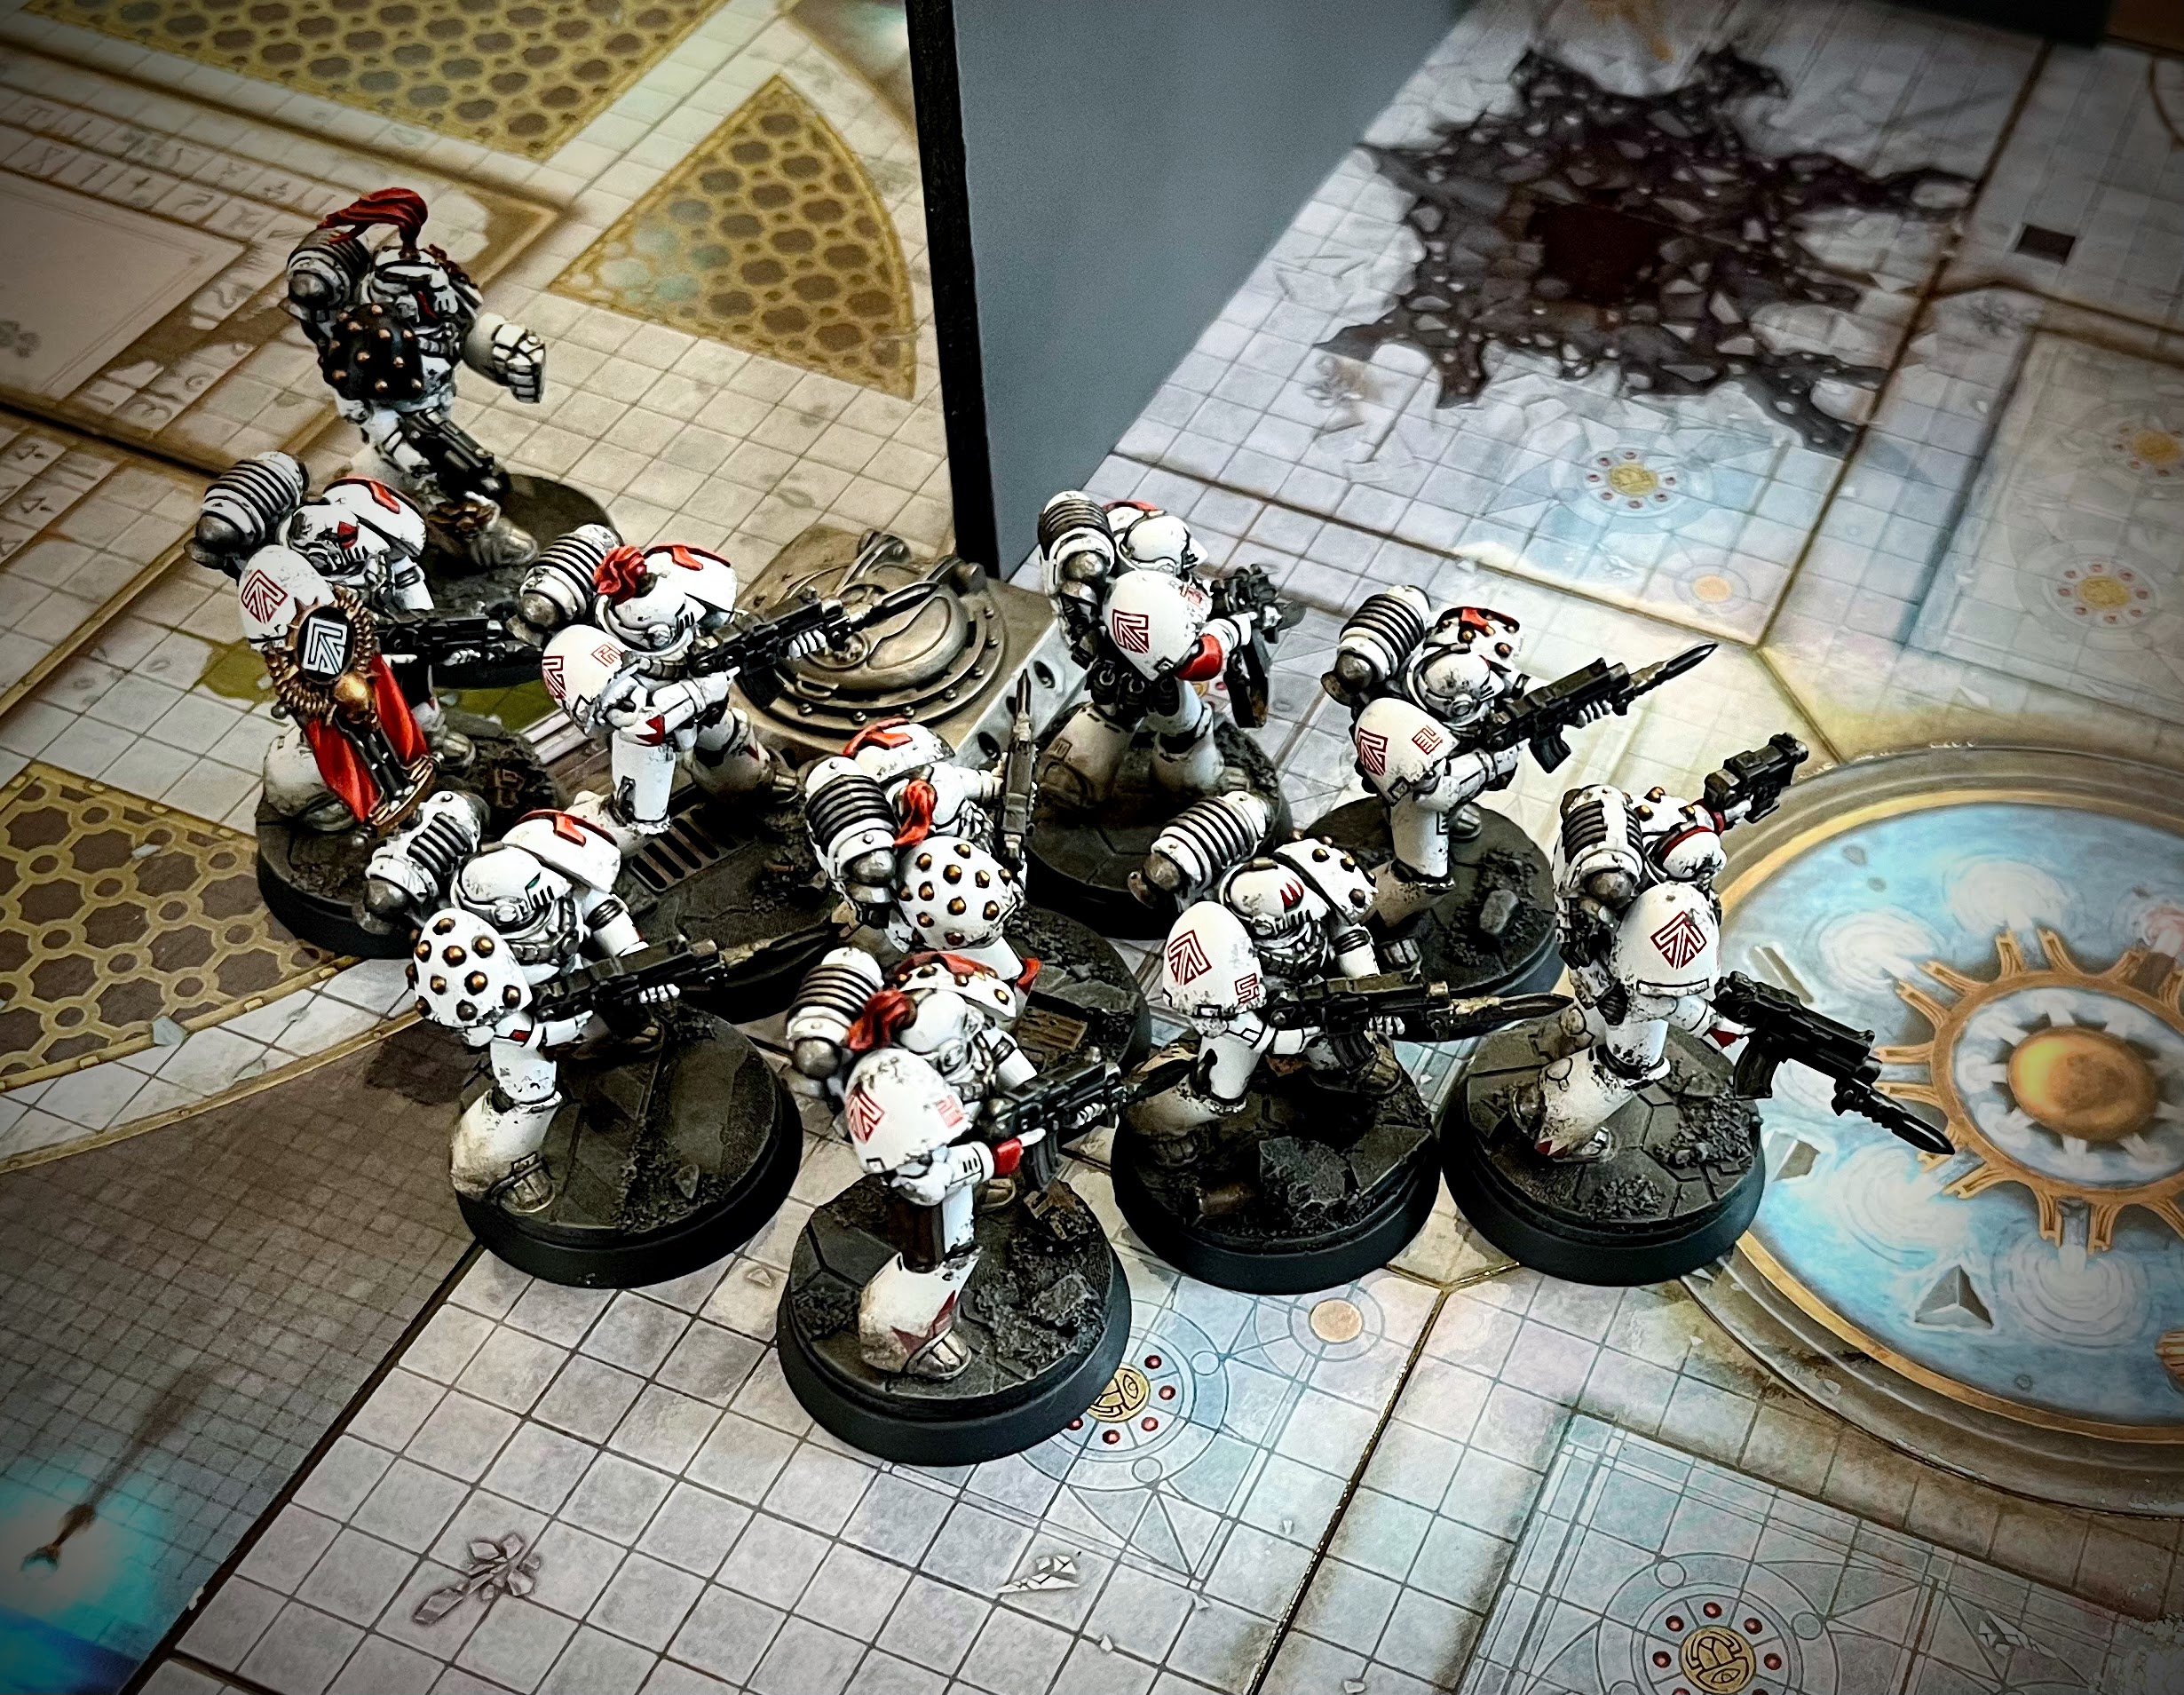
| Praetor and his Tactical Squad quickly move up to secure one of the command consoles. |
 |
| The Ebon Keshig continue their advance under heavy fire from the Death Guard. |
 |
| The Death Guard Tactical Support Squad lines up with good fire lanes down the corridor. |
 |
| Heedless of the enemy fire, the Ebon Keshig run forward. |
 |
| The black-clad warriors ready their weapons for the charge. |

 |
| Deadly melee rages in the narrow hallways. |

 |
| After dispatching the Tactical Support Squad, the Ebon Keshig move to engage the Death Guard Tactical Squad. |
 |
| Reinforcements have arrived with the White Scars Contemptor Dreadnought entering the fray. |
 |
| The Death Guard advance to surround the supply depot. They are prepared to hold it to the last. |
 |
| The Contemptor stays close to provide support, but also maneuvers for better firing lanes through the doorway. |
 |
| The powerful Traitor right flank advances, forcing the Loyalist left back behind cover. |
 |
| The White Scars Ebon Contemptor heads directly for his Traitor counterpart, knowing he is the only one with a chance to stop the enemy war machine. |
 |
| The White Scars fall back behind the wall, biding their time to strike. |
 |
| The Death Guard Cataphractii Terminator Squad slowly lumbers forward as the White Scars keep their heads down. A Tactical Support Squad armed with flamers prepares to clear the fortress room by room. |
 |
| Both sides continue to feed units into the battle with the Deathshroud arriving for the Traitors. The Death Guard Tactical Squad falls back from the Ebon Keshig while the Traitor right continues to press ahead. |
 |
| White Scars tactical marines hold their objective. |
 |
| Death Guard marines make an orderly retreat from the Ebon Keshig and then form up to retake the lost objective with the help of the Deathshroud. |
 |
| The Ebon Keshig press the attack. |
 |
| The Death Guard Tactical Squad is supported by the newly-arrived Deathshroud. |
 |
| The Contemptor continues to protect the central room and the supply depot objective. |
 |
| The silent Deathshroud come searching for victims. |
 |
| The Ebon Keshig have cleared the Tactical Squad and now face the Deathshroud. White Scars Outriders arrive and attack the Cataphractii but lose one of their own to overheating plasma. |
 |
| Outriders maneuver their bikes through the underground fortress, brining supporting fire to bear on the advancing Death Guard. |
 |
| The Ebon Contemptor seeks out his foe. |
 |
| Although nearly hopelessly outmatched by the approaching Cataphractii, the Praetor and his Tactical Squad prepare to fight. |
 |
| The Catphractii stomp into the room, ready to destroy the Loyalist defenders. |
 |
| The two mighty behemoths finally clash. The Death Guard Contemptor gets the better of his White Scar foe and sends him fleeing! |
 |
| Shockingly, the White Scars Contemptor falls back after being badly wounded! |
 |
| The fresh unit of Deathshroud assault the depleted Ebon Keshig. |
 |
| Elite terminators clash once again. |
 |
| Praetor and his men hold the line against the Traitor assault. |
 |
| The quickness of the White Scars is no match for the overwhelming power of the Cataphractii. |
 |
| The victorious Death Guard approach their next victims. The White Scars prepare to open fire at point blank range. |
 |
| Praetor Wolfgang belatedly arrives but finds his men dutifully holding their objective as ordered. |
 |
| The Deathshroud methodically cut their way through the Ebon Keshig. |
 |
| The White Scars Ebon Contemptor rallies and is assaulted in turn by the Death Guard dreadnought. |
 |
| The Death Guard control the center. The surviving White Scars have been pushed back to the edges of the battlefield. |
Post Game:
(I can't get find notes on the scoring.)
Traitor Victory!
Post Game:
Phil - White Scars:
Zone Mortalis in this edition plays quite differently from a standard game. The biggest change is the use of Reinforcement Points and only being able to deploy a portion of your army to start and then trickle in the rest of your forces throughout the game. Units cost a different amount of Reinforcement Points based on their FOC Slot, such as Troops 1, Elites 2, and HQ a whopping 4! Deciding how to use the Reinforcement Points will be critical in this system.
For example, I started with my HQ on the table, figuring I would never build up enough Reinforcement Points to get him in from Reserves until almost the last turn. Pete was wiser and started with his Contemptor on the table, giving him control of the center and forcing me to play defensively until my own Contemptor arrived. He did not get his Warlord until the end of the game, but he correctly judged the Contemptor would be more impactful.
We both deployed both of our scoring units so we could start accumulating VPs from the start. I also chose the Ebon Keshig to start because they are not too fast and need to be in melee to be effective. I thought if they came in later, they would be too far from the action to have much impact.
Pete used his Reinforcement Points better than I did and had an army well-chosen for the battle. I also seem to remember being cursed with some terrible luck in this game. My Contemptor had the charge and an extra melee weapon, but was still bested by Pete's. To add insult to injury, I failed morale despite Leadership 9 and ran away! This enabled his Dreadnought to push back my right flank. Also, my bikes continued to kill themselves as much as their enemies with their suicidal plasma guns. And (not shown in the photos) my MkVI Tactical Squad failed a morale test and fell back off the table edge! In a small game like this, those were devastating rolls.
On the plus side, the Ebon Keshig continued to perform well. They swept forward, putting the pressure on Pete early. They killed two units, including a critical Line unit, denying Pete several VPs. They were no match for the Deathshroud with their WS5 and 3W, however. But by that point, they had served their purpose.
Another big change is the different reactions. They are toned down from the base game so they do not have such a powerful impact on the game, which I like (Return Fire from the core rules is just too powerful.)
It was a good introduction to Zone Mortalis. I am looking forward to playing again with a better handle on the rules and strategy.
No comments:
Post a Comment