Showing posts with label Death Guard. Show all posts

Saturday, February 15, 2025

M31 Campaign: 7-3 Zone Mortalis: Sector Control

 "He who stays on the defensive does not make war; he endures it"

- Praetor Wolfgang, XIV Legion 

Background:

While the White Scars and Blood Angels were assisting in Operation Downfall, the Traitors were not sitting idle. They had discovered the location of one of the White Scars' remaining hidden strongholds in the Uhrtar Mountains and had sent a force of Death Guard to eliminate it. Led by Praetor Wolfgang, the White Scars' longtime nemesis in the war for Xhorik Prime, the Death Guard breached the secret entrance and commenced the deadly business of fighting to clear the underground fortress, tunnel by tunnel. Both sides were desperate to hold key Sectors within the stronghold where their forces could re-arm and defend key choke points. 


Scenario: 

Sector Control (Zone Mortalis mission from The Siege of Cthonia campaign book)
Game Length: 4 turns with 2+ for turn 5 and 4+ for turn 6.

Primary Objective
Six objectives. At the end of each game turn, each players gains 1 VP for each objective they control. 

Secondary Objectives
Counter Strike: The player without strategic advantage gains 1 VP if the first unit destroyed belongs to the player with strategic advantage.
Champions of Renown: 1 VP for destroying any Character
Blood Toll: 1 VP for destroying an Elite or HQ

6 Reinforcement Points. +2 Reinforcement Points at the end of each game turn. 
Critical Objective: Random objective critical each turn. +2 Reinforcement Points for controlling it.
System Override: Active player can expend a Reinforcement Point to try to gain control of all doors.
Counter Assault: Units can enter from other table edges for extra Reinforcement Points.

Belligerents:

Death Guard: Pete
Cataphractii Terminator Praetor
Cataphractii Terminator Squad
Deathshroud Terminator Squad
Contemptor Dreadnought
Tactical Squad
Tactical Squad
Tactical Support Squad with flamers
Tactical Support Squad with volkite


White Scars: Phil
Praetor
Ebon Keshig Terminator Squad
Contemptor Dreadnought
Tactical Squad
Tactical Squad
Tactical Support Squad with plasma
Outrider Squadron with plasma

Sunday, August 18, 2024

Operation Downfall Battle Report 5: Maelstrom of War

  "An alliance lasts exactly as long as it is advantageous to both parties. In war, survival is everything and I do whatever it takes."

-General Titus Ghoulv, Commander of the Iron Battalion 

Background:

Operation Downfall was the Loyalist codename for an attempt to establish a secure landing zone on Xhorik Prime using a planetary drop force from Xhorik Secundus with an attempt to rendezvous with the remnants of the White Scars garrison on the capital planet of the system. 


At this point, the Loyalists have the upper hand with two wins, a loss and a draw. They also have the momentum after their most convincing win yet.

After taking heavy casualties and seeing the Traitor Legions distracted by the Loyalist marines, the Chem Dogs decide to do some pillaging to resupply.


Scenario: Maelstrom of War

Victory points are earned at the end of each player turn for meeting the criteria listed on the missions cards. Each player has three mission cards to start the battle and when one is achieved, it is turned in and replaced. At the end of each player turn, the player can voluntarily discard one card and replace it with another from the deck. VPs can be earned by holding specific objectives, destroying certain types of units in certain ways, or achieving other miscellaneous feats. 


Belligerents:

Death Guard: Pete
Rite of War:  The Reaping
Commander: Praetor Wolfgang - 

2000 points


Traitor Militia: Bill
General Titus Ghoulv’s Iron Battalion:
“The Marauders of Meddeon VII”
“The Pirates of the Northern Fringe”
“The Chem Hounds”
Provenances of War: Alchem Jackers, Industrial Stronghold, Warrior Elite
Commander: General Titus Ghoulv - Robber Baron

2300 points


Loyalist Militia: Phil
Xhorik 87th Drop Troopers, 3rd Company:
"The Firebirds"
Provenances of War: Warrior Elite, Legacy of the Great Crusade
Commander: Captain Skander Xhaer - Marcher Lord

2300 points


Battle:

Some key moments and themes from the battle:

The Contemptor was dominant, almost single-handedly destroying the Chem Dogs' right flank.

There is something wrong with the rules when this giant tank is so utterly bested by this walker.

The OGRE Mech Suits faced off against Wolfgang and the Deathshroud.

The Sentinels were one of the few effective units the militia had.

The OGREs attempted to Hold the Line, but failed morale, then failed again when charged and fled. Should have used Overwatch!.

The Chem Dogs and Xhorik 87th face off over Objective 1. The grenadiers would wreck the Leman Russ in melee with krak grenades.

The Chem Dogs "Ogryn" mercenaries attempted to engage the Death Guard Contemptor but were shot up going in and then easily defeated by the dreadnought. 

The Deathshroud are brought down by concentrated fire from most of the Xhorik forces, but Praetor Wolfgang survives.

The Praetor charges and single-handedly destroys a grenadier squad with a discipline master.

The Xhorik fliers arrive, but the Arvus is shot down before it can deliver its transported unit to the objective. 

The Chem Dogs make a push for Objective 1, finally getting some VPs in the last few turns.

The Death Guard infantry finally move in and easily wipe out the Chem Dogs grenadiers.

Captain Xhaer survives the fray. 


Final Victory Points: 
Death Guard: 7
Xhorik 87th FIrebirds: 7
Traitor Milita Chem Hounds: 4

Draw!


Post-Game:

This battle made clear just how inferior the militia rules are compared to the Legions. Even with 15% more points for the militia armies, the Death Guard easily controlled the game. The Xhork militia managed to keep up in VPs due to swarming the board with Line units and getting lucky enough to draw some objectives on their side of the board. The two militia sides also threw most of their best stuff against the Legion and only skirmished with each other by comparison. The tanks of the Traitor militia really struggled to do any damage against the Death Guard due to the massive de-buffs on the militia ordnance weapons. 

The result being a draw between the Xhorik Drop Troopers and the Traitor Death Guard mean the Loyalist results for the Operation Downfall phase of the campaign stand at 2-1-2. I think the next battle could serve as as suitable finale for the campaign, determining the result of the Loyalist attempt to establish a beachhead on the Traitor-controlled planet of Xhorik Prime. 


Tuesday, June 25, 2024

Death Guard Cataphractii Terminators


Death Guard Cataphractii

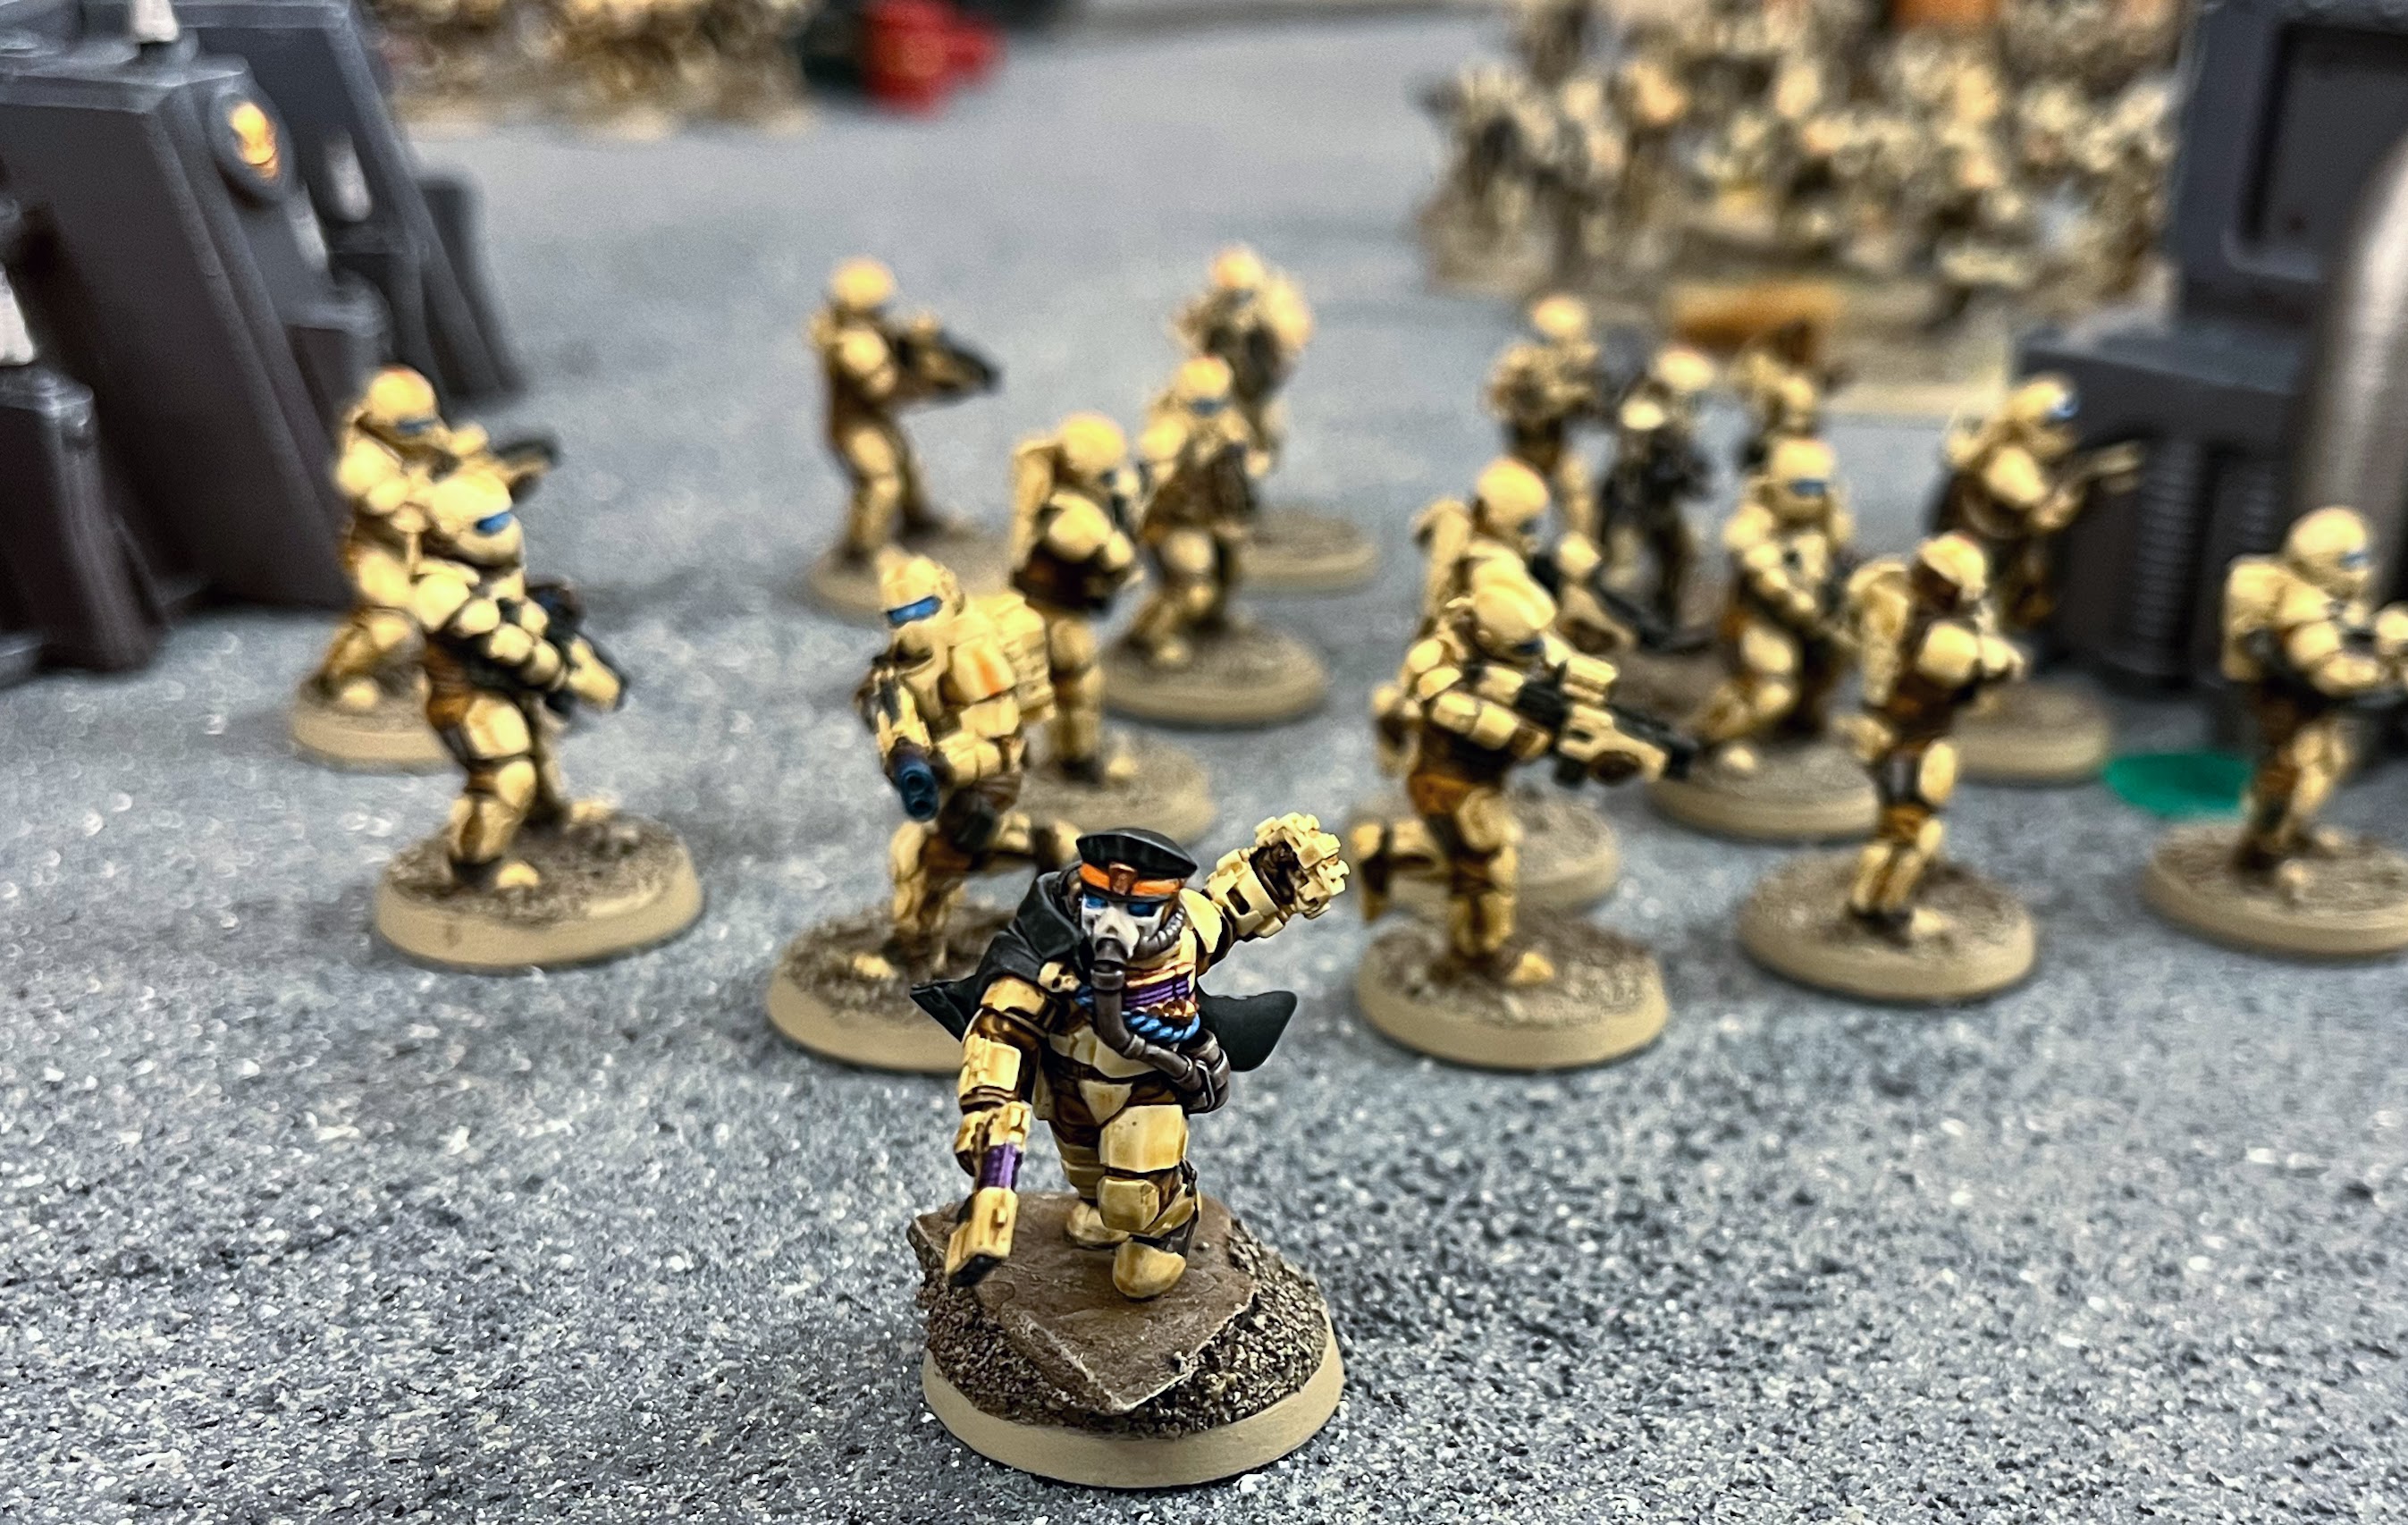
I've been modeling, painting and playing Horus Heresy Death Guard for about 8 years now and I finally got around to making a cataphractii terminator squad for my legion. I always knew the DG paint scheme would suit these models well, and it doesn't disappoint. 

There isn't a pressing tactical need for this unit in a DG army, as their special rules benefit troops choices moving and firing extra bolter shots and heavy weapons without penalty, with no regard for difficult terrain. And they have great elite terminators already in their Death Shroud with 3 wounds each and extra survivability vs. strength 8 weapons. But these cataphractii models are too cool not to paint up for the DG, and they'll do well against any non-elite units they come up against. 

The squad size is 7 to honor Mortarion's number preference. Just as my DG missile launcher squad and volkite squad are both 7. I enjoy mostly sticking to the flavor of a Legion to give them more character when playing. Otherwise marine v. marine battles can get a little flat and monotonous. And I threw in a very uncommon weapon among our armies - 3 power mauls! They just seem brutal and fitting in a DG army - crushing and smashing in power armour heads left and right. Again, not super helpful v. elites like other terminators, praetors or dreadnoughts, but who cares? They look different, and different is fun!


Monday, February 22, 2021

Deredeo Pattern Dreadnought

Now that the Traitors have taken most of the key spaceports of Xhorik and driven the remaining Loyalists into the mountains, fresh supplies and equipment can be brought in to tighten the Warmaster's grip on this key planet. The first unit Preator Wolfgang requested as support for his continued campaign against the White Scars and Kozar Army was a Deredeo Pattern Dreadnought for some much needed anti-aircraft firepower. 

This dedicated heavy weapons platform combines superior firepower with the flexibility, mobility and durability of a dreadnought chassis.  

Wolfgang's prized new toy comes equipped with an Arachnus Heavy Lascannon Battery, a torso mounted twin-linked heavy bolter, and a carapace-mounted Aiolos Missle Launcher. A Helical Targeting Array gives the Deredeo Skyfire and Interceptor if it neither moves nor runs during its turn.


Saturday, February 6, 2021

Campaign Phase 4, The Battle for Berat: Game 5 - The Decisive Moment

  "The Battle for Berat was a decisive moment for the planet of Xhorik Prime during the Horus Heresy. And the action around the central industrial area was the decisive moment of that Battle."

- The Xhorik Wars:
The Military History of a Keystone System Across the Millenia


Campaign To Date:

It has been about 40 years since a combined force of Sons of Horus, Death Guard, and White Scars brought the Xhorik System into compliance during the Great Crusade. The major population centers of the largest continent were quickly brought under Imperial control in the typical fashion: a series of pinpoint attacks of overwhelming force by the Legions against the enemy's strong points, followed by rapid surrender. Due to the richness of the primary planet and the strategic location of the system on a sort of crossroads of warp currents, small garrisons of the Death Guard and White Scars legions were left on the planet to oversee the tithes of men and material to the Great Crusade and to help eradicate the threat of large ork populations in the eastern wastes.

With the advent of the Horus Heresy, the Warmaster ordered that the Xhorik System be taken to act as a way station for resupply on his long march to Terra. The Death Guard and their human allies on Xhorik Prime launched an attack on the White Scars and their allies, the Stratocracy of Kozar.

In Phase 1 of the campaign, the Traitors pushed the Loyalists from the war-torn border city of Bielyr in a series of bloody street fighting.

In Phase 2, the war escalated across the badlands of the Valbaara Plateau in several pitched battles. In the end, the Brotherhood of the Wind was defeated and their leader Praetor Zherdan was killed by the Death Guard.

In Phase 3, the Death Guard marched to the major Kozar city of Berat, fighting their way through a number of Loyalist counter attacks. In the end, helped by taking control of low-planetary orbit over the city in a void battle, the Traitors smashed through the outer walls of Berat behind the might of their super heavy Fellblade battle tank.
---------------------------------------------------------------------------------
Phase 4 is the battle for the Kozar city of Berat. The Traitors have broken through the gates and are working their way toward the city center block by bloody block in a brutal street fight. This Phase uses a number of special rules:

Campaign Points: CP are earned by playing games and by achieving secret secondary campaign objectives (drawn randomly each game and kept secret). They can be used to gain advantages in games. The player with the most CP at the end of the phase wins.

Normal games:
Win: 5 CP
Draw: 3 CP
Loss: 1 CP

Final Game:
Win: 10 CP
Draw: 6 CP
Loss: 2 CP


  • Spend 1 CP to re-roll the die to deploy first or to re-roll the die to steal the initiative. Can only be used once per game.
  • Spend 1 CP to include a unit that would not be allowed due to the Grinding Attrition or Street Fighting special campaign rules below. The point cost of the unit still counts toward the army total. Can only be used once per game.
  • Spend 1 CP to re-roll the die to see if the game ends. Can only be used once per game.

(Special rules apply for the final scenario.)

Hunter Killers: Due to the very dense terrain providing ample hiding places, surprise attacks are extra deadly. Units who used Infiltrate, Scout or Outflank can charge the on the first game turn or the turn they come into play. If they don’t charge, they gain an extra +1 cover save for their first turn in play (stacks with any bonuses they have already).

Street Fighting: Narrow streets, debris, billowing smoke and crumbling towers limit the ability to utilize large vehicles and artillery. Other than the final battle, a max of one total unit can be selected with any of the keywords: heavy, artillery, flyer, or over 3 HP. In the final battle, everything goes.

Grinding Attrition: Other than Troops choices, any unit that is destroyed cannot be used in the next battle. If the next battle is the final battle, it can be taken but must start in reserves. Any unit that is selected as Troops choice can be used even if it was destroyed in the previous battle.

Named Warlord: Choose your warlord trait. Must be the same for the whole phase. Can also can always re-roll LD and morale checks. Other warlords must roll for trait.

If named warlord dies in battle, roll die:
1-2: debilitating injury: can't use in the rest of the campaign phase until final battle
3-4: major injury: can't use in next game
5: close call: no effect
6: Miraculous Recovery (Chosen of the Emperor/Horus/gods of Chaos): can use as normal and has an inspiring presence for the next battle: all units within 12" can use his LD.

The Revenant: Once warlord returns after dying in a game, he has Hatred (Traitors/Loyalists) for the rest of the campaign phase.

Our standard Terrain Rules are in effect.


Pre-Game and Mission:

We created a new scenario: The Decisive Moment

Army Selection: 4000 Points

Traitors - Pete

Death Guard
  • Preator Wolfgang: terminator armor, volkite charger, paragon blade, digital lasers, rad grenades, Fearless, It will not Die
  • Deathshroud Terminators with hand flamers, power scythes and rad grenades
  • Tactical Support Squad Folterer: 8 marines with flamers and melta bombs, sergeant with artificer armor. 
  • Tactical Squad: 14 marines with close combat weapons, sergeant with power fist and artificer armor and Apothecary Gerhard
  • Tactical Squad Toddestraffe: 10 marines with close combat weapons, sergeant with power fist and artificer armor. Mounted in a Rhino APC with a pintle mounted heavy flamer.
  • Heavy Support Squad Feuer Sturm: 7 marines with missile launchers and Apothecary
  • Predator Mittel Panzer 021 with Predator Autocannon and lascannon sponsons and Machine Spirit
World Eaters
  • Chaplin Zungarz: Artificer Armor, plasma pistol, refractor field, crozius arcanum
  • Tactical Squad Hell Hounds: 17 marines – 16 with bolters, bolt pistols and chain axes. 1 sergeant with artificer armor, power fist and plasma pistol
  • Reconnaissance Squad Butcher's Eyes: 5 marines with power armor, sniper rifles, cameleoline
  • Unending Slaughter: Terminator squad with lightning claws 
  • The Red Butchers: 1 Devoured with dual chain fists, 4 Butchers with dual power axes
  • Land Raider Phobos Flesh Grinder: side sponson twin-linked lascannons, twin heavy bolter, armored ceramite, machine spirit 
  • Contemptor Dreadnought Delrog the Diabolicawith twin-linked lascannon and chainfist
  • Predator Severing Cut with Predator Autocannon and lascannon sponsons and Machine Spirit

Loyalists - Phil

White Scars Brotherhood of the Wind 
  • Khan Turan Jorma: jetbike, paragon blade, cyber hawk
  • Centurion Champion Subotei: power glaive, refractor field, artificer armor
  • Skyhunter Squadron Khujaa: 6 jetbikes,  2 x volkite culverin
  • Tactical Squad Temgar: 10 marines with close combat weapons, sergeant has power glaive, artificer armor with Rhino with multimelta
  • Recon Squad Chono: 10 marines with recon armor and camo cloaks, sergeant with power fist and artificer armor
  • Outrider Squad Tsujen: 5 Outriders with plasma, sergeant
  • Tactical Support Squad Khoer: 8 marines with plasma guns, with Drop Pod
  • Ebon Keshig: 10 terminators, 8 power glaives, 2 power fists, 1 melta gun
  • Sicaran Omega Tank Destroyer Flamespear: lascannon sponsons
  • Primaris Lightning Strike Fighter Ariunbold: twin-linked lascannon, 6 x Kraken Heavy Penetrator Missiles, Battle Servitor Control, Ground-tracking Auguries, Ramjet Diffraction Grid

Kozar Army, Berat Garrison
  • Force Captain Xhaer: plasma pistol, iron halo, familiar, Warrior Elite, Duck and Cover (Cyber Augmented)
  • Platoon command squad: power fist, 3 grenade launchers, vexilla, vox caster
  • Medicae: 2 medics
  • Infantry Platoon Secondus: lascarbines
  • Fire Support Squad Septima: 6 fire teams with heavy flamers
  • Recon Squad Decima: 5 infantry with sniper rifles and camo cloaks
  • Recon Squad Tertius: 5 infantry with shotguns and a demolition charge
  • Grenadier Squad : 11 infantry, 1 with plasma gun
  • Arvus Lighter with lascannon and 2 hellstrike missiles
  • 3 x Tarantulas sentry guns with twin-linked lascannon
  • Tarantula sentry gun with heavy bolter
  • 2 x Sentinels with lascannon
  • Tauros with grenade launcher
  • Medusa Siege Cannon with 2 extra crew
++++++++++++++++++++++++++++++++++++++++++++++++++++++++++++


++++++++++++++++++++++++++++++++++++++++++++++++++++++++++++


Battle:

The Decisive Moment

Each army sends a powerful contingent led by their Warlord to contest the central industrial facility, knowing that this point would be the lynchpin of the wider battle. 

Monday, September 7, 2020

Campaign Phase 4, The Battle for Berat: Game 2 - Subterranean Clash

"These corridors have become tombs; these chambers crypts. Beneath the streets of Berat, there is only death."

 - Sergeant Albrecht,
Death Guard Legion


Campaign To Date:

It has been about 40 years since a combined force of Sons of Horus, Death Guard, and White Scars brought the Xhorik System into compliance during the Great Crusade. The major population centers of the largest continent were quickly brought under Imperial control in the typical fashion: a series of pinpoint attacks of overwhelming force by the Legions against the enemy's strong points, followed by rapid surrender. Due to the richness of the primary planet and the strategic location of the system on a sort of crossroads of warp currents, small garrisons of the Death Guard and White Scars legions were left on the planet to oversee the tithes of men and material to the Great Crusade and to help eradicate the threat of large ork populations in the eastern wastes.

With the advent of the Horus Heresy, the Warmaster ordered that the Xhorik System be taken to act as a way station for resupply on his long march to Terra. The Death Guard and their human allies on Xhorik Prime launched an attack on the White Scars and their allies, the Stratocracy of Kozar.

In Phase 1 of the campaign, the Traitors pushed the Loyalists from the war-torn border city of Bielyr in a series of bloody street fighting.

In Phase 2, the war escalated across the badlands of the Valbaara Plateau in several pitched battles. In the end, the Brotherhood of the Wind was defeated and their leader Praetor Zherdan was killed by the Death Guard.

In Phase 3, the Death Guard marched to the major Kozar city of Berat, fighting their way through a number of Loyalist counter attacks. In the end, helped by taking control of low-planetary orbit over the city in a void battle, the Traitors smashed through the outer walls of Berat behind the might of their super heavy Fellblade battle tank.
---------------------------------------------------------------------------------
Phase 4 is the battle for the Kozar city of Berat. The Traitors have broken through the gates and are working their way toward the city center, block by bloody block in a brutal street fight. This Phase uses a number of special rules:

Campaign Points: CP are earned by playing games and by achieving secret secondary campaign objectives (drawn randomly each game and kept secret). They can be used to gain advantages in games. The player with the most CP at the end of the phase wins.

Normal games:
Win: 5 CP
Draw: 3 CP
Loss: 1 CP

Final Game:
Win: 10 CP
Draw: 6 CP
Loss: 2 CP

  • Spend 1 CP to re-roll the die to deploy first or to re-roll the die to steal the initiative. Can only be used once per game.
  • Spend 1 CP to include a unit that would not be allowed due to the Grinding Attrition or Street Fighting special campaign rules below. The point cost of the unit still counts toward the army total. Can only be used once per game.
  • Spend 1 CP to re-roll the die to see if the game ends. Can only be used once per game.
(Costs are doubled for the final game.)

Hunter Killers: Due to the very dense terrain providing ample hiding places, surprise attacks are extra deadly. Units who used Infiltrate, Scout or Outflank can charge the on the first game turn or the turn they come into play. If they don’t charge, they gain an extra +1 cover save for their first turn in play (stacks with any bonuses they have already).

Street Fighting: Narrow streets, debris, billowing smoke and crumbling towers limit the ability to utilize large vehicles and artillery. Other than the final battle, a max of one total unit can be selecged with any of the keywords: heavy, artillery, flyer, or over 3 HP. In the final battle, everything goes.

Grinding Attrition: Other than Troops choices, any unit that is destroyed cannot be used in the next battle. If the next battle is the final battle, it can be taken but must start in reserves. Any unit that is selected as Troops choice can be used even if it was destroyed in the previous battle.

Named Warlord: Choose your warlord trait. Must be the same for the whole phase. Can also can always re-roll LD and morale checks. Other warlords must roll for trait.

If named warlord dies in battle, roll die:
1-2: debilitating injury: can't use in the rest of the campaign phase until final battle
3-4: major injury: can't use in next game
5: close call: no effect
6: Miraculous Recovery (Chosen of the Emporer/Horus/gods of Chaos): can use as normal and has an inspiring presence for the next battle: all units within 12" can use his LD.

The Revnent: Once warlord returns after dying in a game, he has Hatred (Traitors/Loyalists) for the rest of the campaign phase.

Our standard Terrain Rules are in effect.


PRE-GAME AND MISSION:

We played the Search and Destroy scenario from the Zone Mortalis Assault Missions in Horus Heresy Book I. It would be a simple of battle of Victory Points earned for destroying enemy units, plus the secondary objectives Slay the Warlord and First Blood.

This battle represents a White Scars strike force trying to make their way behind enemy lines via the large subterranean labyrinth below Berat. They are attempting to reinforce a Loyalist offensive that is planned to strike at the heart of the Traitor invasion. The Death Guard and their World Eaters allies are also roaming the underground, looking to clear it of enemy forces. Both sides are spread out as they creep forward in the dark passages.

We deployed in opposite quadrants with a 6" radius no-mans land in the center. The table was 3.5' x 5' instead of 4' x 4'. 

We elected not to draw Campaign Secondary Objectives given the smaller size of the game.


ARMY SELECTION: 1250 points


Traitors - Pete

Death Guard
  • Preator Wolfgang: terminator armor, volkite charger, paragon blade, digital lasers, Fearless, It will not Die
  • Tactical Support Squad Folterer7 marines flamers, sergeant with artificer armor. 
  • Tactical Squad Toddestraffe20 marines with close combat weapons, sergeant with power fist and artificer armor and Apothecary Gerhard
  • Deathshroud Terminators: 5 terminators with scythes and hand flamers
World Eaters
  • The Red Butchers: 1 Devoured with dual chain fists, 4 Butchers with dual power axes


    Loyalists - Phil

    White Scars Brotherhood of the Wind 
    • Khan Sorqan: Paragon blade, iron halo, cyber hawk
    • Ebon Keshig Blackhawks: 5 Terminators: 4 with power glaives, 1 with power fist and bolter/melta combi-weapon
    • Ebon Keshig Midnight Sun: 5 Terminators: 2 with power fist and combi-bolter, 3 with power glaives
    • Tactical Squad Temgar: 10 marines, sergeant has power glaive, artificer armor
    • Tactical Support Squad Khoer: 8 marines with plasma guns
    • Recon Squad Chono: 8 marines with bolt pistol, close combat weapons, melta bombs, recon armor; sergeant with power fist and artificer armor


    ++++++++++++++++++++++++++++++++++++++++++++++++++++++++++++


    ++++++++++++++++++++++++++++++++++++++++++++++++++++++++++++

    Monday, May 20, 2019

    Horus Heresy Campaign Phase 3 - Battle 1: The Conclave of the Damned


    "Be careful out there."
    "If I wanted to be careful, I wouldn't have joined the drop troops."
     - exchange between Kozar troopers,
    2nd Platoon, 3rd company,
     just before Operation Comet


    Campaign To Date:

    It has been about 40 years since a combined force of Sons of Horus, Death Guard, and White Scars brought the Xhorik System into compliance during the Great Crusade. The major population centers of the largest continent were quickly brought under Imperial control in the typical fashion: a series of pinpoint attacks of overwhelming force by the Legions against the enemy's strong points, followed by rapid surrender. Due to the richness of the primary planet and the strategic location of the system on a sort of crossroads of warp currents, small garrisons of the Death Guard and White Scars legions were left on the planet to oversee the tithes of men and material to the Great Crusade and to help eradicate the threat of large ork populations in the eastern wastes.

    With the advent of the Horus Heresy, the Warmaster ordered that the Xhorik System be taken to act as a way station for resupply on his long march to Terra. The Death Guard and their human allies on Xhorik Prime launched an attack on the White Scars and their allies, the Stratocracy of Kozar.

    In Phase 1 of the campaign, the Traitors pushed the Loyalists from the war-torn border city of Bielyr in a series of bloody streetfighting.

    In Phase 2, the war escalated across the badlands of the Valbaara Plateau in several pitched battles. In the end, the Brotherhood of the Wind was defeated and their leader Praetor Zherdan was killed by the Death Guard.

    Phase 3 of the Campaign for Xhorik Prime finds the battered Loyalists unable to stand against the Death Guard heavy armor and so they are resorting to guerrilla tactics as the Traitor army advances north toward the major cities of Kozar. This phase will culminate with a large Traitor assault on a fortified Loyalist city. There will be four missions that will impact the deciding battle of the phase.


    PRE-GAME AND MISSION:

    This first battle represents the arrival of the World Eaters into the Xhorik system and their attempts to link up and coordinate with Praetor Wolfgang and his Death Guard. They have arranged a secret meeting at a remote location far from the front lines, but a Loyalist spy was able to get wind of the approximate location. Now a Loyalist R.A.P.T.O.R. team has been assembled to make a daring raid in an attempt to eliminate the Traitor leaders and disrupt their coordination for the coming assault.

    We played the Conclave of the Lost scenario from Horus Heresy Book VI. In this mission, commanders of two allied factions start in a central ruin with a few sentries around the perimeter. The attacker can deploy infiltrators and the rest of each force is in reserve. Victory points are awarded to the attacker for eliminating enemy HQ units by turn 3 or to the defender if they survive for three turns instead. The secondary objective is kill points for destroying units and we elected to use our house rule of units being worth one kill point for every 100 pts the unit cost, rounded up.

    The result of the Kill Team game we played previously setup this game by allowing the Traitor side to start with a dreadnought on the board (rather than just infantry) by obtaining replacement parts and for the Loyalist side to have one unit up to 200 points arrive from reserves on Turn 1 due to capturing additional data on the meeting location from scanner consoles. 


    ARMY SELECTION:  Points

    Traitors - Pete

    Death Guard
    • Praetor Wolfgang: Terminator armor, Paragon Blade, volkite charger, digilasers
    • Tactical Squad Stärke: 12 marines with close combat weapons, sergeant with power fist and artificer armor and Apothecary Wilhelm
    • Tactical Squad Ritter: 10 marines with close combat weapons, sergeant with power fist and artificer armor, rhino with heavy flamer
    • Tactical Support Squad März: 7 marines with volkite calivers and Apothecary
    • Contemptor Dreadnought Friedrich:  multi-melta, melta gun, dreadnought close combat weapon
    World Eaters
    • Vigilator Remulak: Cameoline and bolter
    • Legion Recon Squad The Butchers' Eyes: 4 marines with sniper rifles
    • The Red Butchers: 5 marines with power axes plus Devouer Argore with two chain fists
    • Land Raider Flesh Grinder: twin-linked lascannon sponsons, twin-linked heavy bolter
    • Contemptor Dreadnought Vorgett the Vicious: twin-linked lascannon, melta gun and chain fist


    Loyalists - Phil

    R.A.P.T.O.R. (Rapid Attack / Precision Tactical Operations / Reconnaissance) Team for Operation Comet:

    Kozar 87th Drop Troops, 3rd Company
    • Captain Xhaer with plasma pistol and Command Squad with medic, vox caster, carapace armor
    • Veteran Squad Recon with carapace armor and Forward Observers (infiltrate and homing beacon)
    • 2nd Drop Platoon:
      • First Stick: Infantry Squad with melta gun and vox caster
      • Second Stick: Infantry Squad with grenade launcher
      • Melta stick: Two special weapons squads with melta guns
      • 2 Drop Sentinels with multimeltas
    • Tauros with grenade launcher
    White Scars Brotherhood of the Wind 
    • Tactical Squad Kheeg: 10 marines with close combat weapons, sergeant with power glaive and artificer armor
    • Tactical Support Squad Khoer: 8 marines with plasma guns
    • Sicaran Omega Tank Destroyer Balestorm: Omega Plasma Array, heavy bolter and lascannon sponsons
    • Outrider Squad Anchin: 5 Outriders with twin-linked plasma guns, including sergeant Genju
    • Anvillus Pattern Dreadclaw Dop Pod
    Imperial Fists Support
    • Terminator Squad: 5 marines with plasma blaster, volkite charger, two power fists, chainfist, lighting claw

    ++++++++++++++++++++++++++++++++++++++++++++++++++++++++++++


    "Listen up, soldiers," snapped Captain Xhaer.

    "You've been briefed so you know the importance of Operation Comet. We've already been taking a beating and now the traitor scum is trying to link up with a warband of the World Eaters legion. We know the Death Guard are advancing on Berat. I know more than a few of you are from there and have family there. We cannot let them coordinate a joint attack on the city. This is our chance to disrupt their forces. We must take it and we must not fail.

    "We will have sixty minutes, plus or minus ten, from T-zero when the White Scars drop pod hits until the Valkyries come back in for extraction, depending on how much heat they face.  If the Primaries are neutralized, then take out any enemy targets of opportunity before we pull out. But watch yourselves; this isn't a suicide mission. We cannot afford to deplete too much of our fighting strength. We need to hit them fast and hard, accomplish our objectives, and get out of there alive. Understood?"

    "Sir, yes, sir!" was the shouted response of 2nd Platoon.

    "Into hell we go..." Xhaer began the regimental motto of the Kozar 87th.

    "...Willingly!" the men finished with raised fists.

    ++++++++++++++++++++++++++++++++++++++++++++++++++++++++++++


    BATTLE:

    Deployment Map

    Thursday, April 4, 2019

    Horus Heresy Battle Report 12: Control of the Valbaara Plateau (Phase 2 Finale)


    "For Horus to succeed, Terra must fall. For Terra to fall, Xhorik must fall. For Xhorik to fall, the Brotherhood of the Wind must fall. This is our task."
     - Praetor Wolfgang,
    Death Guard Legion


    Campaign To Date:

    It is the middle of the Age of Darkness, as the Warmaster Horus makes his long march toward Terra, leaving shattered star systems in his wake. Lying in the path of the traitors' advance, the planet of Xhorik Prime is torn apart in civil war after only recently being united by the Great Crusade. The largest nation, The Federation of Unimund declare for the Warmaster and Mortarian as their living gods and liberators, while their ancient rivals to the north, the stratocracy of Kozar and her allies, side with their kindred spirits and sworn blood brothers, the White Scars.

    In the first phase of the campaign, the Death Guard captured the border city of Bielyer and the only space port of any consequence in the region. 

    The second phase of the campaign has centered around the conflict for the Vaalbara Plateau. The White Scars struck first with  a false retreat leading to an ambush of the Death Guard vanguard. The Traitors were able to rescue Praetor Wolfgang in time to lead them to victory in the pitched battle that followed. Then, after using the space port in Bielyr to bring in a super heavy battle tank, the Death Guard attacked and destroyed the Loyalist base, Bunker  Tauruk. Praetor Zherdan and a small band of survivors were forced to fall back and rendezvous with reinforcements that had been on their way to the battle at the bunker. The White Scars reinforcements outflanked the pursuing Death Guard and drove them off.

    With both sides running low on manpower and supplies, the remnants of the two armies converge on an abandoned pumping facility in the middle of the badlands. Both Praetors elect to engage the enemy with everything at their disposal, attempting to drive the other from the Valbaara Plateau once and for all in this decisive battle.

    ++++++++++++++++++++++++++++++++++++++++++++++++++++++++++++


    The bitter north wind scoured the Valbaara Plateau. Praetor Wolfgang felt the tiny shards of ice and grains of sand stinging his face as he surveyed the abandoned outpost. With the help of the rugged terrain, he had managed to conceal a good portion of his forces from the White Scars Outriders that had been sweeping the area ahead of the main loyalist advance. 

    Wolfgang knew the White Scars forces in the area were critically low on supplies after the destruction of their stronghold, Bunker Tauruk, and that he had the opportunity to deliver a decisive strike here today. But time was not on his side. His own supply lines were stretched to cover the long distance of his northern advance from Bielyr and vulnerable to raids by the mobile White Scars and their Kozar allies. He had suffered significant causalities of his own, and ammunition and fuel were running low this far from his supply base. He was not worried about his men; they had marched and fought without food, water or rest for several days already and showed no sign of fatigue. But his vehicles could not drive on fumes or go into battle without shells. He needed these supplies as badly as the Loyalists, but he could afford to be patient and let the enemy come to him and his defensive positions. 

    Sergeant Albrecht's voice came over the comm link, indicating the sensors in his Rhino had picked up the enemy advancing into the center of the outpost.

    "Let them come. Don't attack until I give the word." Praetor Wolfgang ordered.

    He knew he had one chance to break the Loyalists here and he intended to do so.

    ++++++++++++++++++++++++++++++++++++++++++++++++++++++++++++


    PRE-GAME AND MISSION:

    To represent how the battlefield priorities were constantly shifting between the scramble for supplies and the need and desire to destroy the enemy, we played a Maelstrom of War mission from the WH40K 7th Edition Rulebook called Contact Lost. In this mission, you received tactical objective cards for each objective marker you controlled at the start of your turn. We liked that it rewarded being aggressive and controlling the table because a player would get more chances to earn victory points by holding objective markers during the game.

    Pete and Bill won the roll to select their deployment zone and then they won the roll to decide on deployment order and elected to deploy second. That strategy has been hugely successful in the campaign so far as it allows them to put their units in position against their optimal foes.

    After deploying Infiltrators and making Scout moves, Pete rolled a six and stole the initiative! 


    ARMY SELECTION: 1780 Points

    Traitors - Pete and Bill

    Death Guard
    • Praetor Wolfgang: Terminator armor, Paragon Blade, volkite charger, digilasers
    • Tactical Squad Stärke: 14 marines with close combat weapons, sergeant with power fist and artificer armor and Apothecary Wilhelm
    • Tactical Squad Ritter: 10 marines with close combat weapons, sergeant with power fist and artificer armor, rhino with heavy flamer
    • Tactical Support Squad März: 7 marines with volkite calivers
    • Heavy Support Squad Tragen: 7 marines with missile launchers and Apothecary
    • Contemptor Dreadnought Friedrich:  multi-melta, melta gun, dreadnought close combat weapon
    • Legion Fellblade with space marine crew

    Loyalists - Phil

    White Scars Brotherhood of the Wind
    • Praetor Zalitai Zherdan: Master-crafted power glaive,iron halo, digilasers, cyber hawk 
    • Tactical Squad Kheeg: 10 marines with close combat weapons, sergeant with power glaive and artificer armor
    • Tactical Support Squad Khoer: 8 marines with plasma guns
    • Sicaran Omega Tank Destroyer Kharvaak: Omega Plasma Array, heavy bolter and lascannon sponsons
    • Outrider Squad Anchin: 5 Outriders with twin-linked plasma guns, including sergeant
    • Anvillus Pattern Dreadclaw Dop Pod
    Kozar 87th Drop Troops, 3rd Company
    • Captain Xhaer with plasma pistol and Command Squad with medic and vox caster
    • 1st Drop Platoon:
      • Veteran Squad with carapace armor, infiltrate, homing beacon, melta bombs and breacher charge
      • Infantry Squad with melta gun and vox caster
      • Infantry Squad with grenade launcher
      • 2 Drop Sentinels with multimeltas
    • Tauros with grenade launcher


    BATTLE:


    Praetor Wolfgang gives his orders from a good vantage point on top of a rocky hill, surrounded by a block of his toughest soldiers.

    Thursday, January 3, 2019

    Horus Heresy Battle Report 11: The Pursuit of Zherdan

    "Even the greatest mountain is worn to dust by the wind"

    - Brother Veteran Gansukh,
    Brotherhood of the Wind, White Scars Legion


    Campaign To Date:


    It is the middle of the Age of Darkness, as the Warmaster Horus makes his long march toward Terra, leaving shattered star systems in his wake. Lying in the path of the traitors' advance, the planet of Xhorik Prime is torn apart in civil war after only recently being united by the Great Crusade. The largest nation, The Federation of Unimund declare for the Warmaster and Mortarian as their living gods and liberators, while their ancient rivals to the north, the stratocracy of Kozar and her allies, side with their kindred spirits and sworn blood brothers, the White Scars.


    In the first phase of the campaign, the Death Guard captured the border city of Bielyer and the only space port of any consequence in the region.


    The second phase of the campaign has centered around the conflict for the Vaalbara Plateau. The White Scars struck first with a false retreat leading to an ambush of the Death Guard vanguard. The Traitors were able to rescue Praetor Wolfgang in time to lead them to victory in the pitched battle that followed. Then, after using the space port in Bielyr to bring in a super heavy battle tank, the Death Guard attacked and destroyed the Loyalist base, Bunker Tauruk. Praetor Zherdan and a small band of survivors were forced to fall back and attempt to meet up with reinforcements that had been on their way to the battle at the bunker. After a lengthy pursuit over rough terrain, a Death Guard Eradication Patrol has finally caught up to Zherdan and his band of survivors and they are calling for reinforcements of their own.


    ++++++++++++++++++++++++++++++++++++++++++++++++++++++++++++

    Sergeant Albrecht rode across the frozen terrain in the command seat of the Rhino. Outside the vision slit, the world was darkness other than where the small transport’s spotlight shone. He watched the monitor displaying the vehicle’s scanner outputs intently. He had been tracking the fleeing Loyalists for three days and nights since the Death Guard victory at Bunker Tauruk. He knew he had been close on the second day, but his quarry had slipped away in a dust storm. They were on foot and some were injured. He knew it was only a matter of time until he brought them to bay.


    When the scanner display started blinking, Albrecht grinned in anticipation.


    “We’ve got movement, sir. Looks like about twenty pings. Moving with some organization, not randomly. Must be the enemy survivors,” the driver reported.


    Albrecht looked at the scan of the surrounding terrain and immediately gave the command to engage.


    “Support teams, dismount and move into position on the hill with the supply depot. Kill anything that moves,” Albrecht ordered over the com-link to the other Rhinos in his patrol.


    On the screen, the blips did not appear to be fleeing. They looked to be forming up and taking positions in the rocks. Albrecht swung the searchlight around and caught a glimpse of the pale shapes moving in the blackness. He spotted a distinct outline, a man larger than the others and with personal banners that he recognized.


    Sergeant Albrecht got on the com-link to report out: “This is Sergeant Albrecht of Squad Ritter. Target of significance confirmed. It is Praetor Zherdan. Moving to engage. Request support immediately.”


    ++++++++++++++++++++++++++++++++++++++++++++++++++++++++++++


    Pre-Game and Mission

    We decided that the scenario Hunter/Hunted from the Shadow War missions in Horus Hersey Book VI captured the feel we were after: the forces on the table at the start would represent the retreating White Scars survivors of the last battle pursued by Death Guard patrols, while the reserves would represent the Loyalist reinforcements mentioned in the build up to the last battle and on the other side, the Death Guard patrol calling for support once they identified a target of significance. In this mission, you start with half of your force on the table and half in reserve. It is a Kill Point mission with a few additional considerations: a bonus VP for wiping out a unit the turn it arrives from reserves (Mortal Blow); Slay the Warlord; and a bonus VP for wiping out a unit in a Sweeping Advance (Execution). We continued to use our house rule that Kill Points would be awarded for each 100 pts (rounded up) of the cost of a unit. The final special rule in this scenario was that the winner of a Shadow War roll would get to decide if the game started with d3 turns of Night Fighting.

    We decided the Search and Destroy deployment map would be most fitting for the mission. And with each player having two board edges, it would make the Reserves rules more interesting with more choices to be made by the players and the reserve units more likely to have an immediate impact.

    We decided whoever deployed first would get to select his deployment zone, in order to help balance out the disadvantage. We rolled off and Phil (Loyalists) won and elected to deploy second. Pete (Traitors) selected Zone III, which meant Phil would deploy in Zone I. Pete won the Shadow War roll and elected to start with Night Fighting, rolling up three turns of night.


    The battlefield: the rocky badlands of the Vaalbara Plateau. 

    ARMY SELECTION: 1150 Points

    Death Guard Eradication Patrol - Pete
    • Praetor Wolfgang: Terminator armor, Paragon Blade, volkite charger, digilasers
    • Tactical Squad Stärke: 14 marines with close combat weapons, sergeant with power fist and artificer armor and Apothecary Wilhelm
    • Tactical Squad Ritter: 10 marines with close combat weapons, sergeant with power fist and artificer armor, rhino with heavy flamer
    • Tactical Support Squad März: 7 marines with volkite calivers and Apothecary
    • Heavy Support Squad Tragen: 3 marines with missile launchers
    • Contemptor Dreadnought Friedrich:  multi-melta, meltagun, dreadnought close combat weapon

    White Scars, Brotherhood of the Wind - Phil
    • Praetor Zalitai Zherdan: Master-crafted power glaive, refractor field, cyber hawk, 
    • Tactical Squad Kheeg: 10 marines with close combat weapons, sergeant with power glaive and artificer armor
    • Tactical Support Squad Khoer: 8 marines with plasma guns
    • Sicaran Omega Tank Destroyer Kharvaak: Omega Plasma Array, heavy bolter and lascannon sponsons
    • Outrider Squad Anchin: 5 Outriders with twin-linked plasma guns, including sergeant


    BATTLE:


    Deployment: The Death Guard Patrol takes up position on a low hill being used as a supply depot. The White Scars turn to face their pursuers and use the rocky outcrops to stay out of sight of the Death Guard's long range weapons.

    Thursday, December 6, 2018

    Horus Heresy Battle Report 10: Assault on Bunker Tauruk

    "The bigger they are... the harder they hit."
     - Sergeant Albrecht,
    Death Guard Legion


    Campaign To Date:

    As the Horus Heresy rages across the galaxy, the Xhorik System is engulfed in civil war. On the planet of Xhorik Prime, the traitors have been on the offensive, gaining ground and mostly pushing the loyalist forces back to the northern badlands. Despite a few successful raids and ambushes, the White Scars and their allies have mostly been taking the worst of the conflict and have been forced back to their stronghold on the snowy Vaalbara Plateau, pursued by the relentless Death Guard.

    With control of the only major space port in the vicinity, the half-ruined city of Bielyr, the Death Guard are able to bring in a super heavy battle tank to further increase the pressure on the loyalist forces.The White Scars sent a kill team to attempt to disable the tank while it was still making final preparations to leave the port, but they ran into a rival Death Guard kill team protecting the crucial reassembly and armament facility. The White Scars were only able to cause modest damage to the facility, which would slightly delay the tank's arrival to the war zone.

    Meanwhile, Praetor Wolfgang of the Death Guard was preparing to launch his assault on the loyalist fortification known as Bunker Tauruk, knowing he had to strike before enemy reinforcements could arrive. As it stood, he would be starting the assault outnumbered, but he had to trust that his men had done their job and that his super heavy war machine would arrive in time to carry the day.


    ++++++++++++++++++++++++++++++++++++++++++++++++++++++++++++

    Praetor Zhalitai Zherdan watched the Death Guard forces approaching through the dry swirling dust and ice. Raw hatred burned inside him at the sight of the former heroes who had broken their vows, murdered their own brothers, and tore asunder the great accomplishment of humanity, the Empire of Man. He closed his eyes, channeling his anger to a cold focus on the death of his enemies. He gripped his power glaive and felt as one with with the ornate and flawless weapon. 

    No help would be arriving until tomorrow, at the earliest. His small force was on their own. Wolfgang surely knew it as well, which was why he was attacking now.

    Zherdan scanned the horizon for any sign of a large dust plume indicating the approach of the Death Guard Fellblade. If Sergeant Khaljyk and his kill team had succeeded and the Fellblade was unable to join the assault, he was confident he could turn back the traitor tide here today. But if Kill Team Sürel had failed... he knew he had little chance of stopping the monstrous machine with the firepower he had available. He knew his best chance was to find and slay Praetor Wolfgang, cutting the head from the snake and giving his reinforcements time to arrive and launch a counter attack.

    As the Death Guard advanced nearly into range, he finalized the positions of his men, gave his last orders, and positioned himself in the center of the fortification, ready to strike out at any enemy that dared approach too close.

    ++++++++++++++++++++++++++++++++++++++++++++++++++++++++++++


    PRE-GAME AND MISSION:

    We played a modified version of Blood Feud, the first of the original six Horus Heresy missions. This mission awards victory points for destroying enemy units, as well as Slay the Warlord and a bonus VP for the side with the most units left at the end of the game. Additionally, each side picks a specific type of unit to kill for bonus victory points. To stay with the story of the campaign at this point, we decided that Pete (Traitors) would be trying to destroy the loyalist fortification and we counted each individual bunker of the Castellum Stronghold as being worth an extra VP.  For the Loyalists, we thought it would make the most sense to target the enemy vehicles as the biggest threat so we made each vehicle (rhino, dreadnought and Fellblade) worth an extra victory point. Both of these were slight variations from the actual rules, but seemed fair since each side could earn up to three extra VPs. We also decided that a destroyed unit would be worth a number of VPs relative to its point cost rather than all units being worth one victory point: 0 - 100 pts = 1 VP, 101 - 200 pts = 2 VP, etc.

    Finally, with the previous Kill Team game being a draw, we decided that the Fellblade would be available for the battle, but would be in "Delayed Reserve" which meant a 6+ roll to arrive in Turn 2, 4+ to arrive in Turn 3, and would automatically arrive in Turn 4.

    Pete setup the terrain and we mutually decided on the deployment zones to accommodate the large fortification. Phil won the roll to go first and elected to do so.


    ARMY SELECTION: 1700 Points

    Death Guard - Pete
    • Praetor Wolfgang: Terminator armor, Paragon Blade, volkite charger, digilasers
    • Apothecary Wilhelm
    • Apothecary
    • Tactical Squad Stärke: 14 marines with close combat weapons, sergeant with power fist and artificer armor
    • Tactical Squad Ritter: 10 marines with close combat weapons, sergeant with power fist and artificer armor, rhino with heavy flamer
    • Tactical Support Squad März: 7 marines with volkite calivers
    • Heavy Support Squad Tragen: 3 marines with missile launchers
    • Contemptor Dreadnought Friedrich:  multi-melta, meltagun, dreadnought close combat weapon
    • Fellblade Super Heavy Tank

    White Scars - Phil

    White Scars, Brotherhood of the Wind
    • Praetor Zalitai Zherdan: Master-crafted power glaive, bolter, iron halo, cyber hawk, digilasers
    • Tactical Squad Kheeg: 10 marines with close combat weapons, sergeant with power glaive and artificer armor
    • Tactical Support Squad Khoer: 8 marines with plasma guns
    • Sicaran Omega Tank Destroyer Kharvaak: Omega Plasma Array, heavy bolter and lascannon sponsons
    • Castellum Stronghold with two twin-linked lascannons and a twin-linked heavy bolter
    Imperial Fists, Boarding Party
    • Terminator Squad: Plasma blaster, volkite charger, two power fists, chainfist, lighting claws
    Kozar Army Auxillia
    • Infantry squad: 20 infantry with lascarbines
    • Grenadier squad: 12 grenadiers with melta gun and grenade launcher
    • Sentinels: 2 sentinels with multi-meltas
    • Tauros: counts-as Legion Attack Bike with autocannon


    BATTLE:


    The White Scars and their Imperial Fist and Kozar Army allies defend their base as the implacable Death Guard slowly approach. Luckily for the defenders, Kill Team Sürel partially succeeded in their mission and at least delayed the Traitors' massive new weapon of war. But for how long?