Showing posts with label Drop Troops. Show all posts

Tuesday, December 23, 2025

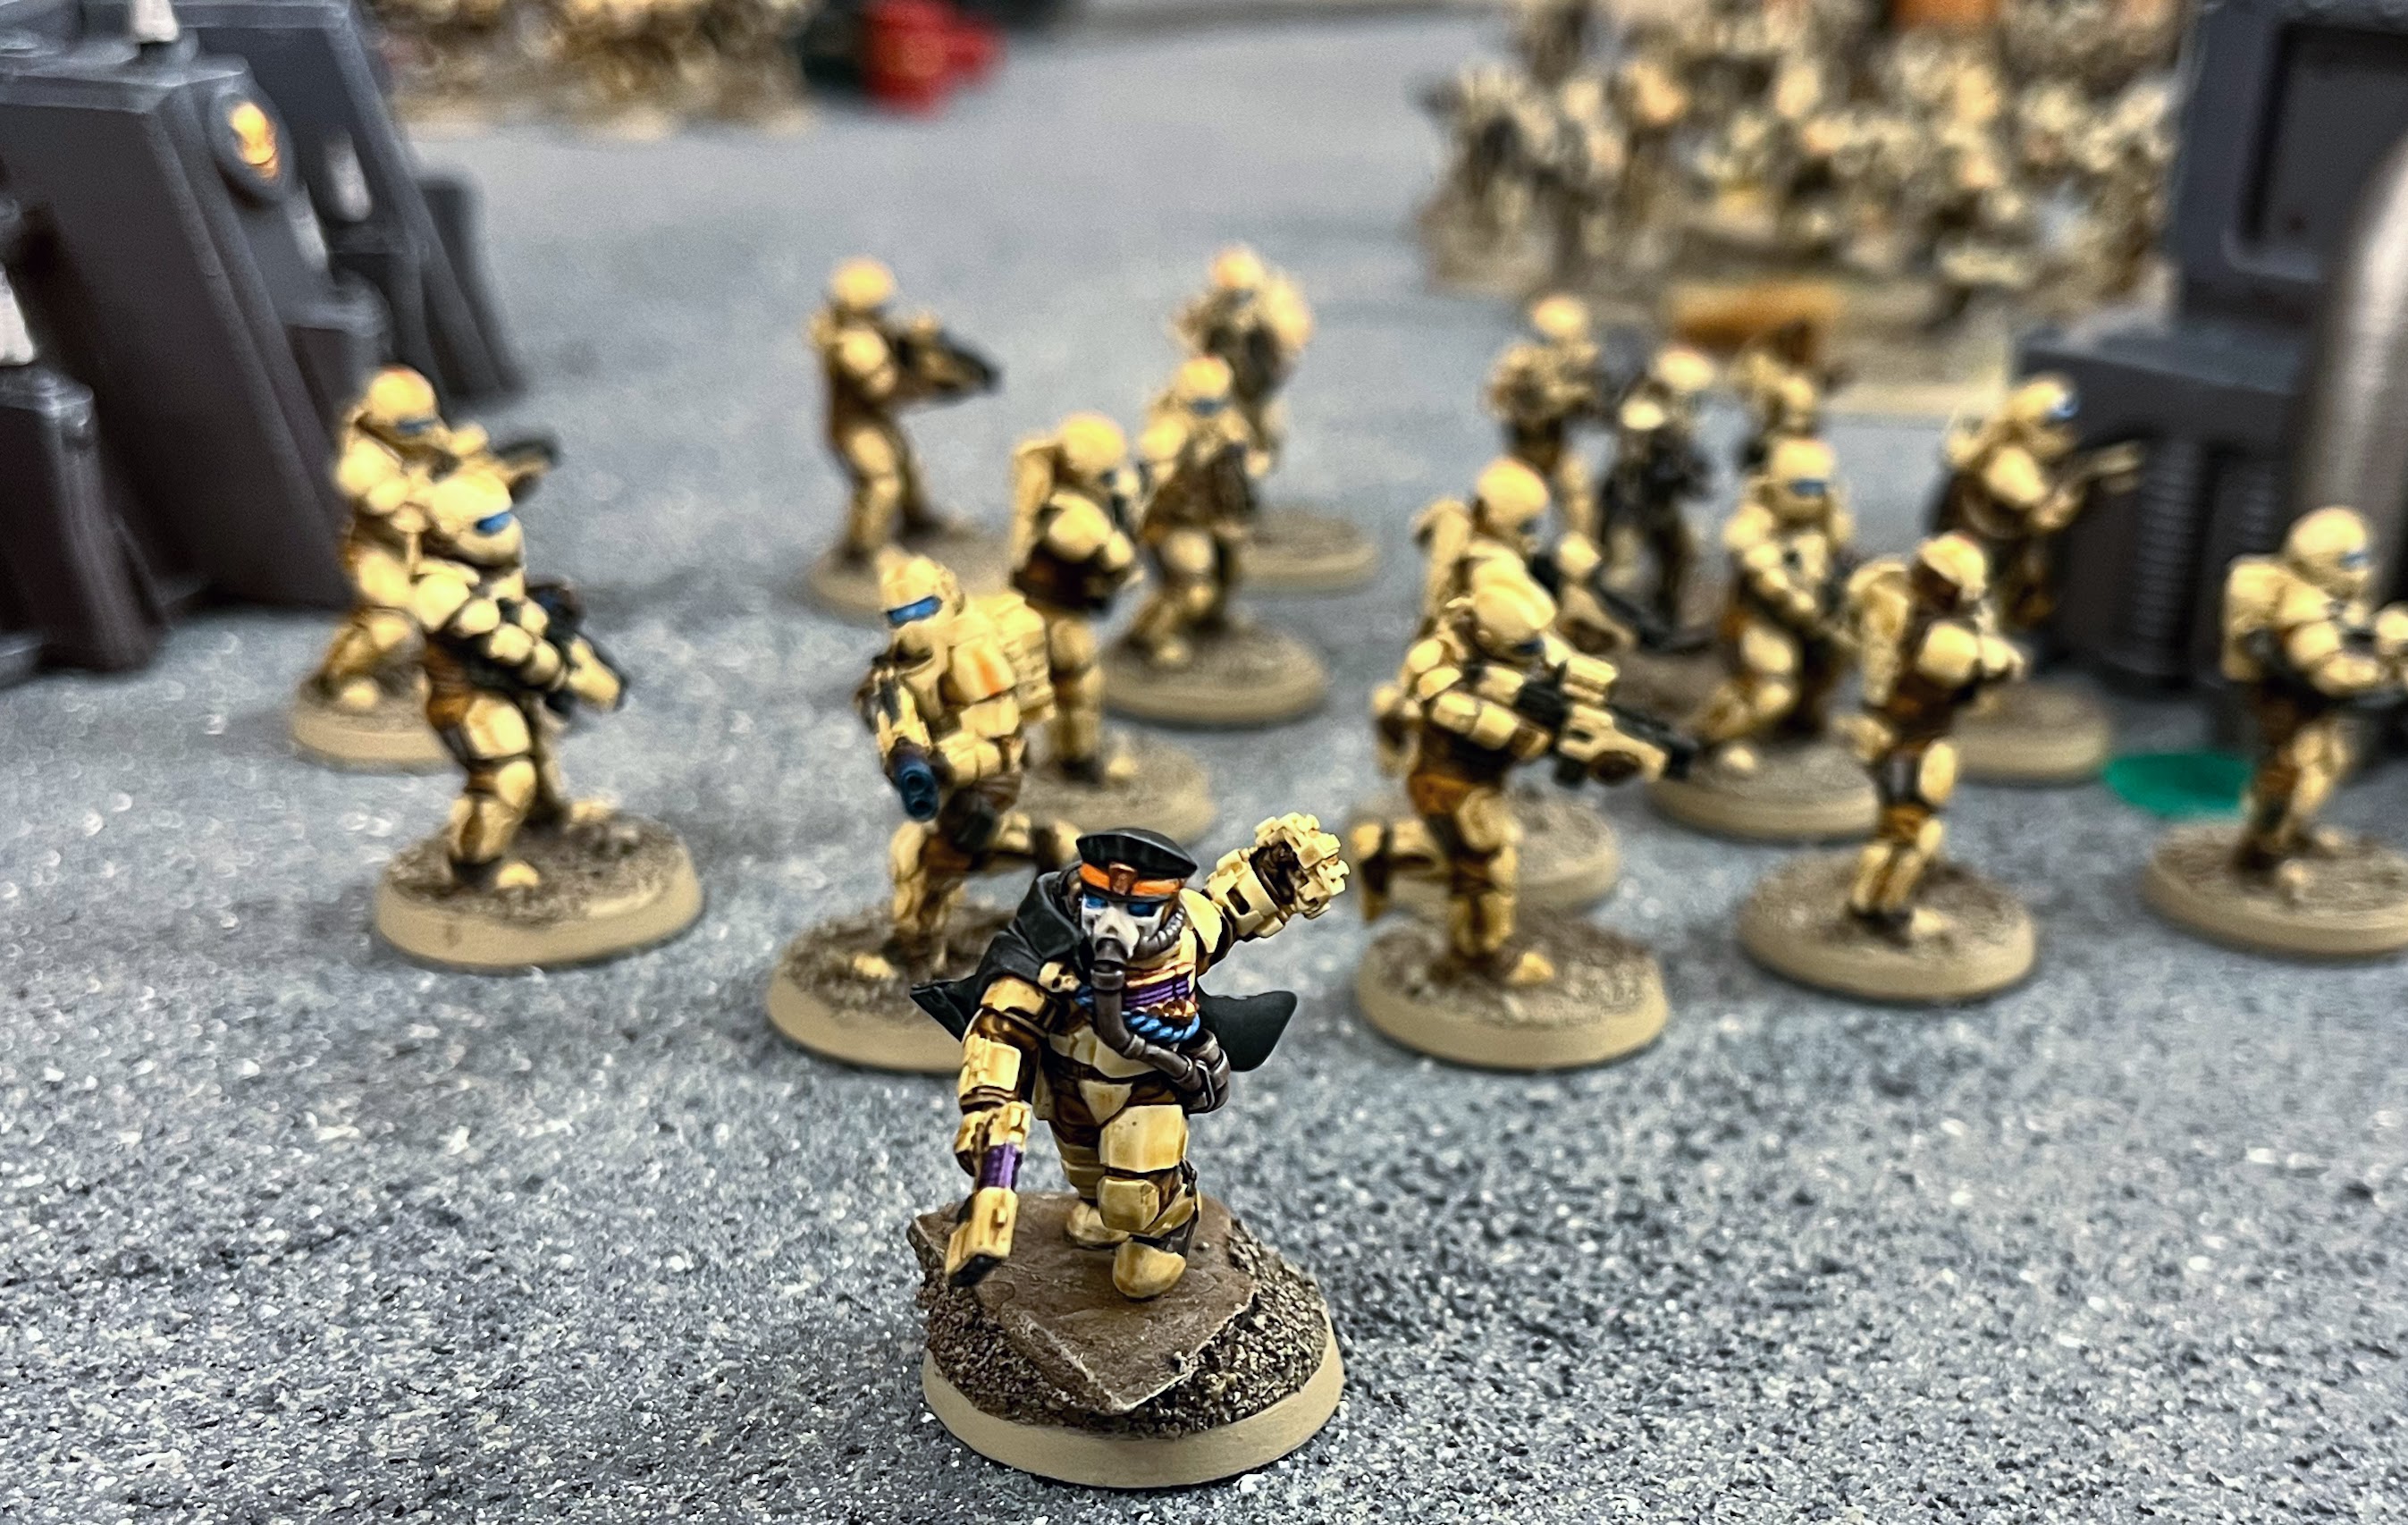
M32 Battle Report 5: Take and Hold - Xhorik D-87 vs Hive Fleet Tarasque

  "You wanna live forever?!"

-Unofficial traditional pre-jump battle cry of the Xhoirk 87th Firebirds 


Background:

The Ork invasion of Xhorik Prime has unwittingly awoken a dormant Tyranid exploratory tendril that had remained in the stasis of interplanetary travel while buried in the polar icecap of Xhorik Prime. The heat and movement of the arriving and mobilizing Orks caused the Lictors to reanimate. As they found prey and released pheromones, more and more of the frozen Tyranids emerged from their long hibernation and joined in the hunt. 

Campaign Summary M32: The War of the Beast - The Third Xhorik War


Scenario:

We played a simple Take and Hold mission from the Fourth Edition rulebook. There was a single central objective and whichever side had more scoring units within 12" at the end of the game wins. We rolled for Night Fighting and determined it would kick in for turn 6.  

Both sides would be fighting for control of a signal beacon in an abandoned Imperial outpost. The beacon could be used by the Imperial forces to bring in air support in the form of targeted bombing runs on Tyranid positions. The Xhorik D-87th Company was given this task due to the expertise they had developed in fighting this new xenos threat. Compiling countless individual pieces of information observed by a multitude of Tyranid life forms spread across the area, the Hive Mind concluded the humans were converging on this point and determined that whatever your enemy is trying to do should be stopped. A collection of quick-moving broods was assembled along with a few synapse nodes in the form of towering Warriors and psychic zoanthropes, all under the overall command of a cunning Broodlord. 

With night coming early at these northern latitudes, each army had only limited time to take control of the critical objective. 


Pre-Game:

"Into Hell We Go"

Phil: I started this army with the first test model way back in 2015 and have worked on it in small bursts of energy over the last decade. (It's been a labor of love!) And for all of that time, I have been wanting to play some games against Tyranids. Imperial Guard vs Tyranids is one of the most classic matchups of the 40k universe and has a special place in my heart. It draws on themes from countless classic sci-fi books and movies. And The Anphelion Project was the first Imperial Armor book that my brothers and I ever owned or read. In all these years, the closest we have come is a game of Kill Team where The Lucky Bastards of the Xhorik 87th took on a brood of genestealers of Hive Fleet Tarasque. (Drop Troops against Space Marines? Less fun. Drop Troops are like Space Marines Lite, with an emphasis on the LITE: anything they are supposed to do, marines just do twice as well.)

First, a word on which rule set to use. IA3: The Taros Campaign would have been best for 4th Edition WH40K, but I only had the 2nd edition of that book, which was updated during WH40K 6th Edition. IA4: The Amphelion Project has the rules for the D-99 "special forces" drop troops, but it has unique bespoke rules for flyers that would add complexity to the game. IA:8 Raid on Kastorel-Novem came out during 5th Edition so is mostly very compatible with 4th Edition and it just treats flyers as fast skimmers. I decided to use the IA4 army rules but the simplified flyer rules from IA8 since flyers did not exist in the core WH40k game until 6th edition. The IA4 D-99 list is very thematic and flavorful and makes it easier to field a smallish army like mine because you take individual veteran squads instead of platoons. Every trooper is more skilled than normal, but you have a distinct lack of bodies for an Imperial Guard force - quite a concern when going up against a horde of gribblies! 

For the rule of cool, I decided to limit myself to my converted Elysians and not take any of my storm troopers, grenadiers, "Ogryn" battle suits, bikers, etc. This gave me a reasonably balanced force with 53 infantry, split into eight squads, two batteries of sentry guns, two walkers, a Tauros, and two fliers (the Avenger counting as a Vulture, the closest equivalent gunship in the list). The weapon composition is not ideal for Tyranids (7 meltaguns and no flamers??) since my historical foe was always space marines. But the missile launchers and fliers gave me some versatility, and I figured all the lascannons, meltaguns, and multi-meltas, combined with my fast skimmers and deep striking infantry, should allow me to slag the big bugs, thus depriving his hordes of synapse control.

The mission was simple: hold the center objective at the end of the game. After watching the Tyranids wreck a static gun line Imperial Guard army in the first battle of our 4th Edition campaign, I knew I could not afford to sit back in my deployment zone and let the Tyranids control the entire table or I would never reach the objective. I used a standard deployment of infantry and artillery aimed at the center objective and placing my mobile fliers / skimmers positioned on the flanks to fend off the speedy genestealers and hormagaunts before swinging into the center. I elected to keep a few units in reserve to deep strike via grav chute combat drop: the special weapons squads (melta stick A and B) to take out choice targets with their short-range weapons and some infantry squads to drop in close to the objective and fight their way to it. I mounted one unit in the Valkyrie as another way to keep them safe until I was ready to grab the objective late. (I knew trying to sit on the objective and hold out against a Tyranid assault for multiple turns was a losing proposition!) I wanted all of my missile launchers on the table from the start in order to maximize my early shooting. 

The plan was to use the gun line to soften up the center, the skimmers to blunt the fast flanking attacks, the deep strikers to hit targets of opportunity, and then converge on the objective with some late-arriving deep striking units and the squad in the Valkyrie. All that stood in my way was an absolute mass of scuttling claws and gnashing teeth...


Unleash the Swarm

Bill: My army list has remained utterly unchanged since its inception about 20 years ago, consisting of tons of weak, cheap units that can swarm forward and dominate the table in the style of classic sci-fi monsters, drowning the better equipped but hopelessly outnumbered human defenders. Powerful enemy units like tanks and dreadnoughts would have to ignored or tied up in suicidal 'tar pit' melee attacks since I just didn't have the high strength weapons to destroy them. My only options were two Warp Blast zoanthropes (who still couldn't be relied upon since they had to manifest their good attack,) a carnifex (who was too slow to reliably attack anything,) and genestealers (who only rend on a roll of 6 in melee.) Luckily, the mission chosen was well-suited to a 'horde' style army, rewarding taking many small squads and ignoring VPs gained from kills so I could spread out my termagants into 4 ten-strong squads that would be fearless, giving me an excellent core to hold the center objective. 

Adding melee power to the center was the intimidating bulk of the carnifex, while shooting was enhanced by a walking gun line of warriors all equipped with medium-strength blast marker guns, perfect for splattering low armor humans but virtually useless against marines since even my heavy weapon was only AP 5. However, against drop troopers, they'd be given their chance to shine. 

I had to spread my army out across the entire width of the table to keep my 7 broods from tripping over each other or blocking movement. The stealers and extremely swift hormagaunts would sweep the flanks, keeping the pressure up on Phil's army and drawing fire from my center, while everything else plunged into the meat grinder. The trick would be to resist overextending myself. It might be tempting to wreck a few tarantulas or dug-in infantry but that would not win the mission! 

And so, with no boasts or battle cries, the silent but cunning aliens began calmly slinking forward, eager to seize control of a technological treasure they had no way of understanding. All they knew was that it was important, somehow... The will of the Hive Mind had decreed it.


Belligerents:

Hive Fleet Tarasque  - 1453 points

  • Broodlord: extended carapace
  • Warriors (5): enhanced senses, extended carapace, toxin sacs, 3 x deathspitters, devourer, barbed strangler
  • Carnifex: reinforced chitin, extended carapace, regenerate, 2 x adrenal glands, toxin sacs, tusked, toxic miasma, 2 x scything talons
  • Zoanthropes (2): 2 x warp blast, 2 x synapse
  • Lictor
  • Genestealers (10): 4 x scything talons
  • Genestealers (9): 4 x scything talons
  • Termagants (10): fleshborers
  • Termagants (10): fleshborers
  • Termagants (10): fleshborers
  • Termagants (10): fleshborers
  • Hormagaunts (15): extended carapace


Xhorik D-87 Drop Troops (The Anphelion Project D-99 rules) - 1449 or 1364 points? 

  • Veteran Command HQ (5): Senior Officer, medic, vox, missile launcher
  • Veteran Command HQ (5): Officer, medic, grenade launcher (deep strike)
  • Special Weapons Squad A: 3 x meltaguns (deep strike)
  • Special Weapons Squad B: 3 x meltaguns (deep strike)
  • Veteran Squad A (10): demo charge, meltagun, vox (deep strike)
  • Veteran Squad B (9): demo charge, vox (in Valkyrie)
  • Veteran Squad C (6): missile launcher, grenade launcher, vox
  • Veteran Squad D (6): missile launcher, grenade launcher, vox
  • Drop Sentinel Squadron (2): 2 x multi-melta
  • Sentry Gun Battery (3): 3 x twin-linked heavy bolters
  • Sentry Gun Battery (3): 3 x twin-linked lascannons
  • Vulture: heavy bolter, twin-linked lascannons, 2 x hellstrike missiles, searchlight, extra armor, infrared targetting (skimmer)
  • Valkyrie: rocket pods, multilaser, searchlight, extra armor (skimmer)
  • Tauros: grenade launcher
Note: We had agreed on 1450 points and that is what my army list said at the time, but when I go back and add it up a year later, I only get 1364 points. I probably got confused on which rule set to use for the fliers as their costs and rules are quite different between IA4 (special flyer rules) and IA8 (treated as fast skimmers).

Xhorik D-87th Special Forces - Tyrannic Veterans


Tuesday, January 21, 2025

Xhorik 87th Drop Troopers Infantry - Contrast Recipe

 After the success of using Contrast on my grenadiers to complete 36 models in 36 days, I decided to try the same recipe and technique on my Drop Troopers. I have two infantry squads that I bought off eBay after the range was discontinued by Forge World. They were obvious recasts and of worse quality than the FW models so they sat in the drawer for a few years. But I need more infantry for the army so I decided to paint them up using the speedy Contrast method. They do not look as good (to me) as the original scheme, but they are obviously a lot faster and they are close enough that they do not look way out of place deployed on the table with the original troopers. 


I just love these guys, despite their sometimes awkward poses, how fiddly they are to assemble, the lack of options, the high (dollar) cost, and the generally poor tabletop performance in most rulesets. They just have so much flavor and they feel truly unique to me. Not another person on the planet has an army with this exact combination of bits, which is one of the things I love about this hobby.

Sunday, August 18, 2024

Operation Downfall Battle Report 5: Maelstrom of War

  "An alliance lasts exactly as long as it is advantageous to both parties. In war, survival is everything and I do whatever it takes."

-General Titus Ghoulv, Commander of the Iron Battalion 

Background:

Operation Downfall was the Loyalist codename for an attempt to establish a secure landing zone on Xhorik Prime using a planetary drop force from Xhorik Secundus with an attempt to rendezvous with the remnants of the White Scars garrison on the capital planet of the system. 


At this point, the Loyalists have the upper hand with two wins, a loss and a draw. They also have the momentum after their most convincing win yet.

After taking heavy casualties and seeing the Traitor Legions distracted by the Loyalist marines, the Chem Dogs decide to do some pillaging to resupply.


Scenario: Maelstrom of War

Victory points are earned at the end of each player turn for meeting the criteria listed on the missions cards. Each player has three mission cards to start the battle and when one is achieved, it is turned in and replaced. At the end of each player turn, the player can voluntarily discard one card and replace it with another from the deck. VPs can be earned by holding specific objectives, destroying certain types of units in certain ways, or achieving other miscellaneous feats. 


Belligerents:

Death Guard: Pete
Rite of War:  The Reaping
Commander: Praetor Wolfgang - 

2000 points


Traitor Militia: Bill
General Titus Ghoulv’s Iron Battalion:
“The Marauders of Meddeon VII”
“The Pirates of the Northern Fringe”
“The Chem Hounds”
Provenances of War: Alchem Jackers, Industrial Stronghold, Warrior Elite
Commander: General Titus Ghoulv - Robber Baron

2300 points


Loyalist Militia: Phil
Xhorik 87th Drop Troopers, 3rd Company:
"The Firebirds"
Provenances of War: Warrior Elite, Legacy of the Great Crusade
Commander: Captain Skander Xhaer - Marcher Lord

2300 points


Battle:

Some key moments and themes from the battle:

The Contemptor was dominant, almost single-handedly destroying the Chem Dogs' right flank.

There is something wrong with the rules when this giant tank is so utterly bested by this walker.

The OGRE Mech Suits faced off against Wolfgang and the Deathshroud.

The Sentinels were one of the few effective units the militia had.

The OGREs attempted to Hold the Line, but failed morale, then failed again when charged and fled. Should have used Overwatch!.

The Chem Dogs and Xhorik 87th face off over Objective 1. The grenadiers would wreck the Leman Russ in melee with krak grenades.

The Chem Dogs "Ogryn" mercenaries attempted to engage the Death Guard Contemptor but were shot up going in and then easily defeated by the dreadnought. 

The Deathshroud are brought down by concentrated fire from most of the Xhorik forces, but Praetor Wolfgang survives.

The Praetor charges and single-handedly destroys a grenadier squad with a discipline master.

The Xhorik fliers arrive, but the Arvus is shot down before it can deliver its transported unit to the objective. 

The Chem Dogs make a push for Objective 1, finally getting some VPs in the last few turns.

The Death Guard infantry finally move in and easily wipe out the Chem Dogs grenadiers.

Captain Xhaer survives the fray. 


Final Victory Points: 
Death Guard: 7
Xhorik 87th FIrebirds: 7
Traitor Milita Chem Hounds: 4

Draw!


Post-Game:

This battle made clear just how inferior the militia rules are compared to the Legions. Even with 15% more points for the militia armies, the Death Guard easily controlled the game. The Xhork militia managed to keep up in VPs due to swarming the board with Line units and getting lucky enough to draw some objectives on their side of the board. The two militia sides also threw most of their best stuff against the Legion and only skirmished with each other by comparison. The tanks of the Traitor militia really struggled to do any damage against the Death Guard due to the massive de-buffs on the militia ordnance weapons. 

The result being a draw between the Xhorik Drop Troopers and the Traitor Death Guard mean the Loyalist results for the Operation Downfall phase of the campaign stand at 2-1-2. I think the next battle could serve as as suitable finale for the campaign, determining the result of the Loyalist attempt to establish a beachhead on the Traitor-controlled planet of Xhorik Prime. 


Sunday, December 17, 2023

Xhorik Commander

 After a long hiatus, I finally painted a few models: a Xhorik 87th commander with power fist, another grenadier, and another recon marine with shotgun (I figure he can be a cheap body to add to the sniper squad and be the first one to bite the bullet). Again, painted 90% with Contrast. 


Thursday, February 10, 2022

Finishing the Fighting 501st

 After a long hiatus, I picked up the rest of the Stormtroopers and finished the second squad. I painted the six last year and the last three riflemen and the sergeant to finish. 


The sergeant is made by a non-GW company to fit the aesthetics of the now-defunct model range. I found it on eBay and I love that my two sergeants are not identical. I also love that this one is resin so I would not have to cut off another metal head and hip-slung helmet because modifying those old metal models is rough.

This now gives me:
Sergeant with power sword and hotshot laspistol
Sergeant with power sword and plasma pistol
Two troopers with flamers
One trooper with meltagun
One trooper with plasma gun
14 troopers with hotshot lasguns

In all, enough for two full 10-man units of the Fighting 501st to join the Xhorik 87th Drop Troopers in their most critical missions.

Sunday, October 24, 2021

Saturday, September 25, 2021

Codex Drop Troopers - Featuring the Xhorik 87th

 A Drop Trooper hobbyist group got together and created an unofficial fan Codex for the new edition of WH40k, since the Drop Troopers have been... dropped... and are no longer officially supported. They saw some of my photos and wanted me to submit some for the Codex so I did and they show up in a few places, including the Regimental Colors pages. Here are a few samples:


I have not played 9th edition and don't have any plans to start in the near future, but this fan codex is really impressive and it is cool to see the Xhorik 87th featured as an unofficial part of the Imperium.


Saturday, August 21, 2021

Xhorik 87th Commission Art


We have something a little different today.

A few months ago, I came across some nice-looking art for an Imperial Guard regiment on a hobby community site. I was intrigued enough that I reached out to the artist and asked what it would take to get a piece done for my Xhorik 87th Drop Troopers. The price seemed reasonable so I decided to give it a try. I shared with him the little bit of story I had written on this blog and a bunch of photos of painted models. I told him to just create whatever he felt would represent the models and the background.

After a few months, here is the result:


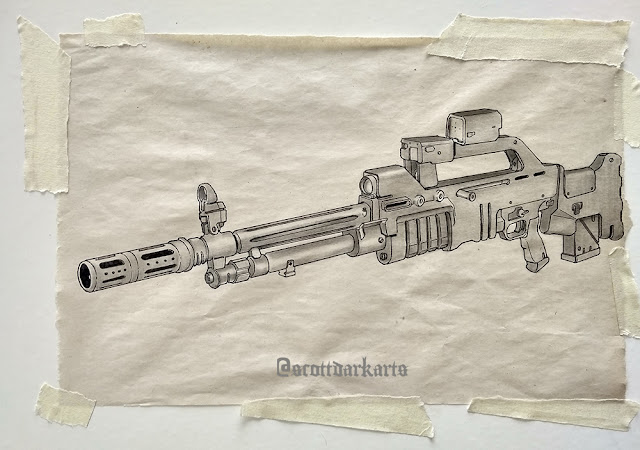
Antax pattern lascarbine sketch


I am very impressed with the effort he put into capturing the unique model of lasgun I converted. 


The second thing he created were the markings and emblems.


He drew a firebird based on the regimental banner model that I painted. And if you look at the badges, there are a lot of 8s and 7s in the imagery, such as the 7-sided polygons inside the 8-sided polygons or the numbers of spears, to represent the 87th. He used spears to represent this regiment being the spear tip of an Imperial army. And of course lots of orange, the regimental color. I really appreciated all the thought he put into the symbolism. The small badges are meant to be at a resolution that could be printed onto transfers for shoulder pads, if I ever want to try that.


Drop trooper sketch


Drop trooper in action


Here is everything put together. 


I think it turned out pretty great. You can tell he put a lot of thought into the project. The art of the trooper is a little busy for my taste, but I like that he captured the unique helmet (on the ground) and lasgun from my conversions and tried to convey a sense of what a drop trooper would be doing: calling in bombing strikes rather than fighting in the trenches. Overall, it was pretty cool to collaborate with someone else I've never met on a hobby project. 

Monday, August 16, 2021

More Stormtroopers

 Painted a few more stormtroopers. Added a few grenades, pouches and a knife to make them look as kitted-out as my drop troopers.


Saturday, August 7, 2021

Operation Downfall Campaign Report 2: The Battle for Alteron Bridge

"I got a bad feeling about this one."
"When was the last time you felt good about anything?"

- Exchange between veterans of the 2nd squad, 1st platoon, 4th company of the Xhorik 87th,
prior to the battle for Alteron Bridge


Campaign To Date:

It is the middle of the Horus Heresy and civil war rages across the galaxy on a thousand worlds. Everywhere, former brothers and sworn allies have turned against each other in a fury of betrayal and hatred. The Warmaster Horus has begun his long march to Terra, crushing all resistance before him. In his direct path is the Xhorik System, located at a strategic crossroads of Warp currents in a sector of space known for smooth transitions between realspace and the Warp. This prosperous system has become a focal point for the Traitor war effort as they attempt to seize control of the key spaceport facilities to enable a rapid refuel and resupply of the main Traitor war host as they make their way to the throne world. 

On Xhorik Prime, the key trading and transport hub of the system, Traitor forces are newly victorious over those loyal to the Emperor in a massive planetary civil war that erupted along old, pre-Imperial factional rivalries. A combined force of Death Guard and World Eaters has crushed the stratocracy of Kozar and their small garrison of the White Scars Legion. The major space ports are now securely in the hands of the Traitors, although small bands of Loyalist survivors continue to wage a shadow war along the fringes of the high desert wilderness. 

On Xhorik Secundus, the planetary governor has remained loyal to the Emperor and maintained control of most of the planet. As war raged on Xhorik Prime, armies began mobilizing for an invasion of the heart of Traitor territory, in the Federation of Unimund. The first phase of the invasion was codenamed Operation Downfall and called for a massive nighttime drop assault on key enemy installations in order to clear the way for the massive, lumbering landing craft that would be bringing the bulk of the invasion the next day.

Although suffering significant casualties in the war for Kozar, the Xhorik 87th Drop Troops Regiment, the Firebirds, were called upon to support Operation Downfall from Xhorik Prime, along with several dozen drop regiments from Xhorik Secundus attacking from orbit. They would be making simultaneous night drops to secure key landing zones, disable defense and communication capabilities, and clear roads and bridges to allow the Loyalist forces to move quickly out of the vulnerable landing zones, establishing a beach head. The target of the 4th Company was the Alteron Bridge. They were to secure it in the night and hold it against any and all enemy counterattacks to enable the landing forces to quickly breakout of their landing zones and establish a controlled perimeter. 


Pre-Game and Mission:

The scenario would be simple. We would play the Bridge Assault scenario posted previously, except with the victory condition that whoever controlled the bridge at the end of the game would win. 


Army Selection:

Traitor Counterattack Force - Pete

General Titus Ghoulv’s Iron Battalion – “The Marauders of Meddeon VII”, “The Pirates of the Northern Fringe”, “The Chem Hounds”
  • Force Commander Saghesh the Sadistic: power sword, plasma pistol, refractor field, Alchem-Jackers, Warrior Elite
  • Squad Alpha - The Tongue Collectors: 15 Grenadiers with plasma gun, flamer
  • Squad Beta - The Psycho Slaves: 15 Grenadiers with melta gun, flamer
  • 2 Auxilia Medicae: Dr. Cut and Dr. Cauterize
  • Leman Russ Battle Tank
  • Leman Russ Demolisher
  • Leman Russ Vanquisher
  • Malcador Battle Tank Chimaera with armored ceramite and flare shields
Death Guard Allies
  • Tactical Squad with vexilla and sergeant with power fist
  • Tactical Support Squad with flamers and Rhino with heavy flamer
  • Deredeo pattern dreadnought with Arachnus heavy lascannon battery, twin-linked heavy bolter, Aiolos missile launcher, and helical targeting array


Xhorik 87th Drop Troopers, 4th Company - Phil

This battle would be a tougher task for my airborne infantry than the last scenario. Holding an open objective in the center of the table would be suicide for an army without any solid armor so I knew I would have to utilize some fortifications in order to have a chance. I took an Aegis defense line along with some tank traps to represent the drop troopers' taking the time to establish a fortified position on the bridge. They had arrived in the night and had time to prepare, after all. 

I would be using all of my Xhorik 87th regiment that I had painted, which would give me some firepower in the form of the three fliers: the Valkyrie transport, the Lightning attack fighter, and the newly-arrived Avenger strike fighter. My plan was to use my veterans to establish a solid line at Pete's end of the bridge to stall him, while deploying a second rank at the other end of the bridge to hold the objective later in the game when the first rank was inevitably destroyed. I would use my reserves to attack Pete's militia on their side of the bridge, pinning them down and striking at any exposed rear armor I could see and generally causing chaos. From previous experience, I knew Pete would hesitate to rush the bridge with everything he had in his first few turns as long as the threat of my reserves striking his rear was still  viable. I knew I could not destroy his much tougher force, but with any luck, I could tie him up on his side of the bridge and use my air support to destroy anything that tries to cross the open space of the bridge toward my second rank. I would be asking my lightly-armed paratroopers to stand against a wall of tanks and a few squads of superhuman space marines, but I knew they were up to the task. To die in defense of the Empire of Man is their duty!

  • 4th Company command section (5): regimental standard, medic, vox, power sword and plasma pistol
  • Lord Commisar with power sword, bolt pistol, and refractor field
  • Stormtrooper squad (10): melta gun, plasma gun, sergeant with power sword
  • 4th Co., First platoon: Veterans
    • Veteran squad (10) with carapace armor, three sniper rifles and missile launcher
    • Veteran squad (10) with carapace armor, two sniper rifles, missile launcher and plasma gun
    • Veteran squad (5) with shotguns and demo charge
  • 4th Co., Second platoon: Grav chute insertion force
    • Platoon command squad (5) with power fist, vox, medic and two grenade launchers
    • 1st Infantry squad (10) with melta gun 
    • 2nd Infantry squad (10) with grenade launcher 
    • Special weapons squad (6) with three melta gun teams 
    • Special weapons squad (6) with three melta gun teams
    • Heavy support squad (6) with three missile launchers
    • Drop sentinels (2) with multimeltas
    • Valkyrie with multilaser, 2 Hellstrike missiles, and 2 heavy bolters
  • Tauros with grenade launcher
  • Drop troop recon bikers White-Bolts (5) with demo charge
  • Drop troop recon bikers Black-Bolts (5) with breacher charge
  • Sentry Guns (3) with twin-linked lascannons
  • Lightning: six missiles, twin-linked lascannon
  • Avenger: Avenger bolt cannon, twin linked lascannon
**WH40k Taros Campaign army list with 15% discount


Battle:


The lead elements of the Xhorik 87th 4th Company fortify the Alteron Bridge, hoping reserves will arrive before the inevitable Traitor counterattack.

Tuesday, July 27, 2021

Back in Black: More Stormtroopers

 Since I still have not had a chance to pick up any black primer (GW store and Home Depot were  both out), I started working on some more Stormtroopers that I had primed with the first batch. 


I will do the decals in a batch once the entire second squad is done. The only other thing that needs to be done is to blacken the tip of the flamer just a bit more. I enjoy painting these classic metal models. I will keep working away at this unit in parallel with other projects. But until the squad is ready, I can at least enjoy having the flamer option available for the other unit.

Thursday, May 13, 2021

Bazooka Joes - Drop Troop Missile Launcher Teams

 I decided to start the 3rd Platoon with a bang - missiles! These are the first heavy weapons teams I have built for my Xhorik 87th. They are loaded up with extra missile tubes/cases. True to real life paratroopers, these paratroopers' missile launchers are nearly useless when firing at a Leman Russ head on (1 in 12 chance to hit and glance the armor) so they will have to line up for side and rear shots to have much chance. From what I read about the true paratrooper battles, that seemed to be the case and the lack of anti-tank capability was a real issue for the paratroopers in the D-Day battles.

I went with a running team, a standing team and a crouching/kneeling team, figuring the two men would be working in unison so it would make less sense to have one running and one kneeling, for example.


Front view of the three teams: standing, running, and kneeling.


Monday, May 3, 2021

Operation Downfall Campaign: Battle Report 1: Night Drop

"To each of us falls a task. And all the Emperor requires of us Guardsmen is that we stand the line and we die fighting. It is what we do best. We die standing."

- General Sturm


Campaign To Date:

It is the middle of the Horus Heresy and civil war rages across the galaxy on a thousand worlds. Everywhere, former brothers and sworn allies have turned against each other in a fury of betrayal and hatred. The Warmaster Horus has begun his long march to Terra, crushing all resistance before him. In his direct path is the Xhorik System, located at a strategic crossroads of Warp currents in a sector of space known for smooth transitions between realspace and the Warp. This prosperous system has become a focal point for the Traitor war effort as they attempt to seize control of the key spaceport facilities to enable a rapid refuel and resupply of the main Traitor war host as they make their way to the throne world. 

On Xhorik Prime, the key trading and transport hub of the system, Traitor forces are newly victorious over those loyal to the Emperor in a massive planetary civil war that erupted along old, pre-Imperial factional rivalries. A combined force of Death Guard and World Eaters has crushed the stratocracy of Kozar and their small garrison of the White Scars Legion. The major space ports are now securely in the hands of the Traitors, although small bands of Loyalist survivors continue to wage a shadow war along the fringes of the high desert wilderness. 

On Xhorik Secundus, the planetary governor has remained loyal to the Emperor and maintained control of most of the planet. As war raged on Xhorik Prime, armies began mobilizing for an invasion of the heart of Traitor territory, in the Federation of Unimund. The first phase of the invasion was codenamed Operation Downfall and called for a massive nighttime drop assault on key enemy installations in order to clear the way for the massive, lumbering landing craft that would be bringing the bulk of the invasion the next day.

Although suffering significant casualties in the war for Kozar, the Xhorik 87th Drop Troops Regiment, the Firebirds, were called upon to support Operation Downfall from Xhorik Prime, along with several dozen drop regiments from Xhorik Secundus attacking from orbit. They would be making simultaneous night drops to secure key landing zones, disable defense and communication capabilities, and clear roads and bridges to allow the Loyalist forces to move quickly out of the vulnerable landing zones, establishing a beach head. The target of the 3rd Company was a signal relay station that transmitted information from orbiting satellites back to the urban areas and Traitor command centers. 


Pre-Game and Mission:

We played the mission Sabotage from the Fourth Edition WH40k rulebook with the Traitor Militia as the defenders and the Xhorik 87th Drop Troopers as the attackers. The defender can deploy any HQ and Troops choices around a central objective (and we added the ability to deploy a single Heavy Support choice to make it more fun and balanced with Pete's limited army). The attacker must get an infantry unit into melee combat with the central building objective and remain in base contact for one full turn until the attacker's next close combat phase. At this point, the demo charges are set and the objective is destroyed. The attacker chooses a narrow table edge and can deploy infiltrators within 12" of the edge. The rest of the force either moves on from that table edge in turn 1 or remains in reserve as normal. Defender's reserves have to roll for a random table edge when they arrive. 

We did not include the sentries as Pete did not have the models for it and it seemed like it would just slow down the game without making much difference. 

As part of Operation Downall, the drop would be taking place in the middle of the night so the old Night Fighting rules would be in effect for the entire game (when shooting, you must roll a spotting range of 2d6 x 3 to see your target or the shots are wasted) and the defender would get to use Hidden Deployment. We also decided the Hidden Deployment would not be revealed prior to the start of the first turn, as normal. Instead, the units would only be revealed if an attacker unit "spotted" it during the first attacker turn (as per Night Fighting rules), with any units still hidden being revealed in the defender's first turn. This would result in any attacker units deep striking on the first turn going in blind without knowing where specific targets would be located. Part of the hidden deployment rule was that any units held in reserves would have their hidden deployment marker become a bobby trap or minefield. 


Night Drop scenario map: the outpost around Relay Station AN-09.


Army Selection: 1200 Points

General Titus Ghoulv’s Iron Battalion – “The Marauders of Meddeon VII”, “The Pirates of the Northern Fringe”, “The Chem Hounds” - Pete
  • Force Commander Saghesh the Sadistic: power sword, plasma pistol, refractor field, Alchem-Jackers, Warrior Elite
  • Squad Alpha - The Tongue Collectors: 15 Grenadiers with plasma gun, flamer
  • Squad Beta - The Psycho Slaves: 15 Grenadiers with melta gun, flamer
  • 2 Auxilia Medicae: Dr. Cut and Dr. Cauterize
  • Leman Russ Battle Tank
  • Leman Russ Demolisher
  • Leman Russ Vanquisher
  • Malcador Battle Tank with armored ceramite

**Horus Heresy Imperialis Militia and Cults army list

An armored division of traitor militia is guarding the landing zones, including this sentry force at Relay Station AN-09. 


Traitor force map icons


Xhorik 87th Drop Troopers, 3rd Company - Phil

I was excited to use my Drop Troopers in a mission where they could really shine. They will almost never win in a straight-up fight, but a night raid where the objective is to destroy a building allows them to utilize their main strength of launching a pinpoint attack anywhere on the battlefield with multiple infantry units. Keeping in mind the objective, I took a thematic force using my drop platoon for the five infantry units and the tank-killing support of the drop sentinels. I knew I would have a hard time dealing with four tanks (including a super-heavy) so I took all of the melta I had available: 9 meltaguns and multi-meltas altogether! My freshly-painted Stormtroopers would get their baptism by fire - I knew their stronger weapons would be helpful against the carapace armor of Pete's grenadiers and their ability to re-roll the scatter when deep striking would ensure they land on target. Finally, I brought some land units in the Tauros and Recon Bikers to ensure I had some units on the board to apply pressure early and to not allow a few bad rolls early on to leave me with no units on the board, resulting in automatic defeat.

  • Company command section (5): regimental standard, medic, vox, power sword and plasma pistol
  • Stormtrooper squad (10): melta gun, plasma gun, sergeant with power sword
  • Second platoon: Grav chute insertion force
    • Platoon command squad (5) with power fist, vox, medic and two grenade launchers
    • 1st Infantry squad (10) with melta gun 
    • 2nd Infantry squad (10) with grenade launcher 
    • Special weapons squad (6) with three melta gun teams 
    • Special weapons squad (6) with three melta gun teams
    • Drop sentinels (2) with multimeltas
    • Valkyrie with multilaser, 2 Hellstrike missiles, and 2 heavy bolters
  • Tauros with grenade launcher
  • Drop troop recon bikers White-Bolts (5) with demo charge
  • Drop troop recon bikers Black-Bolts (5) with breacher charge
  • Sentry Guns (3) with twin-linked lascannons
  • Sentry Guns (3) with twin-linked heavy bolters
**WH40k Taros Campaign army list with 15% discount


Strike Force Glaive: Reinforced 2nd Platoon of the Xhorik 87th 3rd Company, under the command of Captain Xhaer.

Drop trooper map icons


My strategy was to use the recon units (the bikes and Tauros) to try to spot the enemy to improve my positioning when the drop platoon arrived. They would harass the Traitors and draw fire away from the infantry, who would be focused on reaching the Relay Station and planting the demo charges. I decided to drop the Tarantulas in first (using the Combat Drop rules) to secure the drop zone and soften up the enemy a bit before my fragile and important infantry arrived to accomplish the mission.  I knew I would struggle to destroy all those tanks, but I was hoping to overwhelm the defenders with numbers as I swarmed the objective. Onward for the Emperor!

Sunday, April 18, 2021

Secure the Drop Zone: Heavy Bolter Tarantulas

 Before making a hot drop into an active combat zone, the Xhorik 87th will normally drop several Valkyrie loads of sentry guns, or tarantulas as the troopers call them, to secure the drop zone. The automated weapons sweep the area with a wave of high-caliber explosive shells from their heavy bolters and soak up the first enemy counter fire. Their role is to provide covering fire when the drop troopers make their final descent and are most vulnerable. 

Each sentry gun is numbered for organization. Sometimes troopers even give nicknames to favorite guns and ask for them specifically to stay attached to certain platoons. 


Monday, April 12, 2021

The 501st Imperial Stormtroopers: "The Fighting 501st"

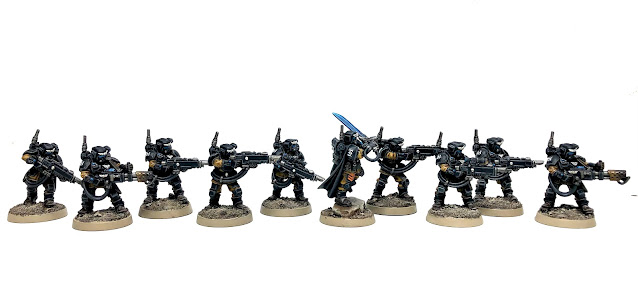
Unlike the normal forces of the Imperial Guard that are raised and organized as regiments, the Imperial Stormtroopers are generally deployed as single companies attached to other regiments. The "Fighting 501st" is a renowned company that has been attached to the Xhorik 87th Drop Troops to bolster their ability to perform rapid strikes on strategic targets.


First Squad is outfitted to destroy targets of significance, such as elite units, vehicles or infrastructure. To this end, they are equipped with high-strength melta and plasma weaponry.