"The Battle for Berat was a decisive moment for the planet of Xhorik Prime during the Horus Heresy. And the action around the central industrial area was the decisive moment of that Battle."
- The Xhorik Wars:
The Military History of a Keystone System Across the Millenia
Campaign To Date:It has been about 40 years since a combined force of Sons of Horus, Death Guard, and White Scars brought the Xhorik System into compliance during the Great Crusade. The major population centers of the largest continent were quickly brought under Imperial control in the typical fashion: a series of pinpoint attacks of overwhelming force by the Legions against the enemy's strong points, followed by rapid surrender. Due to the richness of the primary planet and the strategic location of the system on a sort of crossroads of warp currents, small garrisons of the Death Guard and White Scars legions were left on the planet to oversee the tithes of men and material to the Great Crusade and to help eradicate the threat of large ork populations in the eastern wastes.
With the advent of the Horus Heresy, the Warmaster ordered that the Xhorik System be taken to act as a way station for resupply on his long march to Terra. The Death Guard and their human allies on Xhorik Prime launched an attack on the White Scars and their allies, the Stratocracy of Kozar.
In Phase 1 of the campaign, the Traitors pushed the Loyalists from the war-torn border city of Bielyr in a series of bloody street fighting.
In Phase 2, the war escalated across the badlands of the Valbaara Plateau in several pitched battles. In the end, the Brotherhood of the Wind was defeated and their leader Praetor Zherdan was killed by the Death Guard.
In Phase 3, the Death Guard marched to the major Kozar city of Berat, fighting their way through a number of Loyalist counter attacks. In the end, helped by taking control of low-planetary orbit over the city in a void battle, the Traitors smashed through the outer walls of Berat behind the might of their super heavy Fellblade battle tank.---------------------------------------------------------------------------------Phase 4 is the battle for the Kozar city of Berat. The Traitors have broken through the gates and are working their way toward the city center block by bloody block in a brutal street fight. This Phase uses a number of special rules:
Campaign Points: CP are earned by playing games and by achieving secret secondary campaign objectives (drawn randomly each game and kept secret). They can be used to gain advantages in games. The player with the most CP at the end of the phase wins.
Normal games:
Win: 5 CP
Draw: 3 CP
Loss: 1 CP
Final Game:
Win: 10 CP
Draw: 6 CP
Loss: 2 CP
- Spend 1 CP to re-roll the die to deploy first or to re-roll the die to steal the initiative. Can only be used once per game.
- Spend 1 CP to include a unit that would not be allowed due to the Grinding Attrition or Street Fighting special campaign rules below. The point cost of the unit still counts toward the army total. Can only be used once per game.
- Spend 1 CP to re-roll the die to see if the game ends. Can only be used once per game.
(Special rules apply for the final scenario.)
Due to the very dense terrain providing ample hiding places, surprise attacks are extra deadly. Units who used Infiltrate, Scout or Outflank can charge the on the first game turn or the turn they come into play. If they don’t charge, they gain an extra +1 cover save for their first turn in play (stacks with any bonuses they have already).
Street Fighting: Narrow streets, debris, billowing smoke and crumbling towers limit the ability to utilize large vehicles and artillery. Other than the final battle, a max of one total unit can be selected with any of the keywords: heavy, artillery, flyer, or over 3 HP. In the final battle, everything goes.
Grinding Attrition: Other than Troops choices, any unit that is destroyed cannot be used in the next battle. If the next battle is the final battle, it can be taken but must start in reserves. Any unit that is selected as Troops choice can be used even if it was destroyed in the previous battle.
Named Warlord: Choose your warlord trait. Must be the same for the whole phase. Can also can always re-roll LD and morale checks. Other warlords must roll for trait.
If named warlord dies in battle, roll die:
1-2: debilitating injury: can't use in the rest of the campaign phase until final battle
3-4: major injury: can't use in next game
5: close call: no effect
6: Miraculous Recovery (Chosen of the Emperor/Horus/gods of Chaos): can use as normal and has an inspiring presence for the next battle: all units within 12" can use his LD.
The Revenant: Once warlord returns after dying in a game, he has Hatred (Traitors/Loyalists) for the rest of the campaign phase.
Our standard
Terrain Rules are in effect.
Army Selection: 4000 Points
Traitors - Pete
Death Guard
- Preator Wolfgang: terminator armor, volkite charger, paragon blade, digital lasers, rad grenades, Fearless, It will not Die
- Deathshroud Terminators with hand flamers, power scythes and rad grenades
- Tactical Support Squad Folterer: 8 marines with flamers and melta bombs, sergeant with artificer armor.
- Tactical Squad: 14 marines with close combat weapons, sergeant with power fist and artificer armor and Apothecary Gerhard
- Tactical Squad Toddestraffe: 10 marines with close combat weapons, sergeant with power fist and artificer armor. Mounted in a Rhino APC with a pintle mounted heavy flamer.
- Heavy Support Squad Feuer Sturm: 7 marines with missile launchers and Apothecary
- Predator Mittel Panzer 021 with Predator Autocannon and lascannon sponsons and Machine Spirit
World Eaters- Chaplin Zungarz: Artificer Armor, plasma pistol, refractor field, crozius arcanum
- Tactical Squad Hell Hounds: 17 marines – 16 with bolters, bolt pistols and chain axes. 1 sergeant with artificer armor, power fist and plasma pistol
- Reconnaissance Squad Butcher's Eyes: 5 marines with power armor, sniper rifles, cameleoline
- Unending Slaughter: Terminator squad with lightning claws
- The Red Butchers: 1 Devoured with dual chain fists, 4 Butchers with dual power axes
- Land Raider Phobos Flesh Grinder: side sponson twin-linked lascannons, twin heavy bolter, armored ceramite, machine spirit
- Contemptor Dreadnought Delrog the Diabolical with twin-linked lascannon and chainfist
- Predator Severing Cut with Predator Autocannon and lascannon sponsons and Machine Spirit
Loyalists - Phil
White Scars Brotherhood of the Wind
- Khan Turan Jorma: jetbike, paragon blade, cyber hawk
- Centurion Champion Subotei: power glaive, refractor field, artificer armor
- Skyhunter Squadron Khujaa: 6 jetbikes, 2 x volkite culverin
- Tactical Squad Temgar: 10 marines with close combat weapons, sergeant has power glaive, artificer armor with Rhino with multimelta
- Recon Squad Chono: 10 marines with recon armor and camo cloaks, sergeant with power fist and artificer armor
- Outrider Squad Tsujen: 5 Outriders with plasma, sergeant
- Tactical Support Squad Khoer: 8 marines with plasma guns, with Drop Pod
- Ebon Keshig: 10 terminators, 8 power glaives, 2 power fists, 1 melta gun
- Sicaran Omega Tank Destroyer Flamespear: lascannon sponsons
- Primaris Lightning Strike Fighter Ariunbold: twin-linked lascannon, 6 x Kraken Heavy Penetrator Missiles, Battle Servitor Control, Ground-tracking Auguries, Ramjet Diffraction Grid
Kozar Army, Berat Garrison
- Force Captain Xhaer: plasma pistol, iron halo, familiar, Warrior Elite, Duck and Cover (Cyber Augmented)
- Platoon command squad: power fist, 3 grenade launchers, vexilla, vox caster
- Medicae: 2 medics
- Infantry Platoon Secondus: lascarbines
- Fire Support Squad Septima: 6 fire teams with heavy flamers
- Recon Squad Decima: 5 infantry with sniper rifles and camo cloaks
- Recon Squad Tertius: 5 infantry with shotguns and a demolition charge
- Grenadier Squad : 11 infantry, 1 with plasma gun
- Arvus Lighter with lascannon and 2 hellstrike missiles
- 3 x Tarantulas sentry guns with twin-linked lascannon
- Tarantula sentry gun with heavy bolter
- 2 x Sentinels with lascannon
- Tauros with grenade launcher
- Medusa Siege Cannon with 2 extra crew
++++++++++++++++++++++++++++++++++++++++++++++++++++++++++++
++++++++++++++++++++++++++++++++++++++++++++++++++++++++++++
Battle:The Decisive Moment
 |
| Each army sends a powerful contingent led by their Warlord to contest the central industrial facility, knowing that this point would be the lynchpin of the wider battle. |
 |
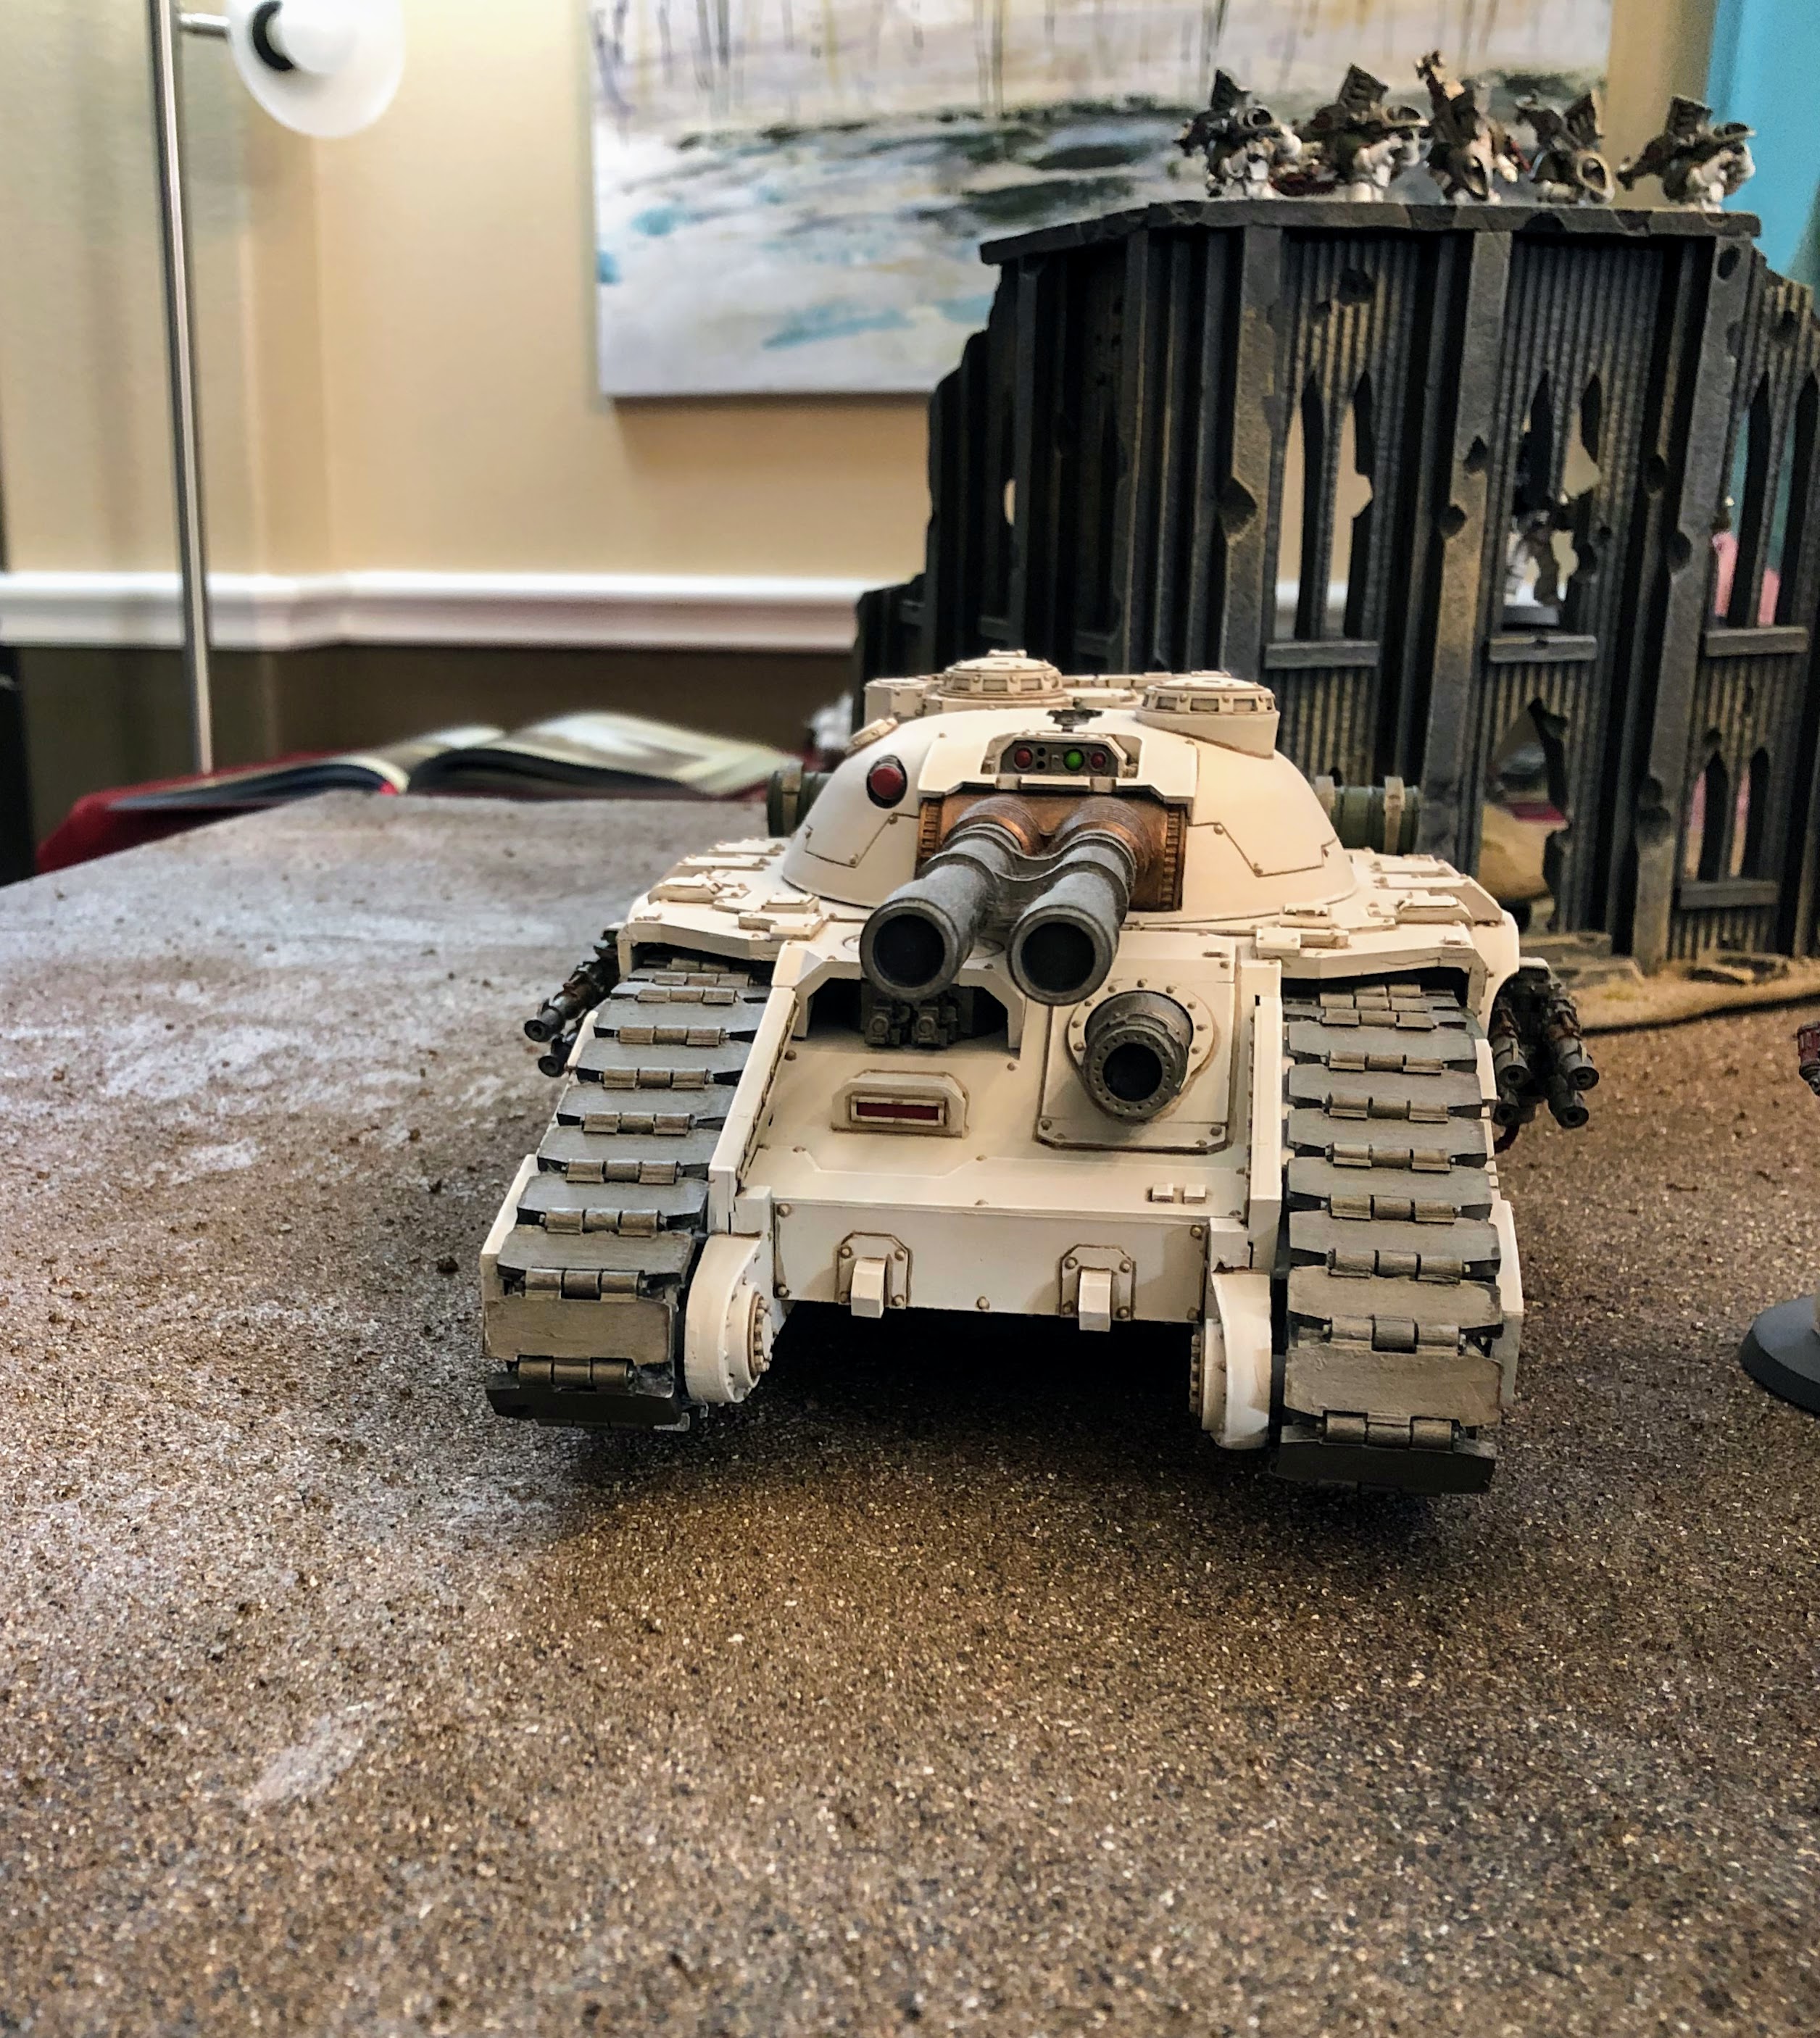
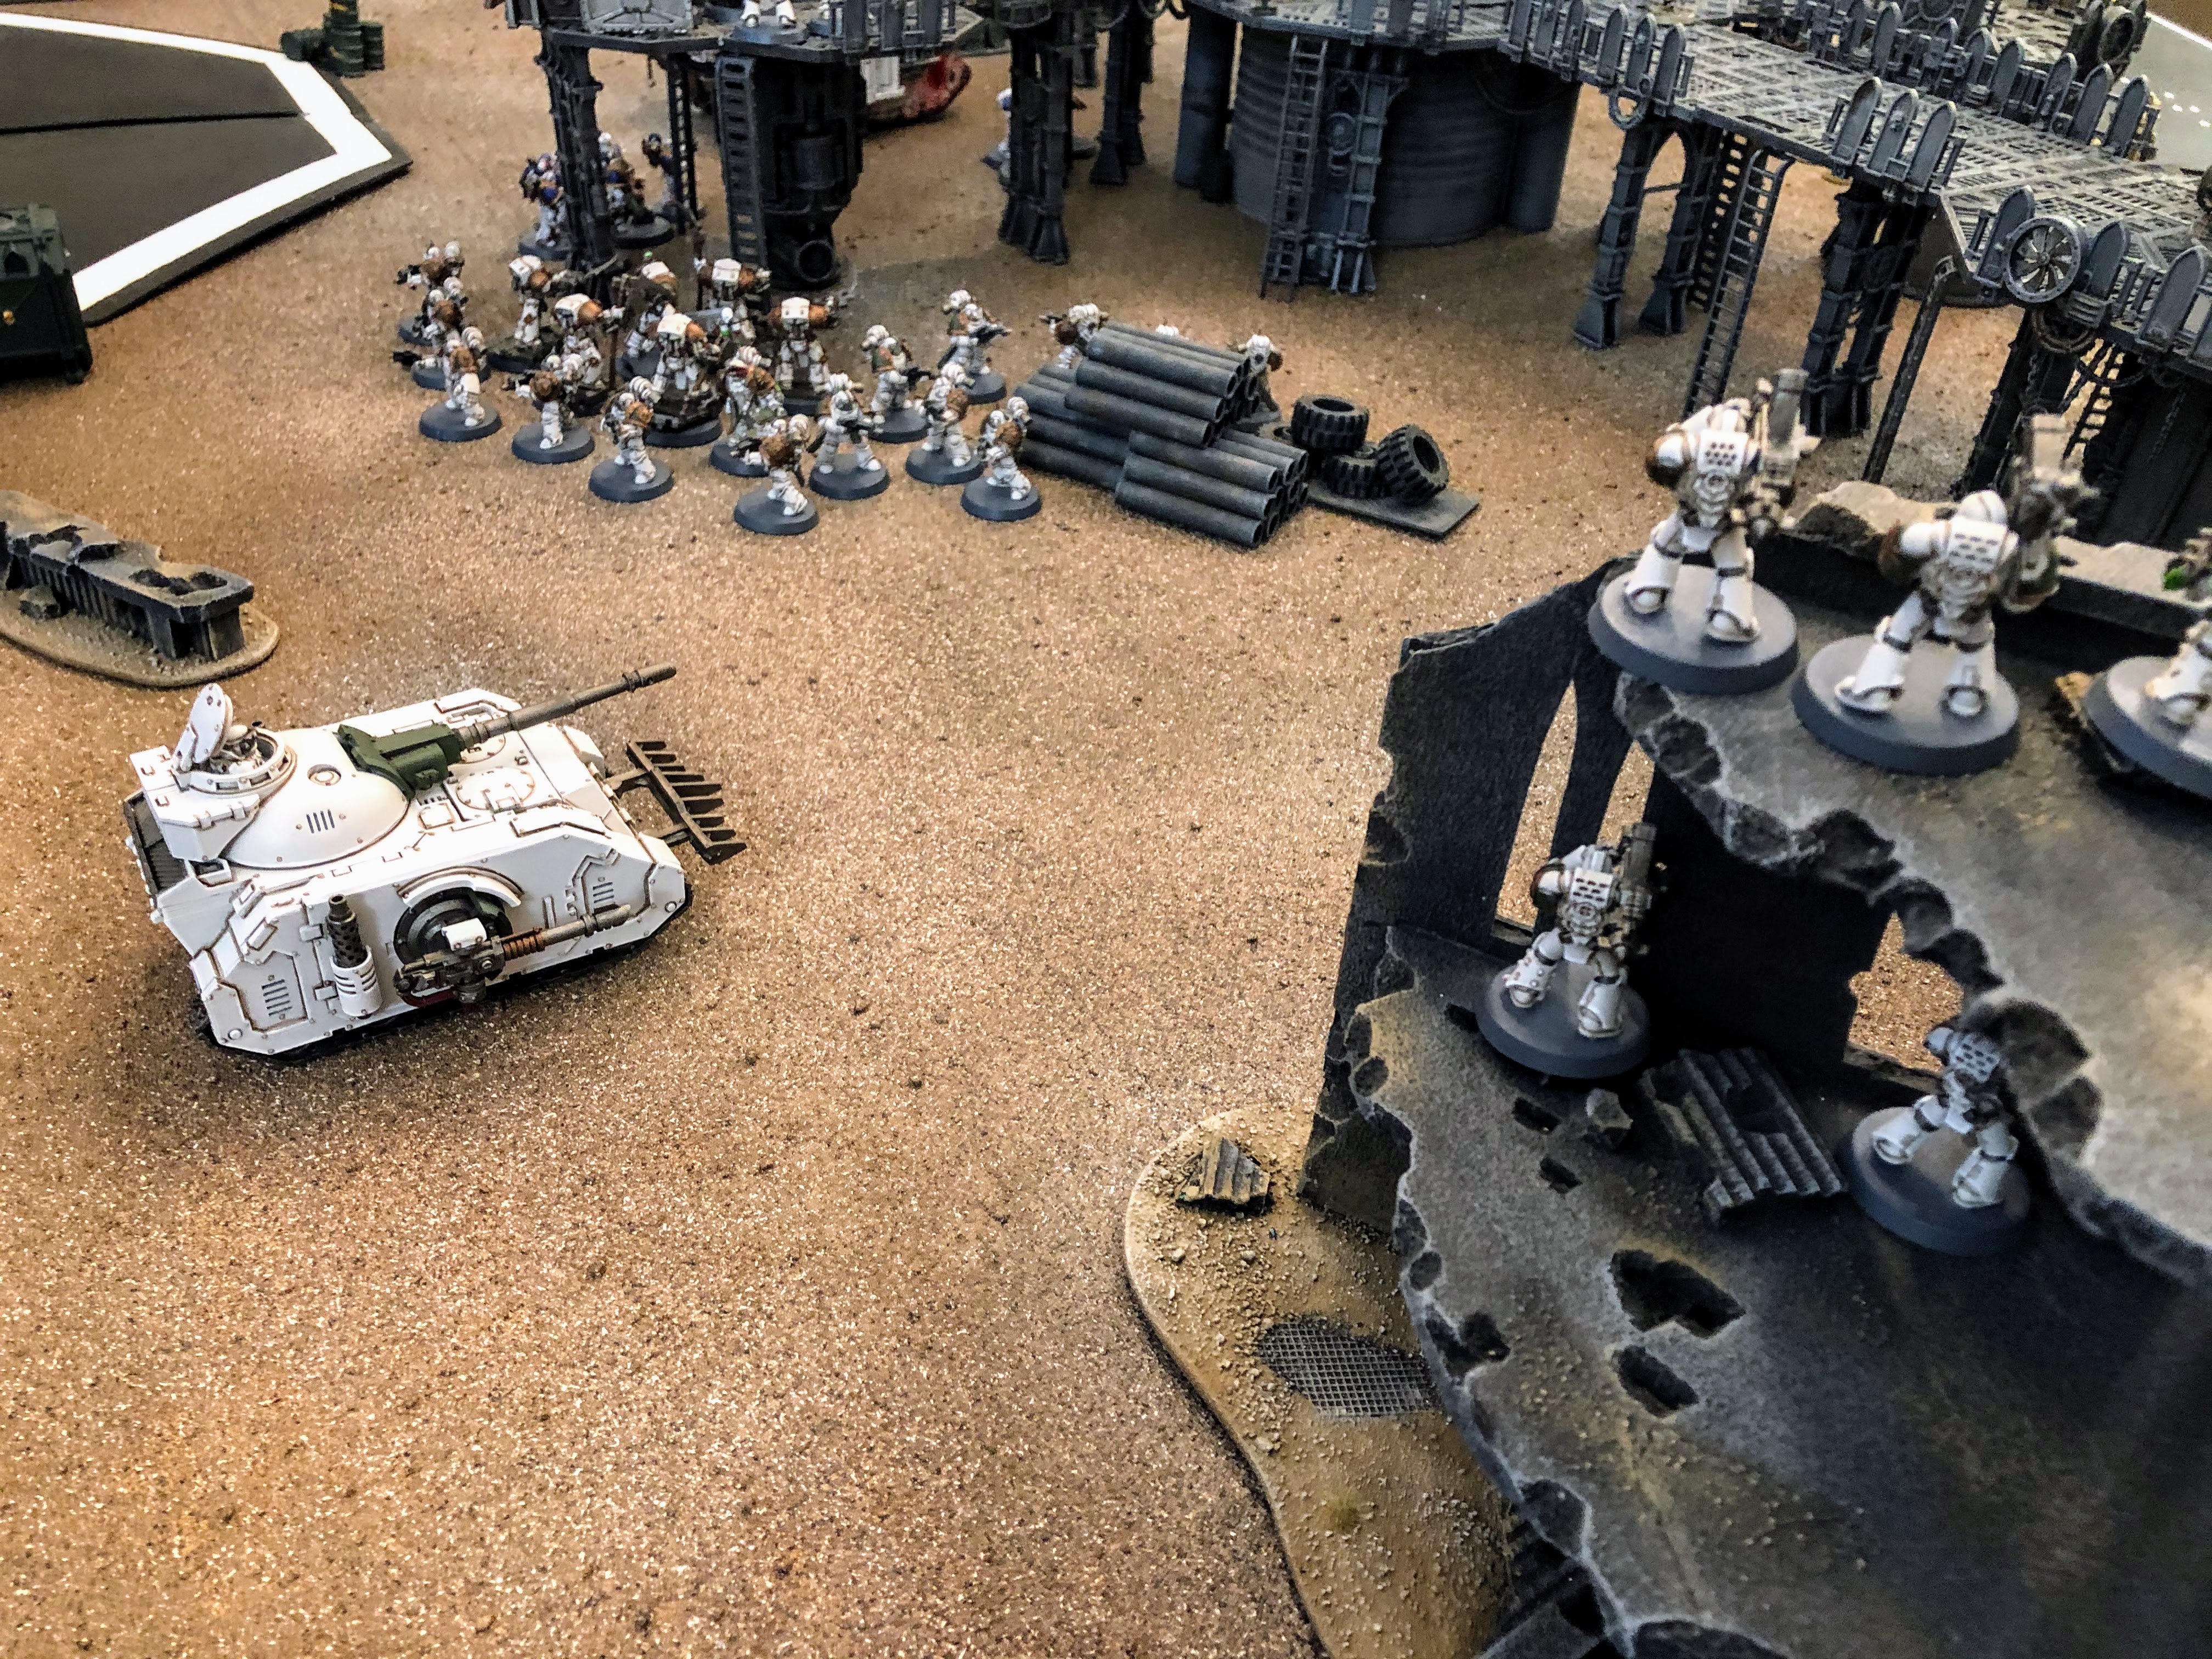
| The mighty Fellblade and rhino transport command the right flank of the Traitor line. |
 |
| Praetor Wolfgang and his Deathshroud bodyguard advance with a massive wall of heavy infantry. |
 |
| His World Eater allies approach from the northeast. |
 |
| A Chaplain leads a powerful force of infantry toward the central industrial tower. |
 |
| The blood-splattered killers hope to be the first to reach the central tower and engage in glorious combat. |
 |
| The Butcher's Eyes creep forward and take up position on the industrial facility. |
 |
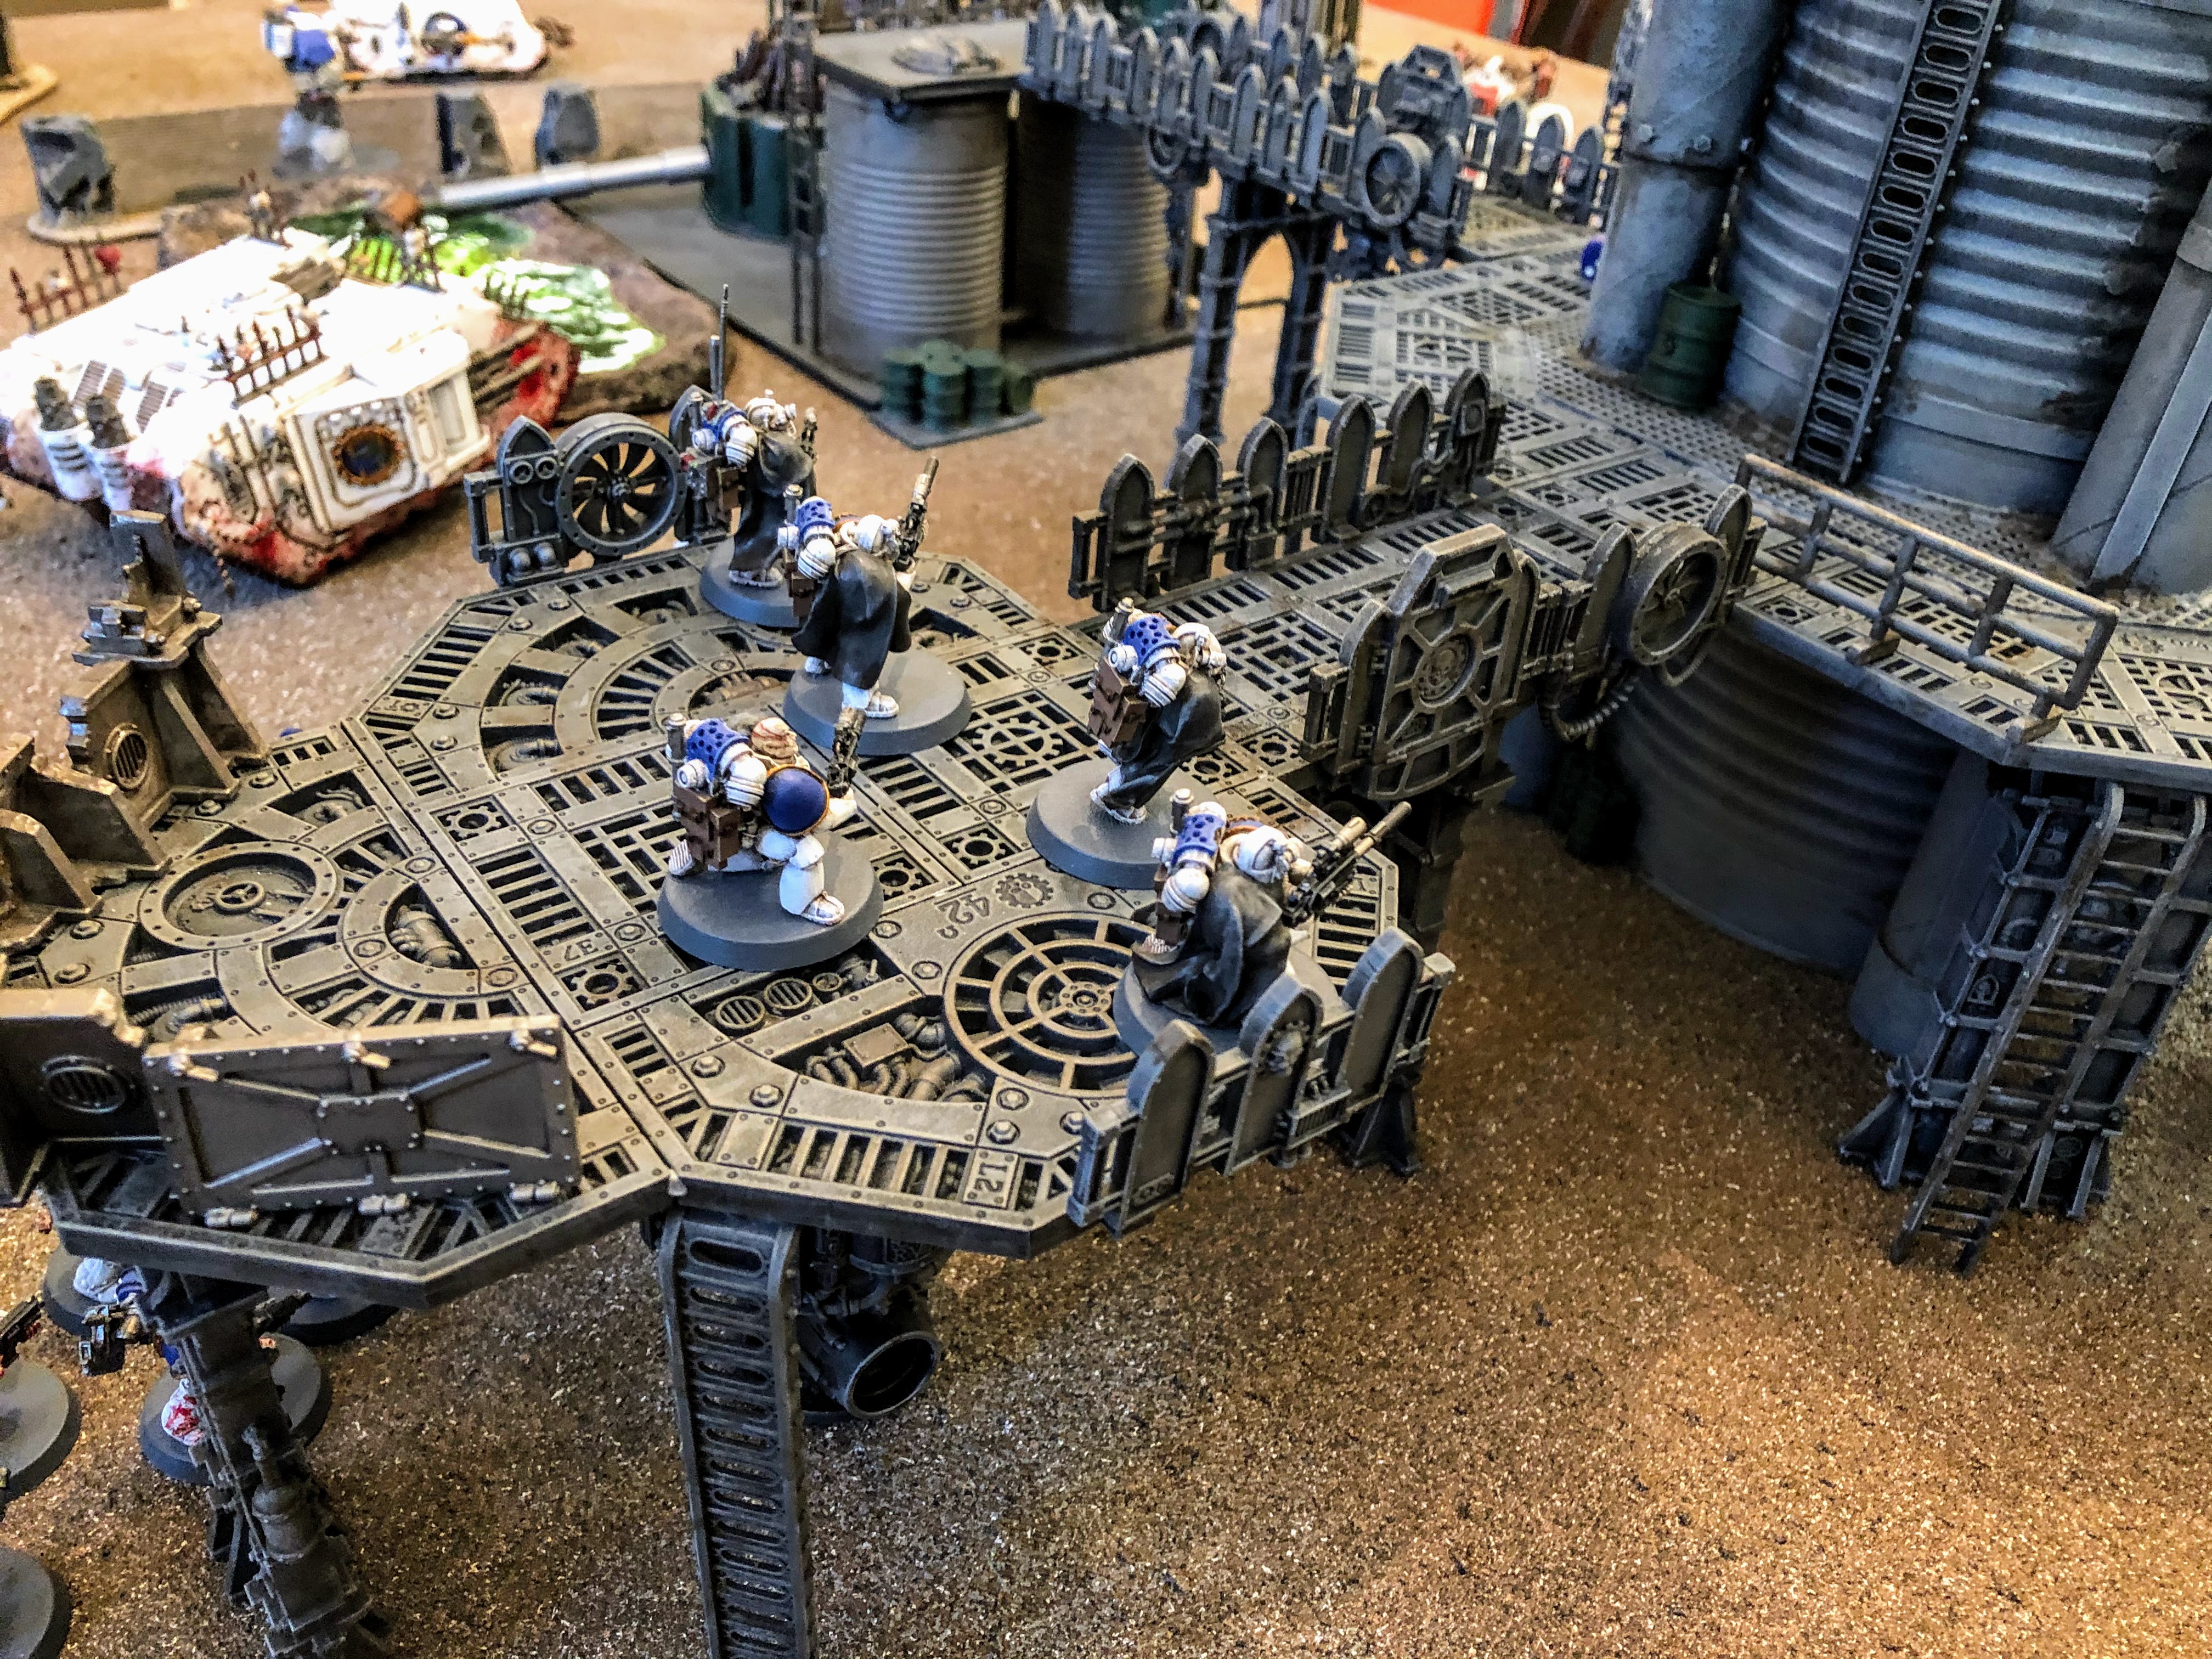
| On the other side of the facility, White Scars Recon Squad Chono has also infiltrated the facility. |
 |
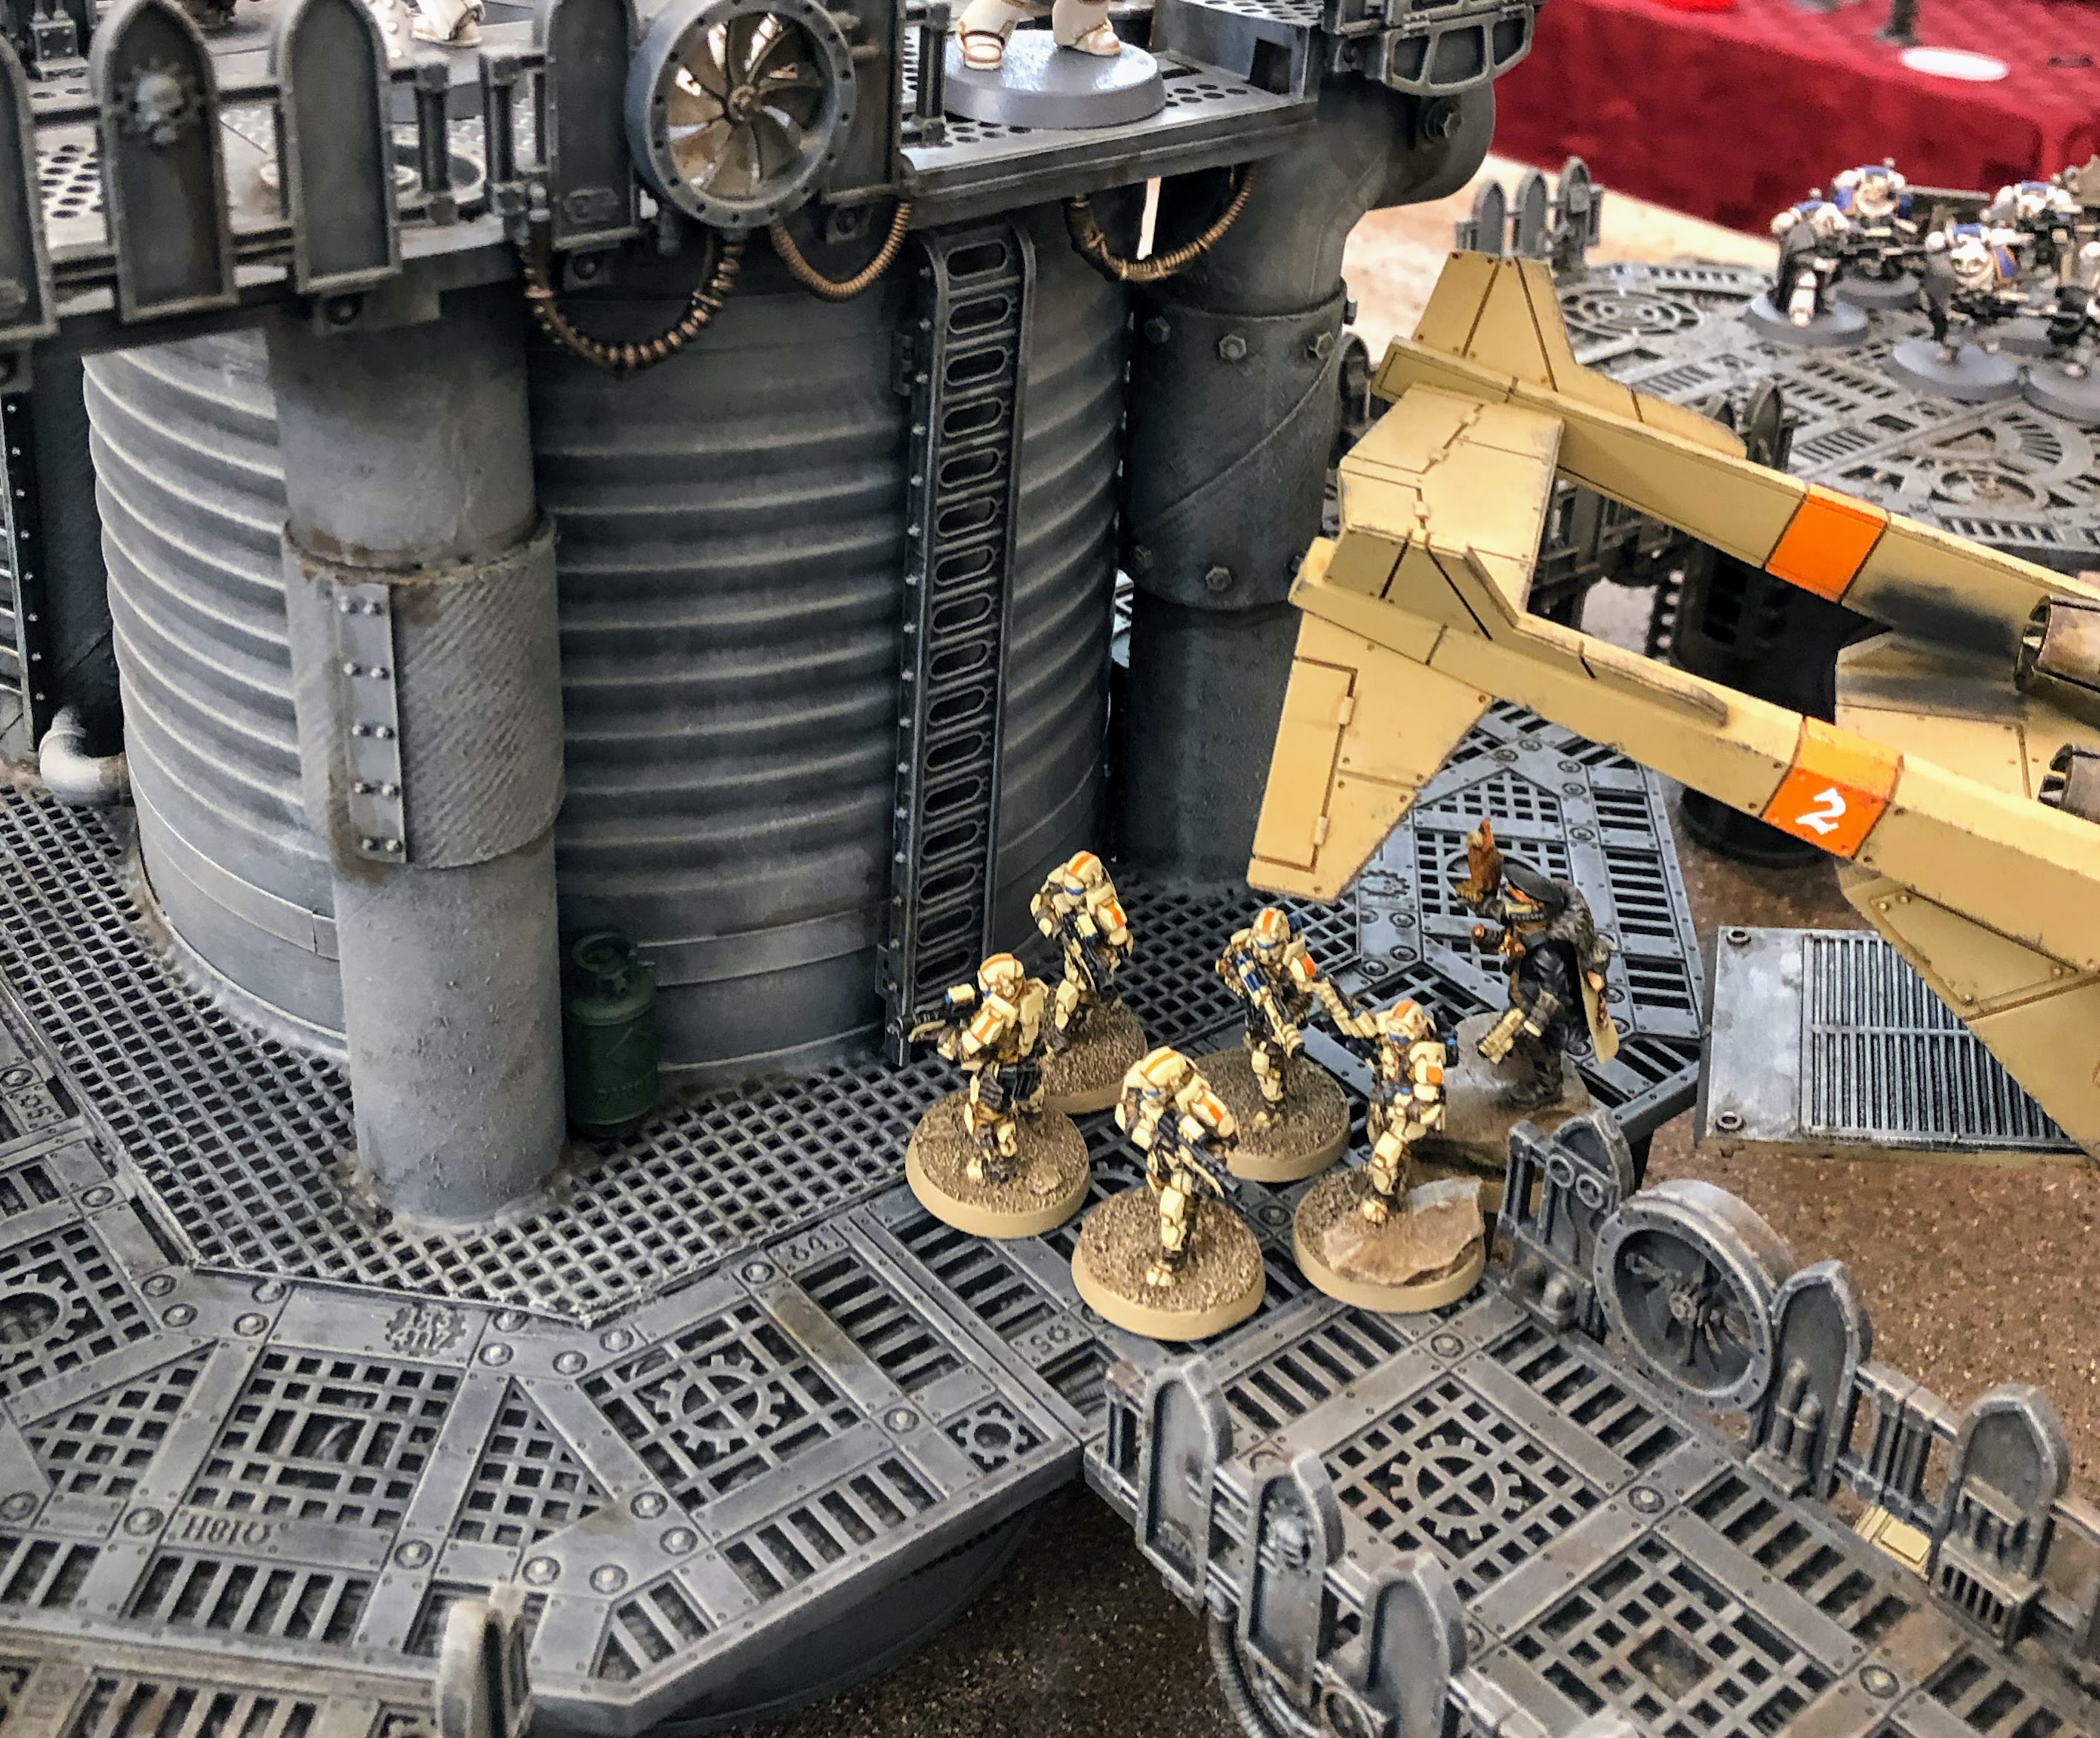
| On the west side of the facility, Recon Squad Decima approaches. |
 |
| Finally, Recon Squad Tertius advances out of the pipes and onto the elevated platforms. |
 |
| The massive Medusa siege cannon holds an elevated position over the western side of the battlefiled. |
 |
| The artillery crew spot the approaching enemy with magnoculars. |
 |
| Khan Turan Jorma leads the White Scars assault from the southeast. His goal is to deliver a decapitating strike to the Traitors that would turn the tide for the Loyalists. |
 |
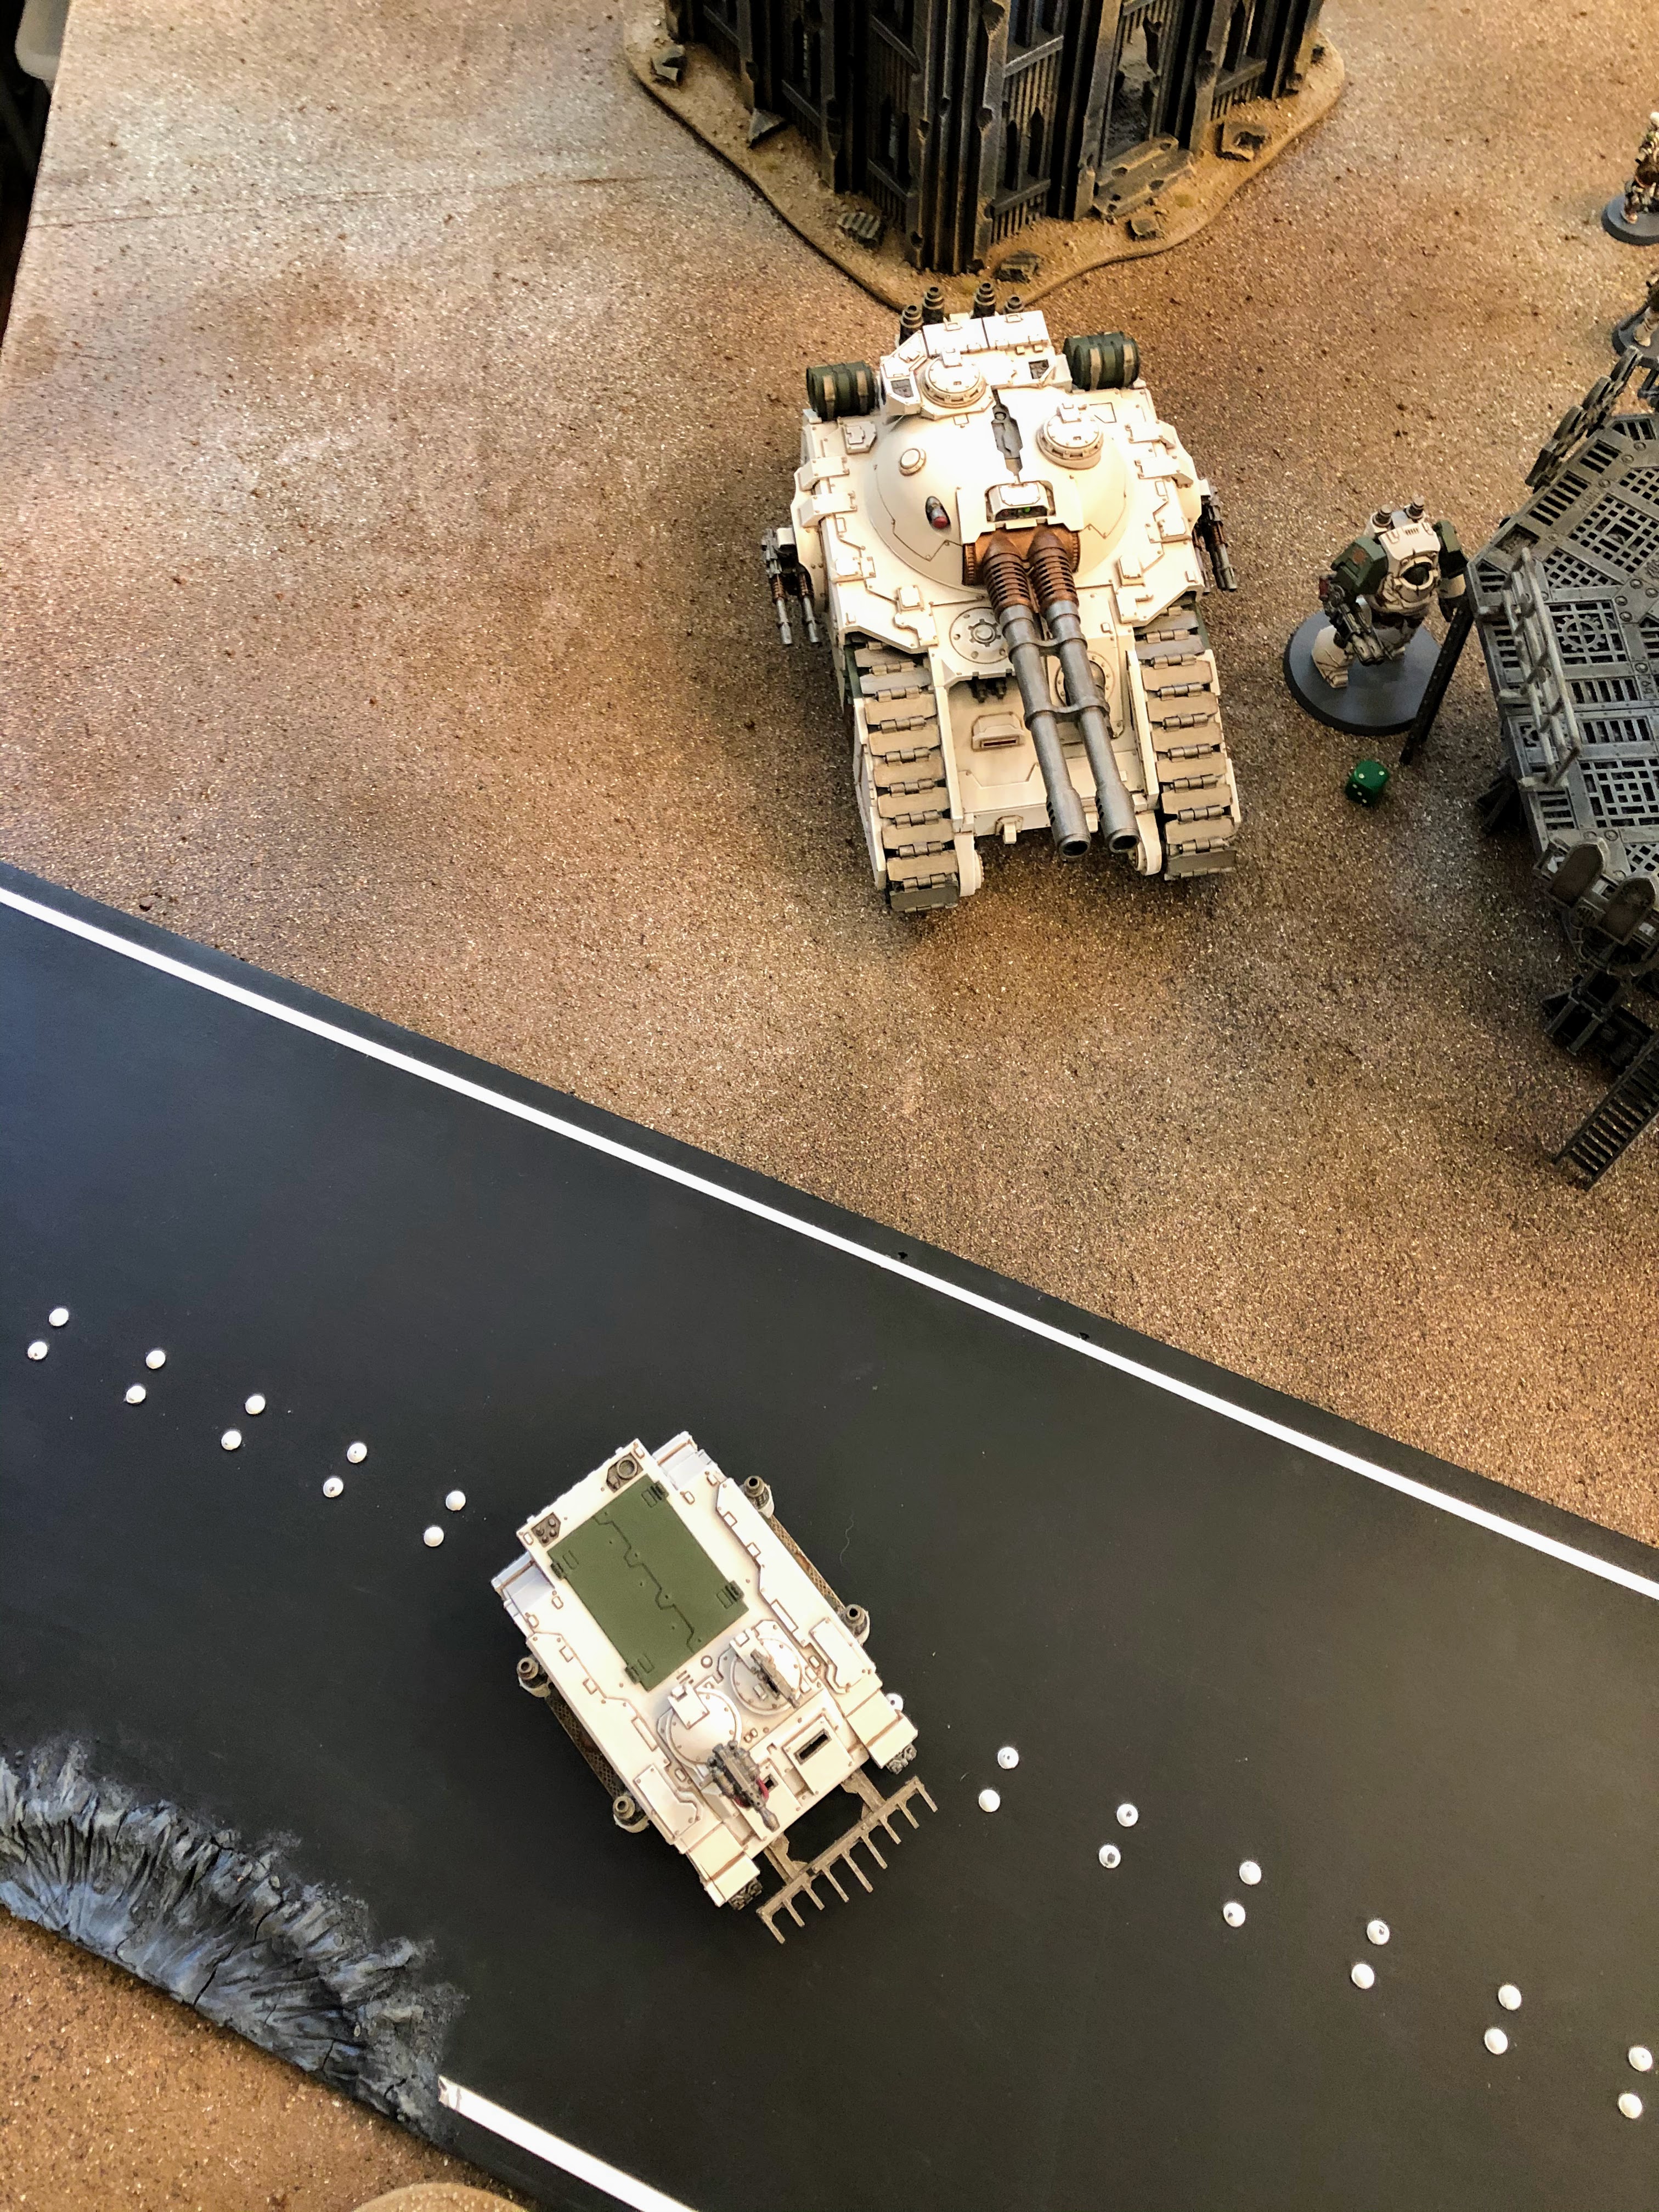
| The Fellblade immediately rumbles forward. |
 |
| The Fellblade launches a salvo at the Kozar artillery in the ruins, killing several of the crew. |
 |
| Tactical Squad Toddestraffe races forward to flank the Loyalists. |
 |
| Death Guard armor threatens the Loyalist left flank. |
 |
| Heavy Support Squad Feuer Sturm provides covering fire as the Death Guard advance. |
 |
| The Death Guard center moves forward to carve a path to the highest point on the battlefield. |
 |
| They take up position behind piles of tires and pipes. |
 |
| The World Eaters also race forward and begin scaling the ladders. |
 |
| The feared Land Raider Flesh Grinder growls forward into the industrial facility. |
 |
| Wolfgang commands from the center as the Traitors close in on central tank facility. |
 |
| The Traitors advance across the entire front, but only inflict light casualties with their opening volley. |
 |
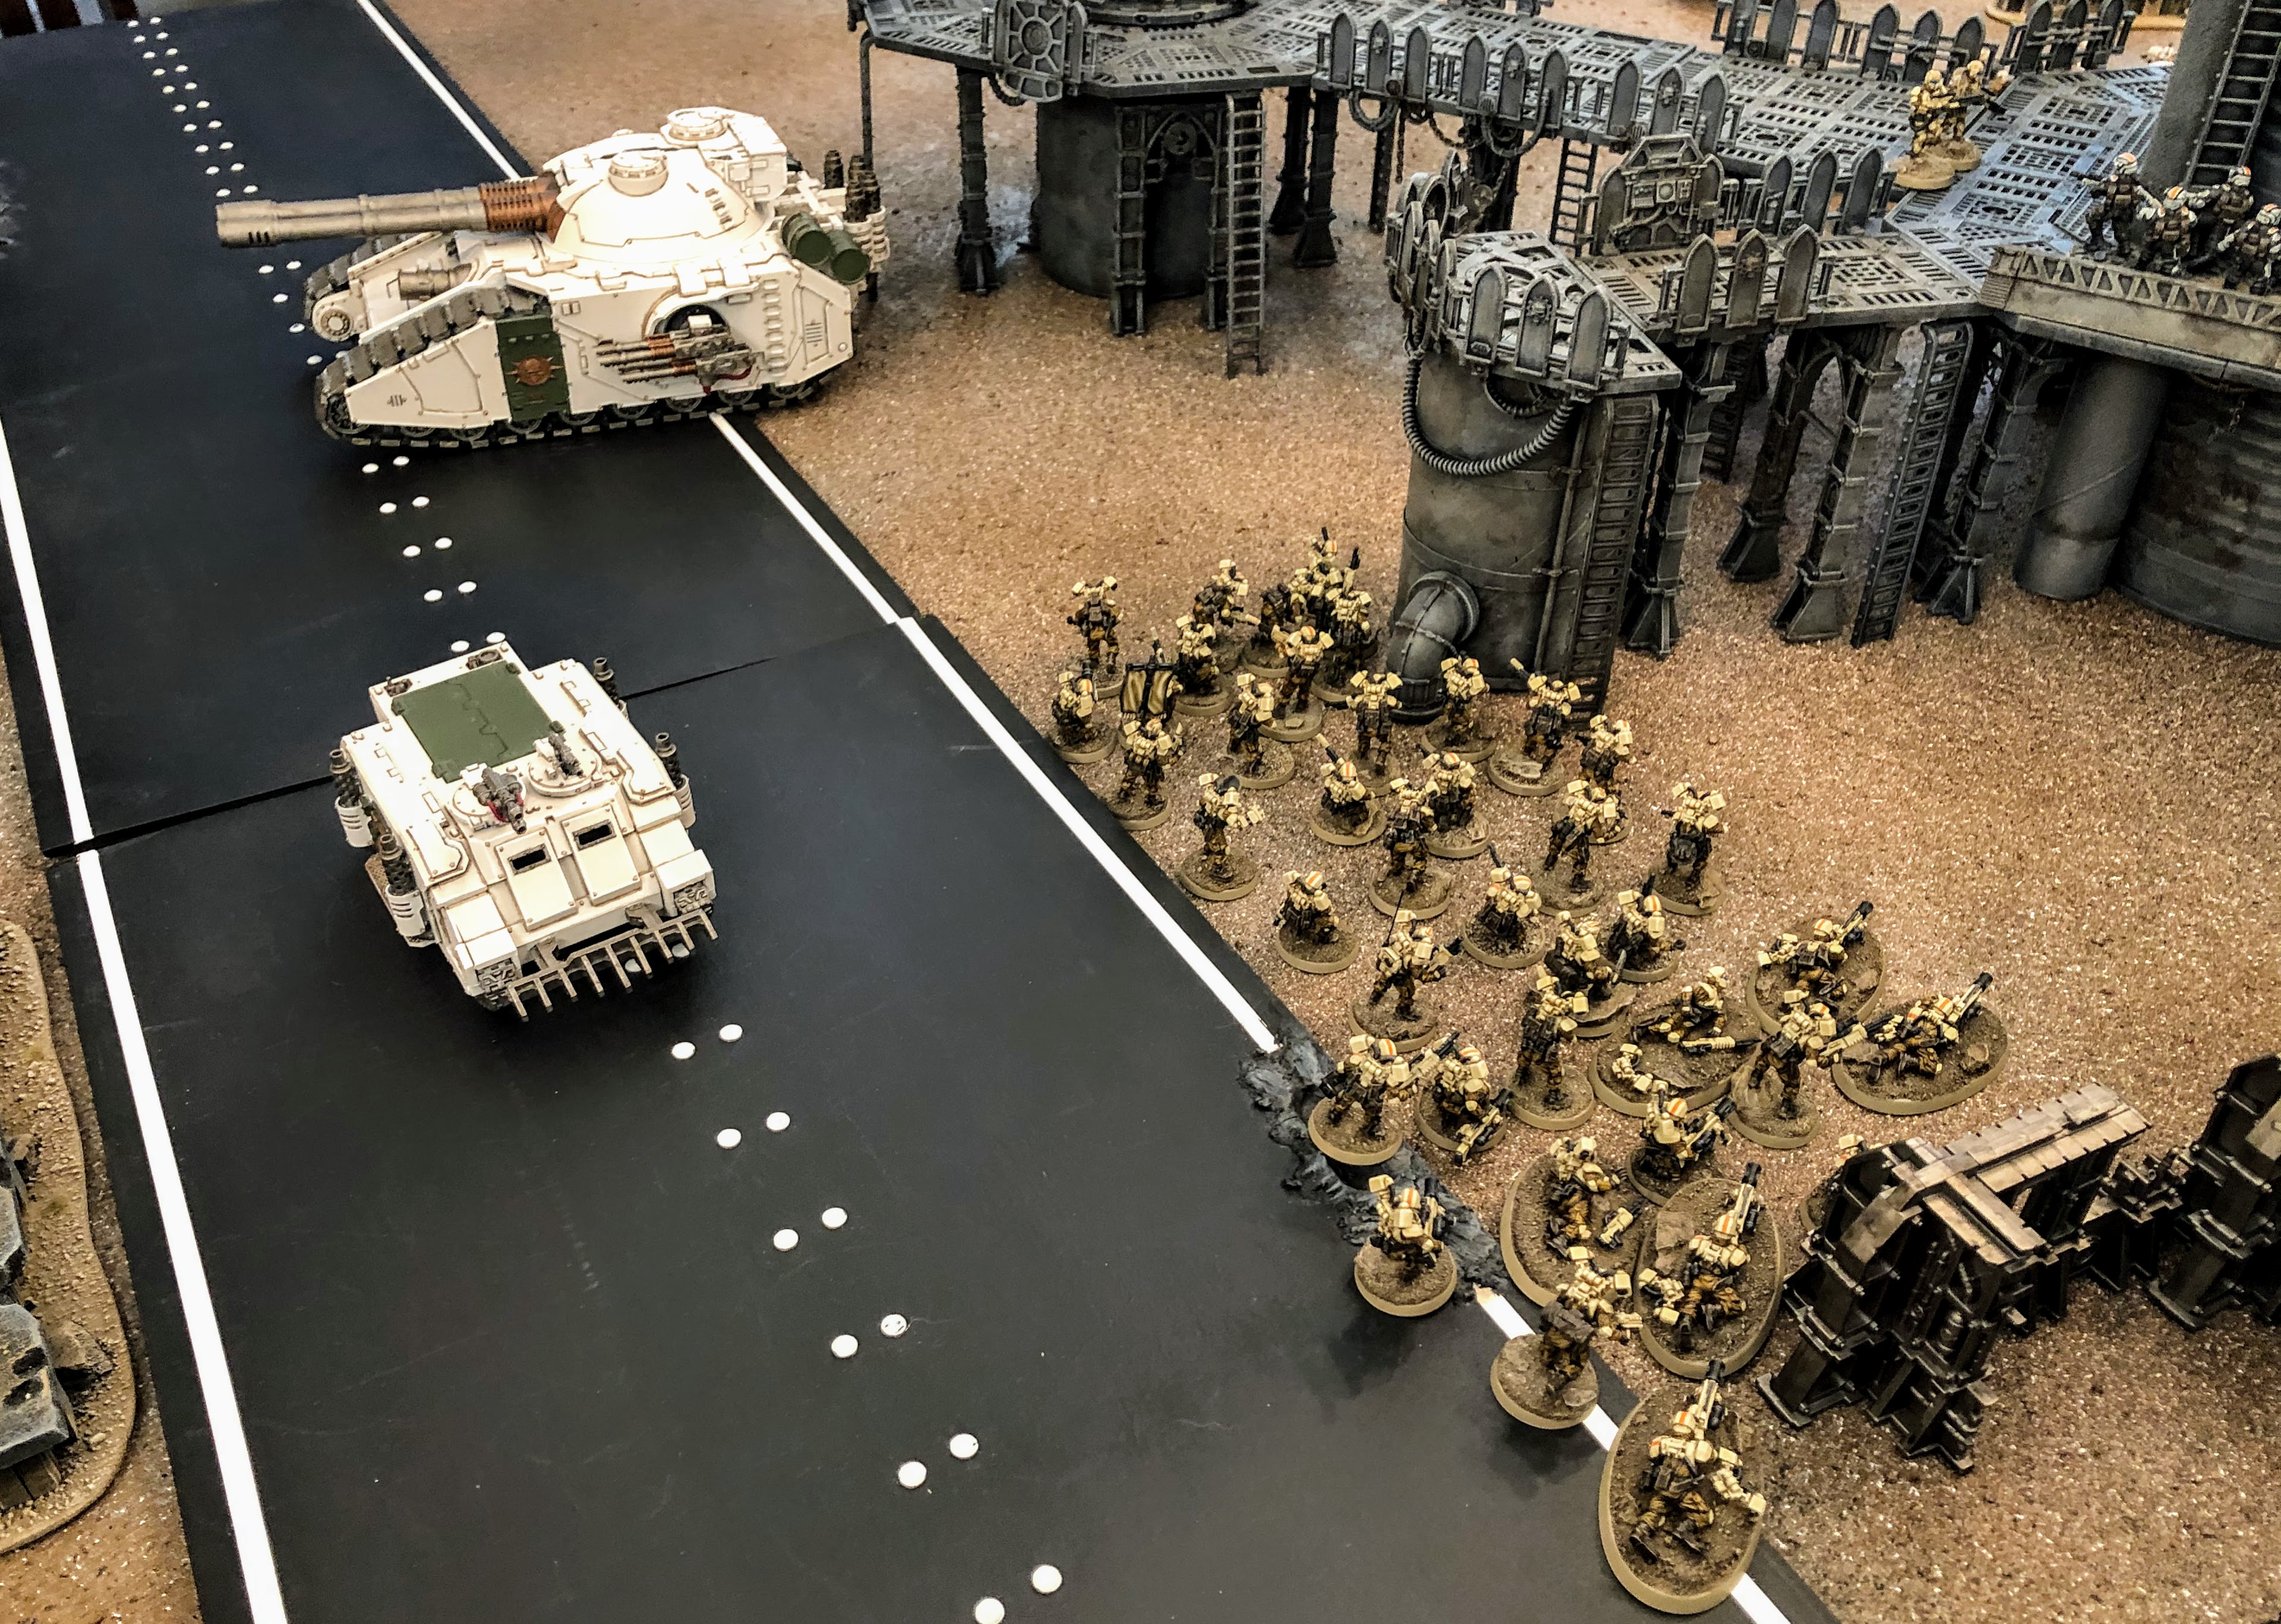
| The Kozar army units race forward to secure the industrial facility in support of the advance recon squads. |
 |
| "Move! Move! Move!" Lieutenant Tarvar orders the platoon forward. |
 |
| The White Scars also race toward the center, looking to cut a path straight to Praetor Wolfgang. |
 |
| World Eater armor swings around the industrial facility to strike at the Loyalists from the east. The White Scars refuse to be drawn in and instead move toward the Traitor center. |
 |
| The outnumbered Loyalists head for the rally point of the central tower and await reinforcements. |
 |
| Recon Squad Chono rapidly advances toward the central tower in order to plant the Loyalist banner at the highest point and inspire their side to victory. |
 |
| Loyalist recon units converge around the highest point while taking fire. |
 |
| The survivors of Recon Squad Decima dash across the catwalk and head for cover. |
 |
| Loyalist artillery lands a shell right in the midst of the advancing Traitors, killing most of Tactical Support Squad Folterer. |
 |
| The view of the battlefield from the west sees all forces converging on the central storage tank facility. |
 |
| World Eater armor rumbles forward firing. |
 |
| Death Guard infantry slog forward through the polluted dust. |
 |
| The Butcher's Eyes hold back and provide covering fire while their brothers to advance. |
 |
| Death Guard missiles rain down on the advancing loyalists. |
 |
| The massive Contemptor Dreadnough Friedrich somehow clambers up onto the gantry! |
 |
| The Fellblade annihilates the Loyalist artillery. |
 |
| Tactical Squad Toddestraffe continues its flanking maneuver to the rear of the Loyalist lines. |
 |
| The World Eaters attack the White Scars' tanks. |
 |
| The Traitors fire on the Sicaran but cannot destroy it. |
 |
| Traitor reinforcements arrive to bolster the attack. |
 |
| The Traitors close the pincer attack on the Loyalists and eliminate their artillery. |
 |
| The Loyalists ignore the flanking Traitors and stay focused on their mission. |
 |
| Loyalist flyers arrive. The White Scars Primaris-Lightning Ariunbold destroys the World Eaters Land Raider. |
 |
| Kozar Army sentinels make a flanking attack and fire into the rear armor of Friedrich, inflicting some damage on the Dreadnought. |
 |
| Tarantula sentry guns are dropped from a passing Valkyrie right into the midst of the Traitor advance. Their automated targetters immediately spot the Contemptor and pivot the weapons to fire upon it - immobilizing the walker and leaving it stranded away from the central objective. |
 |
| The Ebon Keshig arrive and head straight for the objective, with the big guns of the Fellblade bearing down on them. They are prepared to die to accomplish their mission. |
 |
| Khan Jorma continues moving straight at Praetor Wolfgang, hoping to deal a decisive blow to the Traitors. |
 |
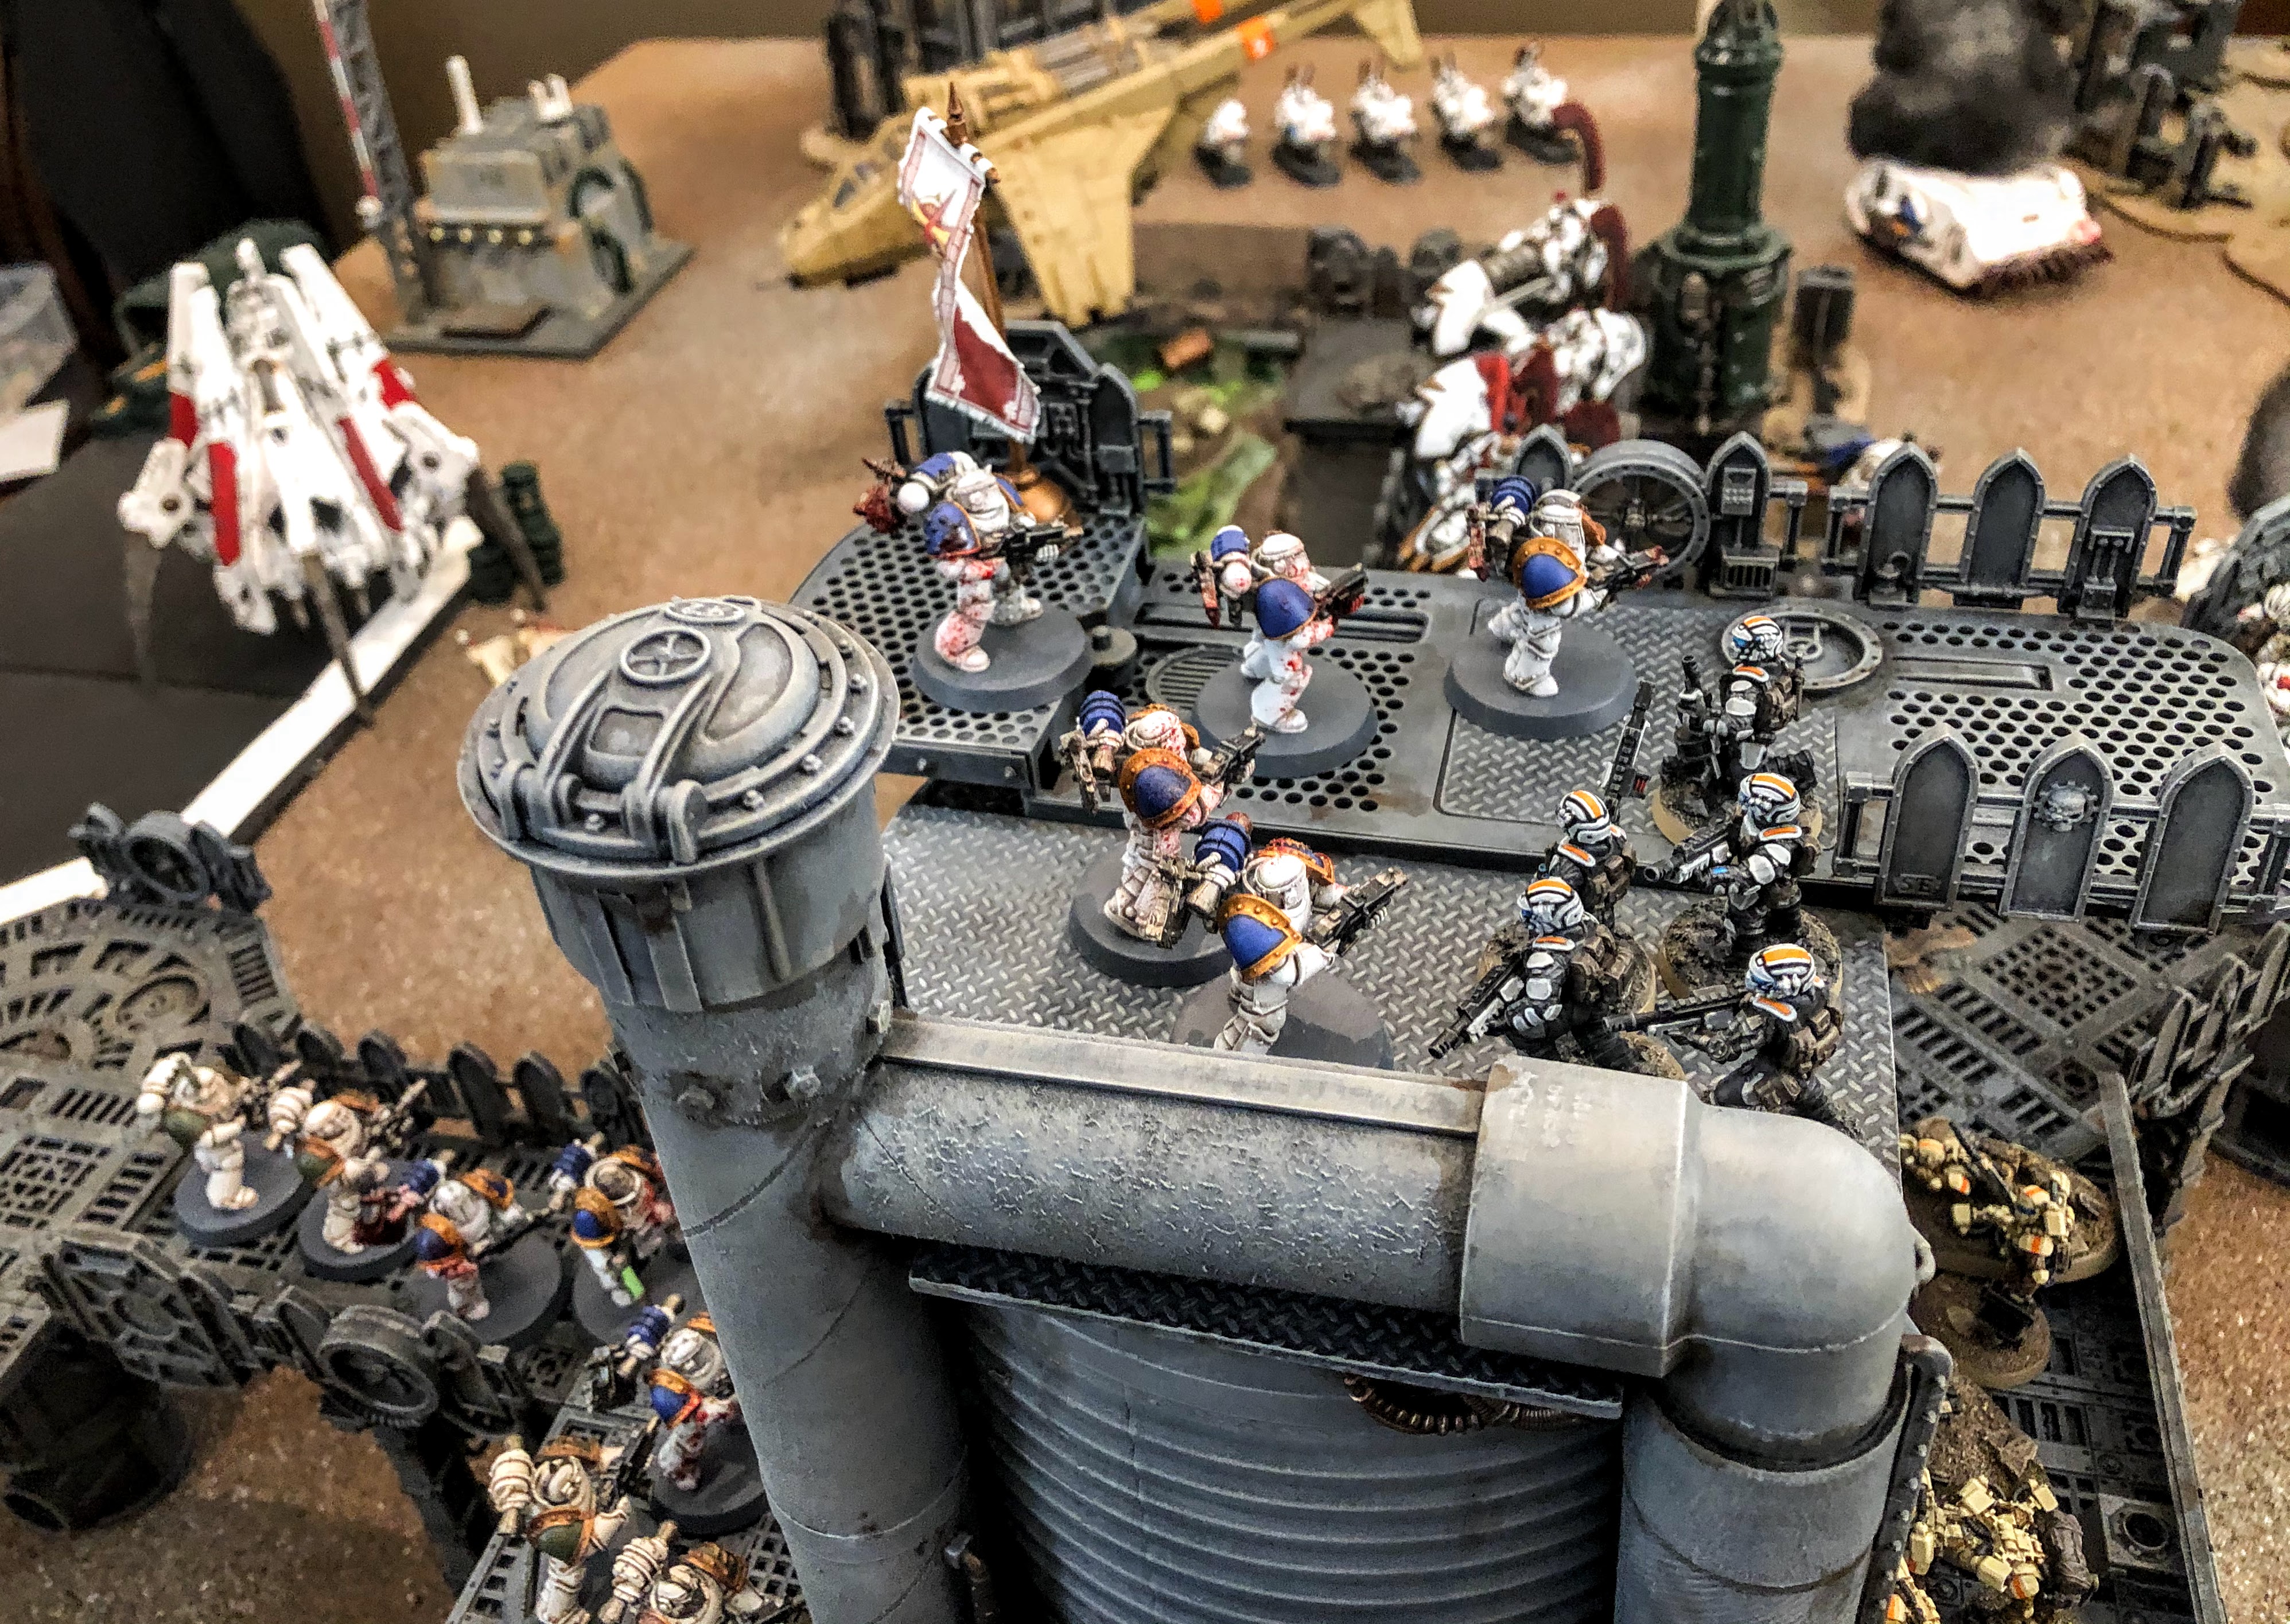
| Squad Chono is the first to reach the pinnacle and they plan the banner of the White Scars Brotherhood of the Wind! |
 |
| The White Scars banner flies high, bolstering the morale of the Loyalists all across the front lines. |
 |
| Kozar sentinels outflank the Traitors and damage the weaker rear armor of the Death Guard dreadnought. |
 |
Tactical Squad Temgar disembark and clamber up onto the gantries.
|
 |
| The advancing Death Guard turn to face the new threat to their rear. |
 |
| Squad Toddestraffe disembark and add fire on the Ebon Keshig who reamin single-mindedly focused on the objective. |
 |
| Bloody World Eaters pour forward across the catwalk to the central storage tank tower. |
 |
| Delrog the Diabloical and the Predator finish off the damaged Sicaran. |
 |
| World Eaters terminators clear out the White Scars recon marines with a blast from the heavy flamer. |
 |
| The chain axes of the tactical squad make short work of the rest of the recon marines by chopping through their lighter armor with ease. |
 |
| Squad Chono fights fiercely but they are outnumbered and at a disadvantage against the heavily-armored tactical squad. |
 |
| The White Scars are quickly cut down while the rest of the Traitors converge on the storage tank tower. |
 |
| The World Eaters turn toward the small Kozar Recon squad next. |
 |
| The Loyalist flag still flies from the top of the tower, but the Traitors have much stronger units closing in. |
 |
| Outrider Squadron Tsujen outflanks the World Eaters and appear behind the predator. |
 |
| Firing their plasma into the weaker rear armor, the Outriders destroy the enemy tank. |
 |
| The Kozar infantry and the Ebon Keshig continue to push forward toward the objective, despite taking heavy fire from the Traitors. |
 |
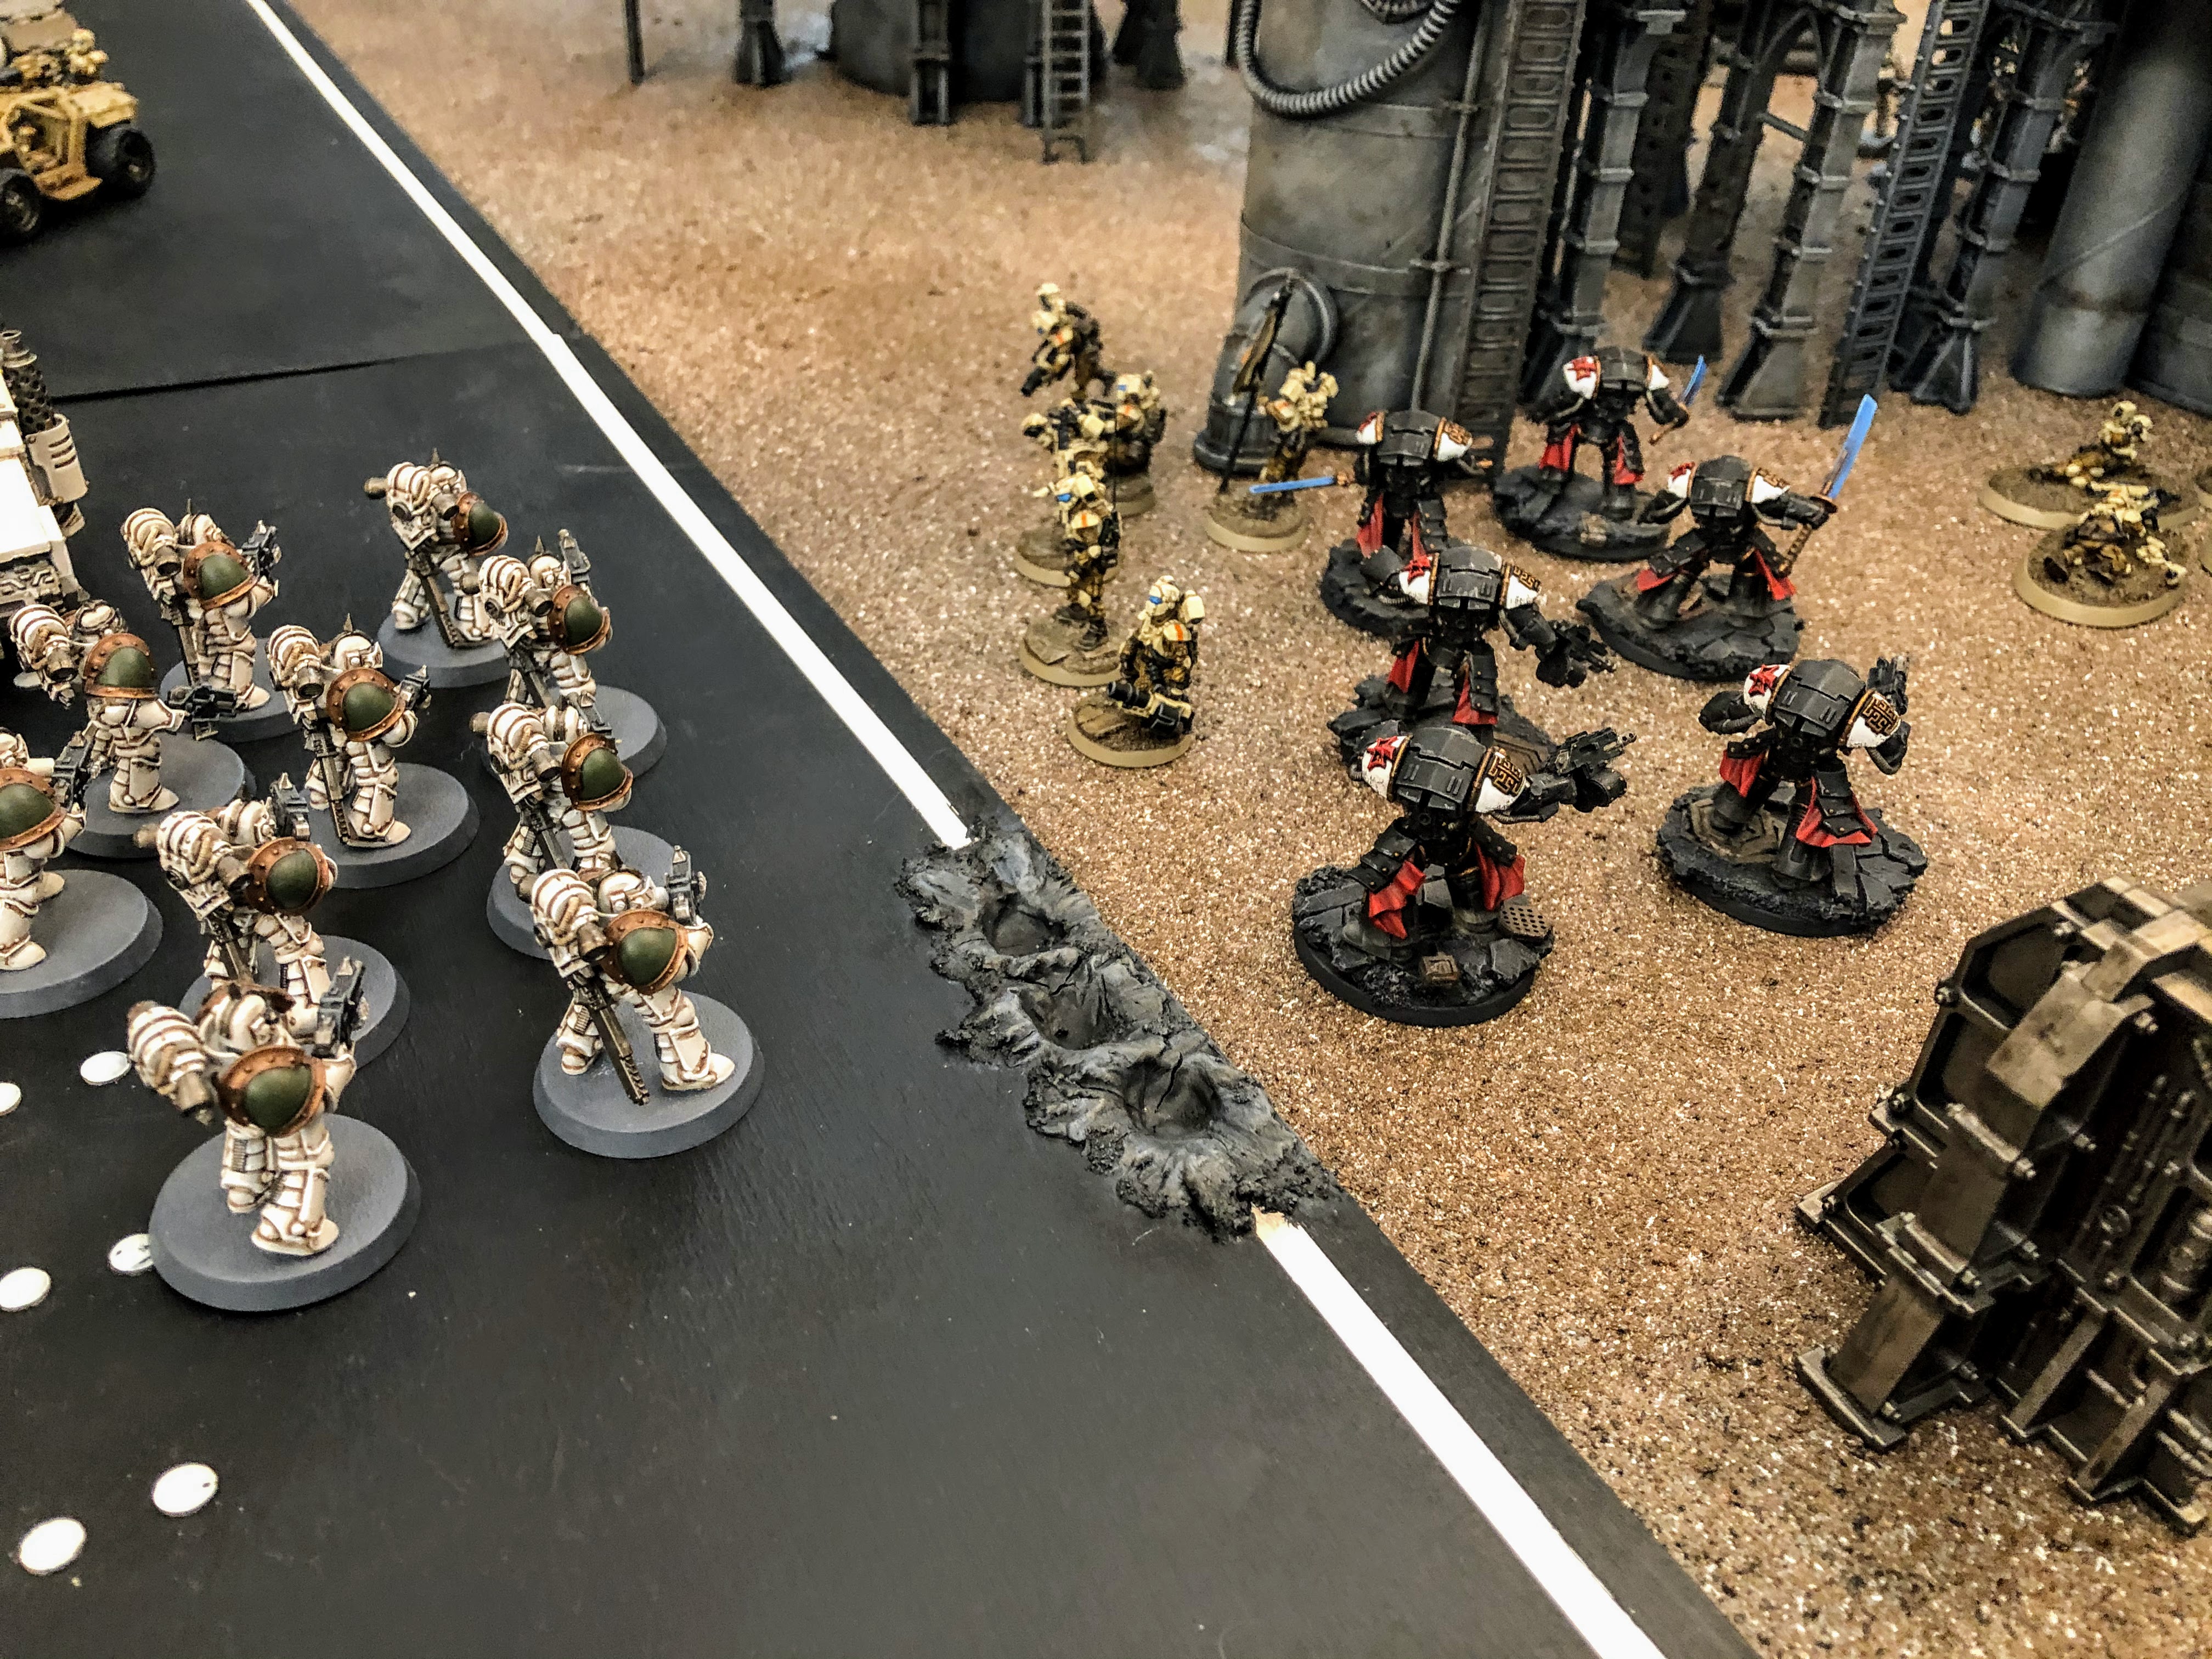
| The Kozar infantry platoon face off with the fearsome space marines of the Death Guard. A salvo of las fire manages to fell two of the superhuman warriors. |
 |
| Squad Temgar fire their bolters again and again at point blank range into the World Eaters terminators, eventually finding enough weak points in their armor to bring down the two walking dreadnoughts. |
 |
| The two remaining Tarantulas continue to follow their preprogrammed logic and fire at the immobilized dreadnought rather than the oncoming Predator battle tank. They destroy the damaged walker and leave it a smoking wreck. |
 |
| The White Scars surprise the Traitors with a precision strike against Praetor Wolfgang, with Consul Subotei and Squad Temgar knocking him out of the battle! Loyalist forces push toward the tower from all sides to defend their standard. |
 |
| The Death Guard continue to whittle down the Ebon Keshig as they make their way up the ladders. |

 |
The Red Butchers survive a salvo of missiles from the Ariunbold and charge toward the White Scars Skyhunters. The Deathshroud move in to avenge the loss of Wolfgang.
|
 |
| Recon Squad Tertius make a brave but futile stand against the massive and blood-crazed Hell Hounds of the World Eaters. |
 |
| The Hell Hounds kill a few Kozar men with explosive rounds from their bolters. |
 |
| The Hell Hounds charge and quickly slaughter the vastly overmatched human soldiers. |
 |
| Meanwhile on the lower level, the Death Guard also charge. Although they have no hope of victory, with the Loyalist banner still flying, Platoon Secondus holds their ground. |
 |
| Centurion Champion Subotei stands alone against two Deathshroud. With lightning reflexes, he cuts one terminator down in a flurry of blows, but is struck down in return by the other's massive scythe. |
 |
| After eliminating all opposition, the Traitors plant their standard at the highest point of the battlefield, boosting the morale of their forces in the wider battle. |
 |
| The carnage intensifies around the central facility as the Traitors take the top level and plant their standard. With both leaders knocked out of the battle, control of the high point will determine the outcome of the wider Battle for Berat. |
 |
| The Outriders continue harassing the enemy from the rear, turning their fire on Delrog the Diabolical and destroying the walking war machine before it can reach the melee around the objective. |
 |
| Squad Temgar holds their position and unleashes the Fury of the Legion on the Red Butchers. But after 40 bolter shots, only one of the massive terminators is killed! |
 |
| The battle rages around the center but the Loyalists cannot retake the central platform. |
 |
| The Traitors control the high ground. |
 |
| The Death Guard Predator and the Deathshroud terminator decimate Outrider Squad Tsujen. |
 |
| The Butchers charge and easily slaughter the Kozar support squad. |
 |
| The Traitor standard still flies over the battlefield. The Fellblade obliterates most of the Ebon Keshig and Tactical Squad Temgar! |
 |
| The Arvus Lighter hovers near the tower and Captain Xhaer and his grenadiers disembark in a last ditch effort to retake the objective. |
 |
| The grenadiers kill another Butcher with plasma fire. |
 |
| The last two survivors of the Ebon Keshig finally reach the tower and launch a hopeless assault against Chaplain Zungarz and his tactical squad, the Hellhounds. On the lower gantry, Lieutenant Tarvar and one brave infantryman charge the last Red Butcher terminator. |
 |
| The last Red Butcher must have been confused by being assaulted by such a weak foe because he only landed one hit and killed the infantryman. Lieutenant Tarvar then struck down the giant terminator with his powerfist! |
 |
| By the Emperor! Tarvar deserves a medal for heroics. |
 |
| The Kozar infantry continue to brawl with the superhuman Death Guard. They put up a strong fight and manage to kill a marine or two over several rounds of combat before they are finally destoryed. |
 |
| One Ebon Keshig reaches the platform and fights alone against an entire squad. |
 |
| The last few Loyalists fight desperately around the storage tank tower but cannot dislodge the superior Traitor forces. |
 |
| The Arvus pilot preforms some impressive jnks to survive a storm of Death Guard missile fire from Squad Feuer Sturm! He keeps the flyer near the tower in case the grenadiers require extraction. |
 |
| The last Ebon Keshig hopelessly fights alone against many and is finally brought down. |
 |
| The Deathshroud charges the Outriders and scythes them both down. |
 |
| Death Guard marines with flamers hold the ladder to prevent the Kozar grenadiers from taking the platform. |
 |
| The Fellblade destroys the sentinels, the Tauros and the rest of Squad Temgar as the Traitors mop up the last of the Loyalists. |
 |
| After suffering 95% casualties, the only Loyalist survivors are Captain Xhaer and half his squad. They regretfully embark on their Arvus Lighter and flee. |
TRAITORS WIN THE BATTLE!
Campaign Phase Score:
Traitors: 26 CP (16 CP +10 CP Win)
Loyalists: 15 CP (13 CP + 2 CP Loss)
TRAITORS WIN CAMPAIGN PHASE FOUR!
Overall Campaign Results:
Phases won by Traitors: 4
Phases won by Loyalists: 0
TRAITORS WIN THE CAMPAIGN FOR XHORIK PRIME!
POST-GAME:
Traitor Post-Game Analysis:
Pete: What a game! Wow was that so fun and satisfying to play a 4,000-point game of Horus Heresy, years after we got into this niche 40k offshoot. Looking around online, our games and the quality of our armies are top tier for sure! At this point, I can actually see a day where we could have a campaign for Horus’ final assault on Terra. The next faction I’m starting this month is the mighty Blood Angels, perhaps the most iconic of legions in the Horus Heresy! It’ll be so fun to add them into the mix.
As for the Battle for Berat, it was a bit one-sided, but only because Phil’s master battle plan never materialized due to his plasma squad killing Wolfgang before his jetbike Praetor could swoop-in and decapitate my army. If his strike landed as planned, he would have won the day and scattered my army by turn 4. So close!
My strategy was to press forward to the objective with so much heavy infantry and elites that Phil’s army just wouldn’t have enough firepower to hold up. I’d circle my armor around both flanks and hit his support units from the side, further cutting off his ability to go toe-to-toe in a 6-turn meat grinder mission. The Fellblade was going to be able to rumble around with impunity knocking out unit after unit, unless Phil chose to concentrate all his firepower on it. I was emotionally ready to see it blow up and die this game, knowing that its sacrifice would allow the rest of my tanks and dreadnoughts to live on and focus their firepower on the center of the board.
Another wise move I think, was to go first and be on the offensive from the get-go. Even if Phil had the final phase of turn 6, hopefully he wouldn’t have an army left strong enough to take the objective. And I think it was helpful that I placed my WE scout squad where I did, allowing my army to not be “blocked” or held-up by Phil’s scouts, whom he could have placed in a more forward position were my scouts not there. The bulk of my army was able to run forward and hit the objective as quickly as this slow army could.
Such a pretty, thematic battle though. Looking back through the battle report pictures, it’s just such eye candy. Each unit is so cool and really worth highlighting. I love how Lieutenant Tarvar was able to run into a melee with a freakin’ Red Butcher and kill it! Wow was that neat. And when the Arvus Lighter hovers near the tower and Captain Xhaer and his grenadiers poured out into the fight – AWESOME!!
I’m pumped for the next campaign! And great job as always Phil on the stellar battle report!
Loyalist Post-Game Analysis:
Phil: What a way to end the phase and the campaign! This was by far the biggest game of Warhammer 40,000/Horus Heresy we have ever played: 4000 points per side, four factions, an 8' x 5' table covered in painted terrain, including a central raised focal point where both sides banners were proudly displayed - at least momentarily in my case! That was the culmination of several of years of building our Heresy armies.
The epic nature of the battle made it special, but it ended the same way every other Phase finale did: with Pete's Traitors claiming a relatively uncontested victory. I knew from the start that my best bet to win the game would be for my Praetor, Khan Turan Jorma, to slay Pete's Praetor, Wolfgang. I knew holding a central objective against the Fellblade, the Red Butchers and the Dreadnoughts would be extremely tough. So the plan was to soften his Praetor and his bodyguard up with my deep striking plasma squad and then shoot and charge with my Praetor and Sky Hunters. On my first turn, the drop pod rolled a massive scatter and ended up off the board, thankfully only getting delayed. They arrived right on target the next time and delivered their deadly volley. Unfortunately, it was a little too deadly and they killed Praetor Wolfgang! While it was nice to see him knocked out of the fight, it also robbed my Praetor of the glorious chance to win an epic duel in front of both armies that would have shocked the traitorous scum into retreating and won the day for the Loyalists. So it goes...
My marines performed quite badly in the clash for the central tower. Of course, my faster army reached the platform first and managed to hold it for a short time. But they were easily overwhelmed and cut down by Pete's superior forces. The one unit of mine that may have been able to go toe-to-toe with his large tactical squads and numerous terminator squads was the Ebon Keshig. Due to the Chogorian Brotherhood Rite of War, they had to start in reserve. By the time they arrived, Pete had his Fellblade bearing down on my back line. The brave terminators had to run straight toward the objective in order to reach it while they were blasted repeatedly by a salvo of heavy weapons, decimating the squad before they could reach the Traitors on the tower. The Sicaran Omega once again killed 2 - 3 infantry troopers and died a fiery death - always such a horrendous waste of points! The Sky Hunters were caught out of position and slaughtered by the Butchers because they were attempting to reach Wolfgang and slay him. In hindsight, I should have circled them farther around the tower.
The most worthy performances came from my humble Auxilia infantry. The large infantry squad held their own for several rounds of melee against Pete's large Death Guard tactical squad, tying them up and keeping the way to the objective clear for the Ebon Keshig and other units. And the Honorifica Imperialis will be awarded to the valiant Lieutenant Tarvar who charged a Red Butcher with only one other man and then managed to slay him in close combat and survive to tell the tale!
In the end, I sort of regret not trying to destroy the Fellblade. Tactically, I knew I had to focus my heavy weapons on the Dreadnoughts and the Red Butchers because they could surround the objective and kill anything of mine that got near. (With only a few power fists and no chainfists, those Dreads would have once again wiped the floor with my army in melee!) And it feels like a waste to deal 10 hull points of damage to a Fellblade over two turns and watch it continue to operate at full capacity as if it had not taken a scratch. Those same 10 HP of damage were enough to take out both Dreadnoughts and the Land Raider and totally neutralize their damage output. But if I was likely going to lose anyway, at least it would have been soooo satisfying to finally destroy that monster!
It is unfortunate that the armies and mission were not better balanced and it ended up a fairly one-sided game yet again. At the end of the game, the Loyalists were completely wiped out except for half a grenadier squad and the Arvus Lighter (Valkyrie), while the Traitors had close to 2000 points (half their original army) still on the board! The result was never really in doubt over the last few turns, which takes away some of the excitement.
Campaign Conclusion:
With that, we will wrap up the campaign for Xhorik Prime with the Traitors dominating in impressive fashion going 4 - 0 in the four phases. This was the best campaign we have ever run with all the unique scenarios and campaign rules, not to mention the amazing armies we built along the way. The first battle was fought with just three units per side and it ended with 4000-points per side! The only downside was that the forces were never well balanced, with the Loyalists only able to win games requiring mobility and being thoroughly bested in every head-on fight.
The result is that the Traitors have destroyed the Loyalist forces on Xhorik Prime, conquering the stratocrocy of Kozar and crushing all resistance. The most inhabited part of the planet is now firmly in Traitor control and the planet can safely be used as a waystation and resupply point for Horus' forces on their long march to Terra. The Loyalists have been reduced to a scattered resistance, fighting a guerrilla war from the barren uninhabited mountains of the east.
Meanwhile, with the humans busy fighting each other, the orks of the east have started to recover their strength and consolidate under a new leader...


Blood Angels the most iconic legion of the Heresy?! I believe you are mistaken. Are you forgetting the legion for which the entire event is named? My Sons will see you on the battlefield and make you take back that blasphemous boast.
ReplyDeleteYeah when I submitted my comments I immediately thought of how that wasn’t quite true. Most iconic loyalist legion perhaps.
ReplyDeleteYour blog would increase in ranking if you post more often..”“ ไปยังเว็บไซต์
ReplyDelete