Tuesday, February 5, 2019

White Scars Anvillus Pattern Dreadclaw Drop Pod

I finally fished my Christmas present from the wife: the Anvillus Pattern Dreadclaw Drop Pod.

Just cleaning and assembling the thing took a few sessions. Fitting it together was actually fairly difficult.


It is a pretty large model! And when it is all together, it looks fantastic.

There were some gaps between some of the resin and plastic pieces so I tried to fill them with green stuff and smooth them as well as I could.


After several weeks of painting sessions (did I mention painting white is a real pain?), here she is, brand new and clean from the manufacturom. But a drop pod isn't going to look like this for long!

I figure a drop pod has an extremely rough life so it should look pretty worn and weathered. 


I wanted it to look like it had made many drops; a valuable transport with a long history within the Brotherhood of the Wind.


The photos aren't the best, but it looks decent in reality. 

Overall, this thing was a much bigger job than I anticipated when I started (but then again, so are almost all of my projects...). One problem is that I have issues with my white priming so I spend a lot of time just painting white on top of white, and white takes a lot of coats to cover anything! Also, the clean white look I have adopted is a lot of work since I am doing all that black lining of every crease instead of just washing and drybrushing the entire model like a smart, sane person would do. But, that clean white is what separates these White Scars from the Death Guard or the World Eaters and their dirty off-whites, and I like the look, even if it is a pain on a model this big.

I didn't even bother with the base, or doing much detail on the bottom of the model (just a boltgun metal drybrush down there), partly because I was burned out on this thing by the end, and partly because a drop pod flying around sideways the battlefield just seems silly to me. In my mind, this thing is meant to rocket straight down from a space ship, slamming directly into its target at a force that would kill anyone who wasn't a superhuman in power armor, and opening up to release a squad of space marines with guns blazing. Screaming down from space, then pivoting around to its side and flying around like a weird, slow jet just doesn't make any physical or tactical sense in my mind. (How does it hover along slowly if it is a jet? Don't the riders all fall over on their sides? In order to burn targets like in the rules, it must be pivoting back and forth between vertical and horizontal positions?) So I will just leave mine off the stand.

I am looking forward to seeing this thing on a battlefield soon.

Saturday, January 5, 2019

Imperialis Militia Drop Troops Force Commander

Here is a Force Commander for my Imperialis Militia regiment, the Kozar Army Airborne "Golden Eagles" regiment (Horus Heresy). He is also the Company Commander of the Xhorik 87th Drop Troops in the 41st millennium (WH40k). 

Here are the draft rules for their provenance of war (feedback welcome) and some pictures of the rest of the army: 


He is not the most imposing army commander, but he has style. 

Their regiment is called the Golden Eagles and I wanted the bird to be both a piece of wargear and a sort of mascot so I tried to give it a sort of golden brown color.  

The wolf pelt and the hunting bird help tie him in with his sworn brothers, the White Scars, and hopefully add a look of being from a martial society and being not fully civilized, as we might think of it.

The model is made from pieces from the Anvil Industries Regiments line. Since he is a fairly small model, I placed him on a larger base with a big rock to help identify him as the commander.

I used mostly the same palette as the other models in the army, with the same color fatigues, boots and gloves and continued with a very small amount of the regimental color orange for accents. I added a bit more blue as a sign of his rank to help him stand out. The black jacket and hat just felt right and it looks cool. Then I had to find some ways to get the bone color in there, so I used it for the cloak, the gas mask and the bird's hood. I wanted to keep their faces a light color to help the blue and orange really pop the way it does on the other infantry in the army.

The cool thing about the raptor is there is actually a piece of wargear he can have called a Cyber-familiar, so the model fits perfectly! He also has what could be a plasma pistol and power sword. But the main reason to take this guy in an Imperialis Militia army is that he allows the army to take Provenances of War, which will allow my grav-chute army to actually play like the drop troops they are.

Thursday, January 3, 2019

Horus Heresy Battle Report 11: The Pursuit of Zherdan

"Even the greatest mountain is worn to dust by the wind"

- Brother Veteran Gansukh,
Brotherhood of the Wind, White Scars Legion


Campaign To Date:


It is the middle of the Age of Darkness, as the Warmaster Horus makes his long march toward Terra, leaving shattered star systems in his wake. Lying in the path of the traitors' advance, the planet of Xhorik Prime is torn apart in civil war after only recently being united by the Great Crusade. The largest nation, The Federation of Unimund declare for the Warmaster and Mortarian as their living gods and liberators, while their ancient rivals to the north, the stratocracy of Kozar and her allies, side with their kindred spirits and sworn blood brothers, the White Scars.


In the first phase of the campaign, the Death Guard captured the border city of Bielyer and the only space port of any consequence in the region.


The second phase of the campaign has centered around the conflict for the Vaalbara Plateau. The White Scars struck first with a false retreat leading to an ambush of the Death Guard vanguard. The Traitors were able to rescue Praetor Wolfgang in time to lead them to victory in the pitched battle that followed. Then, after using the space port in Bielyr to bring in a super heavy battle tank, the Death Guard attacked and destroyed the Loyalist base, Bunker Tauruk. Praetor Zherdan and a small band of survivors were forced to fall back and attempt to meet up with reinforcements that had been on their way to the battle at the bunker. After a lengthy pursuit over rough terrain, a Death Guard Eradication Patrol has finally caught up to Zherdan and his band of survivors and they are calling for reinforcements of their own.


++++++++++++++++++++++++++++++++++++++++++++++++++++++++++++

Sergeant Albrecht rode across the frozen terrain in the command seat of the Rhino. Outside the vision slit, the world was darkness other than where the small transport’s spotlight shone. He watched the monitor displaying the vehicle’s scanner outputs intently. He had been tracking the fleeing Loyalists for three days and nights since the Death Guard victory at Bunker Tauruk. He knew he had been close on the second day, but his quarry had slipped away in a dust storm. They were on foot and some were injured. He knew it was only a matter of time until he brought them to bay.


When the scanner display started blinking, Albrecht grinned in anticipation.


“We’ve got movement, sir. Looks like about twenty pings. Moving with some organization, not randomly. Must be the enemy survivors,” the driver reported.


Albrecht looked at the scan of the surrounding terrain and immediately gave the command to engage.


“Support teams, dismount and move into position on the hill with the supply depot. Kill anything that moves,” Albrecht ordered over the com-link to the other Rhinos in his patrol.


On the screen, the blips did not appear to be fleeing. They looked to be forming up and taking positions in the rocks. Albrecht swung the searchlight around and caught a glimpse of the pale shapes moving in the blackness. He spotted a distinct outline, a man larger than the others and with personal banners that he recognized.


Sergeant Albrecht got on the com-link to report out: “This is Sergeant Albrecht of Squad Ritter. Target of significance confirmed. It is Praetor Zherdan. Moving to engage. Request support immediately.”


++++++++++++++++++++++++++++++++++++++++++++++++++++++++++++


Pre-Game and Mission

We decided that the scenario Hunter/Hunted from the Shadow War missions in Horus Hersey Book VI captured the feel we were after: the forces on the table at the start would represent the retreating White Scars survivors of the last battle pursued by Death Guard patrols, while the reserves would represent the Loyalist reinforcements mentioned in the build up to the last battle and on the other side, the Death Guard patrol calling for support once they identified a target of significance. In this mission, you start with half of your force on the table and half in reserve. It is a Kill Point mission with a few additional considerations: a bonus VP for wiping out a unit the turn it arrives from reserves (Mortal Blow); Slay the Warlord; and a bonus VP for wiping out a unit in a Sweeping Advance (Execution). We continued to use our house rule that Kill Points would be awarded for each 100 pts (rounded up) of the cost of a unit. The final special rule in this scenario was that the winner of a Shadow War roll would get to decide if the game started with d3 turns of Night Fighting.

We decided the Search and Destroy deployment map would be most fitting for the mission. And with each player having two board edges, it would make the Reserves rules more interesting with more choices to be made by the players and the reserve units more likely to have an immediate impact.

We decided whoever deployed first would get to select his deployment zone, in order to help balance out the disadvantage. We rolled off and Phil (Loyalists) won and elected to deploy second. Pete (Traitors) selected Zone III, which meant Phil would deploy in Zone I. Pete won the Shadow War roll and elected to start with Night Fighting, rolling up three turns of night.


The battlefield: the rocky badlands of the Vaalbara Plateau. 

ARMY SELECTION: 1150 Points

Death Guard Eradication Patrol - Pete
  • Praetor Wolfgang: Terminator armor, Paragon Blade, volkite charger, digilasers
  • Tactical Squad Stärke: 14 marines with close combat weapons, sergeant with power fist and artificer armor and Apothecary Wilhelm
  • Tactical Squad Ritter: 10 marines with close combat weapons, sergeant with power fist and artificer armor, rhino with heavy flamer
  • Tactical Support Squad März: 7 marines with volkite calivers and Apothecary
  • Heavy Support Squad Tragen: 3 marines with missile launchers
  • Contemptor Dreadnought Friedrich:  multi-melta, meltagun, dreadnought close combat weapon

White Scars, Brotherhood of the Wind - Phil
  • Praetor Zalitai Zherdan: Master-crafted power glaive, refractor field, cyber hawk, 
  • Tactical Squad Kheeg: 10 marines with close combat weapons, sergeant with power glaive and artificer armor
  • Tactical Support Squad Khoer: 8 marines with plasma guns
  • Sicaran Omega Tank Destroyer Kharvaak: Omega Plasma Array, heavy bolter and lascannon sponsons
  • Outrider Squad Anchin: 5 Outriders with twin-linked plasma guns, including sergeant


BATTLE:


Deployment: The Death Guard Patrol takes up position on a low hill being used as a supply depot. The White Scars turn to face their pursuers and use the rocky outcrops to stay out of sight of the Death Guard's long range weapons.

Wednesday, December 12, 2018

White Scars Plasma Outrider Squad

I added two more Outriders with plasma guns to bring the squad up to a more respectable five members. I think it makes the squad look better and more appropriate. I can't imagine I will add any more to this unit because the cost is already astronomical. Equipped as shown, the squad comes in at over 300 points! Yowza. It seems unlikely they will make back their points in enemy kills in any normal circumstances. But they look so cool that I can't see leaving them out of too many games.


Monday, December 10, 2018

Horus Heresy Campaign Update: Resolution of Phase 2

Phase 2 Overview

The second phase (set of five battles representing the Battle of the Vaalbara Plateau) of the campaign is well under way and approaching the climax. I'd like the last two battles to tie in directly to each other, with Game 4 impacting what type of battle will be played in the finale. I would like the last game to feel like the resolution of a distinct story arc and feel significant.This phase saw the development of the personalities and styles of warfare of the two Praetors as well as escalated the scale with the addition of the Imperial Fists, the Fellblade, and fortifications.

Thursday, December 6, 2018

Horus Heresy Battle Report 10: Assault on Bunker Tauruk

"The bigger they are... the harder they hit."
 - Sergeant Albrecht,
Death Guard Legion


Campaign To Date:

As the Horus Heresy rages across the galaxy, the Xhorik System is engulfed in civil war. On the planet of Xhorik Prime, the traitors have been on the offensive, gaining ground and mostly pushing the loyalist forces back to the northern badlands. Despite a few successful raids and ambushes, the White Scars and their allies have mostly been taking the worst of the conflict and have been forced back to their stronghold on the snowy Vaalbara Plateau, pursued by the relentless Death Guard.

With control of the only major space port in the vicinity, the half-ruined city of Bielyr, the Death Guard are able to bring in a super heavy battle tank to further increase the pressure on the loyalist forces.The White Scars sent a kill team to attempt to disable the tank while it was still making final preparations to leave the port, but they ran into a rival Death Guard kill team protecting the crucial reassembly and armament facility. The White Scars were only able to cause modest damage to the facility, which would slightly delay the tank's arrival to the war zone.

Meanwhile, Praetor Wolfgang of the Death Guard was preparing to launch his assault on the loyalist fortification known as Bunker Tauruk, knowing he had to strike before enemy reinforcements could arrive. As it stood, he would be starting the assault outnumbered, but he had to trust that his men had done their job and that his super heavy war machine would arrive in time to carry the day.


++++++++++++++++++++++++++++++++++++++++++++++++++++++++++++

Praetor Zhalitai Zherdan watched the Death Guard forces approaching through the dry swirling dust and ice. Raw hatred burned inside him at the sight of the former heroes who had broken their vows, murdered their own brothers, and tore asunder the great accomplishment of humanity, the Empire of Man. He closed his eyes, channeling his anger to a cold focus on the death of his enemies. He gripped his power glaive and felt as one with with the ornate and flawless weapon. 

No help would be arriving until tomorrow, at the earliest. His small force was on their own. Wolfgang surely knew it as well, which was why he was attacking now.

Zherdan scanned the horizon for any sign of a large dust plume indicating the approach of the Death Guard Fellblade. If Sergeant Khaljyk and his kill team had succeeded and the Fellblade was unable to join the assault, he was confident he could turn back the traitor tide here today. But if Kill Team Sürel had failed... he knew he had little chance of stopping the monstrous machine with the firepower he had available. He knew his best chance was to find and slay Praetor Wolfgang, cutting the head from the snake and giving his reinforcements time to arrive and launch a counter attack.

As the Death Guard advanced nearly into range, he finalized the positions of his men, gave his last orders, and positioned himself in the center of the fortification, ready to strike out at any enemy that dared approach too close.

++++++++++++++++++++++++++++++++++++++++++++++++++++++++++++


PRE-GAME AND MISSION:

We played a modified version of Blood Feud, the first of the original six Horus Heresy missions. This mission awards victory points for destroying enemy units, as well as Slay the Warlord and a bonus VP for the side with the most units left at the end of the game. Additionally, each side picks a specific type of unit to kill for bonus victory points. To stay with the story of the campaign at this point, we decided that Pete (Traitors) would be trying to destroy the loyalist fortification and we counted each individual bunker of the Castellum Stronghold as being worth an extra VP.  For the Loyalists, we thought it would make the most sense to target the enemy vehicles as the biggest threat so we made each vehicle (rhino, dreadnought and Fellblade) worth an extra victory point. Both of these were slight variations from the actual rules, but seemed fair since each side could earn up to three extra VPs. We also decided that a destroyed unit would be worth a number of VPs relative to its point cost rather than all units being worth one victory point: 0 - 100 pts = 1 VP, 101 - 200 pts = 2 VP, etc.

Finally, with the previous Kill Team game being a draw, we decided that the Fellblade would be available for the battle, but would be in "Delayed Reserve" which meant a 6+ roll to arrive in Turn 2, 4+ to arrive in Turn 3, and would automatically arrive in Turn 4.

Pete setup the terrain and we mutually decided on the deployment zones to accommodate the large fortification. Phil won the roll to go first and elected to do so.


ARMY SELECTION: 1700 Points

Death Guard - Pete
  • Praetor Wolfgang: Terminator armor, Paragon Blade, volkite charger, digilasers
  • Apothecary Wilhelm
  • Apothecary
  • Tactical Squad Stärke: 14 marines with close combat weapons, sergeant with power fist and artificer armor
  • Tactical Squad Ritter: 10 marines with close combat weapons, sergeant with power fist and artificer armor, rhino with heavy flamer
  • Tactical Support Squad März: 7 marines with volkite calivers
  • Heavy Support Squad Tragen: 3 marines with missile launchers
  • Contemptor Dreadnought Friedrich:  multi-melta, meltagun, dreadnought close combat weapon
  • Fellblade Super Heavy Tank

White Scars - Phil

White Scars, Brotherhood of the Wind
  • Praetor Zalitai Zherdan: Master-crafted power glaive, bolter, iron halo, cyber hawk, digilasers
  • Tactical Squad Kheeg: 10 marines with close combat weapons, sergeant with power glaive and artificer armor
  • Tactical Support Squad Khoer: 8 marines with plasma guns
  • Sicaran Omega Tank Destroyer Kharvaak: Omega Plasma Array, heavy bolter and lascannon sponsons
  • Castellum Stronghold with two twin-linked lascannons and a twin-linked heavy bolter
Imperial Fists, Boarding Party
  • Terminator Squad: Plasma blaster, volkite charger, two power fists, chainfist, lighting claws
Kozar Army Auxillia
  • Infantry squad: 20 infantry with lascarbines
  • Grenadier squad: 12 grenadiers with melta gun and grenade launcher
  • Sentinels: 2 sentinels with multi-meltas
  • Tauros: counts-as Legion Attack Bike with autocannon


BATTLE:


The White Scars and their Imperial Fist and Kozar Army allies defend their base as the implacable Death Guard slowly approach. Luckily for the defenders, Kill Team Sürel partially succeeded in their mission and at least delayed the Traitors' massive new weapon of war. But for how long?

Sunday, November 4, 2018

Horus Heresy Campaign Update

Here are some quick thoughts on the campaign so far.

I like the idea of breaking the campaign up into phases of roughly five games and roughly 500 points of escalation each. This gives a chance to have some resolution to certain parts of the story other than the entire campaign and makes the games more significant toward a bigger result. It also gives us a chance to play through some full campaigns from the rule books as a particular phase of the conflict (such as the Death of Isstvan III from HH Book One or the campaign from the 5th Edition Rulebook). I'm leaning more toward Kill Team games just impacting the main battles rather than counting equally in terms of results. They should have a significant impact on the main game and/or potentially carry over victory points. Another option would be to have the impact on the main battle but also count as a half victory for scoring the campaign phase.

Phase 1 was the Battle for Bielyr. This was an escalation of games from about 500 to about 1000 points per side. It consisted of five battles and was won by the Death Guard 4 - 1. This resulted in the Death Guard capturing the now-ruined border city of Bielyr and pushing the war north into Kozar territory.

Phase 2 is the battle for the Vaalbara Plateau. The escalation is continuing from about 1000 to about 1500 points per side, with some Kill Team games thrown in that have effects on the main battles. So far, we have played two main battles and two Kill Team games, with each side claiming a victory in a main battle. The Death Guard advance was stopped by a Loyalist ambush, but after rescuing their commander, the traitors were able to repel a White Scars advance. The next battle will be the Death Guard assaulting the White Scars fortifications as they push deeper into enemy territory. For this task, they have brought in new heavy artillery, but the White Scars were able to slightly delay its arrival by forcing a draw in the last Kill Team game.

For the Game 10 scenario, I am picturing the Death Guard in the role of the Attacker. The Loyalists will be using some fortifications. We only have access to rules for two fortification choices: the Imperial Primus Redoubt and the Imperial Castellum Stronghold. I think I can use my existing bunker and the two new ones I am making to create a poor-boy Castellum Stronghold proxy. The Castellum is supposed to be a main bunker with three annexes and a force field between them all. I can create a three-bunker complex without the force field gates instead for roughly 75% of the cost, if that sounds fair.

Pete and are I looking for a suitable mission, but if we cannot find one, we can either just play for Kill Points or make up a scenario that sounds fun and fair.


Other Campaign Stuff:

Terrain:
We have finally documented our campaign terrain rules to make them more consistent from game to game.

Warlords:
Our Praetors can choose a Warlord Trait instead of rolling for one as long as it is suitable based on the way they have played so far. That trait should not change from game to game unless both players agree there was a significant change in the way the Warlord or his army played and then the new trait should be representative of that. Obviously Praetor Wolfgang has played a much bigger role in the campaign so far, with Praetor Zherdan only featuring in one or two battles. But that should change as the games get larger and I have the points to spend on a Praetor rather than a Centurion.


Blast Marker Weapon House Rule:
For direct fire: Roll to hit as normal. If hit, place the template on the closest visible model in the target unit, as per normal rules for casualty removal. If miss, roll for scatter with artillery dice and scatter dice.
OR: Can use the standard rules (place the blast anywhere in the unit and automatically roll for scatter subtracting BS.
Indirect fire (barrage) stays the same as current if there is no line of sight. If there is line of sight, you can choose to fire directly, as above.

Blast weapons/units should probably cost 15-20% more because of the improved deadliness of the guns.


Feedback is welcome.


Thursday, November 1, 2018

Horus Heresy Battle Report 9: Disable the Fellblade (Kill Team)

"If you can see us, we are dangerous indeed. But that is nothing to the peril you face if you cannot see us, and all you can hear is our laughter."

 - Brother Elder Gansukh of Kill Team Sürel,
White Scars Legion


Campaign To Date:


Xhorik Prime is engulfed in civil war as the traitors attempt to subdue the system prior to the arrival of Horus and his host on their long march to Terra. The loyalists know that if they can gain control of the system, they can deny Horus a place to safely resupply. So far, the war has mostly gone the traitors' way as they have claimed five victories to the loyalists' two. With a recent defeat, the White Scars and their allies, a small band of Imperial Fists and Kozar military auxiliaries, have been forced to fall back to fortified positions in the northern mountains. The Death Guard are making an immediate advance to strike before the loyalists can regroup and gather reinforcements.

Additionally, with their control of the main space port in the region, the traitors are able to bring in additional reinforcements. The latest to arrive is a super heavy battle tank and an icon of the Death Guard, a fearsome Fellblade. Partially broken down for transport on the small craft available, the war machine must be reassembled and loaded out with weapons systems, ammo and fuel prior to battle.  Loyalists scouts were able to spot the tank's arrival, allowing Praetor Zherdan to send a White Scars kill team behind enemy lines to attempt to disable the tank before it is battle-ready. Knowing how critical the heavy weaponry would be to his assault, Praetor Wolfgang of the Death Guard assigned an elite unit of his own, Kill Team Ritter, to guard the tank and see it safely to the front lines. Wolfgang is already moving on the White Scars positions, not wanting to give them a chance to recover, and planning that his big guns will arrive in time to neutralize the enemy defenses and allow his army to overrun the loyalist position. He knows the White Scars have nothing that can match his Fellblade and its arrival should mean a quick end to the war.


PRE-GAME AND MISSION:

This was our first game using the Kill Team boxed game rules. We played the mission Disrupt Supply Lines from the book, with the twist that the attacking White Scars are attempting to disable or at least delay the Death Guard's super heavy Fellblade tank by damaging the tank and the control systems of the equipment conducting the final on-planet re-assembly and loadout after the partial disassembly for planetary landing. Pete placed three objective markers (the rear left vent of the Fellblade and two control consoles) in his deployment zone. Controlling an objective marker is worth 3 victory points. Additionally, the attacker scores 1 victory point for each objective destroyed (using a special mission Tactic card for 1 command point) and a player scores 1 victory point if the enemy's kill team is broken at the end of the game. Game length is 4 turns with a chance for a potential 5th and 6th turn.

The result of this mission would determine whether or not the Fellblade would be available for the upcoming Traitor assault on the Loyalist stronghold.


FORCES:


Death Guard Kill Team Ritter
Their  mission is to protect the crucial Fellblade until it is kitted out for the assault on the White Scars fortified position.

Kill Team Ritter is back for another mission, this time to protect the mighty Fellblade as it receives it's final loadout prior to battle. The team is led by the feared Sergeant Albrecht and features Apothecary Wilhelm and a heavy weapons expert.


White Scars Kill Team Sürel
Their mission is to disable and delay the mighty superheavy tank to give their brothers a chance in the ensuing battle.

For this mission, the White Scars Legion Brotherhood of the Wind has assembled their first kill team. Kill Team Sürel (to stalk) is ostensibly led by the dynamic and charismatic Sergeant Khaljyk (running with glaive), but the centerpiece holding the team together with his wisdom and calm demeanor is the elderly Brother Gansukh, a Terran veteran and expert plasma gun marksman (bare headed).


BATTLE:


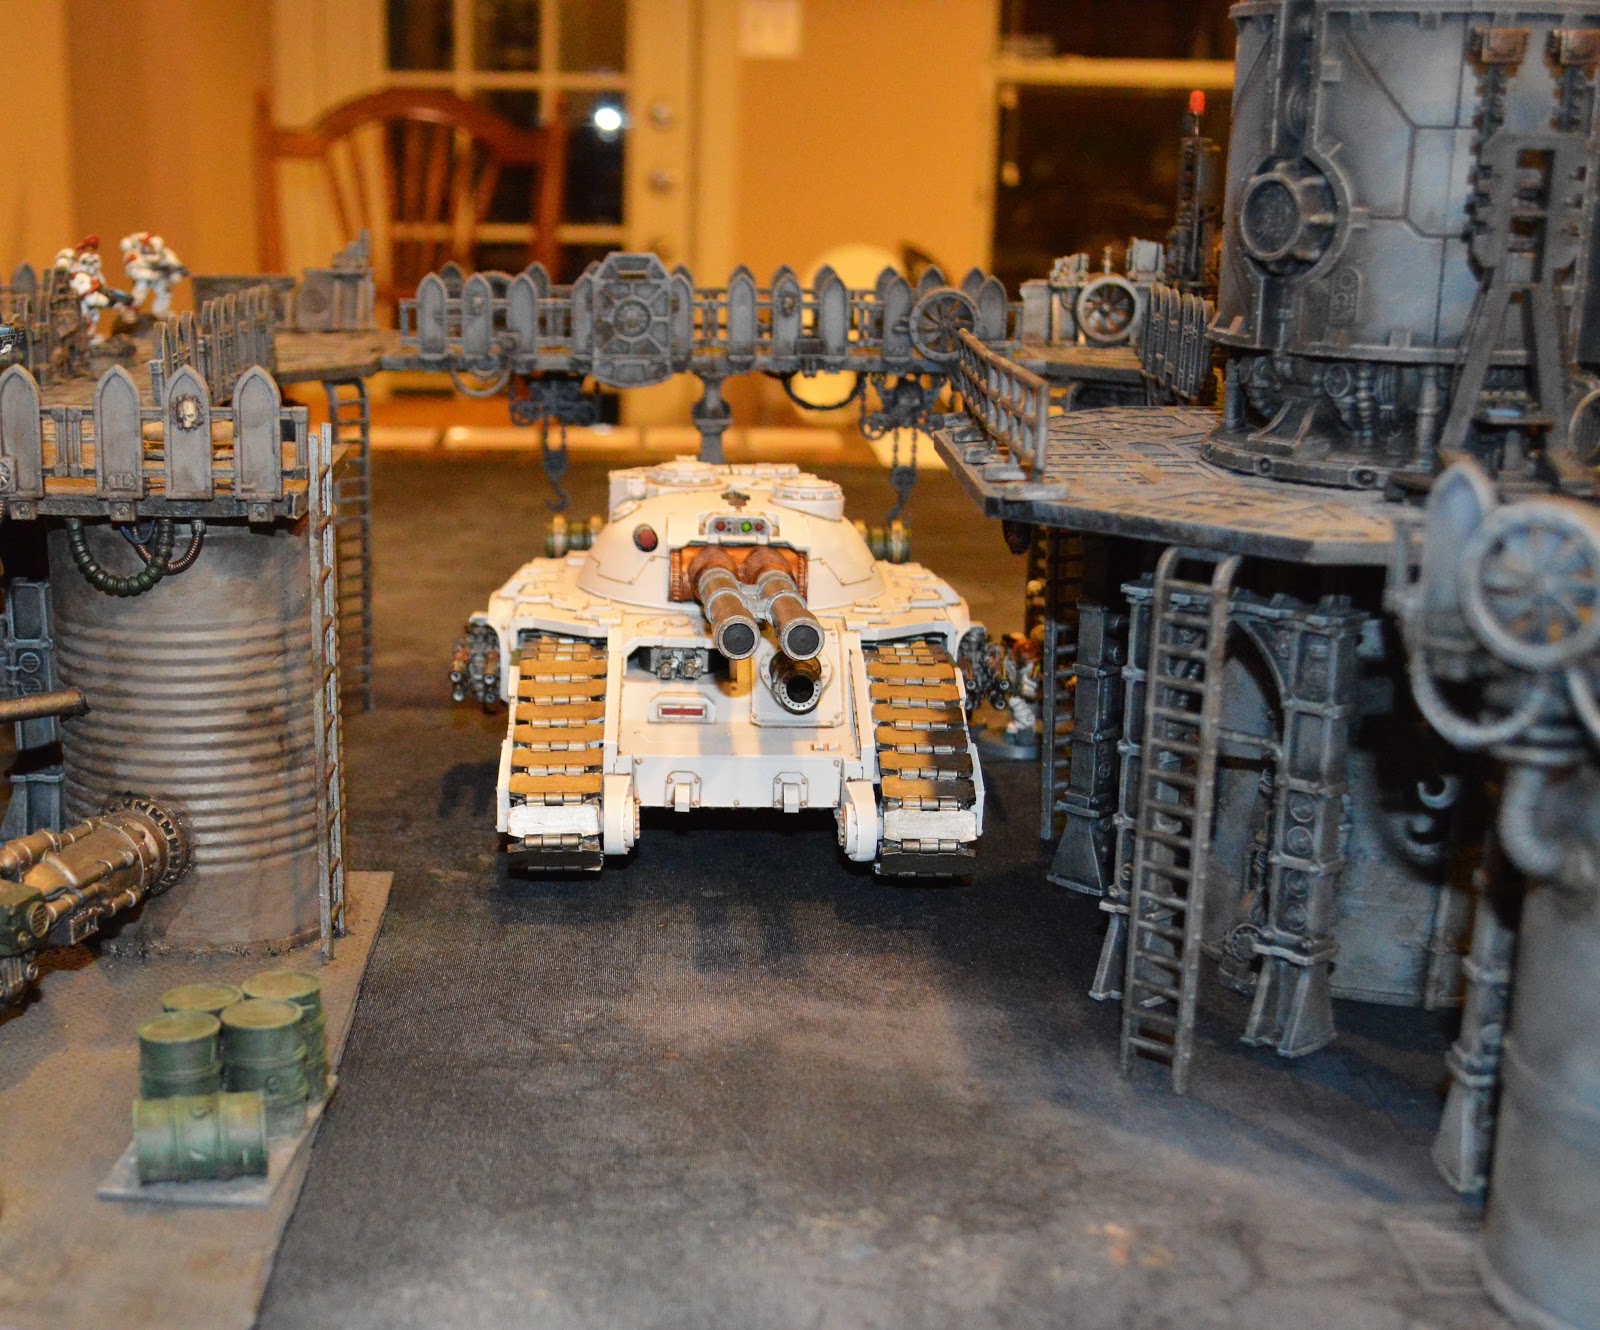
The main objective: the mighty Fellblade, still in the process of being re-assembled and loaded out for battle.
The arrows point out the three objective markers: the left rear vent of the Fellblade and two control systems for the factory. The White Scars infiltrated the plant from the near side.


Kill Team Sürel has taken out the outer sentries and infiltrated the plant before Kill Team Ritter raises the alarm.

Two of the Death Guard cover the long open approach to the crane control system console. 

Sergeant Khaljyk sprints across the open ground just inside the plant's southern entrance, with an eye on the assembly control console on the eastern platform deck.

The White Scars stalk through the heavy equipment, their target in their sights. 

Sergeant Albrecht, Apothecary Wilhelm and a melta gunner guard the key weak point on the Fellblade. 

The Death Guard know the importance of getting their war machine into the upcoming battle and prepare to lay down their lives to protect her, if needed.
Both kill teams advance and fire at close range.

The White Scars move up to the bridge while the Death Guard hold their ground on the objective.

The Death Guard defenders inflict a flesh wound on one of the White Scars plasma gunners. 
 Sergeant Khaljyk sprints on his bionic leg across the open factory floor while two Death Guard marines try unsuccessfully to bring him down. One of the Death Guard is injured from the deadly White Scars sniper, Brother Gansukh.

Khaljyk quickly ascends the ladder as the Death Guard fall back and continue to fire.

The Death Guard heavy weapons expert fires a krak missile at the oncoming White Scars, but the shot sails wide.

The firefight around the crane control module heats up as the combatants close distance. 
The heavy weapons trooper is gunned down at point blank range while his Death Guard brother charges the plasma gunner.

Sergeant Khaljyk charges both Death Guard troopers protecting the assembly console. They try to fall back, but he is quick enough to catch them and inflict a flesh wound on one with his power glaive.

The battle for the elevated control panel objectives rages on, both sides fighting intensely to help their brothers in the upcoming assault. 

Brother Khoro clambers up on top of the Fellblade and starts firing down at Apothecary Wilhelm, trying to clear a path to the tank's weak point where his explosives would be damaging. Meanwhile, Sergeant Albrecht climbs the ladder and charges into the melee on the catwalk. 

The game of cat and mouse on the factory floor continues as the combatants weave and scramble among the pillars for a good line of sight or some cover.

The White Scars gain control of the assembly console while the Death Guard still protect the weak spot on the Fellblade. 

The White Scars missed their chance to detonate the crane console when they had control of it and now Albrecht has them fighting for their lives with his deadly power fist.

The Death Guard hold their ground around the tank as the White Scars advance.

Albrecht strikes down his Loyalist foe with his power fist, as the surviving White Scar marine charges into the fray.

The White Scars also launch an assault on the ground level to try to wrest control of the tank's weak point so they can plant their explosives. 

Melees rage near all of the objectives. 

Sergeant Khaljyk continues to dodge attacks and inflict flesh wounds on his opponents but cannot bring them down, while Albrecht's power fist crushes another of the White Scars near the crane controls. 

The battle for the tank continues with neither side able to strike the decisive blow. 
Brother Gansukh tries to kill Albrecht in revenge for his brothers' lives, but the Death Guard sergeant shrugs off the plasma fire. The battle draws to a close as Death Guard reinforcements close in, forcing Kill Team Sürel to fall back, hoping the damage they inflicted would be enough to delay the deadly war machine in the oncoming assault. 


Result: 

With the Loyalists and Traitors each holding one objective, the tank being contested and neither Kill Team breaking the other, the result was a draw with 3 victory points per side.

Since neither side won outright, I think the most fair result of this mission is that the Fellblade is available in the next game, but is delayed due to the damage the Loyalists caused to the factory. I think the tank should have 4+ chance of arriving turn 3 and if that fails, automatically arrive turn 4. It would be available for roughly half of a standard 5 - 6 turn mission.

Alternatively, the tank could be rushed to the front without finishing assembly or weapons loadout. In this case, it would be available to deploy as normal, but would be at roughly half strength (vs having the tank at full strength for half of the game). This might mean that it starts with half of its hull points and only a 4+ chance for each weapon to be functional for the battle.

Of course, the traitors could elect not to use the tank at all under these circumstances and build an army without it.

These are just my ideas. If anyone has any others, let us know.


POST-GAME:

Loyalist Post-Game Analysis:

Phil: I really enjoyed the fast-pace of the game and the interesting tactical decision making. The alternating deployment, never knowing who will go first on a turn, and alternating shooting/assault attacks all make for a more interesting act-and-react dynamic than the core Horus Heresy/40k games where you take turns landing massive haymakers on each other with your entire army. As our first game of Kill Team, it was a bit of struggle with all of the specialists and command points and both of us missed multiple opportunities to use points and skills because we were caught up in the action.

Overall, it was a good, well-matched game with neither side ever really gaining a distinct advantage. I feel I played well enough to win the mission, but made a big rookie mistake. As part of learning the general rules, the mission rules, and all the Tactics, I forgot to use the Attacker Tactic from the mission that would have allowed me to destroy the crane console objective at the end of the turn that I controlled it; I thought it would be during a model's action phase such as move or shooting. On the next turn, Pete's sergeant charged in and I never controlled the objective again. Had I destroyed it, I would have earned one VP and prevented  Pete from holding it at the end, which may have tipped the game.

The other item of note is just how hard it is for space marines to kill each other in Kill Team. After six turns, only three of our 14 models were out of action (two from the power fist) and neither side was ever at risk of failing morale. Although that may have just been a result of our poor dice rolling: I inflicted 7 flesh wounds on Pete's traitors and never got an "out of action" result, my only kill coming from stacking 3 flesh wounds on the same guy.

In the end, it was a good game (with a few good beers) on nice terrain with some fun, cinematic moments. You can't ask for much more than that.


Traitor Post-Game Analysis:

Pete: Well that was an interesting game. I agree with Phil that having space marines play space marines might have led to a bit of a dud in terms of casualties and action. I’d be excited to play again with some weaker models on the board. But I liked the gameplay and the pace of play with the alternating phases in each turn.

I’m not sure the game really needs the action cards and command points to be a fun experience. I liked the specialists, and I think it’d be entertaining to level them up and see them progress over a series of skirmish battles.

As for my strategy in the game, I tried to spread my small force between the three objectives and wait
for the White Scars to come to me - nothing too fancy. I focused my strongest group with the sergeant, melta gun marine and apothecary down around the tank, thinking they might mix it up with the enemy up close and personal. And it was hard not to think of the objective down on the tank as the primary objective, even if all three counted equally.

I was really disappointed in my missile launcher marine as he fizzled out and got knocked out. I figured he would be one of the strongest participants in the battle and he didn’t live up to his potential. Or live.

We will definitely have to mix-in some more Kill Team into our ongoing campaign for Xhorik Prime, as well as with other armies and games outside of the Horus Heresy. I see a lot of potential.


Saturday, October 13, 2018

Objective Markers

In the last battle, we had to use some tokens to represent the objectives because we did not have many suitable models or terrain pieces, so I decided to make up a few quick objective markers.

These are generic enough to be scanners, force field generators, teleportation devices (or jammers), security controls, you name it.

Campaign Terrain Rules

All cover saves are for infantry. Vehicles use the Hull Down rules and must be at least 25% covered from the view of the firer.

Moving up and down counts as inches of movement. Moving up and down ladders, steps or open slopes counts as normal movement. Climbing up or down without a ladder counts as difficult terrain.

Ruins:
Visibility into/out of/through the ruins is limited to 6".
Entire base provides 4+ cover save.
Entire base is difficult terrain for infantry, dangerous for vehicles.