
For the Legendary Mission: Point of Desperation we are planning to play, I would like to put together a piece of terrain to represent the focal point of the battle: the Armorium.
I rummaged through my collection of trash that may have potential as terrain and found two pieces that seemed to match the rough size, shape and style depicted in the book.


Right now, I am leaning toward cutting up the plastic piece on the left to make it into a suitable ruin. I will stack some ammo crates and barrels inside and have a large hatch in the center leading down into the main Armorium storage space. I am thinking putting it on a piece of foam will allow me to make it taller and more solid, but maybe a piece a bit thinner than this one.
Update: I started cutting up a plastic food tray to make it a ruin and it does not look great. Also, I have a hard time imagining an armory getting bombed with sufficient force to explode and collapse the building without setting off the masses of ammo and explosives stored within. It just seems unrealistic to see a ruin packed with weapons and ammunition.

So I am now thinking of a different approach. A battered or ruined outer wall with a smaller inner bunker that is intact. So the piece overall counts as a ruin and we will say the inner bunker cannot be occupied in the game (because you need to leave it clear for the salvage squads that are gathering the weapons).
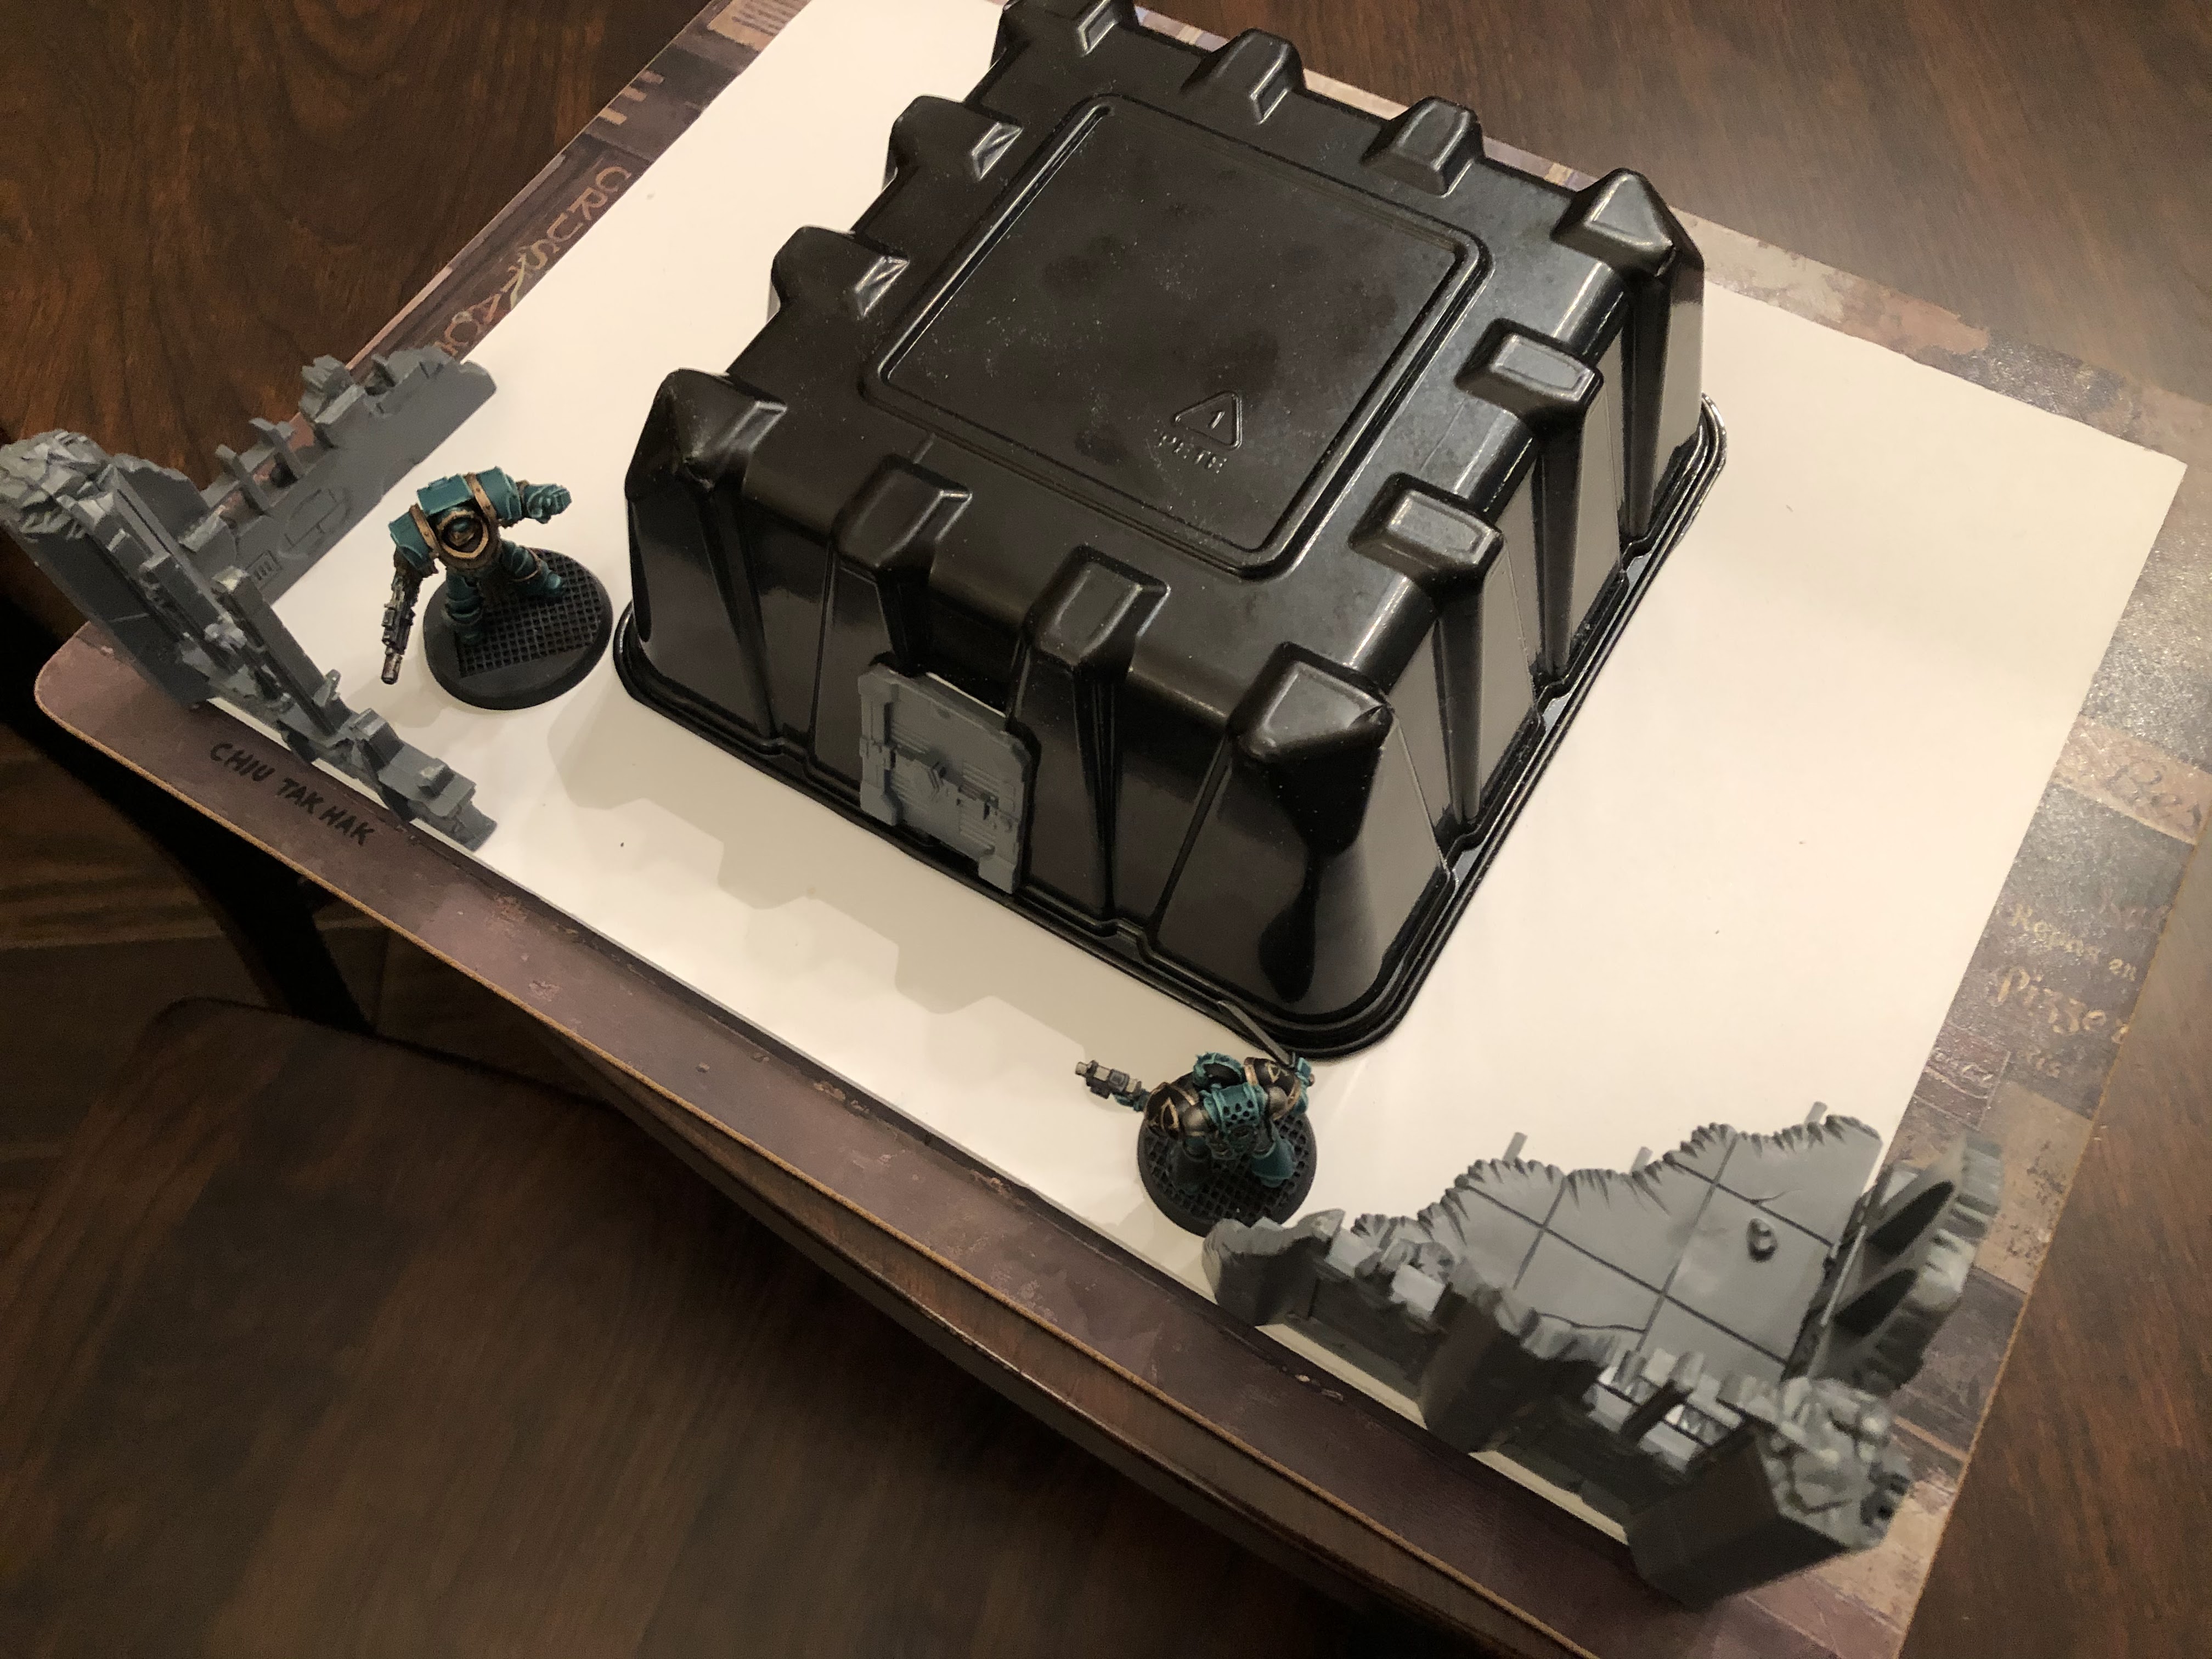
Something like this with a ruined wall around the edge of the wooden rectangle, where anyone inside the walled area will count as on the objective for scoring purposes. The wooden rectangle makes an 8.5" x 11.5" scoring area, which is bigger than the 5" x 10" minimum described in the scenario.

So here is the concept with preliminary rough walls thrown up.

I think these look cool and different and could be a sort of metallic perimeter fence. Of course, the big bunker in the middle does not leave a ton of room for melee inside the objective, but units can climb on top of the bunker as well, so that is available to occupy. And a scoring unit only needs one model inside the zone to count as controlling or contesting the objective so it should be manageable. I could use a smaller bunker but I don't have anything great looking in my junk box smaller than this. I will start with this and see how it goes.
With armored door added, to make it look a bit more like an armored storage bunker:

I also experimented with adding some ruins to give it a more gothic look. I have a few more of these old ruins from the 3rd edition starter box if you guys like these concepts:


Update #2:
Taking the feedback from Pete that the objective area is too small, I made a larger one out of one of those foam posters used for school projects. The new one increases the size from 8.5" x 11.5" up to 10" x 13". With a 7" x 7" bunker in the middle, that leaves 130 sq. in - 50 sq. in = 80 square inches of ground, partially covered with ruined walls. That is more than the 50 square inch minimum ruin size in the scenario and of course the bunker roof can be occupied as well. It could make an epic stage for a duel between warlords! There will be a ~1" wide band running all the way around the ruin for the base, which we can elect to include in the objective definition or not.
This makes the objective much bigger than what is in the book, and therefore easier to reach from the deployment zones. But since our table is bigger than the standard 6' x 4' in the book, we can accommodate a larger objective and still have at least the same distance from the deployment zones to reach the edge of it.
I also reinforced the mushroom package with a foam block that I cut down to size. This will make the flimsy plastic a bit sturdier in case anything heavy gets set on it.

I used a terminator on a 40mm base on a marine on the bigger 32mm base as test dummies this time just to be sure there was enough room to move models around the bunker. Remember, you only need one model from a scoring unit on the objective so you do not need to fit entire units. They can be partially on and partially off, or fighting a melee that spans the objective. So I think there will be enough room.

Since Bill likes the ruins idea and I didn't hear anyone say they liked the fence, I will play around with some ruins. I think I have the set of four of these old school ones in order to have one at each corner. One seems to be missing its platform, but that is fine; it will leave more room for models on the ground level. Then I will add tile for the ground and piles of rubble all along where the walls used to be.
Update #3:
Last update for tonight. I added the tiles around the base and glued the raised building foundation down. Unfortunately (but as expected) the number of tiles does not fit perfectly with the length and width of the placemat I am using as a base. I cut some tiles off short to make the long edges fit, but I might have made a small mistake by leaving the short edges as whole tiles because they slightly hang over the edges on the long sides. So I may need to trim them down, which risks them not being square, or fill in underneath them, or there will be a slight overhang of the tiles over the edge of the base.


Update #4:
I added the tile on the raised section and did the edging trim with plasticard.


Small update tonight. Did a bit of work on the bunker itself to add some detail.
First I added some texture to the roof and a hatch for access:

Then I thought about adding something else to the roof to make it more obvious that any models up there are supposed to get a 4+ cover save.


I thought these little ruined walls might help make it clear that any unit in the ruin gets a cover save and also tie the central bunker in with the surrounding ruins a bit more. They are not cleaned up yet and just loosely let in place to get an idea of how they will look.
What do you think?
What do you think?
Back from vacation and back at the project. I glued the four corner ruins down and started adding some air-dry clay around the bases to form the shape of the rubble piles. Much more work to go on building up the rubble.

Update #7:
Added a few little details to the bunker (including some Lego bits!) and started adding some debris, bricks and rubble around the ruined walls. Added the ruined walls to the roof of the bunker and glued the bunker down so I can start adding debris and rubble around it as well.


Rubble is done and I primed it tonight. I left it pretty open and clean for ease of gameplay. I'm sure it would be completely covered in rubble after a shelling, but maybe since it was destroyed a few weeks ago in the campaign, the local garrison has had time to clear much of the rubble from around the bunker to enable access.


Update #9:
I put the base colors on. A heavy drybrush of Craftsmart graphite on the ruins. A mix of black and Americana primary red on the bunker followed multiple drybrush layers with a lighter mix of black and red each time. The door and metal roof area are drybrushed with Leadbelcher. It is already looking decent. I will add some washes and then lots more drybrushing.

Update #10:
Nearly there! I applied the wash and highlights and picked out a few details. Just a bit left to do now. A few little details to touch up. And I just remembered I put two skulls in the rubble so I need to find them and paint them. I will also look through my decals to see if I have any that are suitable. She is almost battle ready now!


Looking good!!
ReplyDeleteWe appreciate your mad terrain skills! I’ve got no doubt this will be a fitting centerpiece for our big game in a month.