
Background:
TBD
Scenario: Onslaught
Game Length: 6 turns
Primary Objective
Onslaught Objective: Control the objective you place in the opponent's deployment zone: 5 VP
Onslaught Attack: Each unit destroyed in the first turn: 1 VP
Secondary Objectives
Slay the Warlord: 1 VP
Slay the Warlord: 1 VP
Attrition: 1 VP for whoever destroyed the most units
Belligerents:
Death Guard: Phil
Primary Detachment: Death Guard The Reaping
Primary Detachment: Death Guard The Reaping
- Praetor Wolfgang: Catphractii terminator armor, volike charger, thunder hammer
- Deathshroud retinue: 5 terminators with hand alchem-flamers, power scythes and rad grenades
- Tactical Support Squad Folterer: 8 marines with flamers, sergeant with artificer armor.
- Transport: Rhino with pintle-mounted heavy alchem-flamer.
- [Line] Tactical Squad A: 12 marines with chainswords, sergeant with power fist and artificer armor and Apothecary Gerhard
- [Line] Tactical Squad B Toddestraffe: 12 marines with chainswords, sergeant with power fist and artificer armor and Apothecary
- Tactical Support Squad Blitz Schock: 7 marines with volkite calivers
- Heavy Support Squad Feuer Sturm: 7 marines with missile launchers
- Predator Mittel Panzer 021 with Predator Autocannon and lascannon sponsons
- Contemptor Dreadnought Jürgen: Gravis melta cannon, melta gun, Gravis power fist
- Deredeo pattern dreadnought with Arachnus heavy lascannon battery, twin-linked heavy bolter, Aiolos missile launcher, and helical targeting array
2062 points
Loyalists: Pete
Primary Detachment: Blood Angels Day of Sorrows
- Garo Arteo, Bloody Executioner of the Crimson Gate: Praetor w/ artificer armor, iron halo, digital lasers, jump pack, blade of perdition, bolt pistol, Paragon of Unity
- Contemptor Dreadnought: gravis lascannon, gravis powerfist, metlagun
- [Line] The Triarii Guard: 17 tactical marines with chain swords, sergeant with artificer armor, power fist, and plasma pistol. Vexilla and augury scanner.
- Transport: Spartan Assault Tank with flare shield
- [Line] The Sanguine Berzerkers:14 assault marines w/ jump packs, bolt pistols, 2 power axes, sergeant with power fist, plasma pistol, artificer armor
- [Line] The Golden Shields of Baal: 10 breacher marines, void-hardened armor, 8 bolters, 2 melta guns, breacher shields, sergeant with thunder hammer and artificer armor
- Kratos Battle Tank: Melta blastgun with coaxial autocannon, lascannon sponnons, hull-mounted heavy bolters. flare shield, reinforced hull
- Heavy Support Squad: 7 marines with lascannons and augury scanner
2060 points
Army Selection and Pre-Game Plans:
Phil: Since they are both his armies, Pete wrote both lists in an attempt to make them balanced and then let me choose which one I wanted to play. I was very excited to try out the Death Guard for the first time. For once, I would be the one dishing out their deadly shooting instead of being on the receiving end of it!
Looking at the force selected, I had a lot of Troops but only two Line units so I knew how I used those two tactical squads would be essential to winning a game where the majority of potential victory points come from objective control. I decided to put the two apothecaries with the tactical squads to give them the best chance of surviving until the end of the game. I also knew my heavy weaponry on the two dreads and the Predator would be stretched trying to deal with two heavy tanks and a dreadnought. On the plus side, I would have more units than my opponent, which would give me some advantages with this scenario's staged deployment, letting me deploy the last few units. I also knew I had a lot of anti-infantry firepower with the feared volkite calivers, missile launchers, and the flehsbane flamers, which will force the Blood Angels infantry to keep their heads down. Although the strength of this Death Guard force was in its shooting, I also had the satisfaction of going into battle with the toughest infantry unit on the table in the Deathshroud. Their WS5, W3, and Battle-hardened (meaning it would take S10+ to trigger Instant Death) meant they were going to be very, very tough for the Blood Angels to remove.
Pete:
Deployment:
The Death Guard won the roll to select their turn order, and elected to go first and deploy the first unit, using the scenario's staged deployment rule.
 |
| The battle was fought across the former front lines on the city borders of Zdojan |
Phil: I wanted to go first so that I had the best chance of destroying an enemy unit on the first turn, which could be a tie-breaking VP in a scenario where there were only a few ways to earn them.
I placed the Deredeo where it would have good line of sight to where I expected Pete to place his bigger tanks, on the more open left flank. The center of my line was made up of my heavy infantry, the missile launchers, volkite calivers and the Deathshroud. This would allow me to control the center of the table. On the right, I put some firepower in the Predator and Contemptor. On my far left, I placed the two tactical squads. My plan was to concentrate my only two scoring units together and place my objective on that flank. They would have the Deredeo for covering fire and the tactical support squad with flamers in the Rhino to clear them a path.
However, once I saw that Pete placed his objective on my far right flank, where I had nothing but the Predator to defend it, I quickly realized I would have to adjust my plan. I decided to send the Rhino to support my right flank and attempt to prevent the Blood Angels from easily taking their objective.
I also knew that target priority was key in Horus Heresy because only certain units have the potential to damage certain enemy units. In many previous games I had been in the hopeless position of not having any weapons that can reliably threaten an enemy heavy unit after the first turn or two. I was concerned to be facing three very tough units (two tanks with AV 14/15 and 5HP and a Contemptor). But I also knew how deadly a large squad of lascannons could be, so I decided to focus my deployment on destroying the Heavy Support squad in the first turn. This would eliminate a major threat before it could attack and earn me a crucial VP. I knew it was a risk to ignore the armor on turn 1 and use my best weapon, the Deredeo, on infantry, but I knew I had a better chance of wiping out that squad in one volley than the tanks or dreadnoughts. So I deployed a concentration of force opposite from the Heavy Support Squad.
With the deployment complete, my plans were set and ready to be put into action.
 |
| The Deredeo supports the two Tactical Squads |
 |
| The Deredeo sports a frightening arsenal of weapons |
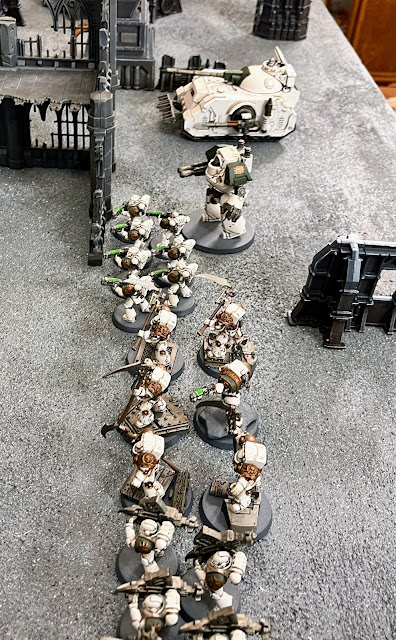 |
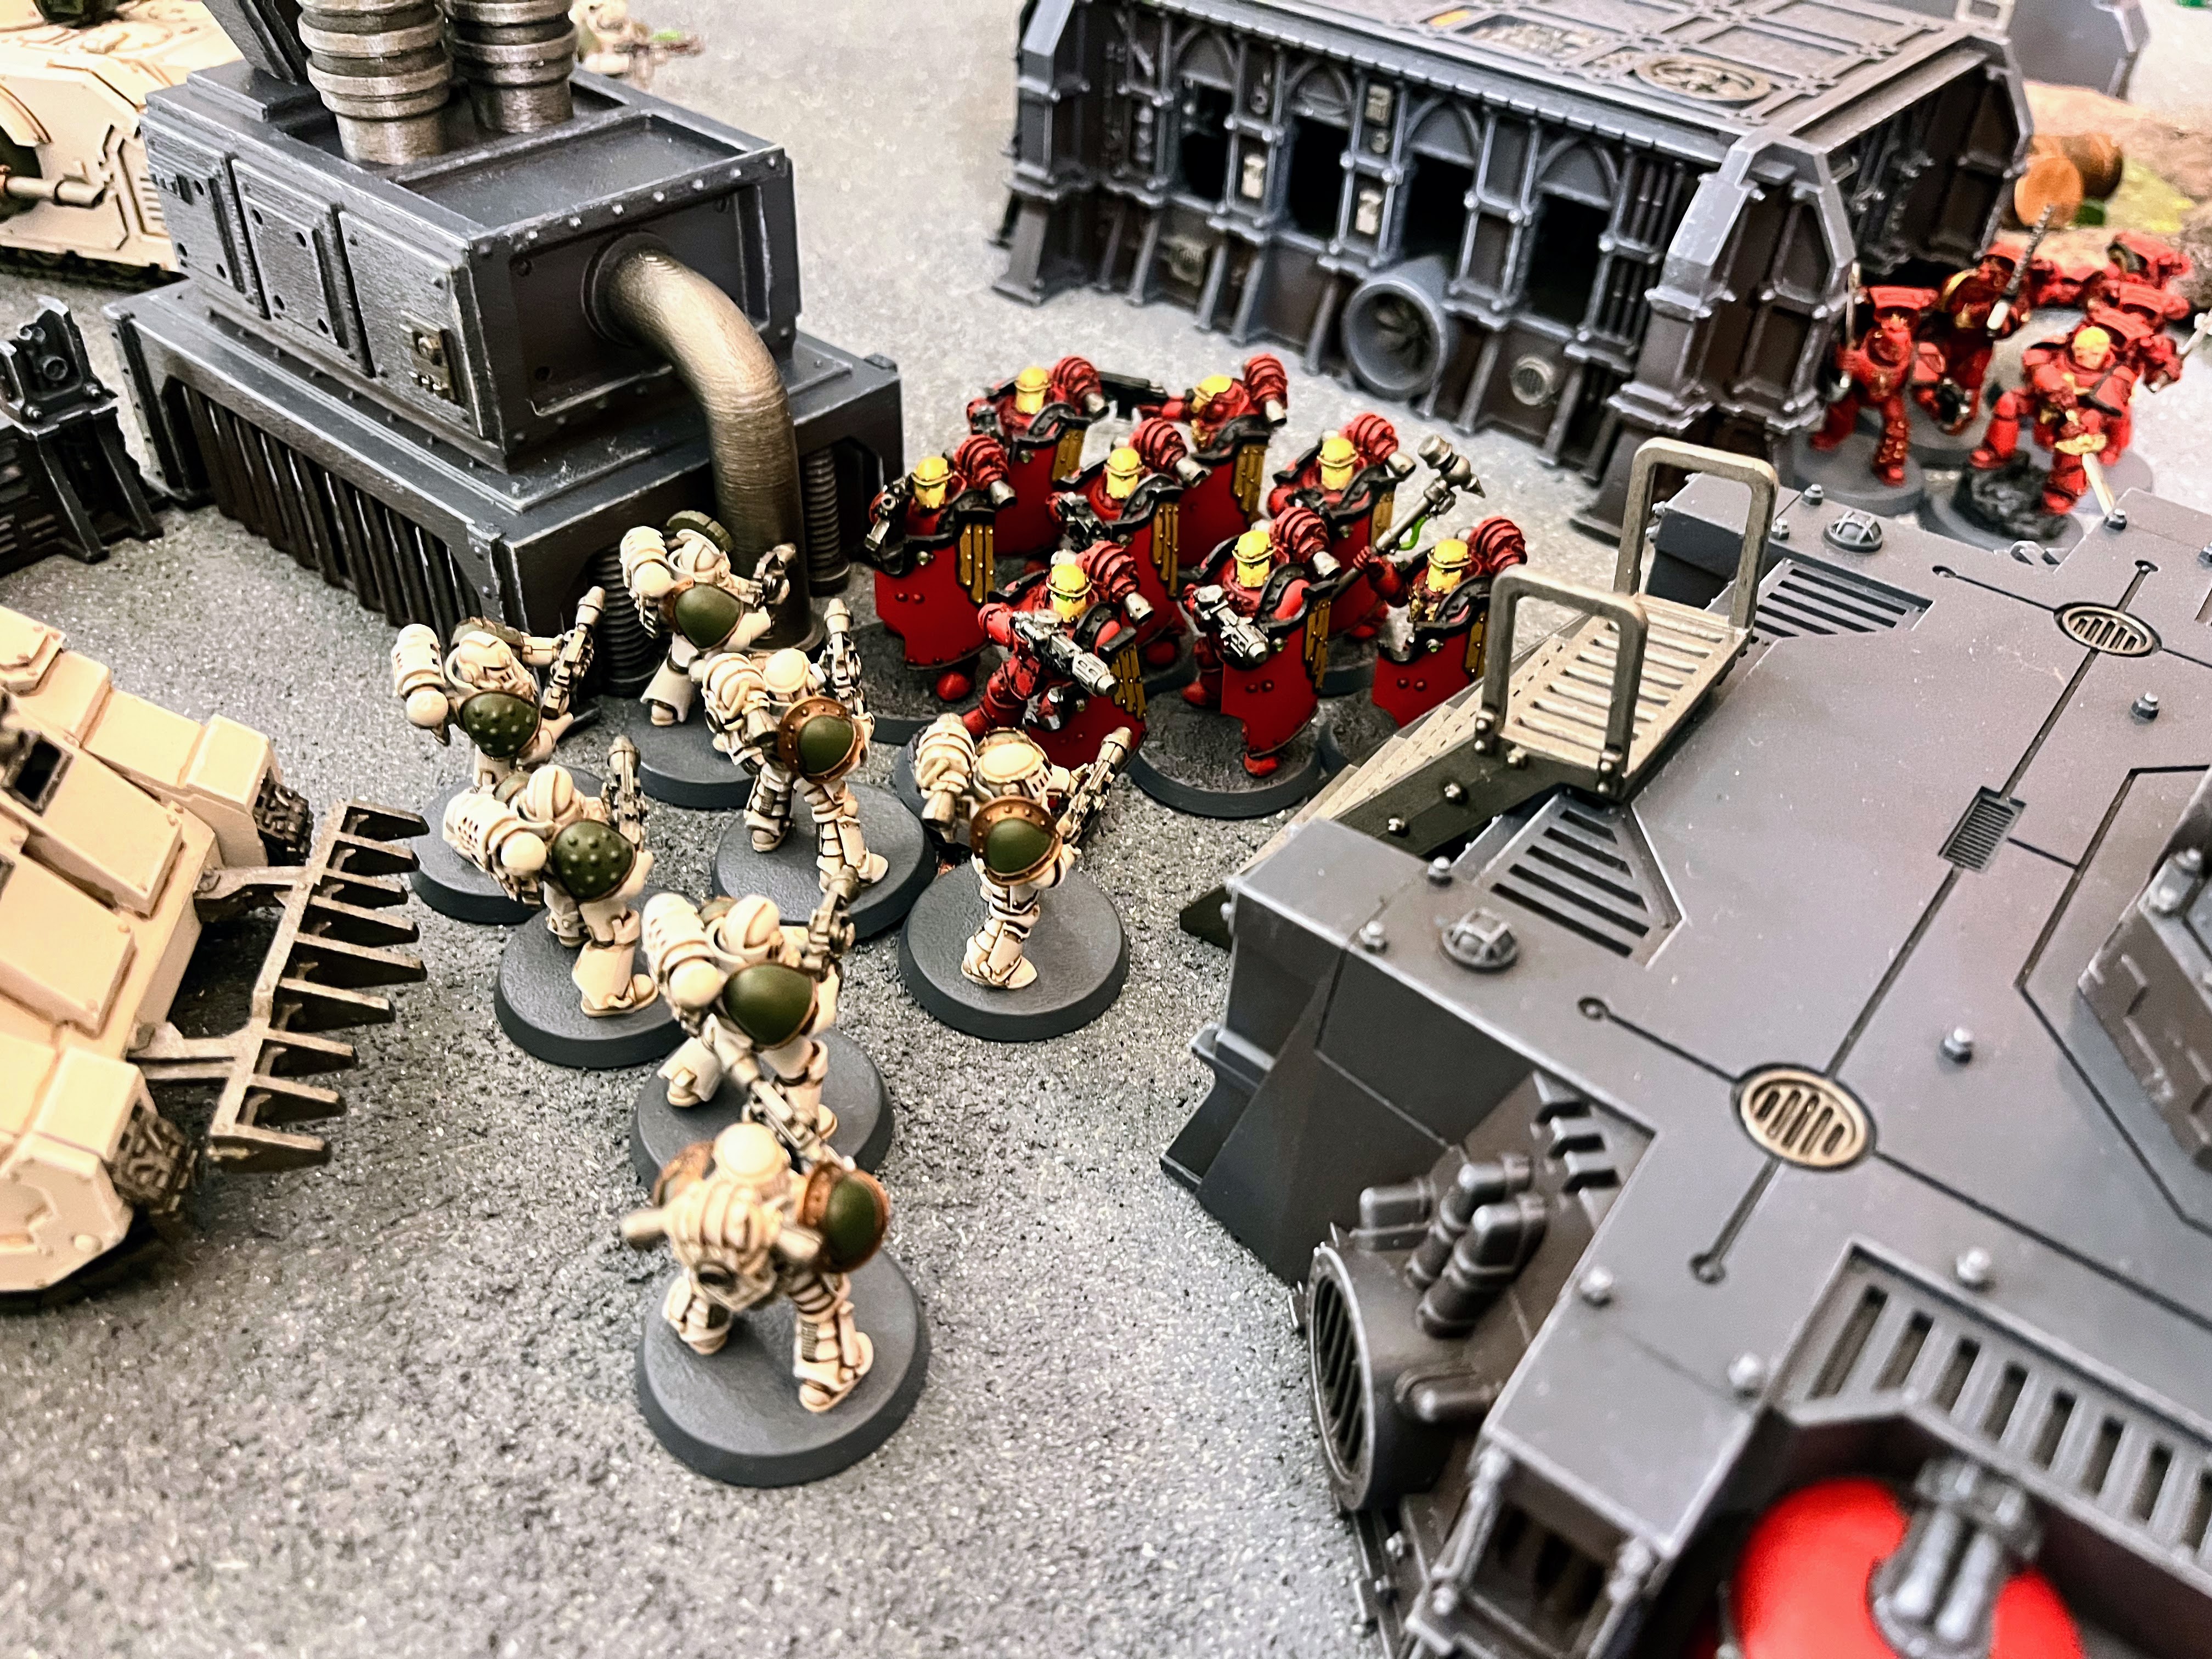
| Wolfgang and his Deathshroud anchor the center of the Traitor line, supported by heavy weapons |
Pete: Well this would be a fun challenge – facing off against the intractable Death Guard in an Onslaught Mission 6 turns long. Could I get to my objective in the DG deployment zone and clear away all Phil’s tough shooting units on my way in? Plus, I needed to accomplish something the Blood Angels weren’t known for – defending an objective in my own deployment zone. With an army like this, I’d prefer to mass my forces and strike in unison and power on turn 2, maybe turn 3, to crush the weakest part of the opposing army and be too fast with too many units to have shooting reactions nullify the charge. Instead, in this game I would need to divide my forces and fight almost two separate battles.
I decided to have the mighty Spartan with my large tactical squad be a tough and nasty barrier to the DG advance, supported by the deadly lascannon heavy support squad and the Contemptor Dreadnought for scrapping with elite units like the Deathshroud or Phil’s opposing Dread. To my left, to go for my objective, that gave me the Blood Angel Praetor with his fierce Assault squad retinue, the brand-new Kratos heavy tank, and the tough-as-nails Breacher squad. Both the Assault squad and Breachers are scoring units, which would be key to gaining the 5 VPs for securing the objective on turn 6. Thankfully there was a lot of terrain to block line of sight on my path to the objective so I should have a bulk of my units alive when I charge in late in the game to secure win.
Time to get rolling. Death to the traitors. Glory for the one true Emperor!
 |
| The Heavy Support Squad takes up position at a supply dump. |
 |
| The Tactical Squad, The Triarii Guard, are mounted in a Spartan |
 |
| The mighty Contemptor holds the center of the Loyalist line |
 |
| Garo Arteo leads the Sanguine Berzerkers. |
 |
| A massive Kratos anchors the Loyalist left flank. |
 |
| On the far left, the Golden Shields of Baal prepare to advance on the Blood Angels' objective. |
 |
| Final Deployment |
Battle:
Death Guard Turn 1:
 |
| Heavy Support Squad Fueur Sturm march forward while firing deadly krak missiles into the Blood Angels Heavy Support Squad. |
 |
| Tactical Support Squad Blitzschock moves through the ruins, firing relentlessly into the Blood Angels Assault Squad across the ruined courtyard |
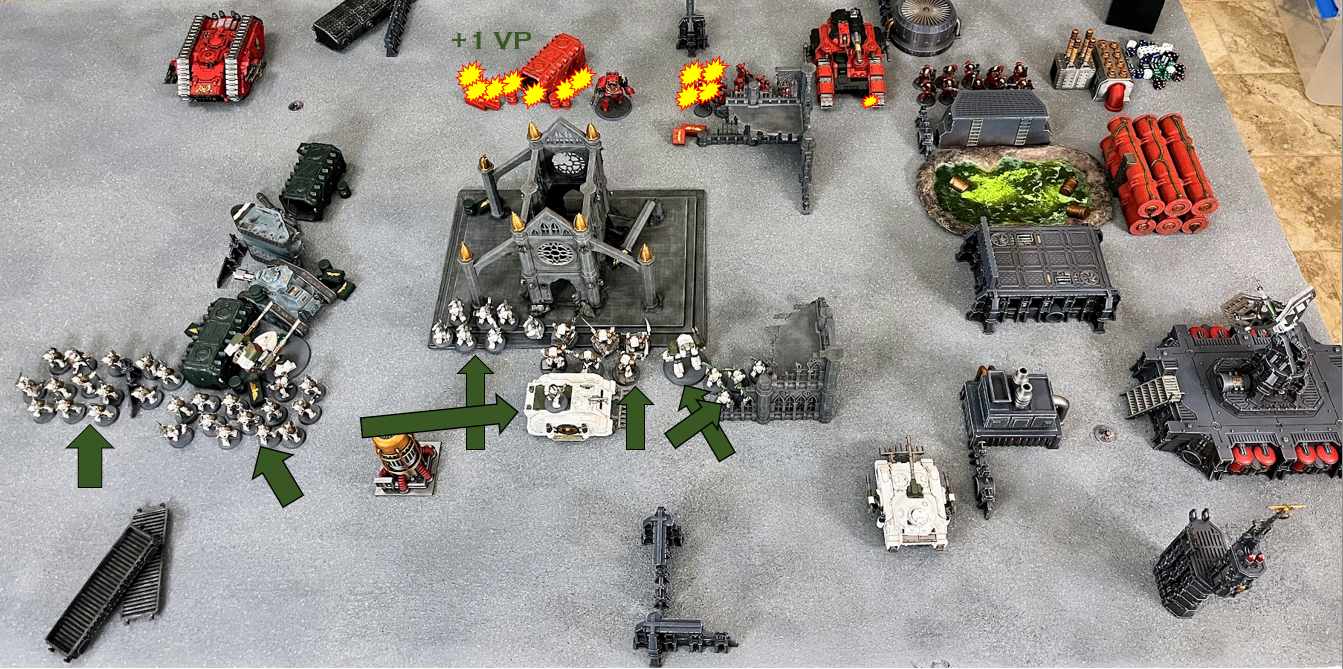 |
| Death Guard Turn 1: Left flank and center surge forward. Heavy weapons pound Blood Angels infantry. Rhino begins redeployment to right flank. |
The Death Guard land a solid blow with the destruction of the Blood Angels lascannon squad, denying their opponent their deadly firepower and earning a Victory Point.
Blood Angels Turn 1:
 |
| The Blood Angels Contemptor steps forward to challenge the Death Guard Deredeo and causes one wound. |
 |
| The Kratos rumbles forward and wounds the traitor Contemptor. |
 |
| The Spartan swings wide to the Blood Angels' right and inflicts another wound on the Deredeo. |
 |
| Blood Angels Turn 1: Line infantry move quickly east to gain cover for their approach to the objective. Blood Angels firepower concentrates on the two dreadnoughts but only inflict a total of three wounds. |
The Kratos only manages to cause one wound to the Contemptor (although to be fair, Pete forgot about the melta rule allowing to re-roll failed wounds vs dreadnoughts). The Spartan and Contemptor combine for two wounds on the Deredeo. The scoring units swing to the Blood Angels' far left to advance through the thick cover of the industrial sector and better avoid the Death Guard guns.
Blood Angels: 0 VP
Death Guard: 1 VP (Onslaught Attack)
Death Guard: 1 VP (Onslaught Attack)
Death Guard Turn 2:
 |
| The Death Guard infantry advance, while the Deredeo blasts the Spartan, stunning the crew. |
 |
| Death Guard Turn 2: The volkite squad again inflicts heavy losses on the Blood Angels assault squad. The center splits up toward the flanks to contest the two objectives. |
The heavy support squad desperately tried to slow down the Contemptor with krak missiles, but did no damage and lost two of their own from the return fire. The Deredeo had better success against the Spartan, while the volkite squad continued to pound the Blood Angels assault squad. The Predator once again gets lucky and glances the Krato for a second time. The tactical squads continue their advance toward the objective on the left flank.
Blood Angels Turn 2:
 |
| The Deathshroud react to the Contemptor by advancing closer to the major threat. |
 |
| The Blood Angels infantry maneuver through terrain to stay out of the line of sight of the Traitor guns. |
 |
| The Spartan advances and the Triarii Guard disembark. |
 |
| The Death Guard fire overwatch as the Blood Angels charge. |
 |
| The two sides clash. The Blood Angels are victorious and the defeated Death Guard fall back. |
 |
| Blood Angels Turn 2: The Spartan and Deredeo destroy each other. The Blood Angels tactical squad defeats their Death Guard counterparts and forces them to fall back. The Line units continue their flanking maneuver. |
Despite being stunned, the Blood Angels Spartan finished off the Deredeo with its heavy bolter! Unfortunately, the Deredeo used return fire to destroy the Spartan in return! Both models exploded, killing one Death Guard heavy support squad member. In the melee, the Blood Angels tactical squad won combat by 5 and forced the Death Guard to fall back, but they failed to destroy them in a sweeping advance, which would have left only a single scoring unit for the Traitors.
Blood Angels: 0 VP
Death Guard: 1 VP (Onslaught Attack)
Death Guard: 1 VP (Onslaught Attack)
Death Guard Turn 3:
 |
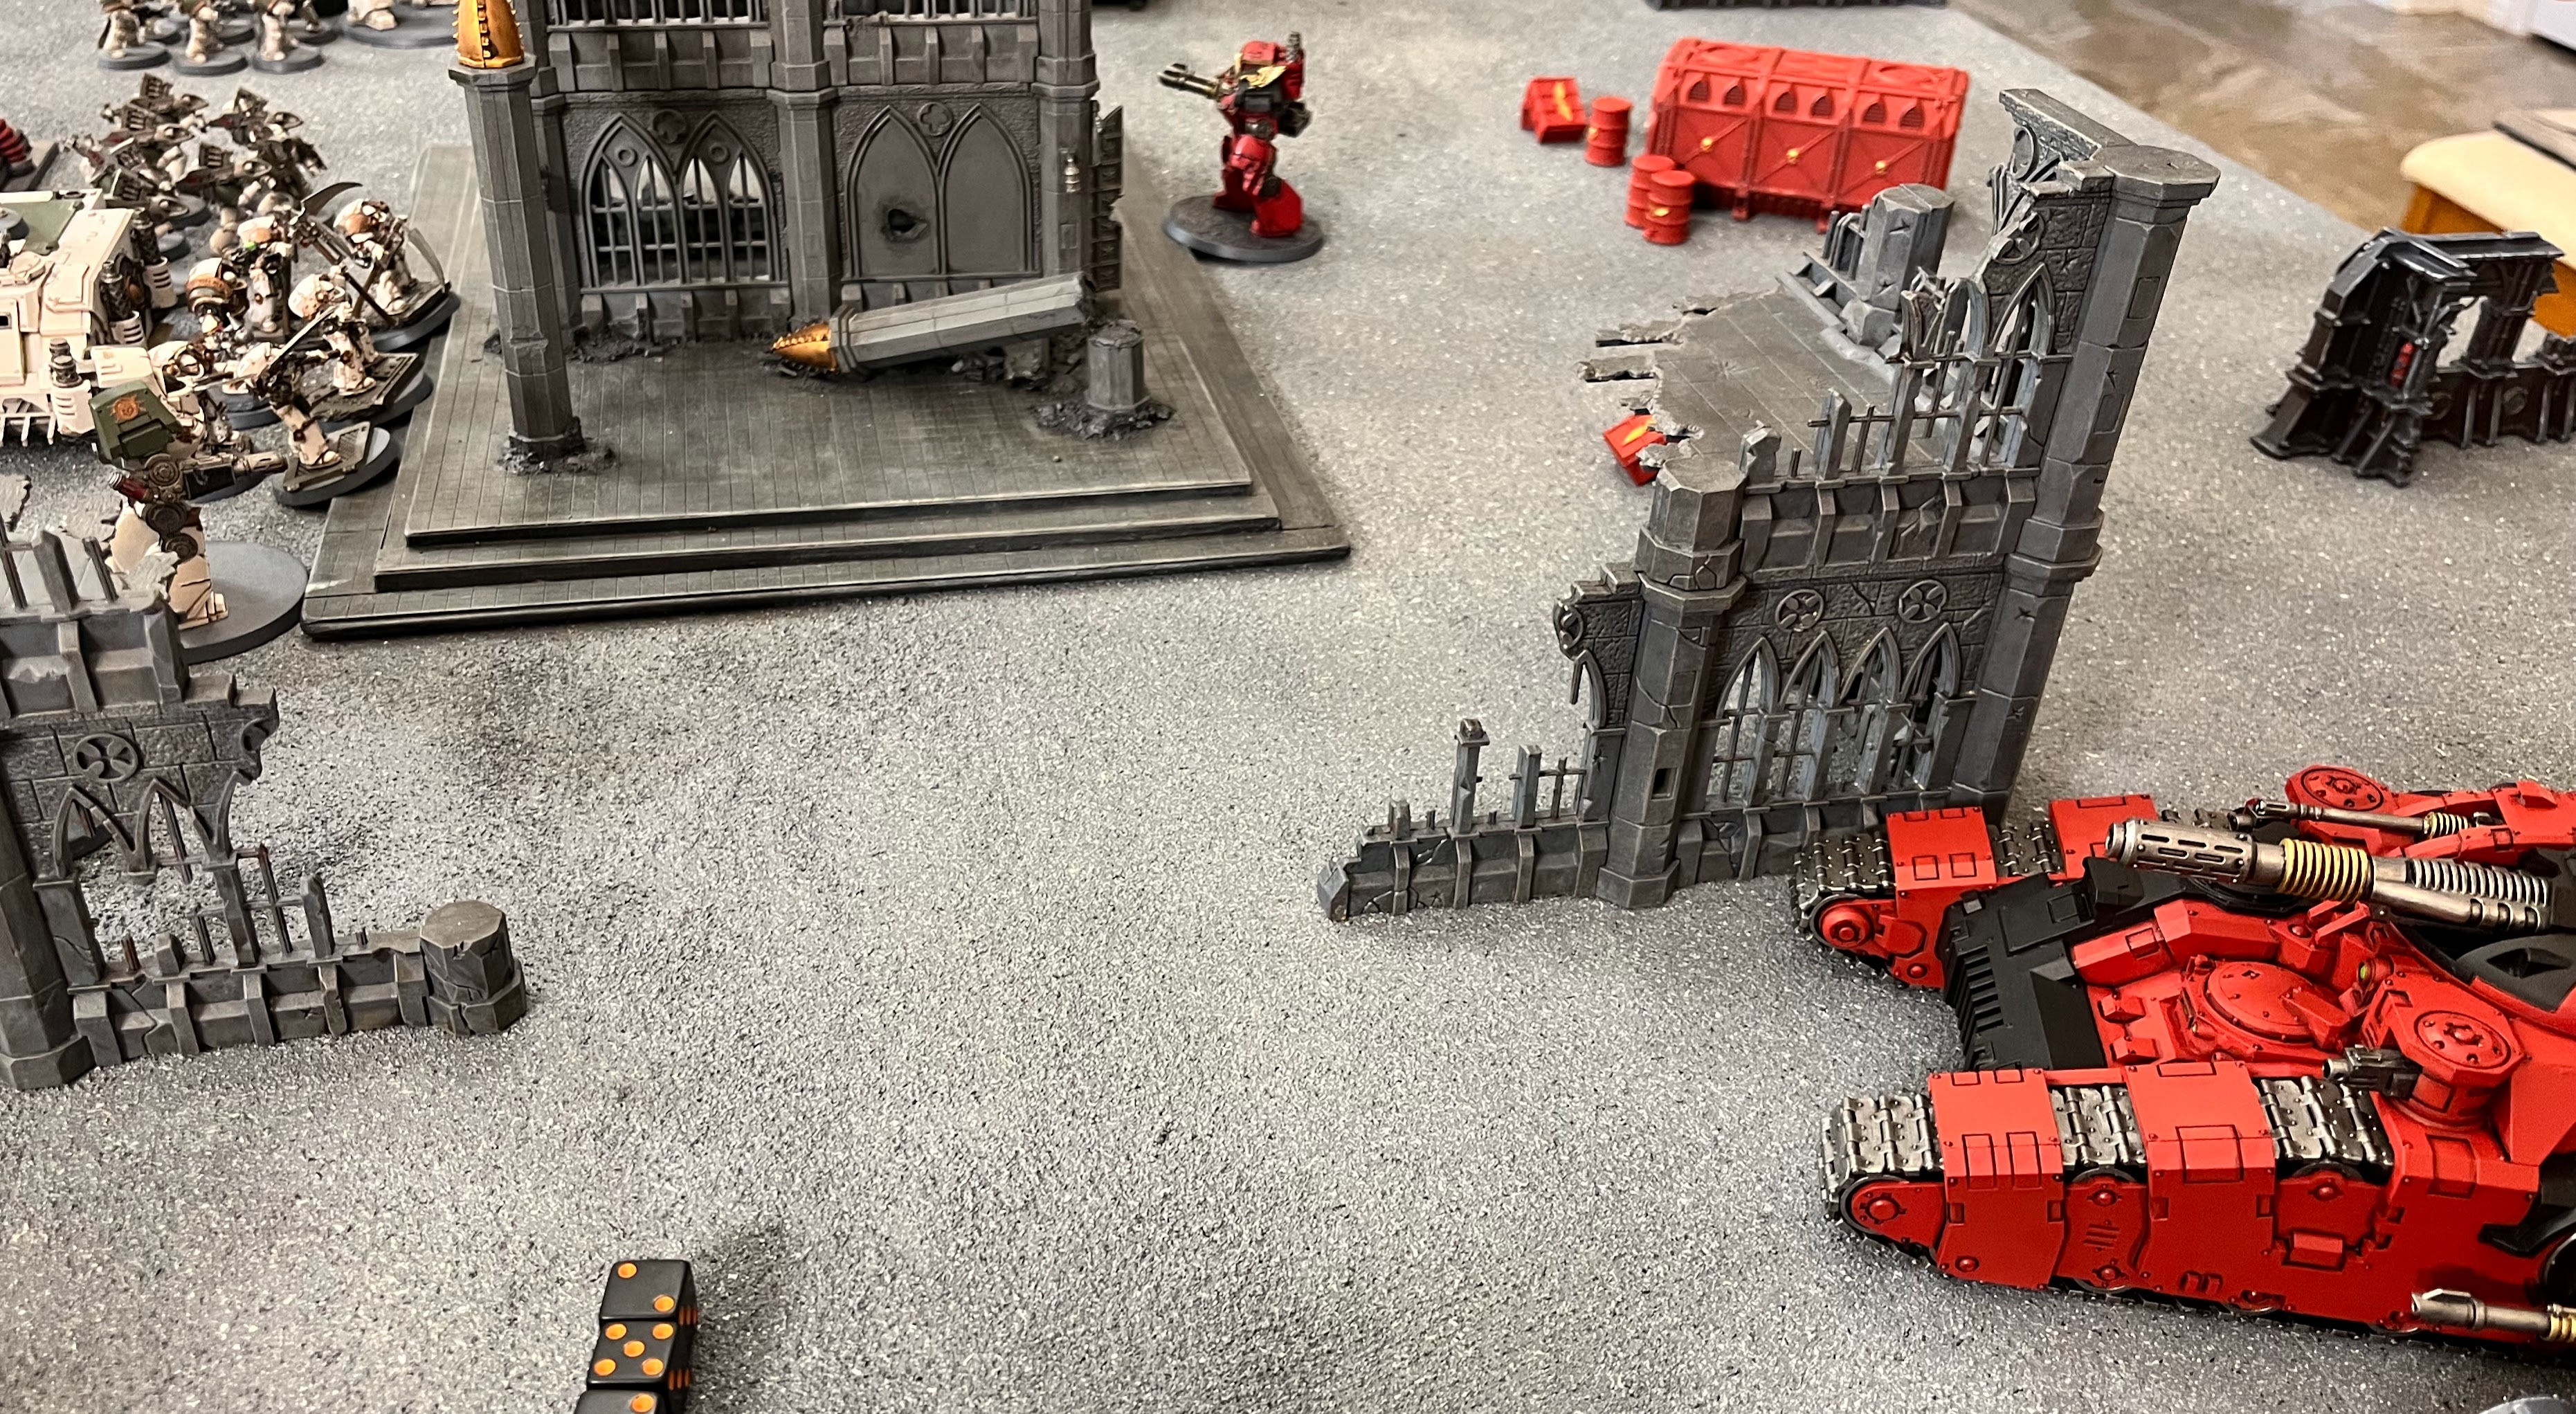
| The tactical support squad in their Rhino continue their eastward sweep to reach the Loyalist objective. |
 |
| Contemptor Jürgen approaches the Kratos, only for it to fall back. Fire from the dreadnought and Predator causes the loss of two more hull points from the battle tank. |
 |
| With the extra distance, the Contemptor fails the charge. |
 |
| The remains of the broken tactical squad rally, while their brother tactical squad prepares to charge the Blood Angels. |
 |
| The melee is bloody. When it ends, the Death Guard have the upper hand. |
 |
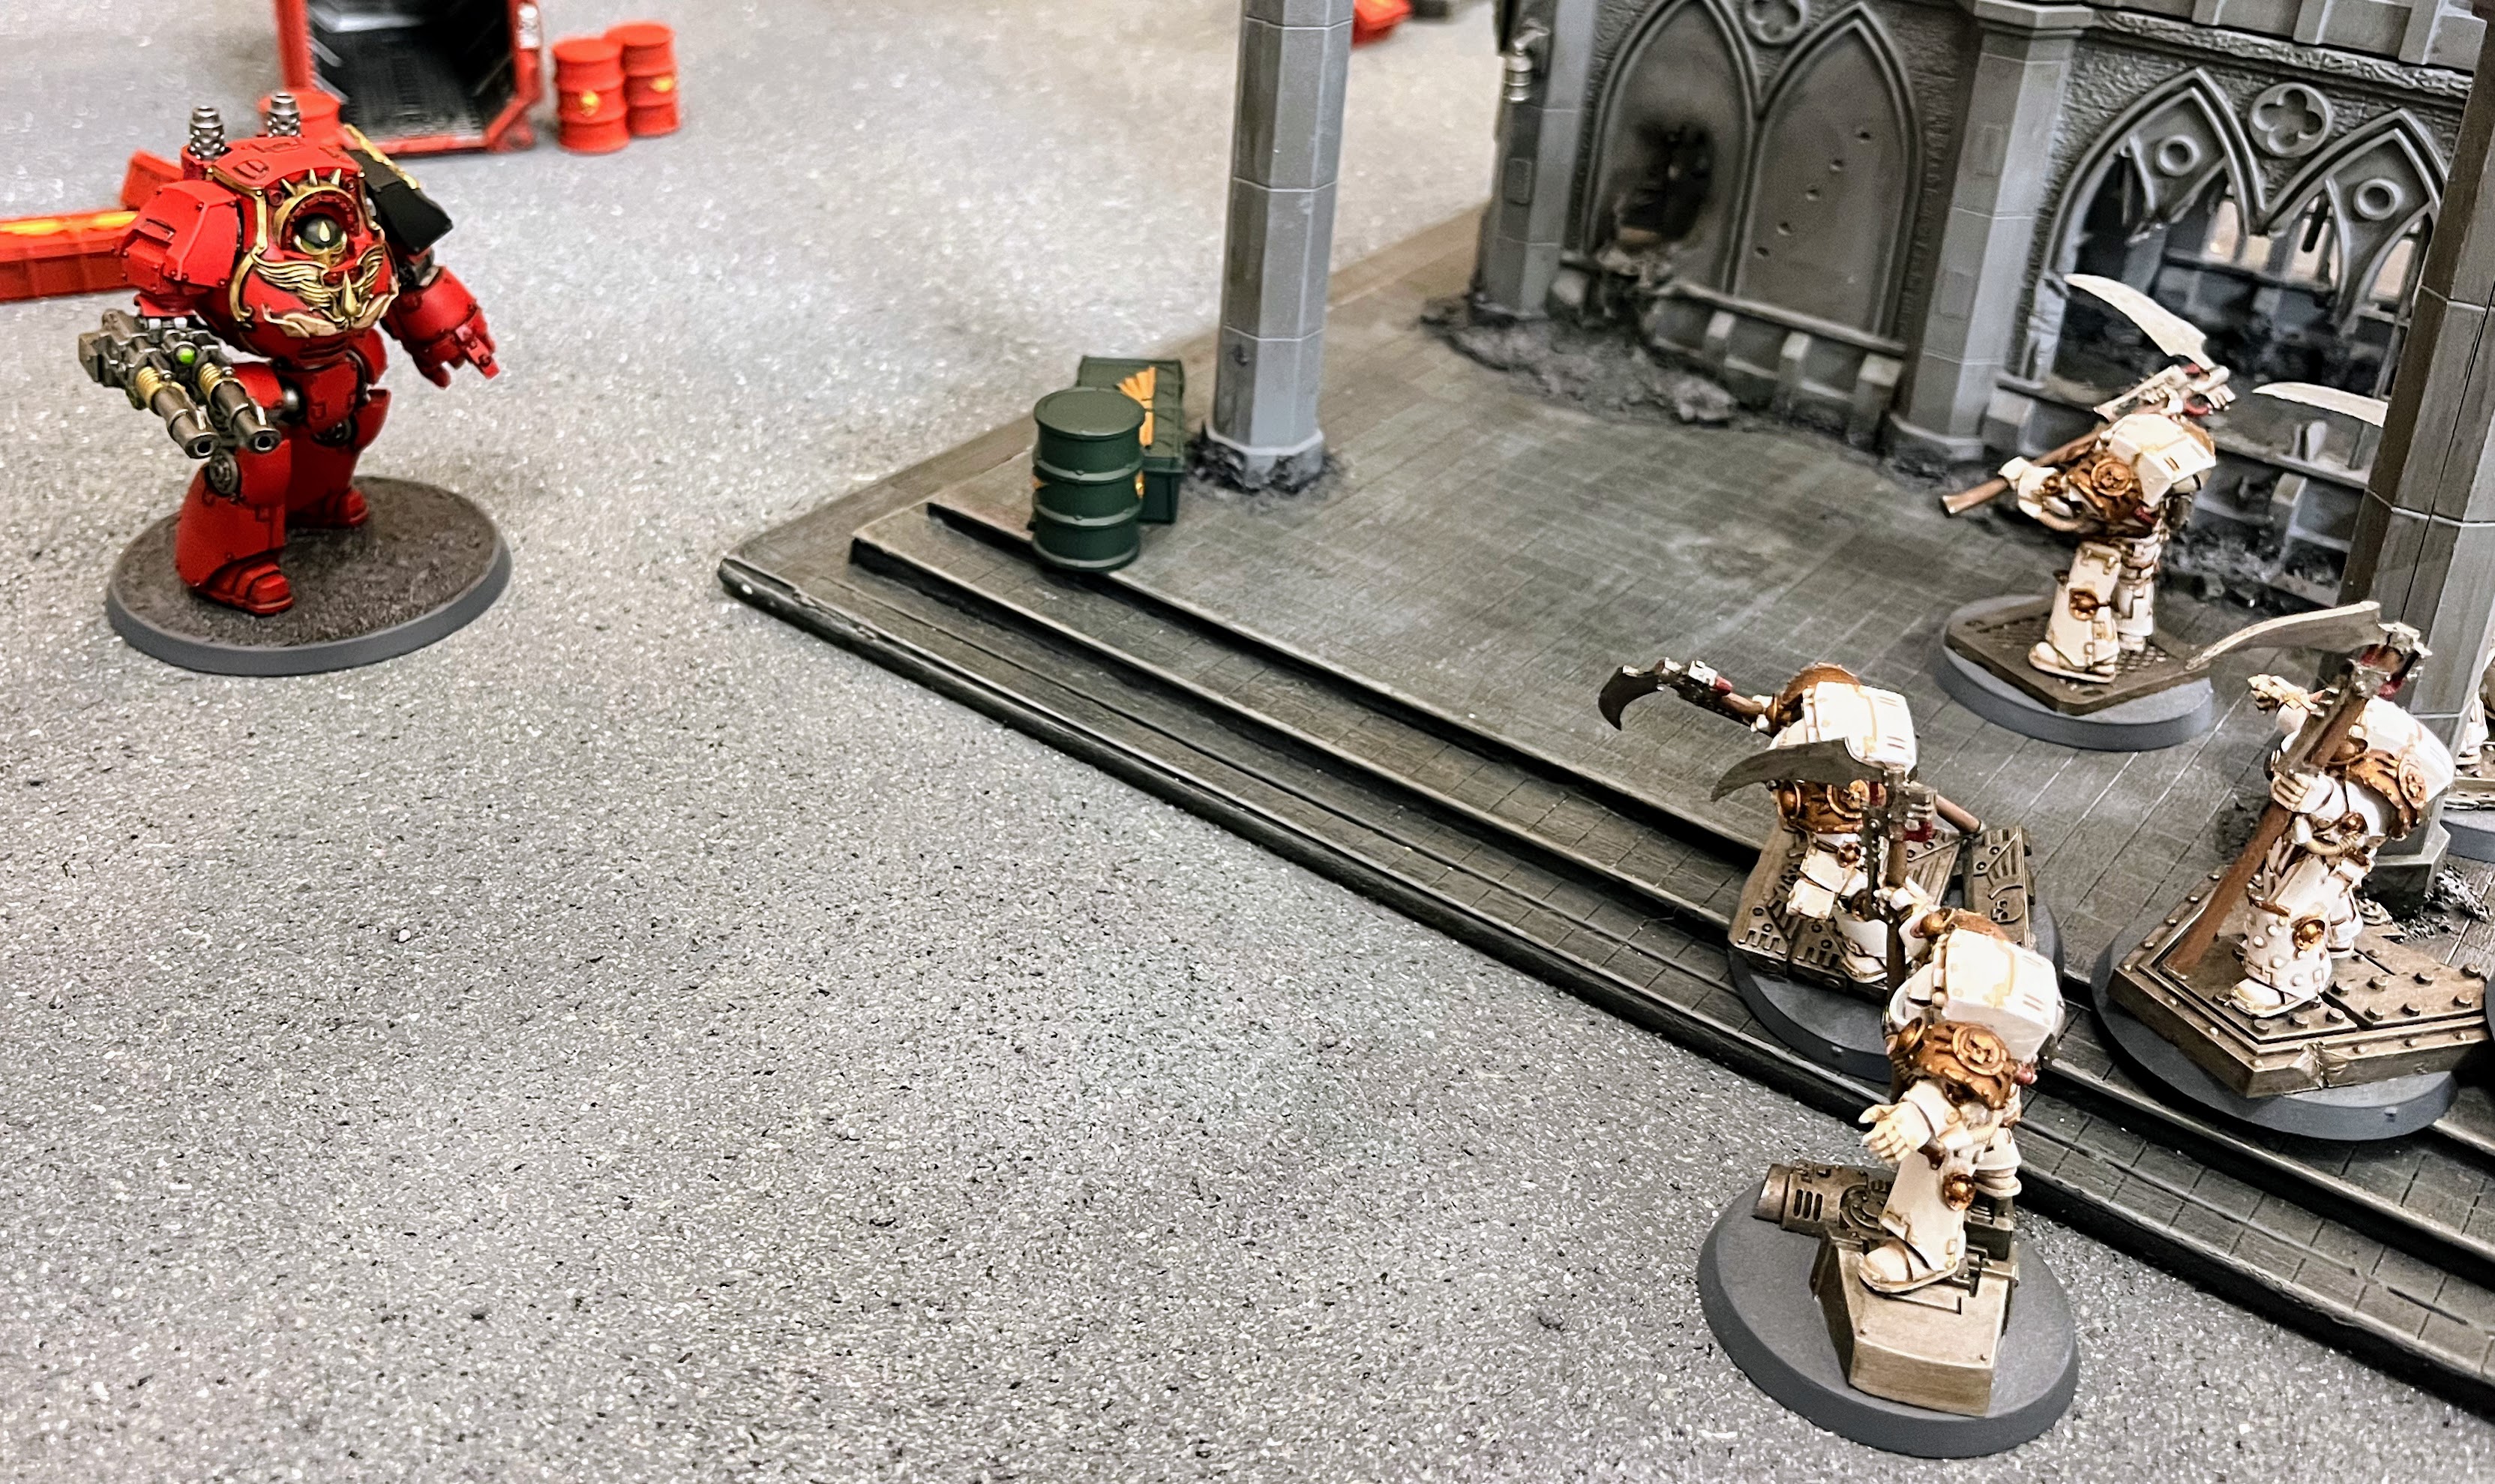
| Praetor Wolfgang and his Deathshroud charge the Contemptor. Wolfgang inflicts heavy damage with his thunder hammer. |
 |
| Death Guard Turn 3: The Traitors press the attack in all directions, winning the large melee between the tactical squads on their left flank. |
Blood Angels Turn 3:
 |
| The Breachers finally get into the action and inflict three casualties on the Death Guard tactical support squad with the volkite calivers. |
 |
| The tactical squad melee continues to rage on the western side of the battlefield, with both squads taking heavy losses |
 |
| Praetor Wolfgang makes good use of his new thunder hammer to smash the Blood Angels dreadnought after it kills two more Deathshroud terminators. |
 |
| Blood Angels Turn 3: The Kratos and Death Guard Contemptor destroy each other. The Death Guard Praetor destroys the Blood Angels Contemptor. |
The Kratos fired at the Death Guard Contemptor, which used the Return Fire reaction, resulting in the two mighty war machines destroying each other. The Blood Angles Contemptor killed two Death Guard in close combat before the Praetor struck back and knocked the dreadnought out of the fight. The two tactical squads continued their brutal melee. The Blood Angels performed well and killed three Death Guard while only losing one of their own, but the Traitors held their ground and the two sides remained locked in combat.
Blood Angels: 0 VP
Death Guard: 1 VP (Onslaught Attack)
Death Guard: 1 VP (Onslaught Attack)
Death Guard Turn 4:
 |
| Tactical Support Squad Folterer disembark on the Loyalist objective and use their chem munitions on the Breachers, but their shields protect them and not a single Blood Angel dies! |
 |
| The enraged Blood Angels use their advanced reaction to charge the Death Guard. One traitor dies and the rest stand firm. |
 |
| On the other flank, the last two Blood Angels strike down another Traitor and break the morale of the survivors, who flee. However, the Loyalists now find themselves surrounded by a sea of white armor. |
 |
| Death Guard Turn 4: The Predator inflicts a few kills on the Breachers, who use their reaction to charge the support squad with flamers. The Blood Angels tactical squad defeats a second Death Guard tactical squad but fails to destroy them in a sweeping advance. |
Blood Angels Turn 4:
 |
| The surviving Blood Angel sergeant decides to die with honor by charging the Death Guard tactical squad, where he is cut down. |
 |
| Praetor Garo Arteo loses his squad to Overwatch but charges in alone. He slays one Traitor and the rest wisely flee from his wrath. |
 |
| The Breachers and Tactical Support squads remain in a stalemate over the objective. |
 |
| Blood Angels Turn 4: The Breachers fail to clear their objective. The Praetor defeats the volkite squad and forces them to fall back. The remnants of the tactical squad make a last ditch effort to stop the Traitors from claiming their objective by charging, but they are cut down. |
We decided to call the game here as it was getting late and outcome was assured at this point. The Death Guard would control their objective. They also achieved Attrition for destroying more units than the Blood Angels and had the VP from the Onslaught Attack (destroying a unit in the first turn). At the start of Turn 5, the Death Guard Predator killed the Blood Angles Praetor for Slay the Warlord. Even if the Blood Angels Breachers eventually beat the Death Guard tactical support squad (which was statistically more likely due to the sergeant with thunder hammer), the Blood Angels would only have achieved the five victory points for holding their objective.
Blood Angels: 5 VP (Control Objective)
Death Guard: 8 VP (Control Objective; Slay the Warlord; Onslaught Attack; Attrition)
DEATH GUARD VICTORY!
Post-Game:
Pete: Great game! A devastating loss for the Blood Angels, but it was close and could have gone either way until my right flank collapsed. Once I couldn’t prevent the remnants of the DG tactical squads from securing Phil’s objective in my deployment zone and he had already slain the warlord and had first blood, it was all over.
I’m proud that I was able to destroy the Deredeo dreadnought – which is probably one of the strongest shooty units in all of Horus Heresy. That thing is downright vicious with its Str 10 twin-linked super lasers. I think I had a great strategy there and focused a hell of a lot of firepower at it, even the weaker weapons like heavy bolters ended up removing wounds and helping bring it down. I think it’s a strategy for others to follow - knock it off the board before it kills everything that has a chance to hurt it. Even if that means shooting it with lots of Str 4 and Str 5 weapons without AP 2. And I’m still open to suggestions about a house rule to lessen dreadnought toughness or wounds…
I wish I would have remembered that the ruins I deployed my assault squad behind were only 6+ invulnerable saves and didn’t block line of sight through them. THAT was a critical mistake that led to them being picked apart by volkite over the first two turns and being almost annihilated before they could get into the late game action. It’s amazing to see the power of the volkite weapons turned on ME for a change. Ouch. I’ll try to never make that mistake again.
I had the perfect unit ready for the DG flamer support squad in the Rhino. The Breachers have special rules allowing them to re-roll any missed saving throws against blast and template weapons. I think getting them into position to take the objective in Phil’s deployment zone and having the weakest unit on the board against them was a real positive outcome, where by the end of the action there weren’t too many successes for the Blood Angels. I think the flamer unit killed more of their own troops with “gets hot” than Breachers, actually.
All-in-all it was an amazing game, beautiful on the battlefield, and well played by the controlling generals. I’m so glad we take the time to get the models off the painting desk and out of their containers to play an actual game of HH once in a while. I think Phil had an effective strategy and took full advantage of the strengths of the Death Guard. Even their one key close combat unit, the Deathshroud, he was able to get into CC with my Contemptor and smash it to bits with his Praetor’s thunder hammer. Perfectly executed strategy and a well-earned win for Phil. If the Blood Angels were hoping to secure a foothold on Xhorik Prime, I think the Death Guard just sent ‘em packing back to space to regroup and retool their raiding party!
PHIL: Death to the slaves of the false Emperor!
A new matchup between two factions that had not yet faced off made this a fresh and interesting game. First off, kudos to Pete for writing two balanced army lists with a roughly equal amount of heavy firepower. Unlike some of our games, I think either army could have come out on top. I think the difference for the Death Guard was a few things: a) getting the first turn, b) the Death Guard ability to move and fire heavy weapons, and c) the fact that dreadnoughts are just better than tanks.
The first turn was key as I was able to wipe out his lascannons before they could do any damage. As I said in the pre-game section, this was a high priority for me and I deployed an overwhelming force across from them to give myself the best chance of killing them.
Being able to move and fire krak missiles and volkite calivers is a powerful boost, meaning your heavy squads are never caught out of position without a good target. Having been on the receiving end of those volkite calivers many times, it was a great feeling to be able to march around, laying down a withering hail of anti-infantry fire. This was crucial for neutralizing the assault squad. By the time they charged, they were too depleted to be a major threat.
Finally, as we all well know, dreadnoughts are very good in this edition. Their ability to return fire and having no Vehicle Damage Table make them superior to tanks. Although the dreadnoughts were not dominant in this game (all three were dead by the end), they are just slightly more points-efficient than tanks and gave the Death Guard an extra edge in a well-balanced firefight. I realize looking back that I destroyed both of Pete's big tanks in his turns by using the Return Fire reaction.
My other observation is that Pete is right that thunder hammers are a "must take" this edition. Having a Praetor that can go toe-to-toe with a dreadnought made all the difference in this game. Previously, when playing my White Scars, I watched as my Praetor with Paragon Blade and a supporting character flailed helplessly against the Dreadnought's high toughness and was easily killed in return. This time, the thunder hammer evened the odds and Wolfgang made short work of the Contemptor. This may be the first time in the new edition that a squad of infantry has taken down a dreadnought in melee!
Pete played a good game, but he was a bit outgunned after losing his lascannons early. The Death Guard just have a lot of anti-infantry firepower which really kept his infantry on the run with their heads down and unable to be very effective. Despite all that, the game was closer than the final score showed. A few different dice roles could have resulted in the Death Guard losing both of their scoring units before reaching the Traitor objective, or the Blood Angels destroying the tactical support squad defending the Loyalist objective.
All in all, a very satisfying game. Despite their Rite of War being underwhelming, the Death Guard are fun and effective with their use of mobile heavy weapon infantry. Their ability to always be moving and firing makes them actually play a lot like the way I envision my White Scars playing but just much more effectively!
A fine victory for Phil! Too bad he had to use Pete's army to get it. I can see why the DG were the more appealing choice since the Angels had a smaller army that specialized in tank hunting with their vast amount of lascannons but few heavy bolters or flamers, vs the DG, who had tons of foot troops and little armor. The mission of simultaneously defending and attacking was favorable to a larger, infantry-focused force. Being able to move and still fire heavy guns was the nail in the coffin.
ReplyDeleteAdditionally, Phil just did everything right. I like his comment on how the DG did what always he wanted his White Scars to do! Rapid redeployment to counter a flank attack? Check. Never sitting stationary but instead moving heavy guns each turn to wherever they're the most effective? Double check. Having a glorious melee charge that kills the enemy's best units? Triple check. Being able to grind down ultra tough units to eventually finish them off through attrition? Quadruple check. It's the white scars strategy used through a death guard army
ReplyDeleteFinally, I really, really like the addition of Reactions. It's such a good idea that keeps the strategy fresh in a game we've been playing for 30 years. Far too often, a shooting attack ends up harming the shooter more than the target! I still remember wiping out the leaf blower boys with a reaction from the Deredeo last year. The old strategy of killing shooty units with other shooty units before they "get their turn" doesn't work anymore!
ReplyDeleteReactions change the calculus of the game so much. It requires different tactics and more forethought before taking any action that would have been a simple no-brainer in old editions. They can be a bit unbalancing at times (Return Fire, for example), especially in smaller games.
Delete