Remember, you can click the pictures for bigger images.
ARMY SELECTION: 1050 Points
Da' Blitzdreg Boyz: Battle Forged Combined Arms Detachment
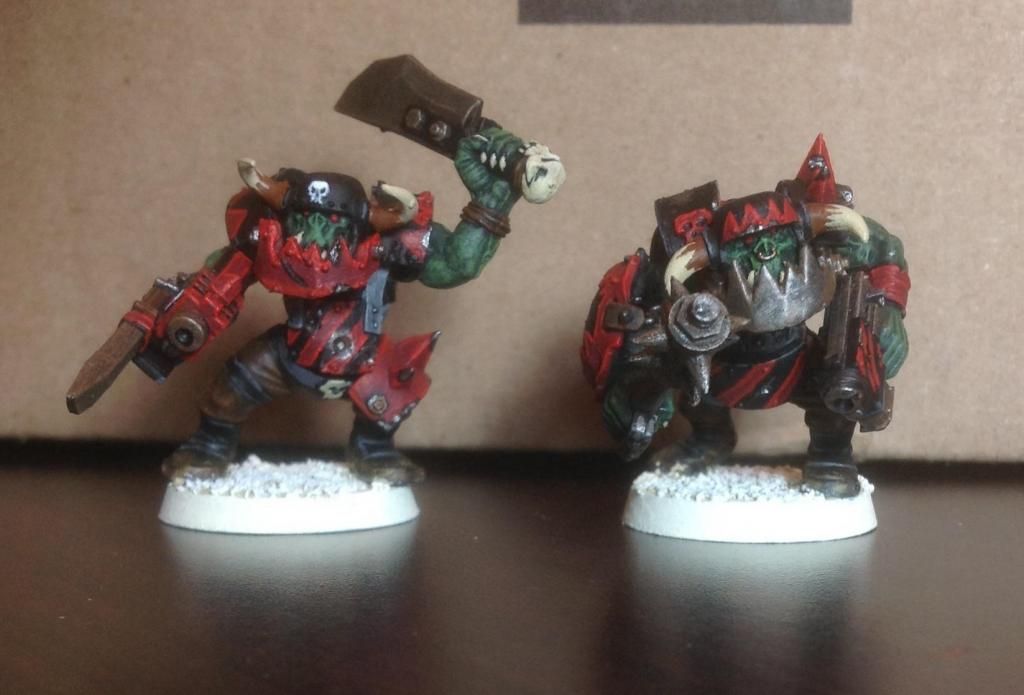
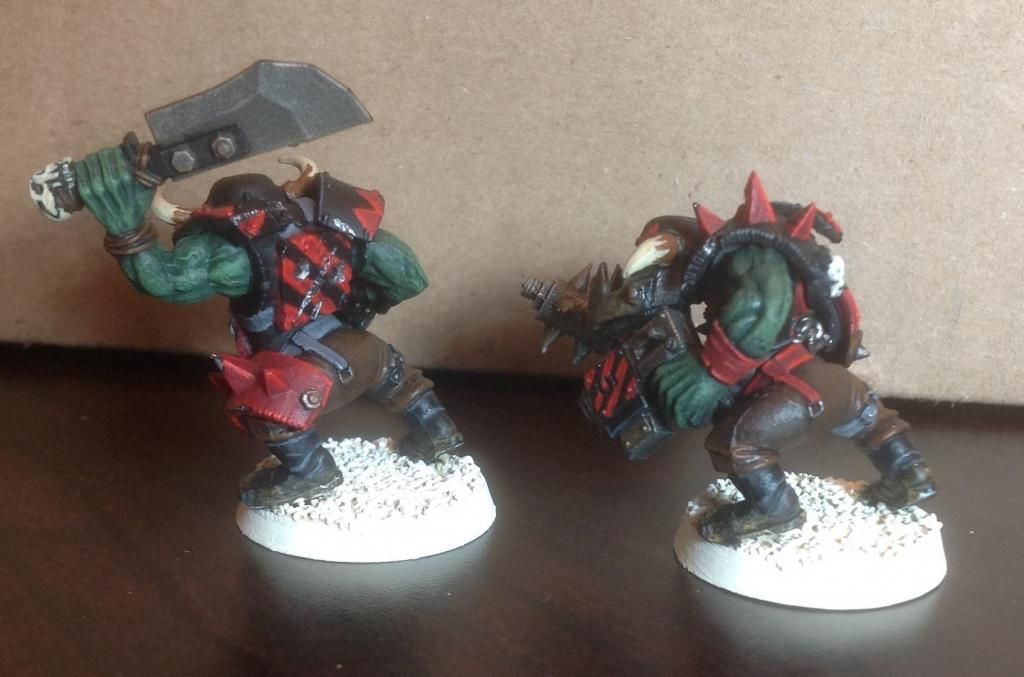
- Warboss Filgakk Skullsplitta: 'Eavy armor, shoota, power klaw, boss pole, Da' Lucky Stikk (+1WS to unit, boss gets to re-roll failed rolls to hit, wound and save, with a chance to kill him)
- Painboy (unit gets Feel No Pain 5+)
- Mek: Kustom mega blasta (attached to shoota boyz)
- Mek: Kustom mega blasta (attached to shoota boyz)
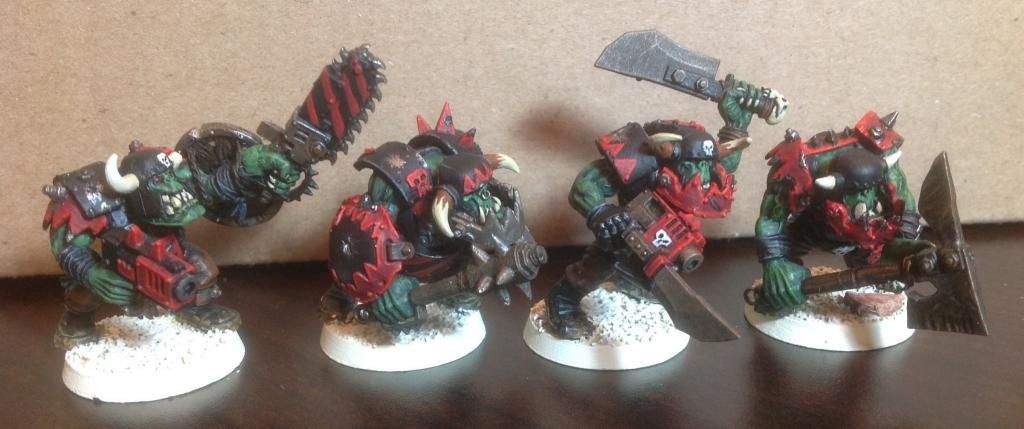
- 'Ard Boyz: 11 boyz with 'eavy armor. Nob with boss pole and power klaw.
- Slugga Boyz: 18 boyz. Nob with boss pole and power klaw.
- Shoota Boyz: 15 boyz. 1 with rokkit. Nob with boss pole and power klaw.
- Grotz: 17 gretchin. Runtherd with squighound.
- Kommandos: 10 boyz. 1 with burna. Nob with boss pole and power klaw.
- Bikes x 4
- Warbuggy with twin-linked rokkits
- Skorcha Trakk
- Killa Kan with rokkit launcha
The Red Brotherhood: Battle Forged Combined Arms Detachment
- Company Captain with 2+/3++ (invulnerable save), bolter, sword that gives +2 STR with AP3 and Rampage
- Tactical Sqaud Alpha: 10 marines. 1 with flamer. 1 with missile launcher. Sergeant with pistol and chain sword. (Split into Combat Team with flamer and Combat Team with missile launcher.)
- Tactical Squad Beta: 6 marines. 1 with plasma gun. Sergeant with plasma pistol and power sword.
- Terminator Squad: 5 terminators with power fists and storm bolters. 1 with assault cannon. Sergeant with power sword and storm bolter.
- Vanguard Veterans: 5 veterans with jump packs and lots of weapons.
- Devastator Squad: 5 marines. 2 x heavy bolters. 2 x lascannons. Sergeant with bolter.
MISSION
Maelstrom of War - Cleanse and Control. For this mission, each player has 3 random Tactical Objectives at all times. Pete and I took turns placing the six Objective Markers, not knowing what deployment method would be used. We then rolled for what type of deployment zone we would have and got long table edges. I rolled for Night Fighting and got it. We decided to play with a house rule that you could re-roll any Tactical Objective that was impossible, such as killing a psyker or a flyer in a game without any of those units. The rules say that after an Objective is accomplished, you cannot draw it again, but since we didn't have cards, we forgot about that rule and I may have rolled the same one multiple times without knowing (it is hard to say, since there are three different "cards" for holding each of the numbered Objective Markers).
Also, Secondary Objectives would be in play: Linebreaker, First Blood, Slay the Warlord for 1 VP each.

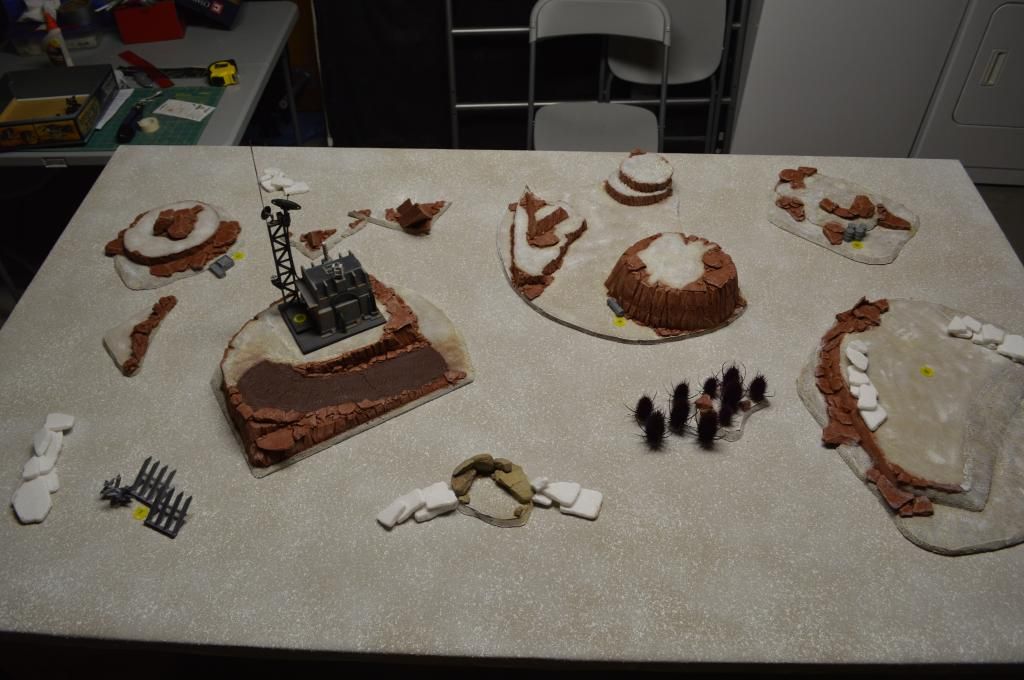
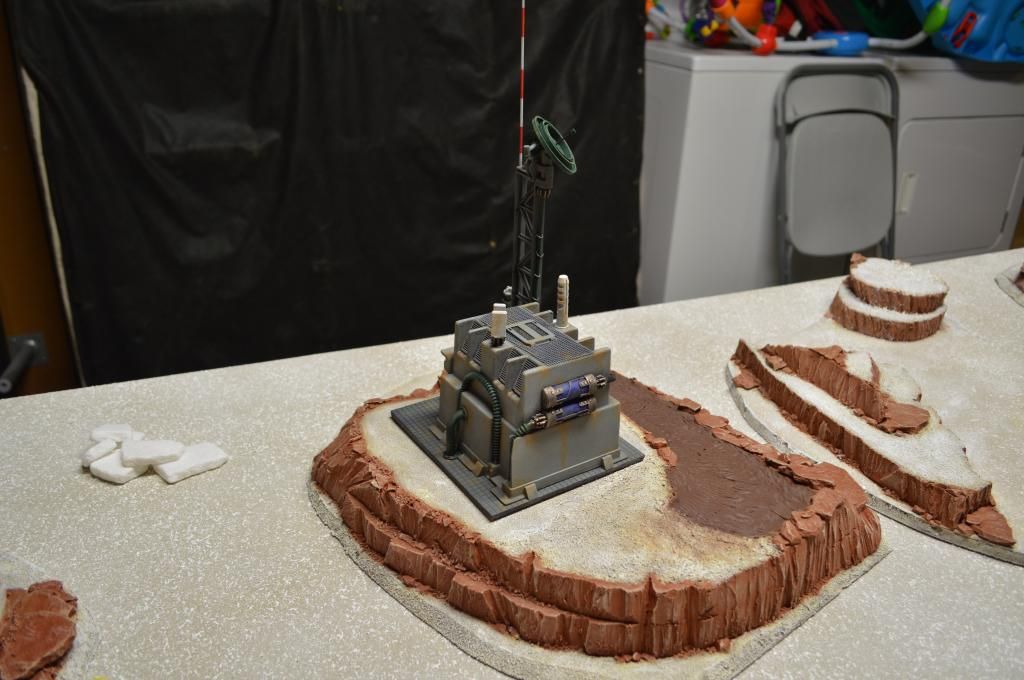
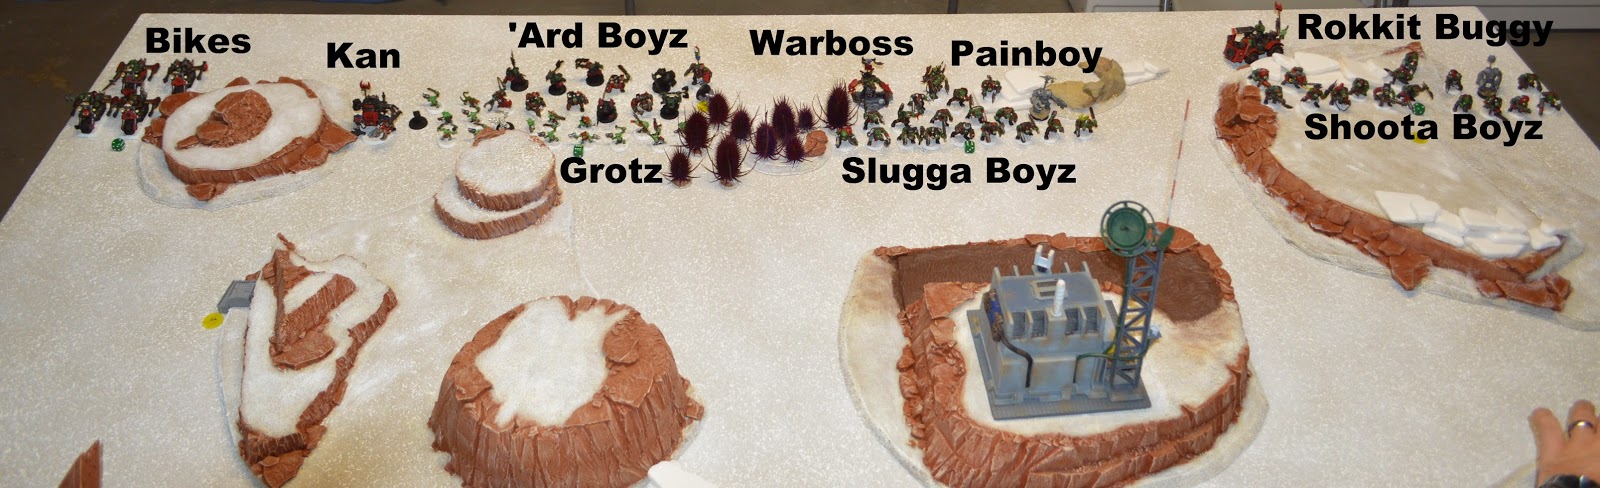
View of the battlefield from the north edge with Objective Markers labeled.
 |
| Objective 1: Ammo crates. |
 |
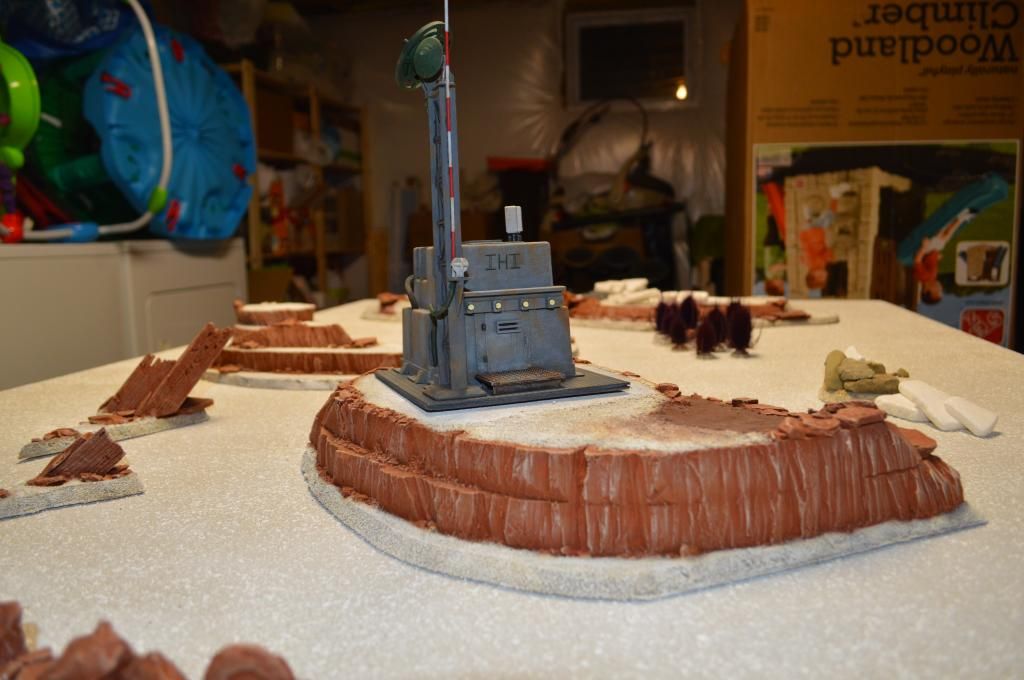
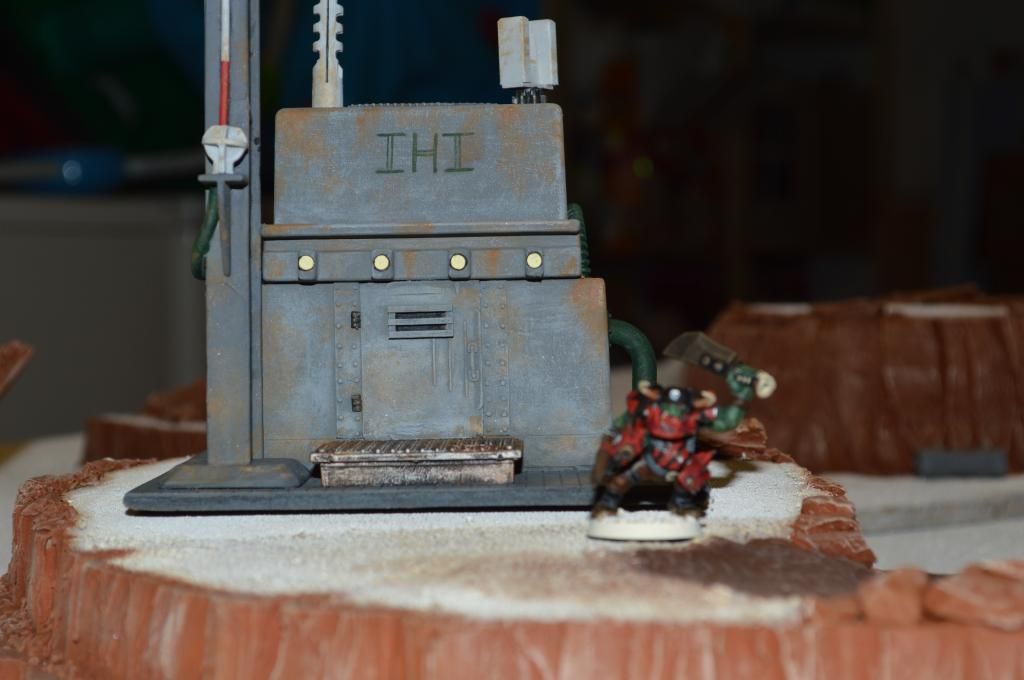
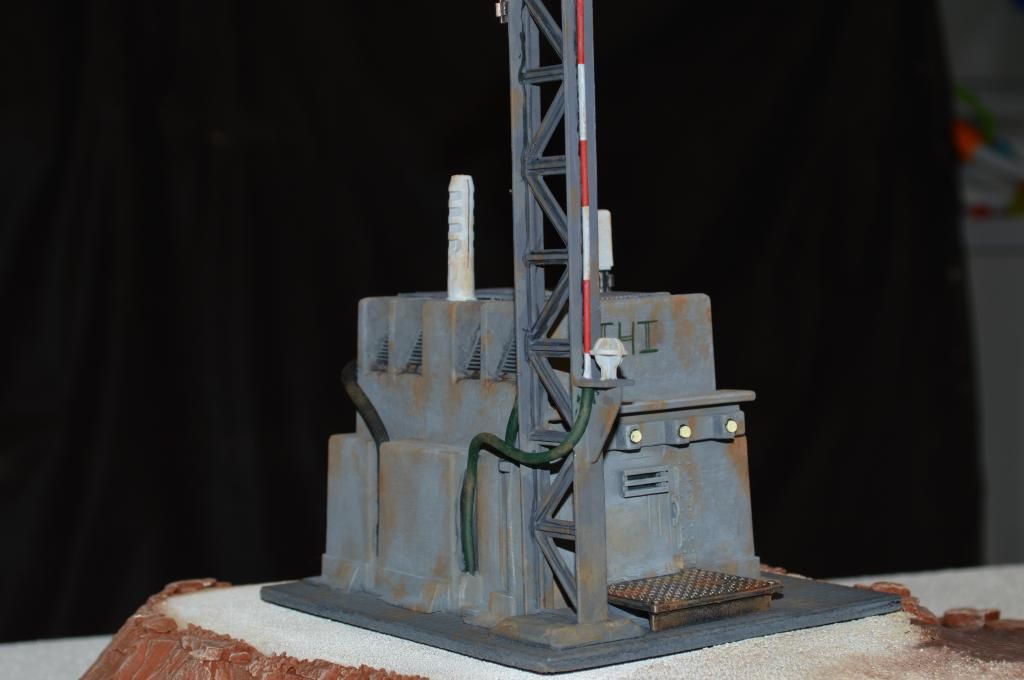
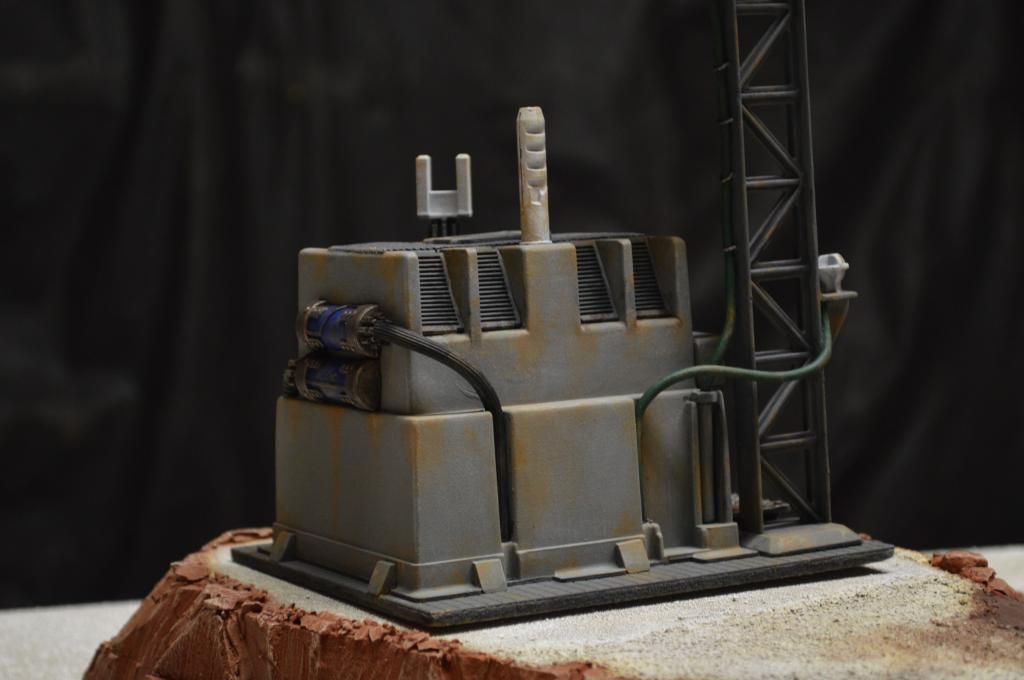
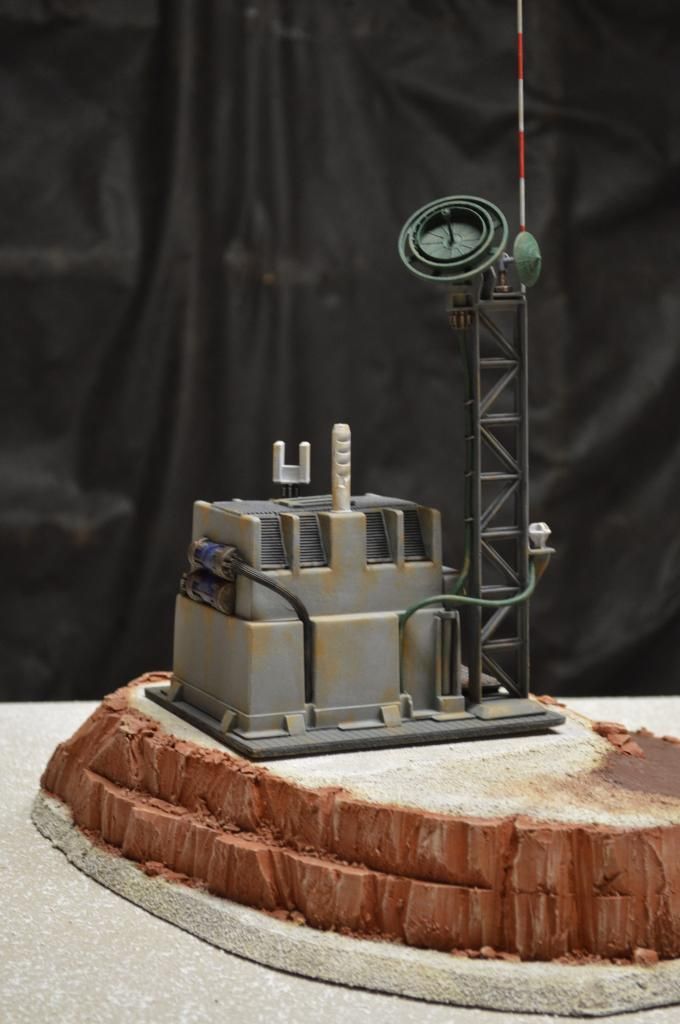
| Objective 2: Communication tower. |
 |
| Objective 3: Fuel drums. |
 |
| Objective 4: Strategic high ground. |
 |
| Objective 5: Cylinder containing mysterious relic, unearthed by IHI mining activity. |
 |
| Objective 6: Wounded marine with critical information on Ork positions. |
 |
| View from the east. |
 |
| View from the west. |
We rolled to see who would get to pick their deployment zone and I won the roll. I elected to take the south table edge with the forest and the big hill. I felt that the big hill would have been too easy for the marines to defend. And I wanted to be able to advance while using the central hills to break up the marines' lines of sight.
DEPLOYMENT
Pete won the next roll and decided that the Orks should deploy first and therefore take the first turn. This gave him the advantage of seeing my deployment and reacting to it.
Ork Deployment and Da Plan:
 |
| Ork deployment. |
I generated my Warlord Trait from the Command table and got Inspiring Presence, which let any unit within 12" of my Warboss use his Leadership. This seemed like it would be especially useful for my smallish mobs of 'Ard Boyz and grotz so I made sure to deploy the Warboss in a central position near the units with the weakest morale.
Not knowing where the space marines would deploy or what Tactical Objectives I would draw, I elected to spread my force across the entire front to give maximum flexibility. The center was anchored by the large mob of slugga boyz with the Warboss and Painboy. Their mission was simple: march straight ahead into the toughest enemy units and fight for the Comm Station objective. My left flank (the west hill) consisted of the shoota boyz (with the meks) and the rokkit buggy. Their goal was to hold the large hill and Objective Marker 4, utilizing the hard cover of the ice blocks and their elevated position to control the left flank with their firepower. To the right of the slugga boyz were the 'ard boyz. Because their mob was small, I elected to screen them with the grotz to give them a cover save against heavy bolters and assault cannons that could punch through their 'eavy armor. Besides acting as a bullet screen, the grotz would be used to hold Objective Marker 6, the wounded Marine, so that my boyz could focus on running across the marines rather than skulking around my own deployment zone. On the ork right flank, I put the Killa Kan, where he could utilize the narrow valleys and jutting rocks for cover as he advanced. And to the far east were the bikes, where they could race up the flank to capture Objective 1 or threaten the enemy early.
I elected to keep the Skorcha in reserve. With the Outflank rule, it could enter the battle from a table edge to take the enemy by surprise or to accomplish a variety of Tactical Objectives. I had planned to infiltrate the Kommandos into the Comm Station, but after the Marines deployed within 12" of the building, I was not able to. After weighing other Infiltrate options, I decided to keep them in reserve since Infiltrators also have Outflank. Keeping two units in reserve seemed like a good strategy since I didn't know how Pete would deploy or what my Tactical Objectives would be.
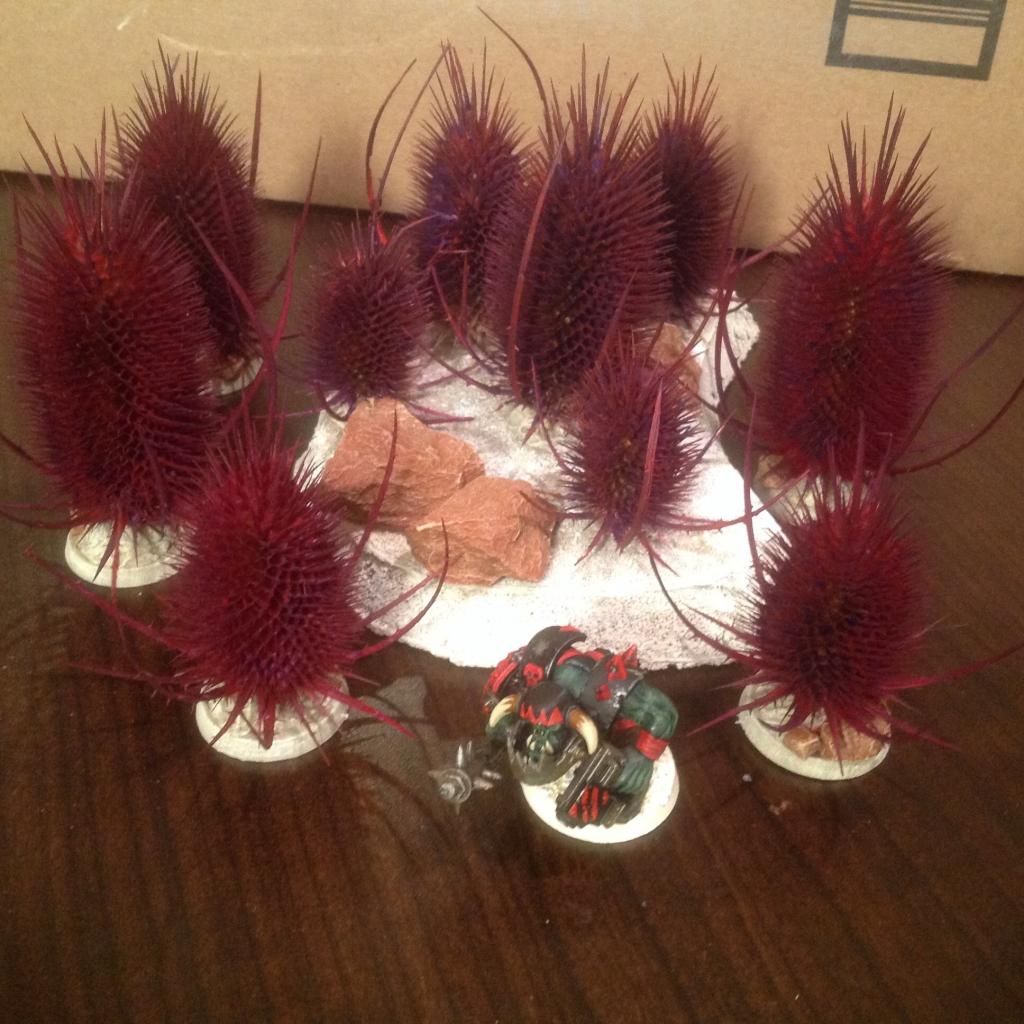
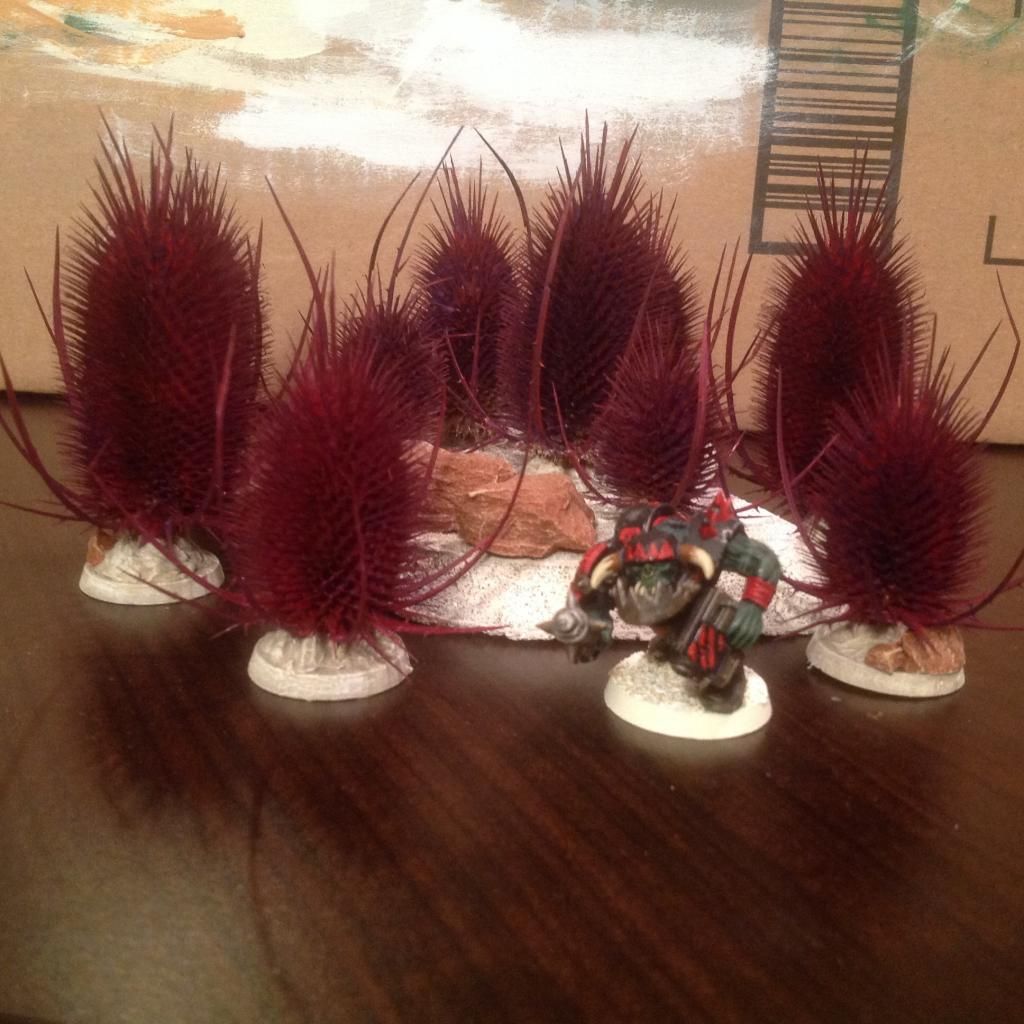
 |
| The shoota boyz hold the western hill, supported by meks and their kustom weapons. |
Marine Deployment
 |
| Marine deployment |
Pete elected to generate his Warlord Trait from the Tactical table to help with the random nature of the Tactical Objectives. He got Forward Planning, which gave him the option to discard his first batch of Objectives and draw three new ones.
After seeing the Ork deployment, the Red Brotherhood set up in the northern deployment zone. Pete has his plasma weapons on his left flank, presumably to counter the threat of the bikes and Killa Kan. Next is a Tactical squad combat team with missile launcher. They are right on top of Objective Marker 3, the fuel drums. In the center are the Tactical squad combat team with flamer, the Terminator squad, and the Captain. It looked like he was setting up to lay down some fire along the wide open path of the main Ork advance. I presumed his "Suicide" tactical squad was in front to take the initial Ork charge and allow his Terminators to either charge in if the Marines held or shoot the Ork victors if the Marines were wiped out. The Devastators hold the small hill on the far right flank, along with Objective Marker 5, the canister with the mysterious unearthed artifact. The last unit deployed were the Vanguard Veterans. They are positioned behind the Devastator hill, out of line of sight from the Orks. He may have been waiting for the Orks to come running toward the Devastators so the Veterans could pounce on them.
Overall Deployment:
At the start of the game, the Red Brotherhood held Objective Markers 3 and 5. The Blitzdreg Boyz held 6 and 4. The remaining Markers 1 (ammo crates) and 2 (Comm Station) were in the middle of the board and up for grabs. But we did not yet know which Objectives we would need to claim to earn Victory Points!
Pete rolled to Seize the Initiative, but didn't get it.
 |
| View of deployment from the east. |
 |
| View of deployment from the west. |
 |
| The core of the Marine army faces off against the main ork horde. |
 |
| The elite warriors hold a narrow pass against the oncoming green tide. |
Ork Turn 1
First, I rolled for my Tactical Objectives and got: Behind Enemy Lines (have a unit in enemy deployment zone); Assassinate (kill a character); Hold Objective 6. Perfect! I already had Objective 6 and the other two seemed like things that Orks should be trying to do anyway. With that, the battle was under way!
To the east on the Ork right flank, the bikes moved forward and fired into Tactical Squad Beta, but did no damage. The Killa Kan moved forward to take cover behind the rocks. The grotz milled around to claim Objective 6. The 'Ard Boyz moved past the grotz and ran in the shooting phase. The Slugga Boyz with Filgakk and his Painboy ran forward an impressive 6 inches! They were obviously eager to get to the fight. The Rokkit Buggy advanced and fired into the Devastators, killing one Marine. The Shoota Boyz also moved forward and shot at the Devastators with a rokkit launcha and two Kustom Mega Blastas that killed a second Devastator (both with lascannons). The high-AP Ork weapons were doing well. The Devastators passed their morale check.
 |
| End of Ork Movement phase. |
 |
| End of Ork Turn 1. Two Devastators killed by shooting. |
At the end of the turn, the Orks got one Victory Point for holding Objective 6. I rolled for my new Tactical Objective and got Hold Objective 6 again!
Orks: 1
Space Marines: 0
Space Marine Turn 1
Pete rolled for his Tactical Objectives and got: Hold Objective 3; Hold Objective 1; Hold the Line (have 3 units in your own deployment zone). He elected not to use his Warlord Trait that would let him put them back and re-draw.
The Marine center moved aggressively forward, challenging the Orks. The Terminators and Captain moved ahead of the Tactical marines. The other two Tactical squads and the Devastators stay where they are in order to accomplish Hold the Line. The Vanguard Veterans also elect not to move from behind the safety of the hill.
In the Shooting Phase, the plasma squad fires at the bikes, but the Jink (with +1 for Night Fighting) saves the bike. The missile squad fires a krak missile that takes out the lead bike. The rest of the squad passes morale. The Terminators fire their storm bolters and assault cannon into the oncoming Slugga Boyz, killing 5 (after 2 made their Feel No Pain). Despite the presence of the Warboss, the boyz failed their morale. I rolled Squabble on the Mob Rule table and the boyz inflicted 3 wounds on themselves, but I saved them all with Feel No Pain! On the Marine right flank, the two heavy bolters fired at the Warbuggy, but only managed to get one glancing hit, removing one of the two hull points. The sergeant decided to take matters into his own hands and fired a single shot from his bolter that got another glance and wrecked the buggy!
Pete debated charging with his Terminators, but after killing the leading five Orks, he would have needed 10 or 11 inches to make the charge and didn't want to risk Overwatch fire for nothing.
(I couldn't find any notes on what the flamer squad did and it is very possible that Pete forgot to shoot with them because no Orks died to them! I didn't get any pictures of this turn because the kids were up from their naps and running up to the table grabbing models and dice so we took a break until bedtime.)
When his turn ended, the Marines held Objective 3, accomplished Hold the Line, and earned First Blood for the Rokkit Buggy. Pete rolled for two new Tactical Objectives and got: No Prisoners (kill a unit); Hold Objective 4 (the hill top).
Orks: 1
Space Marines: 3
Ork Turn 2
I rolled for my reserves and got the Skorcha, but not the Kommandos. I rolled for Outflank and it would arrive on the Ork right flank, the east edge.
During the Movement phase, the Skorcha arrived in the Marine deployment zone to accomplish Behind Enemy Lines. The bikes moved near the ammo crates at Objective Marker 1. The 'Ard Boyz and Kan moved forward into the narrow valley. The slugga boyz moved ahead, eager to get into combat with the elite 'umies in the fancy armor. The shoota boyz on the hill marched forward to take up firing positions behind the ice blocks, where more of their guns would be in range, but made sure to stay near the Objective Marker in case one of us rolled it.
 |
| End of Ork Turn 2 Movement Phase. |
During the shooting phase, the bikes fired Snap Shots due to their Jink last turn and once again did nothing. The Killa Kan missed. The Skorcha roared out of nowhere to douse the plasma Tactical squad in flaming oil and managed to kill one marine. The Orks were once again more successful on the left flank where the Shoota Boyz let rip with everything they had against the Devastators on the hill and killed the last three!
The Warboss called his Waaagh! and the Slugga Boyz and 'Ard Boyz ran forward.
 |
| The marines hold the central valley against the onrushing Orks. |
The Slugga Boyz with the Warboss and Painboy charged the Terminators. Overwatch was ineffective. Filgakk Skullsplitta wanted to see how well the fancy 'umie with the big flag could fight, and he thought that feathered helmet would look nice and proppa' on his boss pole so he stepped to the front and Challenged him. The Red Brotherhood Second Company Captain lashed out with his legendary blade and inflicted two wounds on the towering Ork leader. The Terminators killed a few Orks, but the boyz and the nob managed to bring down the entire Terminator squad! (Pete thinks he forgot to roll their invulnerable saves against the klaw.) Despite the Warboss getting to re-roll his misses in combat, he could not wound the Captain due to his invulnerable save. At the end of the round, the Captain stood alone, surrounded by Orks. But he was unhurt, well-armed, and looking for xenos blood!
 |
| "No one, not even the Emperor, will remember if we were good men or bad. Why we fought, or why we died. All that matters is that one stood against many. That's what's important!" |
 |
| The 'Ard Boyz race forward. 'Ere We Go! 'Ere We Go! 'Ere We Go! |
On the other side of the hill, the 'Ard Boyz charged the Tactical squad with missile launcher. The quicker Marines struck first and felled two Orks. In return, the boyz killed one Marine and the nob killed two more with his power klaw. Despite the losses, the Marines held.
 |
| Waaagh! The half-painted 'Ard Boy mob charges the Marine lines. |
 |
| End of Ork Turn 2. The Devastators and Terminators are killed and the Orks are at the Imperial lines. It was looking grim for the forces of mankind, but the Captain was holding the Ork center at bay. |
The Orks held Objective 6, killed the Terminator sergeant (character) and got a unit into the enemy deployment zone for three Victory Points! I rolled: Kingslayer (kill enemy Warlord); Hold Objective 1 (ammo crates); Hold Objective 6 (wounded Marine) again!
Orks: 4
Space Marines: 3
Space Marine Turn 2
Pete had some tough decisions to make this turn. With his center engaged in melee and his Devastators gone, shooting wasn't much of an option. The Vanguard Veterans used their jump packs to leap over the hill declared an assault on the Shoota Boyz. But the massed Overwatch fire of 17 Orks was enough to kill two Marines, leaving the rest of the squad too far away to make the charge!
 |
| With the help of the difficult terrain provided by the hill, the Orks were able to hold off the Veterans' charge with shooting. |
On the Marine left flank, the plasma Tactical squad set to work claiming the ammo crates on Objective Marker 1. They moved forward and fired into the Ork bikers, wiping them out thanks to the plasma gun and plasma pistol.
 |
| The Marines advance, laying down a hail of plasma that took out the last three bikes. |
In the center, the Tactical squad with flamer decided to rush to the aid of their outnumbered Captain and charged into the fray, killing two Orks. In the duel in the center of the scrum, the Captain slayed the Warboss before the mighty Ork could make another attack. The boyz and their nob fought back, however, and killed three of the Tactical Marines in return. The result was a stalemate as neither side could gain the upper hand.
 |
| The Suicide Squad once again earns their nickname by rushing into the melee to support their Captain. |
 |
| End of Space Marine Turn 2. Despite retaking the lead in Victory Points, the Space Marine lines were getting thin. |
At the end of the turn, the Space Marines had accomplished No Prisoners (+1 VP) by killing the Ork bikers and the Secondary Objective of Slay the Warlord (+1 VP). Pete elected to discard Hold Objective 4 since the Veterans were unable to dislodge the Shoota Boyz from their hill. Rolling for new Tactical Objectives resulted in: Big Game Hunter (kill a vehicle) and Supremacy (hold twice as many objectives as your opponent).
Orks: 4
Space Marines: 5
Ork Turn 3
The Ork Kommandos arrived from Reserves on the west table edge, catching the unlucky Veterans in a pincer. They immediately opened fire with their sluggas and burna, but failed to inflict any casualties. Maybe they surprised themselves more than the Marines by showing up to the battle at the right time!
 |
| The Kommandos enter the battlefield from the flank and promptly inflict zero damage! |
However, the beleaguered Marine Veterans still had the horde of shoota boyz on the hill to worry about and they proved once more to be pretty deadly at short range by wiping out the squad to a man with a combination of shootas and Kustom Mega Blastas. On the Ork right flank, the Skorcha proved his worth by frying two Marines from the plasma gun Tactical squad. The Kan continued to miss, despite its elite BS of 3.
In the Assault phase, the last Marine of the missile squad fights to his last breath by killing an 'Ard Boy before the Nob crushes him with his Power Klaw. In the central melee, the Captain looks around after slaying the Warboss and dares another Ork hero to face him. This time the Painboy steps forward and is promptly cut down before he can strike a blow. The Nob manages to kill another Tactical Marine and the Orks pass their Morale check to stay in the fight.
Sorry, but photos were severely lacking in this turn! The Orks managed to complete Supremacy (+1 VP) by holding two Objective Markers (6 and 4) while the Marines had either one or zero; I can't remember. I also decided to discard Kingslayer after seeing how the Marine Captain was unstoppable in close combat. My new Tactical Objectives were: Hold Objective 3 (fuel drums); No Prisoners (kill a unit); and I still had Hold Objective 1 (ammo crates).
Orks: 5
Space Marines: 5
The Red Brotherhood forces were nearly depleted, but the remaining Marines continued to fight hard, attempting to complete their mission against the odds. The plasma Tactical squad moved up to the ammo crates to secure Objective Marker 1. They fired at the Killa Kan and penetrated his armor, but he was saved by the cover of the rocks.
In the ongoing melee, the Captain threw the head of the Painboy aside and turned to face the hulking Nob and his deadly Power Klaw. Yet again, the elite Marine was too quick for the lumbering Orks and the Nob was dispatched before he could land a blow. The remaining seven Ork boyz managed to bring down the last Tactical Marine, but after seeing all three of their leaders so quickly cut down by this deadly human, they panicked and tried to run. The Captain was in no mood for mercy and he pursued the fleeing aliens, cutting them down. He then consolidated towards the 'Ard Boyz. This would prove to be the lone bright spot in an otherwise bleak day for humanity.
 |
| After four rounds of brutal melee and 25 deaths, the impressive Captain stands alone amongst a pile of corpses. |
 |
| End of Marine Turn 3. The Space Marines hold a narrow lead and hope for an early end to the game. |
At the close of Turn 3, the Marines held Objective 1 for +1 VP, retaking the lead yet again despite only having four models left on the board. Pete still had: Kill a vehicle and Supremacy. He rolled for his new one and got Hold Objective 2 (Comm Station).
Orks: 5
Space Marines: 6
Ork Turn 4
The Orks threw everything on the right flank at the remaining Tactical squad. I certainly had no intention of facing that Captain again! The combined firepower of the Skorcha, Killa Kan and 'Ard Boyz did nothing besides make a lot of noise.
 |
| The pincer closes on the Marines, but the shooting was typically Orky: zero impact. |
 |
| But that's OK. It leaves more Marines for krumpin' in close combat! Charge! |
The 'Ard Boyz and Killa Kan charge the three Marines. The sergeant brings down one Ork, cutting through the heavy iron plates with his power sword. The Nob and the Kan each kill one Marine in return, leaving only the sergeant.
 |
| End of Ork Turn 4. View from the north. |
I didn't accomplish any Tactical Objectives this turn. How did the Space Marines still have the lead?!
The lone sergeant still contested Objective Marker 1, keeping me from claiming it while the Captain has scared my 'Ard Boy away from Objective Marker 3. But I also needed to kill a unit and I was making good progress on that.
Orks: 5
Space Marines: 6
Space Marine Turn 4
The Captain hoped for a miracle as he aimed his bolter at the distant Skorcha, but alas the Emperor did not intervene and he couldn't hurt the ramshackle Ork vehicle.
 |
| The Captain takes out his frustration by empting his clip at the distant Skorcha, but to no effect. |
The Killa Kan finished off the last Tactical Marine of the plasma squad. The lone Captain realizes the battle is lost and decides to fall back to fight another day. Clearly, he had underestimated the Orks, but he vowed to take his revenge on the foul xenos.
 |
| "I challenge you cowardly greenskins to an honorable duel in single combat!" |
Orks: 5
Space Marines: 6
Despite still having the lead in Victory Points, Pete ceded the field, knowing that I would inevitably win. His only hope was that the game would randomly end after Turn 4, but Random Game Length only has a chance to kick in after Turn 5. He knew I would accomplish No Prisoners and Hold Objective 1 in my next turn and would easily have the Linebreaker Secondary Objective by moving my Kommandos into his deployment zone for the win.
Final Result (projected):
Orks: 8
Space Marines: 6
ORKS WIN
POSTGAME
First off, it was an amazing experience playing a game on an awesome table covered in painted terrain and using mostly painted models. It really makes me eager to get those last few boyz painted before the next game! This is the Warhammer 40k that I always dreamed of playing.
From a gameplay perspective, that went about as good as I could have ever hoped! Despite Pete's permanent lead in Victory Points, the result never really felt in doubt by the end of Turn 2. Truthfully, I had a really good feeling about the game even after seeing the initial deployment; I was in an excellent position to control the game from the start. To be fair, Pete had a pretty weak deployment zone. We set up the terrain together so I can't be fully blamed for that, but we'll just have to try to balance it better next time.
My strategy of spreading out and trying to control the board seemed to pay off as Pete was forced to spread his forces pretty thin in order to avoid giving me control of too many Objective Markers. But he really helped me out by making a few errors, too. I'm not criticizing him because it is easy to point out mistakes in hindsight after the heat of the battle is over. I just figured it is worth having a discussion on what could have been done differently to avoid such a lopsided outcome.
Pete started with a good plan to have his Terminators behind the Suicide Squad. The Orks would have to charge the Tactical Marines and then either get charged by the Terminators if they didn't wipe out the Marines or shot to pieces by the Terminators and then charged if they did wipe them out. However, he then moved his Terminators past the Tactical Marines with the intent of charging the Orks first, a big advantage against Furious Charge. But after shooting the Orks, he had killed too many and now the mob was too far away to charge! D'oh!
His strategy with the Veterans also turned out to be flawed. Instead of sitting behind the hill waiting for the Orks (who decided to shoot rather than run forward to their doom), it might have worked better if they could have come to the aid of the Captain in the central melee. I am still convinced that a charge from them will crush any Ork unit I have and they could have ended that combat quickly. Instead, he was forced to throw his Suicide Squad to the wolves in order to help his Captain and they did nothing much besides soak up wounds. The Veterans need to act as a counter-charge unit to support any of his units that get into trouble in close combat. So they needed to be more centrally deployed where they could rapidly react to where they were needed. He must have assumed that my Shoota Boyz were going to run straight forward like they did last time so he put them on that flank. I think my shooting caught him a bit off guard. And the unit just isn't big enough to go off and attack the Orks with no support.
All in all, his mistakes all involved the Assault Phase and I think Assaulting successfully is much tougher to pull off than shooting and he just needs to learn the right tactics. It can take time to get used to playing with new unit types that are very different than the rest of the army.
I also think he got frustrated early because he uncharacteristically forgot a lot of special rules! I had to remind him more than once that he got to re-roll 1's with bolters. He forgot his invulnerable saves with the Terminators against my Power Klaw. And he forgot that his guys get some sort of bonus against vehicles, like re-rolling armor penetration or something like that. He also forgot to shoot with the Suicide Squad on Turn 1, I believe.
We screwed up the rules by not realizing you are not allowed to roll the same Tactical Objective twice. I'm almost sure this happened at least once because I got the same Objective (6) three times and there are only three versions of it on a table containing 36 options and this gave me an extra free VP rather than making me re-roll. I really just need to get the stupid cards that should have come with the book because it just too hard to keep track of everything with a table.
And now, my Postgame Awards:
Ork MVP: Easily, the Shoota Boyz. They single-handedly dominated their half of the table and killed probably two or three times their points-value in Marines. I guess I was using them wrong last time I played Pete when I charged them straight across the table into close combat! Shootas are meant for shooting, not clubbing. Orky Lesson #17.
Ork WTF: Although my army did excellent overall, the biggest disappointment was the Warboss going down without inflicting a single casualty or even a wound, despite his special Lukky Stikk! After his dominance last time, Pete made sure to bring someone who could go toe-to-toe with him and it certainly worked. Maybe I should not have fought the Captain in a Challenge, but it seemed like the proppa' thing to do (what kind of Warboss ignores the biggest enemy for the troops?) and he seemed like the only one who had a chance to take down the Superman Captain. All he needed to do was land a single unsaved wound and his strength would have mean instant death for the hero, but with that 3++ save, the Captain was nigh-invincible.
Marine MVP: No question about it, the Captain turned in a dominating performance. He killed the kitted-out Warboss, the Painboy, the Nob, and the last seven Slugga Boyz in a Sweeping Advance, about 370 points of models without taking a single wound! If there had been any more Orks around, he would have easily continued his rampage. I really don't know how I am going to handle him in future games. I threw my hardest unit at him and he cut through it. I might need to invest in some Mega-Nobz...
Marine WTF: I would say you could make a case for either the Devastators, the Terminators or the Vanguard Veterans as they all seriously underperformed. But the Veterans take the cake as they were wiped out by Orky shooting without doing anything at all (the other units at least killed something before dying). If they could have charged the Shoota Boyz, they may have turned the tide of the entire battle. But after taking two casualties, they were just short on their charge distance despite rolling a 9! Like I said, successfully assaulting can be tricky.
Thanks for reading. I'm eager to hear Pete's comments on how he thought the game went and what he could have done differently. I want to thank him for an awesome battle and a great time. I can't wait for next time. I'm sure he will be refocused and looking for revenge!